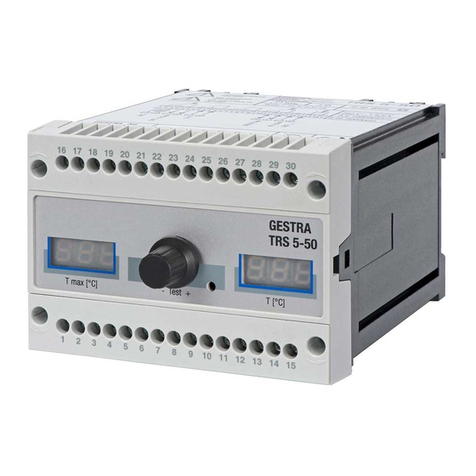
GESTRA TRS 5-6 User manual

1
TRS 5-6
Installation Instructions 810378-05
Temperature Switch
TRS 5-6
GESTRA Steam Systems
EN
English

2
Contents
Usage for the intended purpose ..............................................................................................................4
Safety note .............................................................................................................................................4
Danger ...................................................................................................................................................4
Attention.................................................................................................................................................4
LV (Low Voltage) Directive and EMC (Electromagnetic Compatibility) .......................................................4
ATEX (Atmosphère Explosible).................................................................................................................4
Note .......................................................................................................................................................4
Important Notes
Page
Explanatory Notes
Scope of supply......................................................................................................................................5
Description .............................................................................................................................................5
Function .................................................................................................................................................5
Design....................................................................................................................................................5
TRS 5-6................................................................................................................................................12
Attention...............................................................................................................................................12
Tools.....................................................................................................................................................12
Key.......................................................................................................................................................12
Examples of Installation ........................................................................................................................13
Installation
TRS 5-6..................................................................................................................................................6
Corrosion resistance...............................................................................................................................7
Name plate/ marking ..............................................................................................................................7
Dimensions.............................................................................................................................................8
Technical Data
TRS 5-6..................................................................................................................................................9
Key.......................................................................................................................................................11
Design
TRS 5-6................................................................................................................................................10
Key.......................................................................................................................................................11
Functional Elements

3
Wiring
TRS 5-6................................................................................................................................................14
Attention...............................................................................................................................................14
Note .....................................................................................................................................................14
Tools.....................................................................................................................................................14
Key.......................................................................................................................................................14
Wiring diagram.....................................................................................................................................15
Check wiring ........................................................................................................................................18
Apply mains voltage..............................................................................................................................18
Contents - continued -
Commissioning
Page
Temperature limiter, safety temperature switching controller ................................................................18
Note .....................................................................................................................................................18
Operation
Danger .................................................................................................................................................19
Fault-finding list for troubleshooting......................................................................................................19
Operation Malfunctions
Danger .................................................................................................................................................20
Disposal................................................................................................................................................20
Decommissioning
TRS 5-6................................................................................................................................................18
Performance test
Note on the Declaration of Conformity / Declaration by the Manufacturer ........................................21
Annex
Basic Settings
Adjusting temperature limit...................................................................................................................16
Example 1 ...........................................................................................................................................16
Example 2 ...........................................................................................................................................16
Example 3 ...........................................................................................................................................16
Tools ....................................................................................................................................................16
Code switch settings ............................................................................................................................17

4
Important Notes
Danger
The terminal strip of the equipment is live during operation.
This presents the danger of electric shock.
Cut off power supply before mounting or removing the terminal strips
and the housing cover.
Usage for the intended purpose
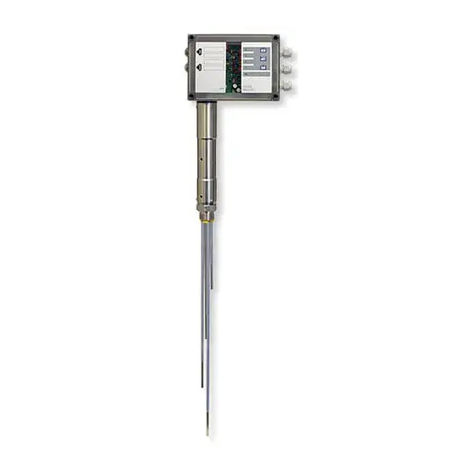
The temperature switch TRS 5-6 serves as safety device in plants requiring official approval and is used
in conjunction with resistance thermometers TRG 5-53, TRG 5-54, TRG 5-55 and TRG 5-57. Use the
temperature switch only for signalling temperature limits.
Safety note
The equipment must only be installed and commissioned by qualified and competent staff.
Retrofitting and maintenance work must only be performed by qualified staff who – through adequate
training – have achieved a recognised level of competence.
Attention
The name plate specifies the technical features of the equipment. Note that any piece of
equipment without its specific name plate must neither be commissioned nor operated.
ATEX (Atmosphère Explosible)
According to the European Directive 94/9/EC the equipment must not be used in potentially explosive
areas.
Note
The temperature sensors TRG 5-53, TRG 5-54, TRG 5-55 and TRG 5-57 are simple items
of electrical equipment as defined in EN 60079-11 section 5.7. According to the European
Directive 94/9/EC the equipment must be equipped with approved Zener barriers if used
in potentially explosive areas. Applicable in Ex zones 1, 2 (1999/92 EC). The equipment
does not bear an Ex marking. The suitability of the Zener barriers is certified in a separate
document.
LV (Low Voltage) Directive and EMC (Electromagnetic Compatibility)
The equipment meets the requirements of the Low Voltage Directive 2006/95/EC and the EMC Directive
2004/108/EC.

5
Description
High-integrity self-monitoring temperature switch with periodic self-checking routine to be used in
conjunction with a resistance thermometer type TRG 5-53, TRG 5-54, TRG 5-55 or TRG 5-57.
The equipment operates as a safety temperature monitor, or in combination with an external lock-out
in accordance with VDE 0116 as a safety temperature limiter. An alarm is given as soon as the tempera-
ture exceeds a preset limit. Application in steam boilers and pressurized hot-water plants operating
without constant supervision (TRD 604) as well as any other kind of heat generating units.
Explanantory Notes
Function
The temperature switch type TRS 5-6 is a two channel unit provided with an automatic periodic self-
checking logic unit, in accordance with DIN 3440/VDE 0116 (regulations on protection circuits for firing
equipment of furnaces). The two channels are designed to monitor the operation of each other. The
integrity of the resistance thermometer is continuously monitored by the TRS 5-6. Unless it finds a fault,
this internal test does not interfere with the output contacts of the temperature switch and therefore
the plant operation is not interrupted. A manual test push button is also provided. When the push button
“Test I” is pressed, it simulates a fault in the resistance thermometer There is also a toggle switch
“Test II / Inspection” for checking the function of the self-checking circuitry. The output contact relays
of the temperature switch are of the normally close type and will therefore signal alarm condition in the
event of a mains failure. The temperature switch can signal the following three operating conditions:
nNormal operation (temperature within permissible range)
nAlarm (limit temperature exceeded)
nAlarm (fault in temperature switch or resistance thermometer)
A green LED indicates Power ON. Two red LEDs are illuminated if the temperature limit is exceeded or if
there is a system malfunction. The failure of one channel (loss of redundancy) is signalled by the light-
ing-up of one red LED. The combination of TRG 5-... and TRS 5-6 provides fail-safe protection against a
first fault, i.e. the system will still continue to provide the safety function even after the occurrence of a
first fault.
Design
TRS 5-6
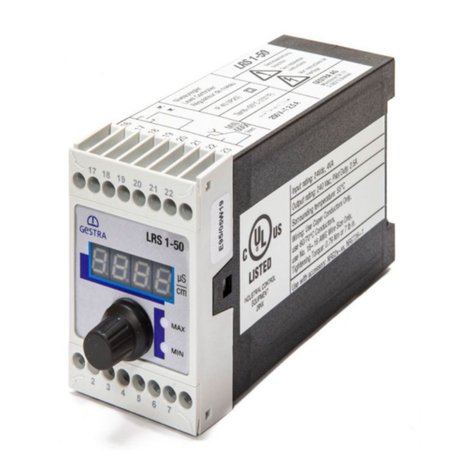
Plug-in unit in plastic case for installation in contol cabinets. The terminals in the case are accessible
after loosening two screws and unplugging the unit from its base. Thanks to the code plug the equip-
ment cannot be connected inadvertently to wrong GESTRA equipment. The equipment may be clipped
onto a 35 mm supporting rail or screwed into position on a mounting panel.
Scope of supply
TRS 5-6
1 Temperature switch TRS 5-6
1 Installation manual
6
TRS 5-6
Technical Data
Type approval
DIN · STW (STB) · 985 07S
Input
3 terminals for the connection of one resistance thermometer (Pt 100):
TRG 5-5..., PN 40-160, Tmax 400 °C – 540 °C
Output
2 volt-free relay contacts. Max. contact rating with switching voltages of
24 V, 115 V and 230 V AC: 4 A resistive, 0.75 A inductive at cos ϕ0.5.
Max. contact rating with a switching voltage of 24 V DC: 4 A.
Contact material: silver, hard-gold plated.
Temperature range
30 °C to 540 °C, adjustable in steps of 2 °C via code switch.
Switching hysteresis
–3 °C
Indicators and adjustors
2 LED “Alarm”, 1 LED “Power”, 1 button “Test 1”, 1 toggle switch “Test 2 / Inspection”,
8 LEDs and 1 code switch for setting the temperature limit
Mains supply
230 V +/– 10 %, 50/60 Hz.
Special voltages 115 V +/– 10 %, 50/60 Hz or 24 V +/– 10 %, 50/60 Hz.
Power consumption
5 VA
Protection
TRS 5-6 b: IP 20 to DIN EN 60529
Admissible ambient temperature
TRS 5-6 b: 0 °C to 55 °C
Body materials
TRS 5-6 b:
Base ABS, black. Cover: Polystyrol, highly shock resistant, stone grey.
Front panel: Aluminium.
Weight
TRS 5-6 b: approx. 1.0 kg
Approvals
EC prototype approval PED Pressure Equipment Directive 97/23/EC, EN 12952-11, EN 12953-09:
Requirements made on limiting equipment for boilers.
TÜV type approval /
DIN CERTCO VdTÜV Bulletin “Wasserstand 100” (= Water Level 100) / DIN EN 14597
Requirements made on temperature conrollers, temperature monitors and
temperature limiters.
DIN registration number STW (STB) 985 07 S.
VdTÜV Bulletin 985.

7
Corrosion resistance
If the unit is used for the intended purpose, its safety is not impaired by corrosion.
Technical Data - continued -
Name plate/ marking
Fig. 1
Mains supply
Protection
External fuse
Equipment designation

8
Technical Data - continued -
Dimensions
Fig. 2
106 7
37.5
75
Fig. 3
158
95

9
Design
Fig. 6
2 3
4
Fig. 4 Fig. 5
°C
°C
256
64
32
16
8
4
2
30
T8
T7
T6
T5
T4
T3
T2
T1
T0
128
2 min
Inspection
Test II
Test I
Alarm
MAX
°C
TRS 5-6
MADE BY GESTRA
1
1
TRS 5-6
16
15
14
13
12
11
10
9
8
7
6
5
4
3
2
1
7
6
5

10
Functional Elements
TRS 5-6
MAX 55 C
MAX 95%
%
IP 20
"
9
0
!
§
1
ON 2345678
Fig. 7
$

11
1 Cover screws
2Base
3Upper part of the housing
4Mounting clip
5Cable entry (flexible)
6Cable entry (housing)
7Fixing holes d = 4.3 mm
8Supporting rail TS 35 x 15 DIN EN 50022
9Toggle switch “TEST II / INSPECTION”
0LED “Alarm”
!Button “TEST I”
"LED “Operation”
§LED “MAX Temperature”
$Code switch, 8 poles
Design/Functional Elements
Key

12
Tools
nScrewdriver (5.5/100)
Attention
nTo provide sufficient ventilation, ensure a minimum spacing of 20 mm between
adjacent units.
Installation
TRS 5-6
On supporting rail
1. Clip temperature switch onto supporting rail.
2. Loosen cover screws 1and detach cover 3from its base 2.
3. Select cable entry 5and remove corresponding seal.
On mounting panel
1. Loosen cover screws 1and detach cover 3from its base2.
2. Unscrew mounting clip 4.
3. Drill hole 7marked in the base to ∅4.3 mm.
4. Select cable entry 5/ 6and remove corresponding seal.
5. Fix base with two M4 screws onto mounting panel.
1 Cover screws
2Base
3Upper part of the housing
4Mounting clip
5Cable entry (flexible)
6Cable entry (housing)
7Fixing holes d = 4.3 mm
8Supporting rail TS 35 x 15 DIN EN 50022
Key

13
Installation - continued -
Examples of Installation
°C
°C
256
64
32
16
8
4
2
30
T8
T7
T6
T5
T4
T3
T2
T1
T0
128
2 min
Inspection
Test II
Test I
Alarm
MAX
°C
TRS 5-6
MADE BY GESTRA
C
16
15
14
13
12
11
10
9
8
7
6
5
4
3
2
1
4 2
5
8
6
6
3
1
MAX 55 C
MAX 95%
%
IP 20
Fig. 9
Fig. 8
16
15
14
13
12
11
10
9
8
7
6
5
4
3
2
1
7
7

14
Wiring
TRS 5-6
Note that screened four-core cable, e. g I-IY(St)Y 2 x 2 x 0.8 or LIYCY 4 x 0.5 mm2is required.
Tools
nScrewdriver for slotted screws, size 2.5 completely insulated according to DIN VDE 0680-01
Attention
nTo protect the switching contacts fuse circuit with T 2.5 A or according to TRD
regulations (1A for 72h operation).
nThe screen must not make any other electrical contact.
Note
nConnect screen only to terminal 13 of the temperature switch.
nThe loop resistance must be below 10 Ω.
nThe rated voltage is indicated on the name plate.
n When switching off inductive loads, voltage spikes are produced that may impair the
operation of control and measuring systems. Inductive loads should be provided with
commercial arc suppressor RC combinations, e.g. 0.1 µF/100 W.
%External wire link
&Burner-protection circuit of the installation
/Mains
( Terminal, red
) Terminal, red
= Terminal, black
a Terminal, black
b Terminal, red
c Terminal, red
d Terminal, yellow
Key

15
Electrical Connection - continued -
Wiring diagram
Fig. 10
Fig. 11
TRG 5-53, TRG 5-55, TRG 5-57
5
3 6
(
)
5
3
2
6
=
a
b
c
d
Fig. 12
TRG 5-54
TRS 5-6
%
&
&
L N
/
°CMAX
Pt 100
IEC 751
TRG 5-53
TRG 5-54
TRG 5-55
TRG 5-57

16
Basic Settings
Adjusting temperature limit
The rear of the upper part of the housing is provided with a code switch (8 poles) for setting the tem-
perature limit.
Example 1
A temperature limit is to be set at Tmax = 176 °C.
The code switch indicates eight values between 2 and 256. The basic temperature is 30 °C.
Set the switches 2, 16 and 128 to the right by using a small screwdriver. The sum of the values gives a
temperature of 146 °C.
Plus 30 °C basic temperature makes the requested limit temperature Tmax = 176 °C. Fig. 13
Example 2
A temperature limit is to be set at Tmax = 446 °C.
Set the switches 32, 128 and 256 to the right by using a small screwdriver. The sum of the values gives
a temperature of 416 °C.
Plus 30 °C basic temperature makes the requested limit temperature Tmax = 446 °C.
Example 3
A temperature limit is to be set at Tmax = 79 °C.
Set the switches 16 and 32 to the right by using a small screwdriver.
The values add up to a temperature of 48 °C.
Plus 30 °C basic temperature makes the requested limit temperature Tmax = 78 °C. Note that tempera-
tures can only be adjusted in steps of 2 °C. Fig. 14
Tools
nScrewdriver for slotted screws, size 2.5, completely insulated according to VDE 0680

17
Basic Settings - continued -
Code switch settings
Fig. 13 (Example 1) Fig. 14 (Example 3)
30 °C 176
S1 ON 2
S2 OFF 4
S3 OFF 8
S4 ON 16
S5 OFF 32
S6 OFF 64
S7 ON 128
S8 OFF 256
30 °C 78
S1 OFF 2
S2 OFF 4
S3 OFF 8
S4 ON 16
S5 ON 32
S6 OFF 64
S7 OFF 128
S8 OFF 256

18
Apply mains voltage to temperature switch TRS 5-6.
Commissioning
Make sure that the TRS 5-6 is wired to its associated temperature sensor as indicated in the wiring
diagram. Fig. 10, Fig. 11, Fig. 12
Check wiring
Apply mains voltage
Performance test
1. When switching on the mains voltage the green LED "must be permanently illuminated.
2. Raise temperature in the heat generator until the permissible temperature limit is exceeded.
The two red LEDs 0of the temperature switch must light up.
3. After lowering the temperature the two red LEDs 0must extinguish.
4. To simulate a temperature alarm press button “Test I”.
When pushing the button, the two red LEDs 0must light up.
5. To test the self-checking routine of the temperature switch proceed as follows: Set switch “Test II /
Inspection” in the direction of the arrow. After max. two minutes the two red LEDs 0should signal
a temperature alarm. Note that the button “Test I” must not be operated during this test nor must
the adjusted limit temperature be exceeded!
After a successful test set the switch back into its original position.
Both LEDs 0must extinguish after the response delay.
TRS 5-6
Operation
Operation only in conjunction with temperature sensors TRG 5-53, TRG 5-54, TRG 5-55 or TRG 5-57 in
(pressurized) hot-water and steam plants to TRD 401, TRD 602, TRD 604, EN 12952, EN 12953.
Temperature limiter, safety temperature switching controller
Note
nTo analyse and remedy malfunctions occurring during the commissioning procedure
refer to section Operational Malfunctions.

19
Operation Malfunctions
Fault-finding list for troubleshooting
Normal operation - Temperature switch triggers an alarm
Fault: The temperature switch triggers an alarm during normal operation.
Remedy: Make sure that the green LED "is illuminated. If this is not the case check whether the
equipment is supplied with mains voltage.
Remedy: Check whether the cable leading to the resistance thermometer is damaged.
Remedy: Check whether the resistance thermometer gives correct readings (basic values of
measuring resistors to DIN EN 60751 for Pt 100).
Fault: The test “Test II / Inspection” was not successful, because after two minutes only one or
none of the red LEDs 0is illuminated.
Remedy: Replace temperature switch.
Danger
The terminal strip of the equipment is live during operation.
This presents the risk of severe cases of electric shock!
Cut off power supply before mounting or removing the terminal strips and the housing
cover.
If faults occur that are not listed above or cannot be corrected, please contact our service centre or
authorized agency in your country.

20
Disposal
Decommissioning
Dismantle the equipment and separate the waste materials, using the material specification as a
reference.
Electronic component parts such as the circuit board must be disposed of separately! For the disposal
of the equipment observe the pertinent legal regulations concerning waste disposal.
Danger
The terminal strip of the equipment is live during operation.
This presents the risk of severe cases of electric shock!
Cut off power supply before mounting or removing the terminal strips and the housing
cover.
Table of contents
Other GESTRA Switch manuals

GESTRA
GESTRA LRS 1-50 User manual

GESTRA
GESTRA NRGS 15-1 User manual

GESTRA
GESTRA NRS 1-2 User manual

GESTRA
GESTRA NRS 1-51 User manual

GESTRA
GESTRA NRS 2-50 User manual

GESTRA
GESTRA NRS 2-4 User manual

GESTRA
GESTRA NRGS 15-1 User manual

GESTRA
GESTRA NRS 1-50 User manual

GESTRA
GESTRA NRS 1-50 User manual

GESTRA
GESTRA LRGS 15-1 User manual

GESTRA
GESTRA NRS 1-53 User manual

GESTRA
GESTRA TRS 5-52 User manual

GESTRA
GESTRA NRS 1-50 Series User manual

GESTRA
GESTRA NRS 1-51 User manual

GESTRA
GESTRA NRS 1-50 User manual

GESTRA
GESTRA NRS 1-56 User manual

GESTRA
GESTRA LRS 1-50 User manual

GESTRA
GESTRA NRS 1-56 User manual

GESTRA
GESTRA URS 2 User manual

GESTRA
GESTRA LRS 1-7 Manual