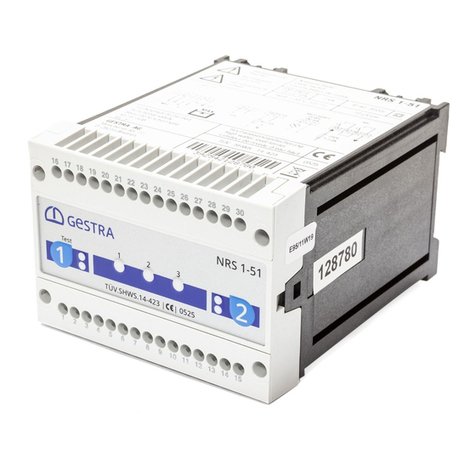
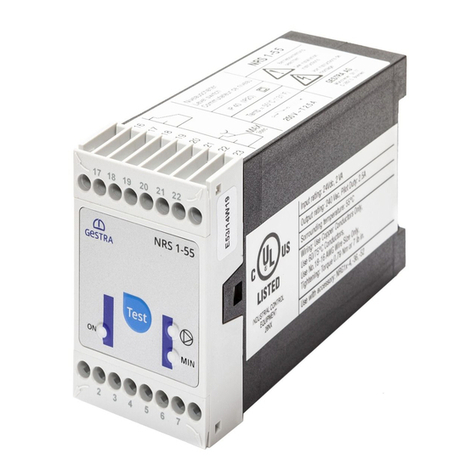
GESTRA NRS 1-41 User manual

1
EN
English
Level Switch
NRS 141
Original Installation Instructions
81083004

2
Contents
Usage for the intended purpose ..............................................................................................................5
Safety note .............................................................................................................................................5
Danger ...................................................................................................................................................5
Attention.................................................................................................................................................5
ATEX (Atmosphère Explosible).................................................................................................................5
Note on the Declaration of Conformity / Declaration by the Manufacturer ..........................................5
Important Notes
Page
Explanatory Notes
Scope of supply......................................................................................................................................6
Description .............................................................................................................................................6
Function .................................................................................................................................................6
Associated components..........................................................................................................................7
Design....................................................................................................................................................7
NRS 141..............................................................................................................................................14
Note .....................................................................................................................................................14
Tool ......................................................................................................................................................14
Key.......................................................................................................................................................14
Example of installation..........................................................................................................................15
Installation
NRS 141............................................................................................................................................ 8, 9
Corrosion resistance...............................................................................................................................9
Name plate / Marking .............................................................................................................................9
Dimensions...........................................................................................................................................10
Technical Data
NRS 141..............................................................................................................................................11
Key.......................................................................................................................................................13
Design
NRS 141..............................................................................................................................................12
Key.......................................................................................................................................................13
Functional Elements

3
Electrical Connection
Control cable ........................................................................................................................................16
Note .....................................................................................................................................................17
CAN bus voltage supply ........................................................................................................................17
Attention...............................................................................................................................................17
Wiring diagram.....................................................................................................................................18
Attention...............................................................................................................................................18
Wiring diagram for the sensor plugin connections ...............................................................................19
Key.......................................................................................................................................................19
CAN bus wiring diagram .......................................................................................................................20
Attention...............................................................................................................................................20
Note .....................................................................................................................................................21
Tool ......................................................................................................................................................21
NRS 141..............................................................................................................................................25
Note .....................................................................................................................................................25
Contents – continued –
Commissioning
Page
NRS 141..............................................................................................................................................25
Test Cycle
NRS 141..............................................................................................................................................25
Operation
Bus cable..............................................................................................................................................21
Node ID ................................................................................................................................................22
Factory setting......................................................................................................................................23
Establishing / changing node ID............................................................................................................23
Attention...............................................................................................................................................23
Code switch settings.............................................................................................................................24
Basic Settings
NRS 141..............................................................................................................................................26
Highwater level alarm for water limiter................................................................................................26
Note .....................................................................................................................................................26
Alarm

4
Danger .................................................................................................................................................34
Disposal................................................................................................................................................34
Decommissioning
Danger .................................................................................................................................................28
Causes .................................................................................................................................................28
Danger .................................................................................................................................................29
Systematic fault finding procedure for system malfunctions..................................................................29
Error message 1 ...................................................................................................................................30
Error message 2 ...................................................................................................................................31
Error message 3 ...................................................................................................................................32
Error message 4 ...................................................................................................................................32
Error message 5 ...................................................................................................................................33
Error message 6 ...................................................................................................................................33
System Malfunctions
Declaration of conformity......................................................................................................................35
Annex
Contents – continued –
Page
Danger .................................................................................................................................................27
Fault finding list for troubleshooting......................................................................................................27
Operational Malfunctions

5
Important Notes
Danger
The terminal strip of the equipment is live during operation.
This presents the danger of electric shock.
Cut off power supply before mounting or removing the terminal strips and housing lid.
Usage for the intended purpose
Use level switch NRS 141 only in conjunction with GESTRA level electrode NRG 1641, NRG 1741 or
NRG 1941 for signalling high water level (max. alarm).
Safety note
The equipment must only be installed and commissioned by qualified staff.
Maintenance and service work must only be performed by adequately trained persons who have a
recognized level of competence.
ATEX (Atmosphère Explosible)
According to the European Directive 2014/34/EU the equipment must not be used in explosionrisk
areas.
Attention
The name plate indicates the technical specification of the equipment.
Do not commission or operate equipment without a name plate.
For details on the conformity of our equipment according to the European Directives see our Declaration
of Conformity or our Declaration of Manufacturer.
The current Declaration of Conformity and Declaration of Manufacturer are available in the Internet under
www.gestra.com documents
or can be requested from us.
Note on the Declaration of Conformity / Declaration by the Manufacturer

6
Scope of supply
NRS 141
1 Level switch NRS 141 (plugin unit in plastic case with terminals)
1 Terminating resistor 120 Ω
1 Installation manual
Description
The switching controller type NRS 141 is a selfmonitoring highwater level limiter with periodic self
checking and monitoring feature of the output relay contacts designed to be used in conjunction
with one level electrode type NRG 1641, 1741 or 1941. The switching controller has the following
function:
nHighwater level alarm with one level electrode
The equipment detects the max. water level (highlevel limiter) and complies with the German regula
tions for use in steam and hotwater plants operating without constant supervision according to
TRD 604, sheets 1 and 2 (24/72 hrs operation) as well as DIN EN 12952 and DIN EN 12953.
This item of electrical equipment complies with the Technical Regulations on Protection Circuits
DIN EN 501561.
The level data are transferred from the electrode NRG 1…41 to the switching controller via CAN bus
using the CANopen protocol. Only one highlevel limiting system may be used per CANbased network.
Explanatory Notes
Function
At regular intervals the level electrode NRG 1…41 sends a data telegram to the switching controller
NRS 141. The data transfer is effected by means of a CAN bus according to ISO 11898. The transferred
measuring data are constantly evaluated by the controller. A periodic selfchecking routine tests every
3 seconds the integrity of the system and its safety functions, with a malfunction in the switching
controller resulting in immediate boiler shutdown. When the CAN bus line and, consequently, the data
transmitting cycle are interrupted, the controller sends a visual signal to indicate a faulty condition and
the relays are instantaneously deenergized (failsafe position).
The switching controller also facilitates userfriendly performance tests and detection/evaluation of
malfunctions.
To guarantee the correct and safe functioning of the highlevel limiter a min. electrical conductivity of
0.5 µS/cm at 25 °C is required.
The relay deenergizing delay is normally set to 3 seconds at the factory but delays of 15 to 25 seconds
are available on request.
Apart from the burner protection circuit there is also a separate PhotoMOS make contact output for
remote indication.
The automatic selftesting routine of the switching controllers checks every 3 seconds their safety
functions. The corresponding functions of the level electrodes will be tested by the electrode’s self
checking routine every 10 sec. The malfunction information is updated with every selftest. If no faults
have occurred the malfunction information will be deleted automatically. If faults persist the malfunction
information remains stored. If a malfunction is detected, the signal output of the control unit (terminal 7
and 8) is opened and closed in a clock pulse controlled way. As part of the automatic selftesting routine
of the switchting controller, the switchingoff of the output relays every 6 hrs is checked, too.

7
Explanatory Notes – continued –
Associated components
NRG 1641
Level electrode NRG 1641, PN 40
NRG 1741
Level electrode NRG 1741, PN 63
NRG 1941
Level electrode NRG 1941, PN 160
Design
NRS 141
Enclosure of insulating material with terminals for installation in control cabinets.
The terminals are externally accessible.
Snapping onto a 35 mm standardised supporting rail (DIN EN 50022).
External dimensions: 73 x 100 x 118

8
NRS 141
Technical Data
Type approval no.
TÜV · SWB/SHWS · 12403
Type examination certificate
Input/Output
Interface for CAN bus to ISO 11898 CANopen protocol
Output voltage supply for electrode
18 – 36, shortcircuit protected
Output for control circuit
Two voltfree relay contacts, locally connected in series.
Max. contact rating for switchting voltages 24 V AC/DC, 115 V AC and 230 V AC:
4 A resistive/inductive. Contact material: hardgold plated (AgNi 0.15)
Interference suppression
Provide contactor with external RC combination (100 Ω / 47 nF)
Signal output
PhotoMOS output, instantaneous with high level, timed malfunction signal, max. contact rating for
switching voltages 24 V AC, 115 V AC and 230 V AC/DC:
100 mA resistive
Relay deenergizing delay
Output “Highlevel alarm”, set to 3 sec. (default), or 15 sec., 25 sec.
internally connected for relay contact test
Indicators and adjustors
4 pushbuttons “Parameterisation/TEST”
1 red LED for “Highlevel alarm electrode”
3 red LEDs “Multifunction”
1 red LED “Bus status”
1 green LED “Power”
1 tenpole code switch, 7 poles for setting node ID, 3 poles for setting baud rate
1 twopole code switch, without function.
Internal selfchecking routine
Every 3 seconds
Periodic testing of output relay contacts
Every 6 hours
Mains voltage
230 V +/– 10 %, 50/60 Hz, 115 V +/– 10 %, 50/60 Hz (optional)
Power consumption
10 VA
Sensitivity
≥0.5 µS/cm at 25 °C

9
Corrosion resistance
When used for its intended purpose the safe functioning of the equipment will not be impaired by
corrosion.
Technical Data – continued –
Name plate / Marking
Fig. 1
NRS 141 – continued –
Protection
Enclosure: IP 40 to DIN EN 60529
Terminal strip: IP 20 to DIN EN 60529
Admissible ambient temperature
0 °C to 55 °C
Enclosure material
Front panel: polycarbonate, grey
Enclosure: polycarbonate, black
Weight
Approx. 0.8 kg
12345 16 17 18 25 29
Steuergerät
control device
appareille de commande
S
24V
DC CAN-BUS
-CH
CL
Tamb = 55 °C ( 131 °F)
IN / OUT: CAN-Bus
18-36 V DC
IP 40 (IP20)
-15/+10%230V10VA
Betriebsanleitung
beachten
See installation
instructions
Voir instructions de
montage
Node ID:___ ___ ___
+
87
LNN
1
Sicherheitsstromkreis
Protection circuit
Circuit de securite
NL
Alarm extern
24-230 V 100 mA
S
250 V
T 2,5 A
3sec.
GESTRA AG
Münchener Str. 77
D-28215 Bremen
Alarm
TÜV . SWB / SHWS . XX-403
NRS 1-41
Funktionale Sicherheit
Functional safety
Sécurité fonctionnelle
IEC 61508 SIL 2
MAX

10
Technical Data – continued –
Dimensions
Fig. 2
118
100
73

11
Design
!
"
Fig. 3
0
NRS 141
0

12
Functional Elements
NRS 141
Fig. 5
Fig. 4
1
7 6 5 4 3 2
8 9

13
Design / Functional Elements – continued –
Key
1Status LED Alarm Malfunction
LED 1 Electrode Highlevel alarm Malfunction alarm
LED 2 no function Malfunction alarm
LED 3 no function Malfunction alarm
LED 4 no function Malfunction alarm
2LED “Bus status”
3LED “Power”
4Enter / Test mode
5Decrease
6Increase
7Program key
8Twopole code switch (no function)
9Tenpole code switch
0Terminal strip
!Screws for terminal strip
"Housing
§Mounting rail TS 35 x 15 DIN EN 50022

14
Tool
nScrewdriver (5.5/100)
Installation
NRS 141
Installation on mounting rail
1. Clip switching controller onto mounting rail 35 x 15 mm (DIN EN 50022).
2. Align switching controller, Fig. 7
Note
nIf an external measuring pot is used, each level electrode type NRG 1…41 requires
one switching controller type NRS 141 and one GESTRA monitoring unit SRL 640.
0Terminal strip
!Screws for terminal strip
"Housing
§Mounting rail TS 35 x 15 DIN EN 50022
Key

15
Installation – continued –
Fig. 6
Example of installation
§
"
0 !
0
Fig. 7
20 20

16
Electrical Connection
Control cable
NRS, NRR, LRR, TRS, URB 1
To wire the equipment, screened multicore twistedpair control cable must be used for the bus line, e.
g. UNITRONIC®BUS CAN 2 x 2 x ... mm2or RE2YCYVfl 2 x 2 x ... mm2.
Control cable assemblies (2 x 2 x 0.32 mm² cable with plug and connector) of various lengths are
available as addon equipment.
NRG, LRG, EF, URZ, TRV, URB 2
The equipment is fitted with sensor plugin connectors (5 poles, Acoded). For connecting the bus
devices control cable assemblies (with plug and connector) of various lengths are available as addon
equipment.
Note that the recommended control cables are not UVresistant and must be protected by a
UVresistant plastic tube or cable duct if the equipment is installed outdoors (except for URB 2).
The baud rate (data transfer rate) dictates the cable length and size between the bus nodes. The total
power consumption must also be taken into consideration when selecting the conductor size. The total
power consumption is obtained from the number of bus nodes.
If the cable length between the steam boiler and the control cabinet exceeds 15 m, we recommend that
you fit a branching box that is resistant to electromagnetic interference (stock code 1501214) and use
a control cable with a larger conductor size for the distance to the control cabinet.
S 8 S 9 S 10 Baud rate Cable length Number of pairs
and conductor size [mm2]
OFF ON OFF 250 kBit/s 125 m 2 x 2 x 0.32
Factory setting
ON ON OFF 125 kBit/s 250 m 2 x 2 x 0.5
OFF OFF ON 100 kBit/s 335 m 2 x 2 x 0.75
ON OFF ON 50 kBit/s 500 m on request, depending on
bus configuration
OFF ON ON 20 kBit/s 1000 m
ON ON ON 10 kBit/s 1000 m
Set baud rate via code switch 9. Make sure that all bus nodes feature the same settings.
UNITRONIC®is a registered trademark of LAPP Kabelwerke GmbH, Stuttgart.

17
Electrical Connection – continued –
CAN bus voltage supply
To ensure the troublefree operation of the CAN bus system make sure that the voltage supply for all bus
devices is sufficient.
Please use the following table to check the voltage supply of your bus system.
Control units with
voltage supply
Qty. xPower output per item = Sum
x6 W = W
Please enter data. Sum 1 = W
Sensor, transmitter, control
units, operating & display unit
URB 1
Qty. xPower consumption per item = Sum
x3 W = W
Operating & display unit
URB 2 x5 W =W
Please enter data. Sum 2 = W
If sum 2 exceeds sum 1 supply the CAN bus with 24 V DC coming from a separate and stabilized safety
power supply unit (e. g. SITOP Smart 24 V 2.5 A).
The power supply unit must be electrically isolated from dangerous contact voltages and must meet at
least the requirements on double or reinforced isolation acc. to DIN EN 50178 or DIN 610101 or
DIN EN 607301 or DIN EN 60950 (safe isolation).
The power supply unit must be provided with an overcurrent protective device in accordance with
EN 610101.
Attention
If a safety power supply unit (e. g. SITOP smart, 24 V, 2.5 A) is used for the voltage supply
of the CAN bus do not tap the supply voltage from the terminals 1 and 5 of the GESTRA
control devices.
SITOP smart is a registered trademark of Siemens AG, Munich
Note
nThe max. baud rates and cable lengths indicated above are based on empirical values
obtained by GESTRA. In certain cases it may be necessary to reduce the baud rate in
order to ensure operational safety.
nThe type and design of the data cable has a strong influence on the electromagnetic
compatibility (EMC) of the equipment. Take special care when connecting the equip
ment.
nIf you do not use the control cable assemblies connect the connectors and jacks for
the control cables as indicated in the assignment diagram for sensor plugin unions.

18
Attention
nDo not connect terminals 19 – 24 and 26, 27, 28 and 30!
nDo not connect terminals 10, 11 and 12!
Wiring diagram
Fig. 8
$
%
&
/
(
)
)
Electrical Connection – continued –

19
Wiring diagram for the sensor plugin connections
Fig. 9 b=c cd=aadb( (
Electrical Connection – continued –
Fig. 10 RES 1 Fig. 11 RES 2
$ Mains voltage
% Safety circuit, uninterrupted, ≥ 18 V AC/DC
& Other devices in the safety circuit
/ PhotoMos output 24 V230 V AC/DC, 100 mA.
With HWalarm: instantaneous. With malfunction alarm: switched
( Terminating resistor 120 Ω, RES 1 or RES 2
) CAN bus line, twisted pair control cable
= Pin 1: Screen
a Pin 2: Power supply 24 V DC+ (red)
b Pin 3: Power supply 24 V DC– (black)
c Pin 4: CAN data line CH(white)
d Pin 5: CAN data line CL(blue)
Key

20
Electrical Connection – continued –
CAN bus wiring diagram
Fig. 12
RES 2
CEP NRS, NRR, LRR,
TRS, URB 1
URB 2 NRG, LRG, TRV
EF, URZ NRG, LRG, TRV
EF, URZ
RES 1
Attention
nWire equipment in series. Startype wiring is not permitted!
nLink screens of control cables such that electrical continuity is ensured and connect
them once to the central earthing point (CEP). If equipotential bonding currents are
to be expected, for instance in outdoor installations, make sure that the screen is
separated from the central earthing point (CEP).
nTo protect the switching contacts fuse circuit with T 2.5 A or according to TRD
regulations (1.0 A for 72 h operation).
nIf two or more system components are connected in a CAN bus system, provide the
first and the last device with a terminating resistor of 120 Ω, Fig. 10, Fig. 11
nNote that in a CAN bus network only one highwater level limiting system may be
used.
nDo not interrupt the CAN bus network during operation with one or more system
components!
If the CAN bus network is interrupted the safety circuit will be opened.
If the control unit is to be replaced detach terminal strip 0, Fig. 3
Before taking the CAN bus line from the terminal strip, make sure that all connected
system components are out of service.
Table of contents
Other GESTRA Switch manuals

GESTRA
GESTRA TRS 5-52 User manual

GESTRA
GESTRA LRS 1-50 User manual

GESTRA
GESTRA NRS 1-52 User manual

GESTRA
GESTRA NRS 1-51 User manual

GESTRA
GESTRA NRGS 15-1 User manual

GESTRA
GESTRA URS 2 User manual

GESTRA
GESTRA NRS 2-40 User manual

GESTRA
GESTRA NRS 2-1 Quick guide

GESTRA
GESTRA NRS 1-50 Series User manual

GESTRA
GESTRA NRS 1-53 User manual

GESTRA
GESTRA NRS 1-50 User manual

GESTRA
GESTRA LRS 1-50 User manual

GESTRA
GESTRA NRS 1-50 User manual

GESTRA
GESTRA NRS 1-2 User manual

GESTRA
GESTRA NRS 1-51 User manual

GESTRA
GESTRA NRS 1-56 User manual

GESTRA
GESTRA NRS 2-50 User manual

GESTRA
GESTRA NRS 1-56 User manual

GESTRA
GESTRA LRS 1-50 User manual

GESTRA
GESTRA NRGS 15-1 User manual