GEX Corporation Thermo Scientific GENESYS 30 Installation instructions

100-167 Rev. B Release Date: 10/29/18 Page 1of 9
Product Specifications and Usage Information
P4400
GENESYS 30 Spectrophotometer
DESCRIPTION
The P4400 Thermo Scientific GENESYS 30 Spectrophotometer (G30) is a device used to measure the optical absorbance of
transparent samples in the spectrum of visible light.It is designed to be simple and fast with the highest performance and
quality.
The spectrophotometer is built for the fast-paced, high-volume processing environment, and can withstand the rigors of daily
usage for many years.
APPLICATION
The G30 is used for the measurement of optical absorbance of dosimeters using a select wavelength in the visible spectrum,
such as GEX B3 radiochromic film dosimeters, and FWT-60 radiochromic film dosimeters. The instrument is combined with
specially designed dosimeter holders which position the dosimeters appropriately to obtain accurate and repeatable
measurements.
SPECIFICATIONS
Physical Specifications:
GEX Part
No.
Description Product Dimensions Packaging Dimensions
Product
Weight
P4400-US
Spectrophotometer – Type B plug
34.3 cm L x 38.1 cm W x 20.3
cm H
(13.5” L x 15” W x 8” H)
58.4 cm L x 50.8 cm W x 33.0
cm H
(23” L x 20” W x 13” H)
10.0 kg
(22 lbs.)
P4400-EU
Spectrophotometer – Type F Plug
P4400-UK
Spectrophotometer – Type G Plug
**For a complete list of specifications see the brochures and information from Thermo Scientific.
Material
Molded plastic
Color
Grey and White
Printing
Thermo Scientific logo plate on front
Electrical Supply
100–240 V, 50–60 Hz, selected automatically; 150 W maximum
Optical Design
Single-beam
Spectral Bandwidth(s)
5 nm
Light Source
Tungsten-Halogen lamp
Detector
Silicon Photodiode
Wavelength
Range: 325 –1100 nm
Accuracy: ±2 nm (full range 325 to 1100 nm)
Repeatability: ≤ 1 nm
Photometric
Range: -3A to +3A
Accuracy – Instrument: ±0.002 A (0 – 0.3A)
0.5% of ABS reading (0.301A – 2.5A)
Repeatability: ±0.002 A
Drift (Stability) <0.002 A/hr
Stray Light
<0.1 %T at 340nm and 400nm
Baseline Flatness
<0.003 A
Keypad
Tactile rubber 23 keys with numeric keypad
Display
Touchscreen LCD panel; 800 x 480; 12.7 cm (5 in) diagonal

100-167 Rev. B Release Date: 10/29/18 Page 2of 9
Product Specifications and Usage Information
P4400
GENESYS 30 Spectrophotometer
PRODUCT PHOTO
Thermo Scientific GENESYS 30 Spectrophotometer
Included Components:
•Plastic insert plate with cuvette holder
•USB thumb drive
•Power cord
•USB interface cord
Packaging:
Unit is shipped in a cardboard box with a form-fitting foam enclosure.
Storage:
Store the instrument in a cool and dry location.
INSTALLATION
Please refer to the Thermo Scientific GENESYS 30 Spectrophotometer User Guide for explicit detail. Information supplied herein
should be considered supplemental or redundant and is specific to usage for dosimetry in radiation processing applications.
CAUTION! - Whenever the spectrophotometer has been stored or shipped, immediate exposure to room air can cause
condensation damage. Move the shipping cartons to the installation location at least 24 hours before installation. This allows
the instrument to equilibrate at room temperature before the shipping cartons are opened and protective packaging is
removed.
Unboxing:
After at least 24 hours, open the shipping box and remove the documentation packet and USB thumb drive. Remove the
instrument from its shipping box.
Operating Environment:
Instrument was designed for use under the following conditions:
Temperature Range*
5°C to 35°C (41°F to 95°F)
Relative Humidity
<20% to 80% noncondensing
Altitude
0m to 200m
*Operating the instrument outside of this temperature range may cause permanent damage.

100-167 Rev. B Release Date: 10/29/18 Page 3of 9
Product Specifications and Usage Information
P4400
GENESYS 30 Spectrophotometer
Instrument performance should be verified when operating outside of these ranges. GEX has verified instrument performance
at an altitude of approximately 1610m.
The instrument should be positioned on a surface that is level and free of vibration. Consider all GLP’s (Good Laboratory
Practices) concerning cleanliness of the area.
Power and Connectivity:
1. Connect the USB cable from the port on the front-right side to the USB port on the PC.
2. Connect the power cord from the front, right-side of the instrument to the outlet.
3. Ensure the instrument’s sample chamber is empty
a. (i.e. there is no film dosimeter holder with the 2.5mm aperture).
4. Turn on the PC and login to Windows®.
5. Power ‘ON’ the spectrophotometer using the switch on the front-right side.
a. If the instrument is powered on with the 2.5mm aperture film holder or any dosimeter sample in the
sample compartment, simply turn the unit off, clear the obstruction and turn the instrument power back
on.
6. The instrument will perform a series of self-checks that will take approximately one minute.
7. The instrument must be allowed to warm up for a minimum of 30 minutes before use otherwise measurement
accuracy and repeatability may be affected.
8. Open the Device Manager on the PC and locate the unidentified device. Select Properties -> Driver and then press
the Update Driver button. See Figure 1 below.
FIGURE 1
9. Browse to the GENESYS 30 driver folder provided separately by GEX. Repeat this process twice or until the device is
recognized as a COM device in the system and “Genesys30” is the displayed name of the device.
10. To make the connection to a PC, select ‘Settings -> Connect to PC’ and the instrument will display “Connected to
computer”. See Figure 2 below.
11. The instrument is designed to be turned on for long periods and no special procedure is necessary to turn the
instrument off after use; simply turn off the power switch at any time.

100-167 Rev. B Release Date: 10/29/18 Page 4of 9
Product Specifications and Usage Information
P4400
GENESYS 30 Spectrophotometer
FIGURE 2
Dosimeter Holders:
Install the holder system according GEX Doc# 100-168 - GENESYS 30 Dosimeter Holder System. Once the holder system is
properly installed, the dosimeters can be inserted and the sample compartment lid of the GENESYS 30 should remain open
during measurements. The lid should be closed when not in use or during Performance Verification (P.V).
INSTRUMENT CALIBRATION / PERFORMANCE VERIFICATION (P.V.)
The instrument is not provided by Thermo Scientific with a Calibration Certificate because of a change in technical terminology.
The instrument can be tuned so that it performs within a given list of specifications but technically cannot be ‘calibrated’.
Therefore, it is tested at the factory for proper performance, but it is the user’s responsibility to ultimatiley verify the
instrument performance after the instrument is installed at the user’s site.
The term ‘Performance Verification’ replaces the older term ‘Calibration Verification’ but the intent of either is the same; to
determine if the instrument is performing within the manufacturer specifications. See GEX Doc# 100-270 - GENESYS 30
Performance Verification for complete details.
STAND-ALONE MEASUREMENTS
The instrument can be used when disconnected from a PC to make measurements. For most users, this will never be a
necessity, but some users may find it useful despite the limitations from using the instrument in this manner. For more
information on making fixed or scanning measurements, see the Thermo Scientific GENESYS 30 User Guide.
Fixed Wavelength Measurements:
The protocol below must be followed to make fixed wavelength dosimeter measurements:
1. Insert the appropriate dosimeter holder according to GEX Doc #100-168, GENESYS 30 Dosimeter Holder System -
Product Specifications and Usage (PSU).
2. From the instrument home screen, highlight “Fixed” and press the enter () button. See Figure 3 below.
FIGURE 3
3. Input the correct wavelength setting for the dosimeter type you are measuring and select “Done”. See Figure 4
below.

100-167 Rev. B Release Date: 10/29/18 Page 5of 9
Product Specifications and Usage Information
P4400
GENESYS 30 Spectrophotometer
FIGURE 4
4. Ensure the dosimeter holder is empty, then zero the instrument by pressing the yellow “0.00” button.
5. After the instrument is zeroed, insert a dosimeter to be measured and select the green diamond-shaped button. The
measurement will be captured on the screen. See Figure 5 below. Measurement time for each dosimeter is less than
1 second.
FIGURE 5
6. After the measurement is recorded, remove the dosimeter and insert the next sample to be measured. Repeat step 5
above for all dosimeters.
NOTE:Only 10 consecutive measurements may be taken. If more than 10 measurements are needed, you must save or
discard the data before proceeding. The recorded measurements may be output to an external USB drive in the
form of .CSV files.
Scanning Measurements:
Sometimes a series of measurements over a range of wavelengths is the objective, in particular for qualification and
performance verification activities, and this can be accomplished using the Scan feature of the GENESYS 30.
Follow the procedure below to determine the peak wavelength of an irradiated film dosimeter or reference standard
(modify the procedure as necessary for other similar types of measurements):
1. On the home screen of the GENESYS 30 navigate to the scan icon.
2. Set the Scan Range (X-axis limits) at 500 – 600 nm in the absorbance mode by navigating using the arrow keys and
typing in the values for the lower and upper limits.
3. Zero the GENESYS 30 with the intended dosimeter holder installed with no sample using the yellow 0.00 button.
4. When the zeroing process is complete insert a B3 dosimeter into the dosimeter holder.
5. Press the green Play (measure) button on the instrument keypad.
6. The resulting graph will display. Using the arrow keys move the vertical line.
7. The resulting graph forms a peak, move the line until you reach the peak absorbance value. Record the wavelength
associated with this value; this is the peak absorbance wavelength.

100-167 Rev. B Release Date: 10/29/18 Page 6of 9
Product Specifications and Usage Information
P4400
GENESYS 30 Spectrophotometer
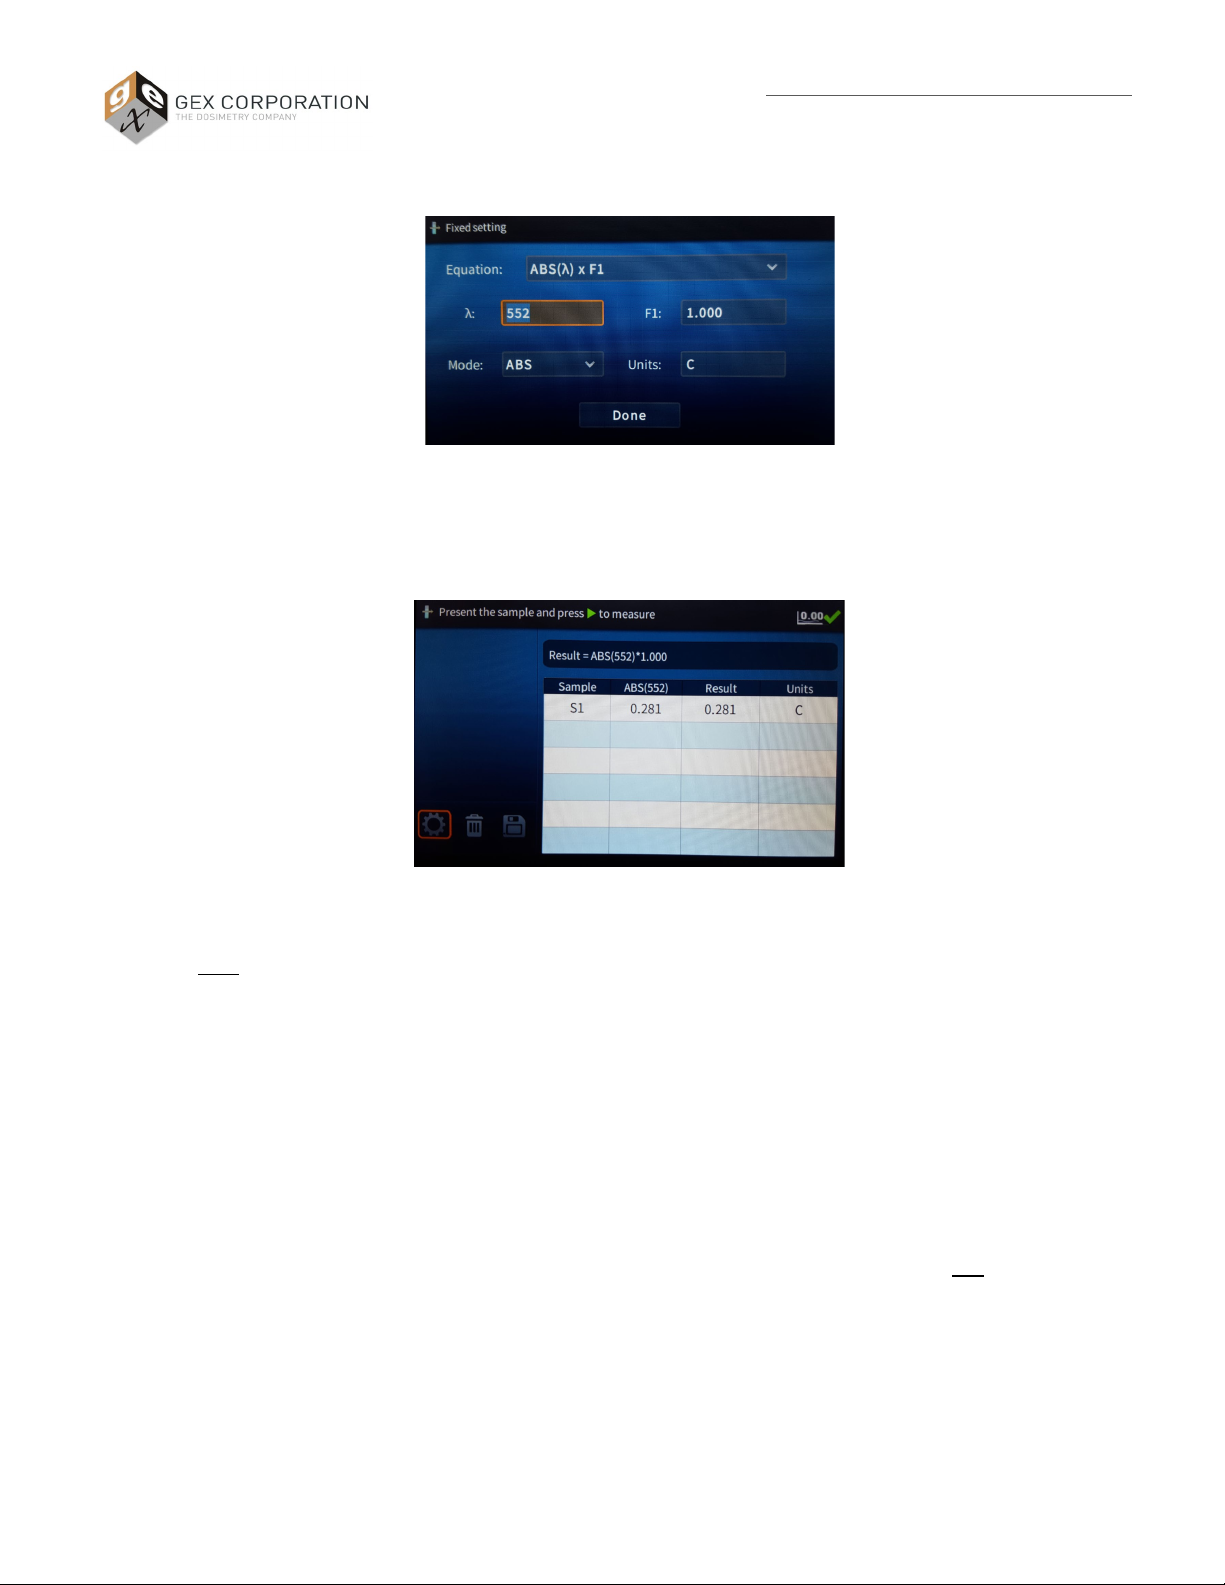
8. Review the results. The wavelength at which the maximum value is found for B3 should be 552nm ±2nm.
Saving a Measurement Session:
1. Insert a USB drive into the port located on the front of the G30.
2. Use the directional arrows to highlight the floppy disk icon and press enter.
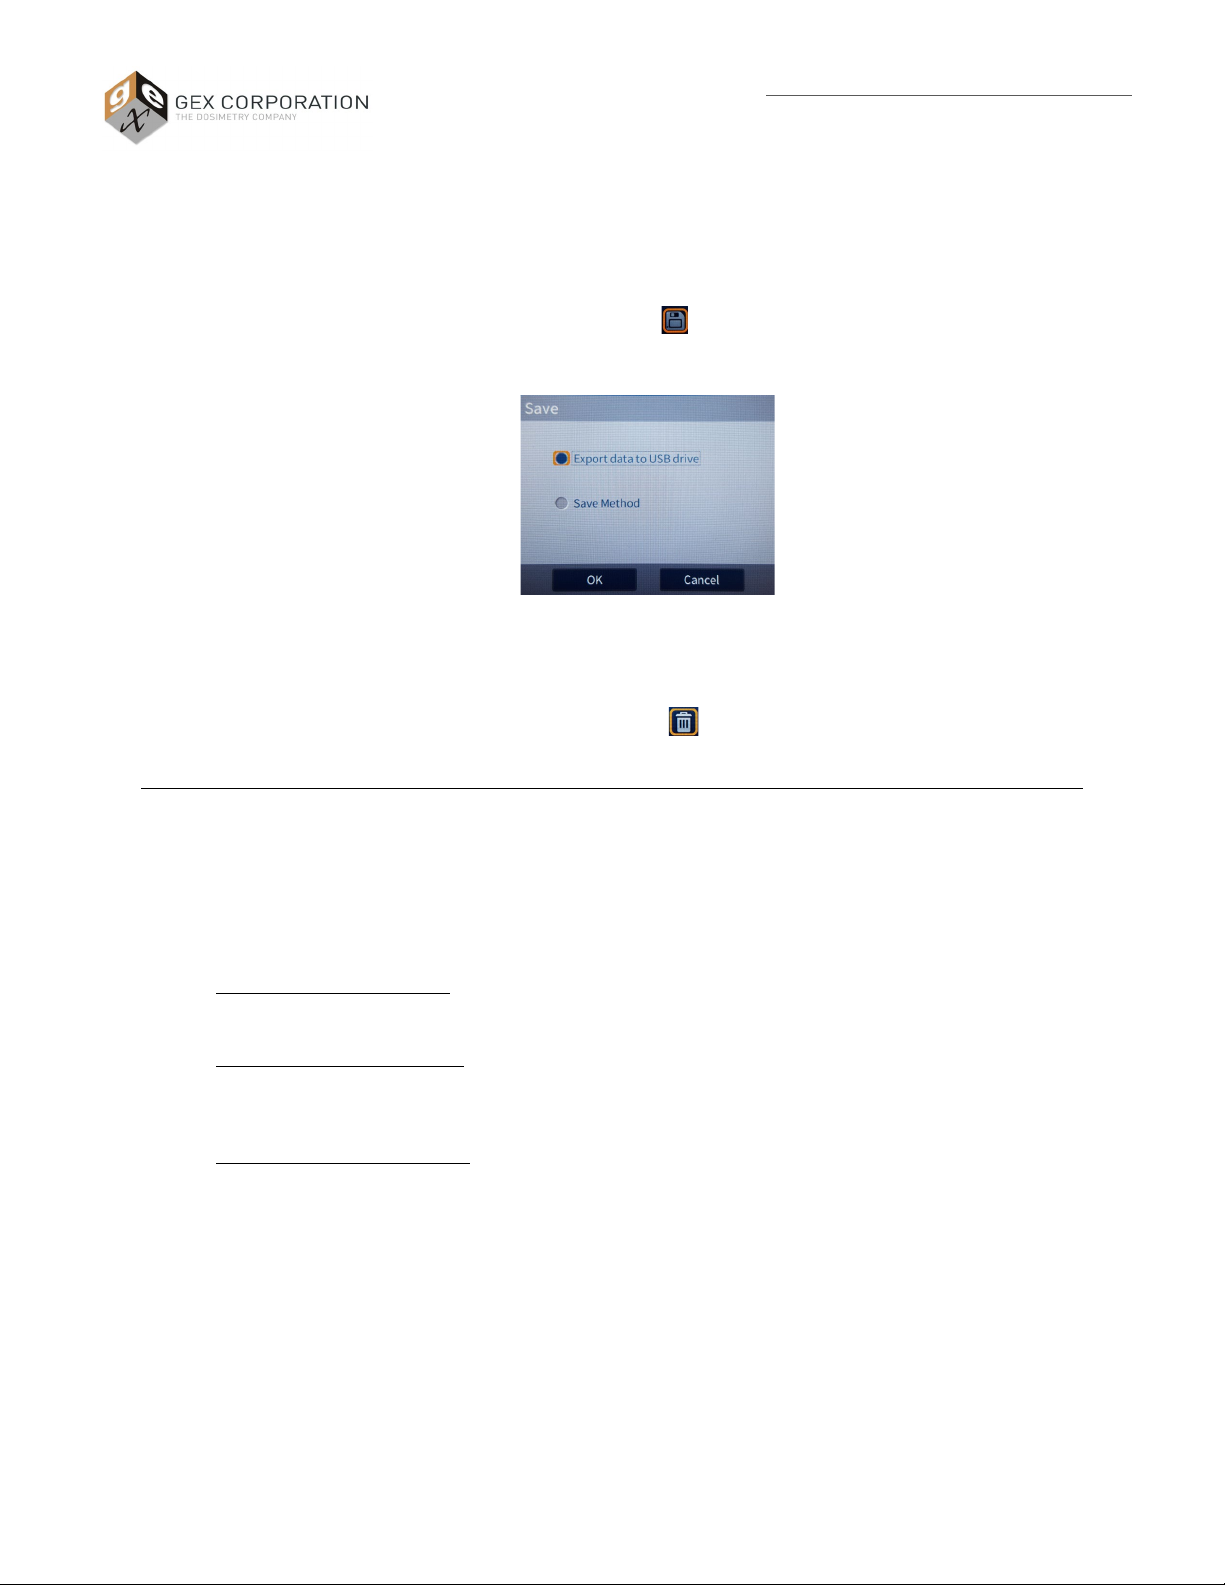
3. Use the enter key to select “Export data to USB drive” from the window that is displayed and press OK. See Figure 6
below.
FIGURE 6
4. The top of the screen will display “Data is successfully saved” when complete.
5. The USB drive may be removed and the data transferred to a computer for review and analysis.
6. Clear out the measurements by selecting the trash can icon and select enter.
QUALIFICATION
The information in this protocol is provided for reference only. GEX Corporation shall not be liable for errors
contained herein nor incidental or consequential damages in connection with the provision, performance, or use
of this protocol. The information in this protocol is subject to change without notice. Users are ultimately
responsible for validation of their systems. GEX does not provide any warranty of any kind regarding this
procedure.
IQ/OQ/PQ for use in B3 or FWT dosimetry applications:
1) Installation Qualification (IQ)
Verify the installation of the instrument according to the instructions provided above in this document.
2) Operational Qualification (OQ)
Complete a Full Performance Verification in accordance with GEX Doc# 100-270 - GENESYS 30
Performance Verification Procedure, or equivalent.
3) Performance Qualification (PQ)
Some measure of the instrument’s ability to provide repeatable (< 1.0% C.V. or equivalent is suggested)
and reproducible (< 2.0% C.V. or equivalent is suggested) dosimeter absorbance measurements at the
specified wavelength of measurement must be completed by the end-user to demonstrate that the
equipment is installed and operating properly for the intended use of measuring film dosimeters. It is
suggested to perform a simple R&R study for each dosimeter type that will be used in accordance with a
written standard operating procedure for the use of the equipment. For some users, the completion of a
dosimeter batch calibration may provide data which is acceptable for the purposes of this type of
assessment.

100-167 Rev. B Release Date: 10/29/18 Page 7of 9
Product Specifications and Usage Information
P4400
GENESYS 30 Spectrophotometer
Notes:
•GEX has completed the necessary testing on the instrument (described above) as part of the
DoseControl System validation. The validation data is available for audit.
•It is suggested to conduct thirty (30) repeated measurements of single dosimeters irradiated at low,
middle, and high doses in the user’s range, and to reproduce this test for a minimum of three (3) days
using 3 or more operators.
•Some may wish to perform a formal Measurement Systems Analysis (MSA) and redefine the steps
suggested herein.
CARE & MAINTENANCE
Cleaning:
The instrument’s exterior and the sample compartment should be periodically cleaned as part of a Preventative Maintenance
program along with the dosimeter holder system. An instrument that is maintained and cared for will perform better and have
a longer life. Complete cleaning instructions which include the proper materials can be found in the GENESYS 30 User Guide.
Instructions for cleaning the dosimeter holder system may be found separately in GEX Doc# 100-168, GENESYS 30 Dosimeter
Holder System - Product Specifications and Usage (PSU).
Manufacturer Service:
If the device requires service for any reason there are two options:
1. Depot Service:
For customers in the USA and Canada, the GENESYS 30 needs to be sent to Thermo Scientific in Madison, WI, U.S.A.
for repair or other services. Please contact GEX Customer Service at cs@gexcorp.com for more information if service
is required.
2. On-site Service:
On-site service may be available in some countries. Contact GEX Customer Service at [email protected] or your local
Thermo Scientific representative for details.
Lamp Replacement:
See GEX Doc# 100-169, GENESYS 30 Replacement Lamp - Product Specifications and Usage (PSU) for complete details about the
lamp. The procedure for replacement of the lamp is below:

100-167 Rev. B Release Date: 10/29/18 Page 8of 9
Product Specifications and Usage Information
P4400
GENESYS 30 Spectrophotometer
ACCESSORIES
GEX Part No.
Description
Purpose
P4220
Spectronic Standards Set
Performance Verification
P4401
G30 Tungsten-Halogen Lamp
Assembly
Lamp replacement part
P4405
Dosimeter holder system baseplate
with beam tubes
Platform for interchangeable dosimeter holders allowing the sample
compartment lid to remain open during measurement.
P4410 DoseStix Dosimeter holder
Positioning 50mm x 15mm GEX DoseStix style film dosimeters in the sample
compartment for measurement.
P4420 WINdose Dosimeter holder
Positioning 10mm x 10mm film dosimeters in the sample compartment for
measurement.
PRECAUTIONS
Please refer to the Thermo Scientific Site and Safety User Guide for additional information and the full listing of precautions.
NOTICE:
Immediate exposure to room (ambient) air can cause condensation damage whenever the spectrophotometer has been stored
or shipped. Move the shipping cartons to the installation location at least 24 hours before installation. This allows the
instrument to equilibrate with the room temperature before the shipping cartons are opened and protective packaging is
removed.

100-167 Rev. B Release Date: 10/29/18 Page 9of 9
Product Specifications and Usage Information
P4400
GENESYS 30 Spectrophotometer
•Keep shipping cartons upright at all times. Damages due to improper moving techniques are not covered by the
warranty.
•Connect the spectrophotometer to a suitable uninterruptable power supply to minimize line current fluctuations that
may alter the measurement or damage the spectrophotometer.
•Keep the top cover closed and latched as much as possible. Minimize exposure of the spectrophotometer to airborne
contaminants like smoke, dust, oil vapor, or chemical fumes.
WARRANTY/GUARANTEE
Warranty:
Please refer to the Thermo Scientific GENESYS 30 Warranty Information document for details.
Guarantee:
1-year GEX satisfaction guarantee. Product may be returned to GEX within one year from the date of delivery for any customer
dissatisfaction.
REFERENCES/DOCUMENTS
Thermo Scientific documents (typically included with each instrument purchase):
•GENESYS 30 User Guide
•GENESYS 30 Setup Guide
•GENESYS 30 Warranty Information
•Site & Safety Information
•Declaration of Conformity
•GENESYS 30 Test Report
GEX Corporation documents:
•100-168, GENESYS 30 Dosimeter Holder System - Product Specifications and Usage (PSU).
•100-169, GENESYS 30 Replacement Lamp - Product Specifications and Usage (PSU).
•100-269, GENESYS 30 Performance Verification Form
•100-270, GENESYS 30 Performance Verification Procedure
REVISION HISTORY
DATE
CHANGE DESCRIPTION
REVISION
05/12/17
Initial release.
A
10/03/18
Complete major revision of all sections except the specifications, which had some information
removed. Reflected newly released G30 PV documents (#100-269 and #100-270). ECO 70403. B
To learn more about GEX products and services, visit www.gexcorp.com or contact a GEX representative at +1 303 400-9640.
©2018 GEX Corporation – USA
This manual suits for next models
3
Table of contents
Popular Measuring Instrument manuals by other brands

Micro Audiometrics
Micro Audiometrics ES3S user guide

Ametek
Ametek BARBEN ANALYTICAL OXY visor Installation, operation and maintenance manual

Trumeter
Trumeter APM quick start guide

Tektronix
Tektronix 492, 492P Operator's manual

WOBIT
WOBIT ADT42 user manual

Hi-Target
Hi-Target ZTS-720 Series instruction manual