INSTALLATION INSTRUCTIONS #615598
CAREFULLY READ INSTRUCTIONS BEFORE STARTING INSTALLATION
When installing this exhaust system make sure to use proper safety precautions. Use jack stands when working under
the vehicle, set parking brake, block tires and use safety glasses and gloves. Allow exhaust to cool before attempting
installation. Severe injury or burns could occur if safety measures are not taken.
SUGGESTED TOOLS: 1/2”, 9/16” 15mm wrenches & sockets, WD-40, hacksaw, jack stands.
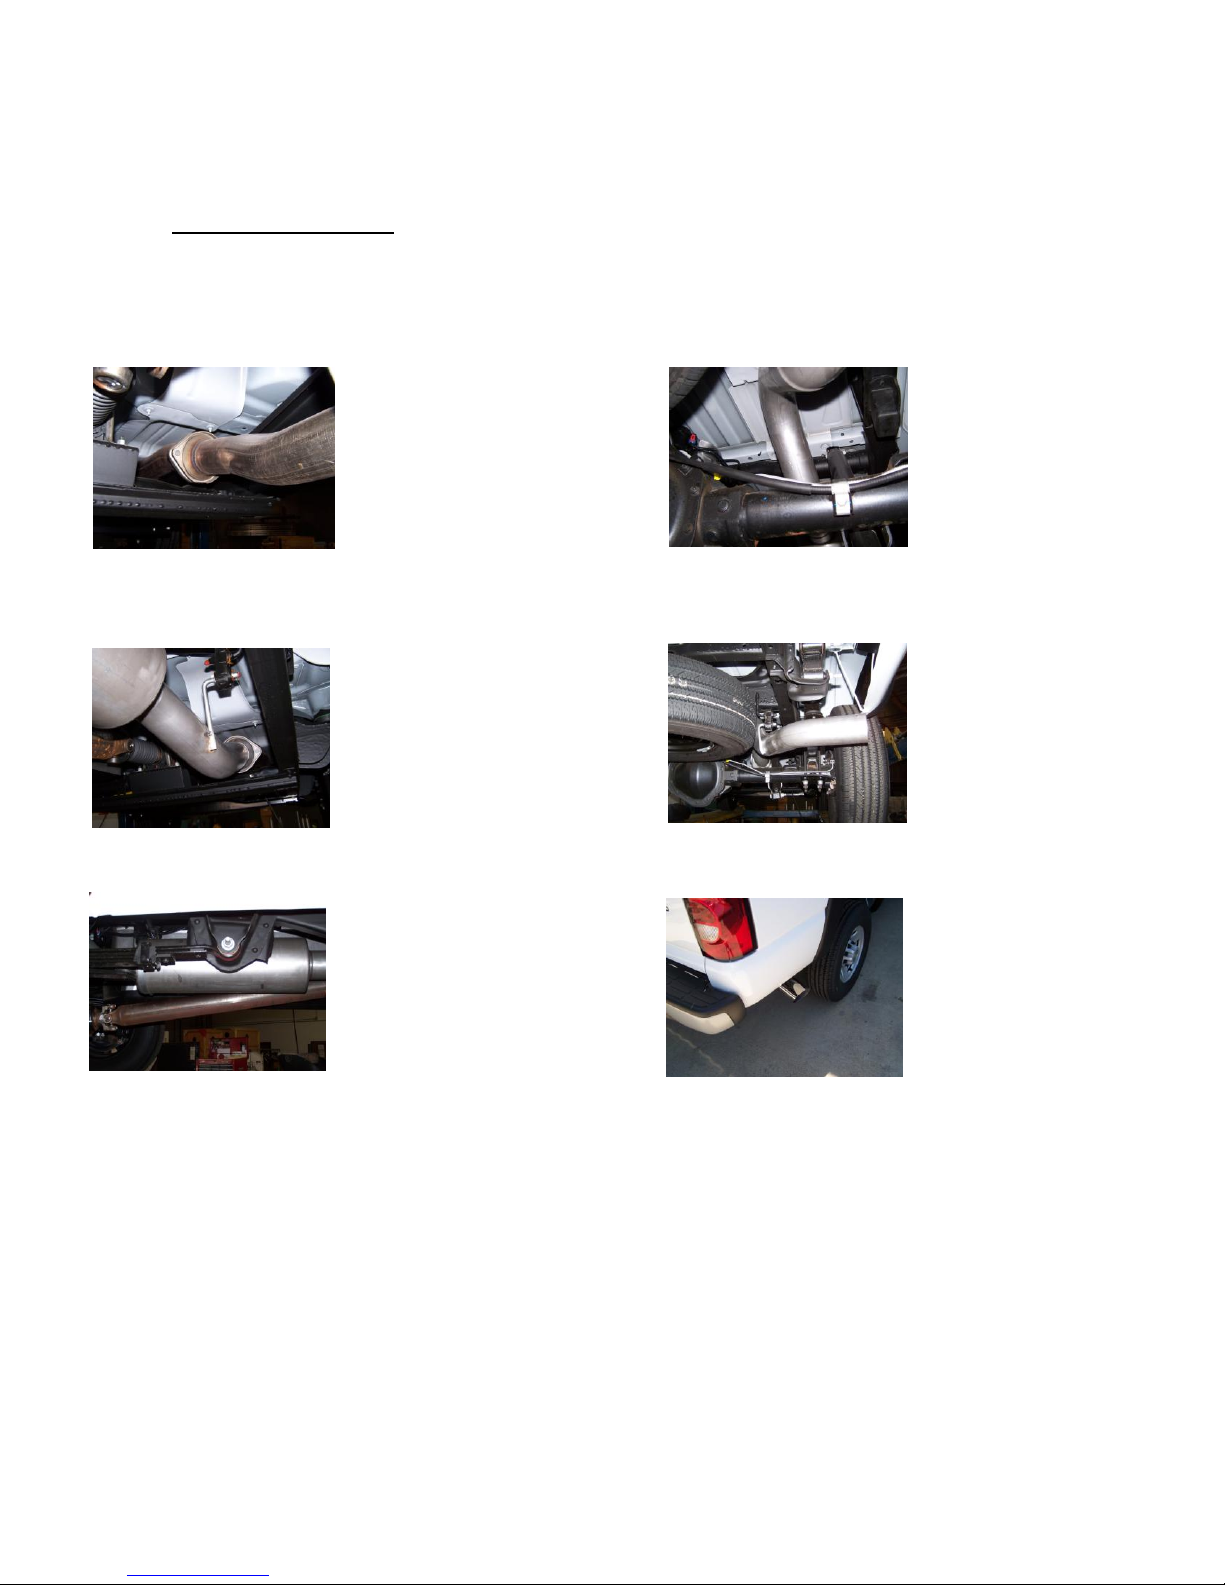
2. To remove stock exhaust
unbolt it from the 2 bolt flange
located in front of your stock
muffler. You will reuse the
factory nuts. Cut your stock
tailpipe off for easier removal of
stock exhaust. Use WD-40 to
disengage hangers from rubber
grommets. Do not damage or
remove the rubber grommets as
you will reuse them to mount
your new system.
5. Install overaxle tailpipe #C
into muffler 1 ½” – 2”. Use
clamp #F to secure pipe to
muffler. Do not tighten.
GIBSON EXHAUST systems are designed on a factory stock vehicle. Any aftermarket products installed could increase the sound
levels of this Exhaust.
Make sure there is a 1” clearance from ALL rubber brake lines, shock boots, fuel lines, tires, etc to prevent heat
related damage or fire.
4. Slide muffler #B onto headpipe
1 ½”-2”. Use jack stand to
support muffler. Use clamp #F to
secure muffler to headpipe.
Next, install band clamp #G onto
muffler. Insert hanger into rubber
grommet. Use bolt kit #H to
secure band clamp. Do not
tighten.
3. Install headpipe #A onto your
exisiting 2-bolt flange reuse your
factory nuts to secure. Do not
tighten. Insert welded hanger
onto rubber grommets.
6. Slide exit pipe #D onto
overaxle tailpipe. Insert welded
hanger into rubber grommet.
Use clamp#F to secure pipes
together. Do not tighten. Rotate
pipe until level.
7. Install stainless steel tip #E.
Clamp down. When you have
everything in place, firmly
tighten all bolts and clamps
down securely. Use stainless
steel cleaner and a Scotch Brite
pad weekly to prevent tip from
discoloration. Inspect all
fasteners after 25-50 miles of
operation and re-tighten as
necessary.
1. Disconnect the negative battery cable before removal of OEM exhaust. This will allow the computer to reset and
recognize the new exhaust. Lay out the exhaust on the floor so it looks like the drawing and compare parts with manual.


