manuals.online logo
Brands
  1. Home
  2. •
  3. Brands
  4. •
  5. GIGA Copper
  6. •
  7. Network Hardware
  8. •
  9. GIGA Copper G4201TM User manual

GIGA Copper G4201TM User manual

G4201TM
G.hn Master and Client
Quick start guide
For further information and purchase enquiries
please contact in[email protected]
1. Introduction
With the G.hn modem G4201TM you can easily extend
your network via existing data and telephone cables.
The devices are also suitable for the distribution of fiber
optic connections from the ONT to the router via existing
telephone line.
The modem can use any type of cable - both twisted pair
and non-twisted pair - for data transmission and
achieves a speed of approx. 1500 Mbit/s (sum of both
transmission directions).
The devices are always connected in pairs - a master and
a client. The master determines how fast the data is
transferred towards the client and back
(download/upload).
In networks with several clients, a G.hn switch can be
used instead of several master modems (see
Installation). This enables the central administration of
all G.hn components.
2. Package content
•G4201TM Master or G4201TM Client
•DC-12V/1A Power adapter
•RJ11/RJ11 telephone cable 1.5m, 4- wire (SISO and MIMO)
•TAE-F/RJ11 plug, 4- pole (SISO and MIMO)
3. Technical data
•Dimensions: 111.5 * 83 * 24.5 mm
•Weight: 0,19 kg
•Operating temperature: 0°C - 40°C
•Power consumption: < 3 Watt
4. G.hn Specification
•G.hn Wave2, 2-200 MHz
•Connection type: SISO (1 wire pair, 2-200MHz) and
MIMO (2 wire pairs, 2-100MHz)
•Total bandwidth –ca. 1500 Mbit/s
(Total Download and Upload)
•Splitting of the bandwidth –variable, default:
70% Download (from master to client)
30% Upload (from client to master)
•Maximum permissible attenuation of the cable
connection: 75dB
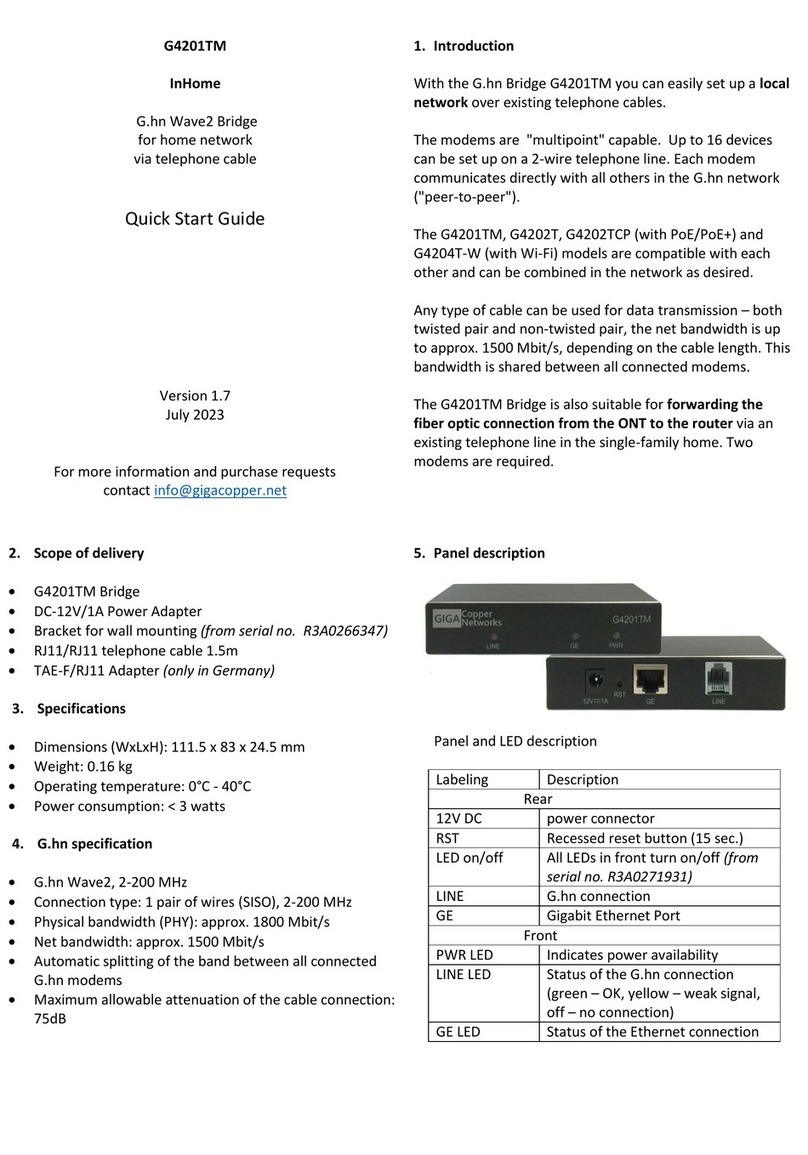
5. Interfaces
Panel and LED description
Labelling
Description
12V DC
Power input
RST
Recessed reset button (15 Sec.)
LINE
G.hn port
GE
Gigabit Ethernet Port
PWR LED
Displays power availability
LINE LED
Status of the G.hn connection
(Green - OK, Yellow - weak signal,
Off - no connection)
GE LED
Ethernet Connection Status
6. Installation
Variant 1 –„Point-to-Point“: one master and client
Variant 2 –Connection to the Switch G4224T or G4200-8T/4T
7. Connection type and wire assignment on device (RJ11 plug)
The G.hn connection can be established either via one wire pair (connection type SISO = G.hn profile “PHONE 200MHz”) or
via two wire pairs (connection type MIMO = G.hn profile “PHONE 100MHz MIMO”). The connection type must be
configured via web interface in both modems or via the G.hn switch.
The default setting is one wire pair connection (“PHONE 200MHz”).
Wire assignment SISO
Variant 1 –„Point-to-Point“
Wire assignment SISO
Variant 2 –Connection to Switch
Wire assignment MIMO
Variant 1 –„Point-to-Point“
Wire assignment MIMO
Variant 2 –Connection to Switch
8. Installation notes
•The wires of a pair can be connected straight or crossed.
•Maximum range of the G.hn connection depends on the type of cable used, the connection type and the environment.
Typical values for a 0.5 mm twisted pair cable: connection possible up to approx. 600/800 metres (SISO/MIMO),
maximum bandwidth of 1500 Mbit/s - up to approx. 100/200 metres (SISO/MIMO).
•For longer cables (up approx. 100-150m), the bandwidth can be increased by up to 15% (SISO) resp. up to 25% (MIMO)
by adjusting the signal level. For this purpose, the "Range optimization model" must be set to "Long" in the web
interface of both devices resp. the "LongRangeMode" setting must be activated in the G.hn switch.
•The negotiated bandwidth can be queried via the web interface of the devices (see point 11).
•The bandwidth split of the G.hn connection is variable. It can be set between 80/20% and 20/80%. In the factory setting,
70% of the bandwidth is reserved for download (direction master to client) and 30% for upload (direction client to
master). The allocation can be configured via master web interface (menu G.hn DownStream / UpStream Ratio) resp. via
the G.hn switch.
•
9. Administration
10. IP address
The devices do not require IP addresses from the local network segment during operation, because they transmit the data
traffic via the MAC addresses. In the factory setting, they do not obtain any addresses from the local DHCP server.
If desired, static IP addresses can be configured or the DHCP client can be activated ("IP" menu in the web interface).
11. Query of the negotiated bandwidth
The negotiated bandwidths for both directions can be queried via web interface of each modem. The values shown are
gross data transmission rates on physical layer (PHY). The transmission rate on application layer is approx. 15-20% lower.
IP-Adress: 192.168.10.252 (Master), 192.168.10.253 (Client). Login passwort: paterna, Factory reset passwort: betera
Login via Webinterface
•Connect your computer to the G.hn modem via the GE
port..
•Assign a fixed IP address to your computer, e.g.
192.168.10.100 (network mask 255.255.255.0).
•Open a web browser and connect to 192.168.10.252 or
192.168.10.253
•Login with the standard password: paterna
It is possible to transmit an analogue telephone line on the same
line parallel to the G.hn signal. Use a DSL splinter for this purpose.
12. Guarantee
We provide a 24-month warranty on all products purchased from us. You can find complete warranty conditions at
https://gigacopper.net/web/en/Guarantee_declaration.pdf

Other GIGA Copper Network Hardware manuals

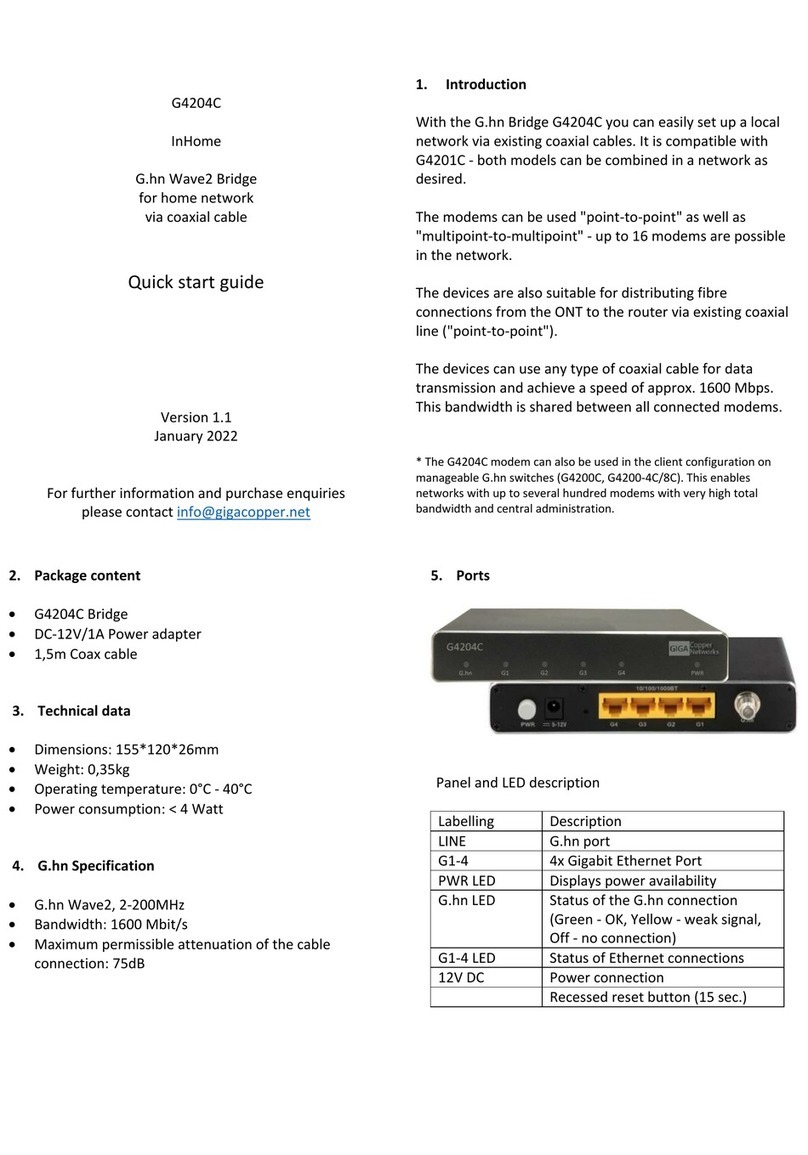
GIGA Copper G4204C User manual

GIGA Copper

GIGA Copper G4204C User manual

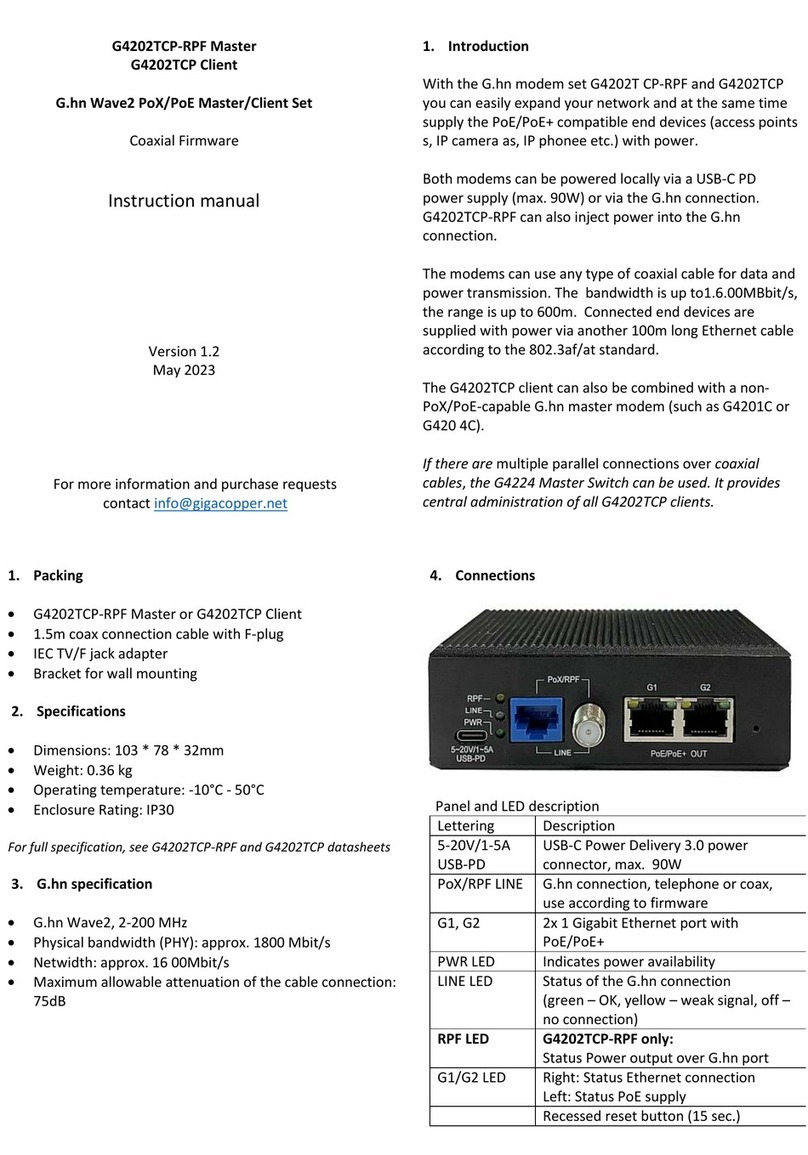
GIGA Copper G4202TCP-RPF User manual

GIGA Copper

GIGA Copper G4202TCP-RPF User manual

GIGA Copper G4202TCP-RPF User manual

GIGA Copper

GIGA Copper G4202TCP-RPF User manual

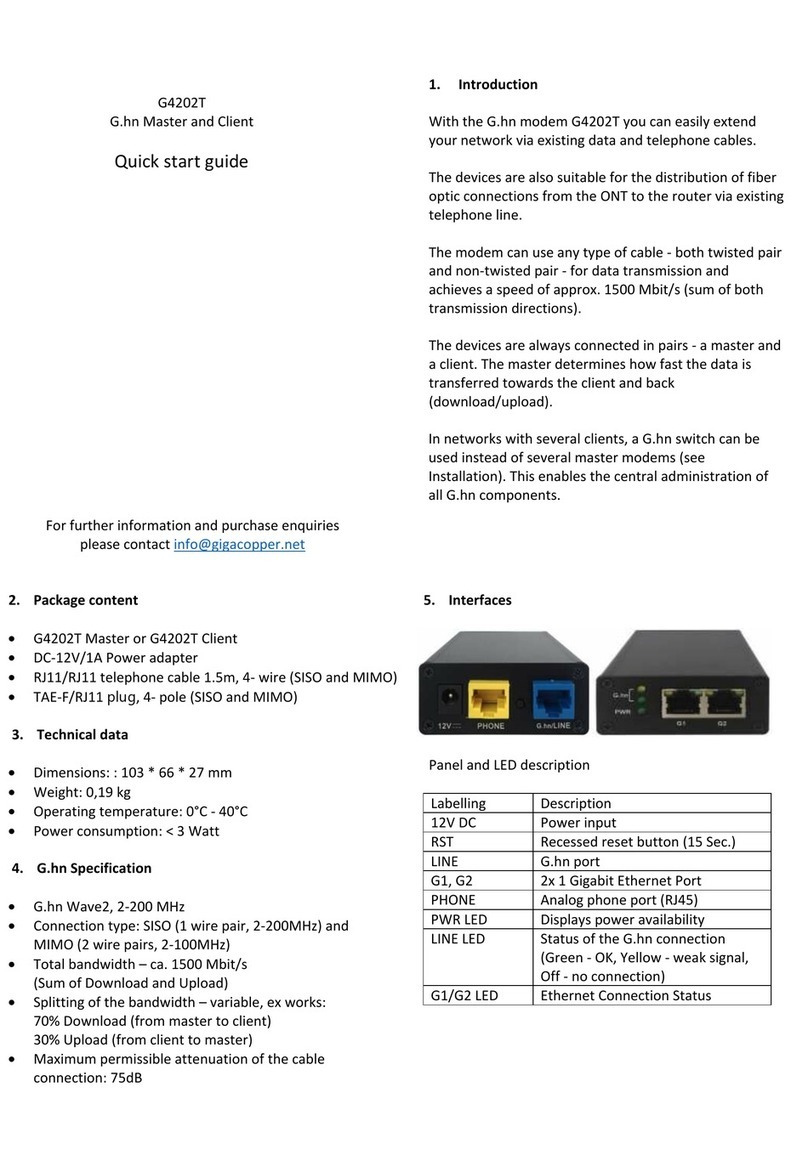
GIGA Copper G4202T User manual

GIGA Copper

GIGA Copper G4202T User manual

GIGA Copper G4201TM User manual

GIGA Copper

GIGA Copper G4201TM User manual

Popular Network Hardware manuals by other brands

Hypercom IEN2500 datasheet

Hypercom

Hypercom IEN2500 datasheet

Aetina Jetson AIB-MX11 Series user manual

Aetina

Aetina Jetson AIB-MX11 Series user manual

LumenRadio CRMX Nova DMX quick start guide

LumenRadio

LumenRadio CRMX Nova DMX quick start guide

HMS Anybus 021440 user manual

HMS

HMS Anybus 021440 user manual

Lenovo Iomega StorCenter ix12-300r user guide

Lenovo

Lenovo Iomega StorCenter ix12-300r user guide

Scheiber WIFI SERVER User's manual and troubleshooting guide

Scheiber

Scheiber WIFI SERVER User's manual and troubleshooting guide

Tenda GUI user guide

Tenda

Tenda GUI user guide

ActionTec HCB1000 installation guide

ActionTec

ActionTec HCB1000 installation guide

Digital Watchdog Blackjack NAS user manual

Digital Watchdog

Digital Watchdog Blackjack NAS user manual

Intelbras ONU user guide

Intelbras

Intelbras ONU user guide

Texas Instruments TMS380C26 user manual

Texas Instruments

Texas Instruments TMS380C26 user manual

ADTRAN SLC-5 U-BR1TE III Installation and Maintenance

ADTRAN

ADTRAN SLC-5 U-BR1TE III Installation and Maintenance

Trend Micro Cloud Edge 100 G2 quick start guide

Trend Micro

Trend Micro Cloud Edge 100 G2 quick start guide

Cisco SA520-K9 - SA 500 Series Security Appliances quick start guide

Cisco

Cisco SA520-K9 - SA 500 Series Security Appliances quick start guide

Aerohive AP410C Hardware user's guide

Aerohive

Aerohive AP410C Hardware user's guide

Patton electronics 2784 NAU Specification sheet

Patton electronics

Patton electronics 2784 NAU Specification sheet

Psiber Pinger user guide

Psiber

Psiber Pinger user guide

ettus N321 Getting started guide

ettus

ettus N321 Getting started guide

manuals.online logo
manuals.online logoBrands
  • About & Mission
  • Contact us
  • Privacy Policy
  • Terms and Conditions

Copyright 2025 Manuals.Online. All Rights Reserved.