Gigo SMART BRICKS 7066 User manual

109
PIECES
8+
AGES
5
MODELS
# 7066
SMART BRICKS

1
Checklist:
TABLE OF CONTENTS
Table of Contents ........................................................ 1
Kit Contents ................................................................ 2
Safety Information ....................................................... 3
Important Information and Tips ................................. 4
ASSEMBLY STARTS ON PAGE 9
Downloading and Using the App ..........................6
Camera Quadcopter Drone................................. 9
Flying Your Camera Drone .............................. 12
Robotic Camera Car......................................... 14
360-Degree Camera.......................................... 18
Turntable Camera ............................................ 22
Hands-Free Camera Mount .............................. 25
NO. Description
Qty. Item No.
1B-SHORT PEG 20 7344-W10-C2D
2C-20mm AXLE CONNECTOR 3 7413-W10-T1B
3C-STATIC AXLE CONNECTOR 10 1187-W10-E1S2
4C-30mm STATIC CONNECTOR TUBE 2 7066-W10-A1S
5C-WASHER 1 R12#3620
6C-35mm AXLE II 2 7413-W10-O1D
7C-60mm AXLE II 2 7413-W10-M1D
8C-70mm AXLE II 2 7061-W10-Q1D
9C-1 HOLE CONNECTOR 2 7430-W10-B1D
10 C-3 HOLE DUAL ROUND ROD WITH PEGS 1 7404-W10-B1S2
11 C-3 HOLE ROD FRONT CLOSED 2 7026-W10-X1Y
12 C-3 HOLE ROUND ROD 4 7404-W10-C1D
13 C-5 HOLE PROLATE ROD 2 7443-W10-C1S1
14 C-5 HOLE ROD 3 7413-W10-K2SK
15 C-5 HOLE ROD FRONT CLOSED 1 7413-W10-R1Y
16 C-5 HOLE DUAL ROD BOTTOM CLOSED 4 7413-W10-W1SK
17 C-7 HOLE WIDE PROLATE ROD 4 7404-W10-C3D
18 C-7 HOLE ROUND ROD 4 7404-W10-C2D
19 C-5X5 FRAME 2 7413-W10-Q1D
20 C-3X13 DUAL FRAME 2 7406-W10-A1S
21 C-5X3 L-ROD, RIGHT 1 7066-W10-C1S
NO. Description
Qty. Item No.
22 C-5X3 L-ROD, LEFT 1 7066-W10-C2S
23 C-20T GEAR 2 7026-W10-D2S1
24 C-40T GEAR WITH HOLE 2 7408-W10-D2S
25 C-40T SPINDLE GEAR 1 7408-W10-D1Y
26 C-WORM GEAR 2 7344-W10-A1SK
27 C-96T ANNULAR GEAR 2 7066-W10-F1S
28 C-MINI GEAR 4 7066-W10-F3S
29 C-OD53mm PULLEY 2 7344-W10-N1Y1
30 C-OD56 O-RING 2 R12-09S
31 C-MOTOR AND ARM ASSEMBLY, LEFT 2 7066-W85-A1
32 C-MOTOR AND ARM ASSEMBLY, RIGHT 2 7066-W85-A2
33 C-HD CAMERA 1 7066-W85-C
34 C-CONTROLLER BOX 1 7066-W85-B
35 C-3.7V LITHIUM-ION BATTERY 1 7066-W85-D
36 C-LED HOLDER FOR DRONE 1 7066-W85-E
37 C-SET OF 4 PROPELLERS 2 E41#7066
38 C-SMALL PEG REMOVER 1 7066-W10-F2S
39 B-PEG REMOVER 1 7061-W10-B1Y
40 C-PROPELLER SHIELD RING 4 7066-W10-E1D
41 O-Micro USB CABLE 1 E30#7066A

2
Robotics: Smart Machines — 5-in-1 Buildable Drone
KIT CONTENTS
What’s inside your experiment kit:
1 2 3 4 5 6 7 8 9 10
11 12 13 14 15 16 17 18
21 22 23 24 25
31 32
36 37
38 39 40 41
20x 3x
3x
10x 2x
2x
2x
2x 2x
26 27 28 29 30
2x 2x 4x 2x 2x
2x
2x 2x 2x 2x
19 20
2x2x
4x4x4x4x
1x
1x2x
1x1x 1x
1x
1x 1x 1x4x
2 sets of 4
33 34 35
1x 1x 1x
1x
You will also need:
USB power adapter,
tablet or smartphone
running iOS or Android

Safety for Experiments with Batteries
››› To operate the models, you will need one
lithium-ion battery which is included in
the kit.
››› The battery is not replaceable.
››› The supply terminals are not to be short-
circuited. A short circuit can cause the
wires to overheat and the batteries to
explode.
››› Different types of batteries or new and
used batteries are not to be mixed.
››› Batteries are to be inserted with the
correct polarity. See page 9.
››› Rechargeable batteries are only to be
charged under adult supervision.
››› Dispose of used batteries in accordance
with environmental provisions, not in the
household trash.
››› Be sure not to bring batteries into contact
with coins, keys, or other metal objects.
››› Avoid deforming the batteries.
As all of the experiments use batteries, have
an adult check the experiments or models
before use to make sure they are assembled
properly. Always operate the motorized
models under adult supervision.
DC Power Supply (Not Included)
A USB power adapter is required to charge
the lithium-ion battery.
››› The transformer or a power supply used
with the toy shall be regularly examined
for damage to the supply cord, plug,
enclosure or other parts, and in the event
of damage, it shall not be used until the
damage has been repaired.
››› The toy shall only be used with a
transformer for toys or a power supply
for toys.
››› The transformer is not a toy.
Notes on Disposal of Electrical and
Electronic Components
The electronic components of this
product are recyclable. For the sake
of the environment, do not throw
them into the household trash at the
end of their lifespan. They must be
delivered to a collection location for
electronic waste, as indicated by the
following symbol:
Please contact your local authorities
for the appropriate disposal location.
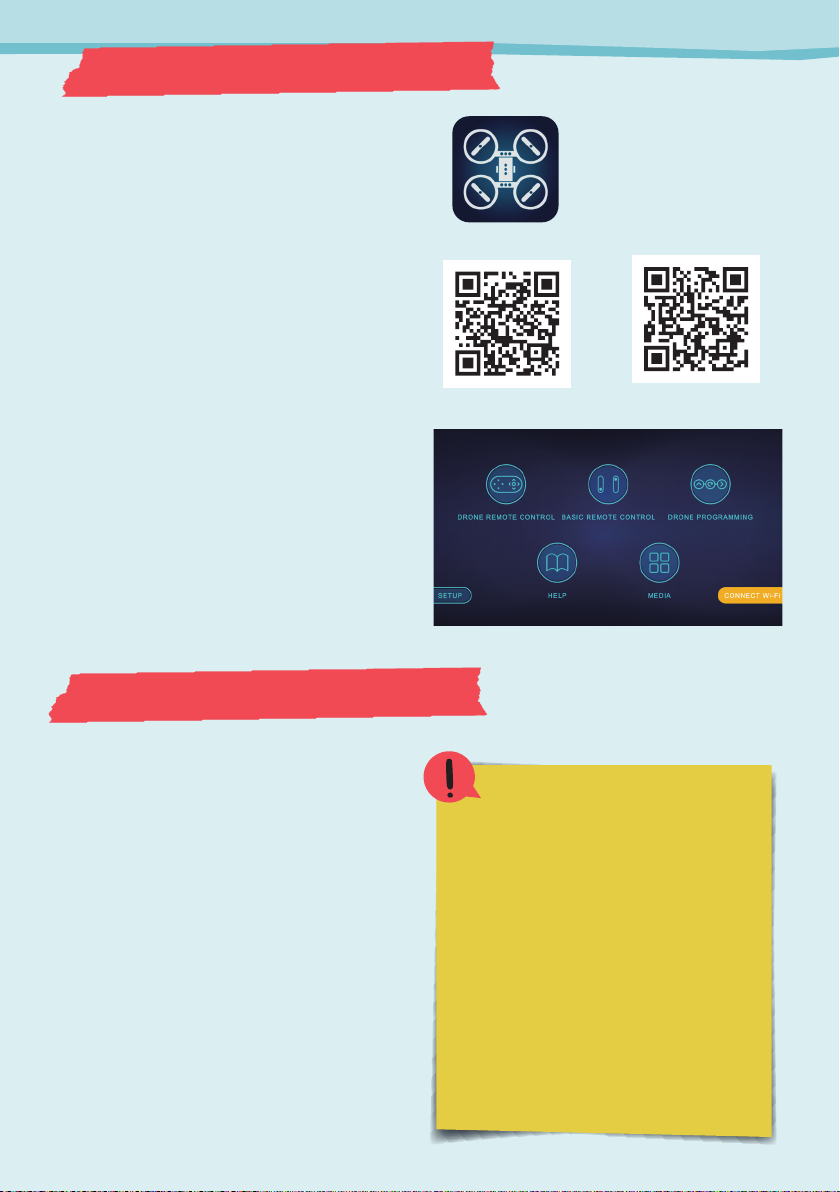
SAFETY INFORMATION
3
WARNING. Only for use by children aged 8 years
and older, due to accessible electronic
components. Instructions for parents or other
supervising adults are included and have to be
observed. Keep packaging and instructions as they
contain important information.
WARNING. Not suitable for children under 3 years.
Choking hazard — small parts may be swallowed
or inhaled.
Store the experiment material and assembled
models out of the reach of small children.
Stay away from rotating propellers and motors!
Do not touch them!
Use the drone with caution! Skill is required in
order to control the flight and avoid collisions
with the user, objects, or third parties.
Always maintain a visual line of sight to your drone
when flying.
Always pay complete attention to the drone when
flying. Do not get distracted.
When running a programmed flight path, always
be ready to take control of the drone or press the
emergency stop button if necessary.
We recommend using this drone indoors. If you do
fly it outside, make sure the weather is calm. Do
not fly the drone in wind conditions above a gentle
breeze (Beaufort scale 3; 12 mph wind speed) or in
temperatures outside of the range of 0 ° to 40° C.
Make sure that you follow all federal and local laws
and guidelines for drone operation. Do not fly in “no
fly zones.” You can research this online.
Users are fully responsible for, and should be
aware of, all local laws and regulations governing
flying or remote control vehicles. Drone regulation
frequently depends on weight, and the finished
weight of the 5 in 1 Buildable Drone with HD
Camera (ref. no. #7066) is less than 250 grams.
Make sure the flying location is clear of magnetic
and radio interference, and buildings, trees, power
lines, and other obstacles.
Do not fly near people or animals, or above crowds.
Do not fly at altitudes above 120m.
The drone might not fly well in locations more than
4000m above sea level.
An optical flow sensor on the bottom of the drone
helps the drone orient itself. This sensor doesn’t
work well on all surfaces, which may cause flying
errors. Shiny, reflective, or wet surfaces, or
surfaces with small repeating patterns, may cause
problems with flight.
When the battery gets low, land the drone in a safe
location and recharge it.
When flying, the battery charge lasts for about
eight to ten minutes and then it needs to be
recharged. It takes 2 to 3 hours to charge the
battery (until the red light on the battery turns off).
Do not use if any of the parts are worn, chipped, or
damaged.
Make sure that the propellers are securely
mounted onto the motors before use.
!
!
GENERAL WARNINGS
DRONE WARNINGS

See the inside back cover for more tips
on using the PEG REMOVER.
IMPORTANT INFORMATION
4
With this experiment kit, you and your child can
work together to build an experimental robotic
drone and other camera-enabled robotic
devices. Flying toys and drones have a unique
set of safety precautions that you must follow to
ensure that no harm comes to people and
animals — and nothing else is damaged —
during use. Before building and experimenting,
read the instructions together with your child
and discuss the safety instructions. Support
your child with advice and a helping hand,
especially during tricky assembly steps. You
absolutely must supervise your child during all
drone flights. Before flying, make sure the
model is securely assembled and that you have
chosen a suitable location for flying, in which
drone flying is allowed. The drone is primarily
meant for indoor use, but if you do fly it outside,
make sure that it’s not windy. We hope you and
your child have a lot of fun building and
experimenting with the drone and other robotic
models in this kit.
Children want to explore, understand, and create new things.
They want to try new things and they want to do this on their own.
They want to gain knowledge! They can do all of this with Gigo
experiment kits. With every single experiment, they grow smarter
and more knowledgeable.
Dear parents and adults,
Use the PEG REMOVER to separate parts
that are difficult to separate with just
your fingers. The smaller gray tool is
used to remove the mini gears and
propellers from the motor shafts. The
Larger yellow tool is used to pry apart
larger parts, like short pegs and rods.
When plugging the
cables into the
sockets, pay close
attention to the
direction of the pins
inside the sockets.
The plugs can only
be inserted in one
direction.
G
E
r
T
S
Robotics: Smart Machines — 5-in-1 Buildable Drone
Scan ths QR code
to vew a vdeo of
helpful tps for
usng and flyng
your camera drone

Say
Cheese!
A quadcopter is a helicopter with four rotors. A rotor is a propeller that is
spun around by a motor on a shaft. The four rotors in a quadcopter work
together to allow it to hover and move through the air. By increasing or
decreasing the speed of some or all of the rotors, the quadcopter can move in
any direction. A quadcopter is a robotic device because it requires a central
processing unit and sensors to control the speed of its motors to stay balanced
and move through the air. Because they can hover in one spot and move
around in a precise way, quadcopters are perfect for carrying cameras to take
aerial photos and videos.
A
R
o
b
o
t
i
c
E
y
e
i
n
t
h
e
S
k
y
5

A
R
o
b
o
t
i
c
E
y
e
i
n
t
h
e
S
k
y
TROUBLESHOOTIN THE WI-FI
ONNETION
If the wreless connecton sn’t workng
– Make sure the battery s fully charged
and the robot s turned on (the LED
lght s blnkng)
– Make sure W-F s enabled on your
devce and that your smart devce
satsfes the devce requrements on
the app download page
– Try restartng the app, the devce,
and/or the robot
– Try dsconnectng and reconnectng
the camera wre and/or the battery to
reset the robot
To control and program the drone and other
robots in this kit, you will need a free app. You
can download the app for iOS devices from
the iOS App Store, or for Android devices
from Google Play.
For device requirements, see the information
section on the app’s download pages.
To get the app:
1. Scan the QR code to the right to take you to
the product page for this kit (or search for
the “Gigo Robotics Drones app”).
2. On the product page, scroll down until you
see the downloads section containing the
app icon. Follow the links for the correct
app store based on your device.
3. Follow the steps on the app download page
to download and install the app on your
device.
4. Open the app and the main menu will
appear.
The app communicates with the robot (the
drone) via a Wi-Fi connection. After you have
assembled your robot (pages 9 and on),
follow these steps to connect it to the app:
1. Make sure the robot is powered on and
was recently charged.
2. Go to the Wi-Fi (or wireless) settings on
your device (tablet or smartphone).
3. Look for the network named “Drone-”
followed by some numbers. This is your
robot’s unique ID number. Select this
network to connect to your robot.
4. If you don’t see the network, power down
your device and the robot, remove and
replug in the camera wire, and turn the
device and the robot back on.
6
Using the App
DOWNLOADING AND INSTALLING THE APP
ESTABLISHING A WIFI CONNECTION
Gigo Robotics Drones
app icon
iOS Android

Here is an overview of the controls in drone
remote control mode. Use this mode with the
drone only. Read the safety rules on page 3 and the
flying instructions on page 12.
1. Return to main menu
2. Take photo
3. Take video
4. Motion control: Steer the drone by moving your
smart device.
5. Flight speed setting: Set the speed at which the
drone moves.
6. 360 flip: The drone will do a somersault in the
air. Flight speed must be set to medium or fast.
7. Track flight route: Draw a path in the app for
your drone to follow.
8. LED status: Controls the light on the drone.
9. Setup menu:
10. Rotate screen
11. Split screen (helpful for VR viewing)
12. Reset the drone’s balance
13. Show/hide remote control interface
Drone remote controls (B):
14. Rotate counterclockwise
15. Rotate clockwise
16. Go up (away from floor)
17. Go down (toward floor)
18. Auto take off: Press this when you want your
drone to take off and hover
19. Selfie mode: Speak the voice command
“photo” and the drone will take a picture
20. Auto landing: Press this when you want your
drone to lower itself back to the floor
21. Go left
22. Go right
23. Go forward
24. Go backward
25. Rotation (yaw) trim: If your drone keeps
turning to one side, use this to compensate
26. Emergency stop
27. Left/right trim: If your drone keeps drifting to
one side, use this to compensate
28. Forward/backward trim: Same as left/right
trim, but on the forward/backward axis
Remote controls for the other models (C): Use
these controls to power the motors for the other
models you can build in this kit.
Find your photos and videos in the media folder (D).
A
B
C
D
1
16
18
19
20
26
25
29
30
36
31
37
32
35
38
33
27
28
23
17
24
15
22
14
21
34
2
3
4
5
6
7
8
9
10
11
12
13
3
1
1
3
4
4
2
2
USING THE APP
7

You can program your drone to follow a
predetermined set of instructions in the drone
programming mode. Here’s an overview of the
controls in this mode:
1. Return to main menu
2. Take photo: When the program is running, you
decide when the drone takes a photo by pressing
this button.
3. Take video: Manually start and stop the video
capture when the program is running.
4. Program sequence area: This is where the
active program commands are arranged in
order from left to right.
5. Change the LED status
6. Emergency stop
Program commands:
7. Rotate counterclockwise 90 degrees
8. Rotate clockwise 90 degrees
9. Go up half a meter (about 50cm)
10. Go down half a meter
11. Go left half a meter
12. Go right half a meter
13. Go forward half a meter
14. Go backward half a meter
15. Start (run) the program
16. Stop the program
17. Save the program. Saved programs can be
accessed via the program menu (20).
18. New command steps are entered into the blank
space in the program sequence area (18).
Here’s an example that shows you how to write a
program:
A. In programming mode, the program always
starts with the take off command (19).
B. Press the go up button to enter a command into
the program that will tell the drone to go up half
a meter (21).
C. Add a go forward command (22).
D. Add another go forward command, and then a
go right command (23).
E. Add a rotate clockwise command (24).
F. After tapping start to run a program, you need
to swipe the unlock bar (25) to confirm that you
want to run the program and it is safe to do so.
Make sure you follow all of the safety rules on
page 3 and the general flying instructions on
page 12.
A
1
2
3
5
4
18
19
9
13
15
16
6
10
14
7
11
8
12
17
20
21
22
23
24
25
B
C
D
E
F
PROGRAMMING THE DRONE WITH THE APP
8
Using the App

Note There
are whte
lnes on the
A propellers
Make sure
you put the
propellers on
the correct
motors
1
6x
21 22
1x 1x
36 37 40
1x 4x2x pairs
31 32
33 34 35
2x 2x
1x 1x 1x
310
3x 1x
Remnder Use the
small peg remover
tool f you need
to remove the
propellers from
the motors
CAMERA QUADCOPTER DRONE ASSEMBLY
Micro USB
charging port
x2
Propeller A
Propeller B
Red and
blue wires Black and
white wires
Leave a small
gap between
each propellor
and motor.
Red and
blue wires
Black and
white wires
Red and
blue wires Black and
white wires
9
1
3
4
2

Note Remove the clear protectve
flm from the camera lens
Guide the motor cables through the holes in the
motor arms to prevent the cables from touching
the ground and getting caught on things.
(Motor wires
not shown)
Camera
LED
1
3
2
4
Camera
Motor
Motor
Assemble the parts in
the order shown.
Bottom view
Motor
Power button
LED
Motor
(Motor wires
not shown)
10
7
5
6
Camera Quadcopter Drone

Propellers done!
Done!
Make sure the PROPELLER SHIELD RING
are securely attached.
Snap each ring
onto the motor
on the top ...
... and underneath.
(Motor wires
not shown)
Remove ths propeller sheld rng before
nsertng the chargng cable nto the socket
Read all of the flyng
nstructons on the next page
and all of the warnngs on page
3 before flyng your drone
Spn each
propeller wth
your fnger
to make sure
the propellers
don’t ht the
-PROPELLER
SHIELD RIN
CAMERA QUADCOPTER DRONE ASSEMBLY
11
8

1. Before flying your drone, read all of the warnings
and safety info on page 3 and perform a final
preflight check, making sure that:
a. all of the pieces of the model are securely
attached, especially the propellers,
b. the motors cables are threaded through the
holes in the motor arms and completely out of
the way of the propeller, and
c. the battery is fully charged. Use the included
Micro USB CABLE and your own USB power
adapter to charge the battery. It takes 2-3 hours
to charge. It is fully charged when the red light
on the battery goes out.
2. Press the power button on the bottom of the drone
for two seconds to turn it
on. The LED light will flash
on and off.
3. Place the drone in a wide
open area. Then stand at
least 190cm behind the
drone at all times.
4. Connect to the drone’s
Wi-Fi network from your
device settings. It will be
named “Drone-” followed by your drone’s unique
ID number.
5. Open the Gigo Robotics Drones app. The main
menu will appear on screen.
6. Tap the button for the drone remote control mode.
The drone remote control mode opens and you
should see live-streaming images from the drone’s
camera.
7. Tap the auto takeoff button. The drone will
immediately lift off the floor to a height of about
150cm. See the diagram to the right for a
description of what is happening when the drone is
hovering.
8. Use the controls in the control pads to fly the
drone. See the next page for descriptions of the
Scan ths QR code
to vew a vdeo of
helpful tps for
usng and flyng
your camera drone
controls. Tap and slide the circle in the center of
the control pad in the desired direction. Start
slowly to get a feel for how the drone responds to
the commands and so that it doesn’t fly out of
control.
9. Tap the take photo button or take video button to
take a photo or video. You will need to give the app
access to your device’s photo/video library when
you do this the first time.
10. To land the drone, press the auto landing button.
11. If there is an emergency and you need to
stop the drone immediately, press the
emergency stop button.
12. To turn off your drone, press and hold the power
button on the bottom of the drone for two
seconds, until the LED light goes out.
190cm
A B
CD
HOVER
The A and D rotors rotate clockwise.
The B and C rotors rotate counterclockwise.
The RPM of the four rotors is the same.
The RPM is enough to provide lift to make
the drone hover.
The torque is in equilibrium so there is no
yaw (turning).
RPM = Revolution(s) Per Minute (a
measure of speed)
B
C
AD
B
C
AD
FLYING YOUR CAMERA QUADCOPTER DRONE
12
Camera Quadcopter Drone

Increases RPM (speed) on all four rotors simultaneously.
A B
CD
A B
CD
A B
CD
A B
CD
A B
CD
A B
CD
A B
CD
A B
CD
Increase Altitude
Decreases RPM on all four rotors simultaneously.
Decrease Altitude
Increases RPM on B and C rotors to generate more
torque (spinning force) in the clockwise direction.
Yaw Clockwise
Increases RPM on A and D rotors to generate more
torque in the counterclockwise direction.
Yaw Counterclockwise
Increases RPM on C and D (rear) motors, and/or decreases
RPM on A and B (front) motors, to move forward.
Pitch Forward
Increases RPM on A and B (front) motors, and/or decreases
RPM on C and D (rear) motors, to move backward.
Pitch Backward
Increases RPM on A and C (left) motors, and/or decreases
RPM on B and D (right) motors, to move right.
Roll Right
Increases RPM on B and D (right) motors, and/or decreases
RPM on A and C (left) motors, to move left.
Roll Left
Here is an explanation of the resulting behaviors when you slide the circles on the
control pads in each of the four directions:
To program your drone to fly in a preset pattern, see the programming
information on page 8.
FLYING YOUR CAMERA QUADCOPTER DRONE
13

1 3 7 8 9
18x 7x 2x 2x 2x
12 13 16 17 18
2x 4x4x4x2x
1 4 11
1x 1x 1x
21 22
24 26 27 28 29 30
2x 2x 4x 2x 2x2x
1x 1x
36
1x
31 32 33 34 35
2x 2x 1x 1x 1x
Please note The next
three models are drven
by gears If the model
doesn’t work well, check
the gears Sometmes they
are too close together and
need some small gaps
between them
Do steps 1–5 two
times to make two
identical assemblies.
x2
x2
x2
ROBOTIC CAMERA CAR (ZOOM SETUP)
14
Robotic Camera Car
2
1
3

x2
x2
70 mm
x2
60 mm
60 mm
ROBOTIC CAMERA CAR (ZOOM SETUP)
15
6
7
5
4

From step 6
From step 7
16
Robotic Camera Car
8
10
11
12
9

Zoom
setup
Pan
setup
Additional parts
13
12a
1 3 7 8 9
18x 7x 2x 2x 2x
12 13 16 17 18
2x 4x4x4x2x
1 4 11
1x 1x 1x
21 22
24 26 27 28 29 30
2x 2x 4x 2x 2x2x
1x 1x
36
1x
31 32 33 34 35
2x 2x 1x 1x 1x
Motor aMotor bMotor cMotor d
Done!
Modify step 12 as
shown here to turn the
camera sideways for a
panning shot. Done!
Camera
LED
Motor a Motor b
Motor cMotor d
Use the basc remote
control mode n the app
to control ths model
ROBOTIC CAMERA CAR (PAN SETUP)
ROBOTIC CAMERA CAR (ZOOM SETUP)
17

35 mm
70 mm
35 mm
11 12 13 14 15 16
17 18 19 20
3x2x
2x2x4x2x
4x4x 1x1x
21 22
23 24 25 26 27 28
2x 2x 2x 4x1x 1x
1x 1x
36
1x
31 32 33 34 35
2x 2x 1x 1x 1x
1 2 3 4 5 6 7 8
910
20x 2x 10x 2x 2x 1x 2x
2x
1x
1x
360DEGREE CAMERA
18
360-Degree Camera
1
2
3
6
7
4
5

From
step 3
From
step 4
From
step 7
70 mm
60 mm
360DEGREE CAMERA
19
8
11
12
10
9
13
14
Table of contents