Gill Instruments R3-50 User manual

User Manual
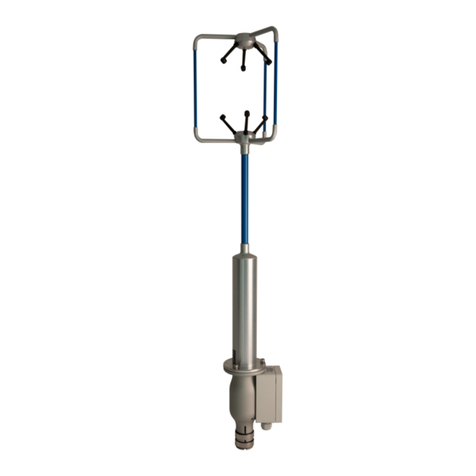
3 Axis Ultrasonic Anemometers
1210-PK-085 (R3-50)
1210-PK-065 (R3-100)
1210-PK-066 (R3A-100)
Document Number: 1210-PS-0015 Issue 1
Gill Instruments Limited
SaltmarshPark, 67 Gosport Street, Lymington,
Hampshire, SO41 9EG, UK
Tel:+44 1590 613500 Fax:+44 1590 613555
R3
-
50
R3
A
-
100
R3-100
陕西威瑞仪器仪表有限公司 生产代理销售:实验检测设备气象科学仪器设备
Tel:18966887800 Web:www.xavery.cn Email:[email protected]

R3-50, R3-100 and R3A-100 Doc. No 1210-PS-0015 Issue 1 March 2017
___________________________________________________________________________________________
Page 1
1FOREWORD .............................................................................................................3
2INTRODUCTION......................................................................................................3
3PACKING LIST ........................................................................................................4
4OPTIONAL EXTRAS ...............................................................................................4
5PRINCIPLE OF OPERATION.................................................................................5
6TECHNICAL SPECIFICATION..............................................................................6
7INSTALLATION.......................................................................................................7
7.1 Installation Guidelines................................................................................................................7
7.2 Mounting......................................................................................................................................7
7.3 Alignment.....................................................................................................................................7
7.4 Polar definition............................................................................................................................7
7.5 U, V, and W axes definition........................................................................................................7
7.6 Orientation...................................................................................................................................9
7.7 Alignment and Dimensions........................................................................................................9
7.8 Mechanical installation.............................................................................................................11
7.9 Location.....................................................................................................................................11
7.10 Corrosion...............................................................................................................................11
7.11 Earthing..................................................................................................................................11
7.12 Mounting Base......................................................................................................................12
7.13 Flange Mounting...................................................................................................................12
7.14 Cabling...................................................................................................................................13
7.15 Cable length..........................................................................................................................13
7.16 20 Way Hirose Connector....................................................................................................14
8OPERATION...........................................................................................................15
8.1 Overview....................................................................................................................................15
8.2 Operating modes......................................................................................................................15
8.3 Measurement Mode..................................................................................................................15
8.4 Sampling....................................................................................................................................15
8.5 Averaging (and Output Rate)...................................................................................................15
8.6 Wind Measurement, SoS and Temperature Reporting Format.............................................16
8.7 Analogue Input Reporting Formats.........................................................................................16
8.8 Diagnostics................................................................................................................................16
8.9 Confidence Tone.......................................................................................................................16
8.10 Result Reporting...................................................................................................................16
8.11 Interactive Mode....................................................................................................................17
8.12 Configuration Commands.....................................................................................................17
8.13 Default Configuration Command Settings...........................................................................17
8.14 Default Output Data String...................................................................................................17
8.15 Interrogation Commands......................................................................................................17
9CONNECTION TO A PC OR OTHER DEVICE..................................................18
9.1 Anemometer Connector / SIU Power and Data Connector...................................................18
10 CONNECTING R3 TO A PC USING RS422......................................................19
10.1 Connecting R3 to a PC via Optional Power and Communications Interface (PCI 1189-
PK-021 or PCIA 1189-PK-020)...........................................................................................................19
10.1.1 Environmental....................................................................................................................19
10.1.2 PCI/PCIA Electrical Power Requirements.......................................................................20
10.1.3 PCI/PCIA Operation..........................................................................................................20
10.1.4 PCIA Box (1189-PK-020) R3 Analogue Output Connections........................................22
10.1.5 Gill Instruments R3/SIU to PCI/A Ready Made Gill Cable 1210-PK-043......................23
11 SYSTEM CONNECTION DIAGRAMS..............................................................25
11.1 Basic System Connection ....................................................................................................25
11.2 System Connection Including Optional SIU........................................................................26
11.3 Interface Cable Connections................................................................................................27
11.4 1210-00-011 Interface Cable ...............................................................................................28
12 USING ANALOGUE INPUTS WITH SENSOR INPUT UNIT PART 1210-PK-
016 ...............................................................................................................................29
12.1 Analogue Inputs....................................................................................................................29
12.2 Using the SIU PRT Input......................................................................................................30
12.3 1210-K-067 Sensor Input Unit Mounting Details................................................................31
陕西威瑞仪器仪表有限公司 生产代理销售:实验检测设备气象科学仪器设备
Tel:18966887800 Web:www.xavery.cn Email:[email protected]

R3-50, R3-100 and R3A-100 Doc. No 1210-PS-0015 Issue 1 March 2017
___________________________________________________________________________________________
Page 2
13 CONFIGURING THE ANEMOMETER WITH A PC RUNNING GILL WIND
SOFTWARE...................................................................................................................32
13.1 Software commands Introduction........................................................................................34
13.2 Software Commands............................................................................................................35
14 USING THE ANEMOMETER DIGITAL OUTPUTS .......................................38
14.1 Digital Serial Output Format.................................................................................................38
14.1.1 Binary Result Message Format (post conversion)..........................................................38
14.1.2 ASCII Result Message Format.........................................................................................39
14.2 Status Fields..........................................................................................................................40
15 USING ANALOGUE OUTPUTS WITH PCIA BOX 1189-PK-020.............43
15.1 Introduction............................................................................................................................43
15.2 Analogue outputs..................................................................................................................43
15.3 Analogue Sync. Output.........................................................................................................44
15.4 Analogue Status Output .......................................................................................................44
15.5 Test Modes............................................................................................................................44
16 VIEWING & LOGGING THE DATA USING GILL WINDVIEW
SOFTWARE...................................................................................................................45
17 INSTRUCTIONS FOR USING WINDCONVERT BINARY TO ASCII
CONVERSION UTILITY .............................................................................................51
18 MAINTENANCE & FAULT-FINDING..............................................................53
18.1 Cleaning.................................................................................................................................53
18.2 Servicing................................................................................................................................53
18.3 Fault-finding...........................................................................................................................53
18.4 Status (error) codes..............................................................................................................53
18.5 Returning units......................................................................................................................53
19 TESTS ...................................................................................................................54
19.1 Bench test..............................................................................................................................54
19.2 Head Alignment Test............................................................................................................54
19.3 Calibration..............................................................................................................................54
20 APPENDIX A........................................................................................................55
Summary of Abbreviations Used In This Manual...............................................................................55
陕西威瑞仪器仪表有限公司 生产代理销售:实验检测设备气象科学仪器设备
Tel:18966887800 Web:www.xavery.cn Email:[email protected]

R3-50, R3-100 and R3A-100 Doc. No 1210-PS-0015 Issue 1 March 2017
___________________________________________________________________________________________
Page 3
1 FOREWORD
Thank you for purchasing a R3-50, R3-100 or R3A-100 (Asymmetric Head) manufactured by Gill
Instruments Ltd. The units have no customer serviceable parts and require no calibration or
maintenance. To achieve optimum performance we recommend that you read the whole of this
manual before proceeding with further use.
Gill products are in continuous development and so specifications may be subject to change without
prior notice.
The information contained in this manual remains the property of Gill Instruments and should not be
copied or reproduced for commercial gain.
2 INTRODUCTION
This manual describes the operation of the R3-50 (1210-PK-085), R3-100 (1210-PK-065) and R3A-
100.
The term R3 is used in this manual as a general term for both the R3-50, R3-100 and R3A-100;
they are robust three axis anemometers with no moving parts.
The units of wind speed, output rate and formats are all user selectable.
Both the R3-50, R3-100 and R3A-100are constructed of aluminium & carbon fibre & can perform
measurements in wind speeds up to 45m/s.
The R3-50 can provide an output rate up to 50Hz and the R3-100/R3A-100 can provide an output
rate up to 100Hz.
Each unit is calibrated in a wind tunnel to ISO 16622, traceable to national standards.
WIND software is available free from the Gill website http://gillinstruments.com/main/software.html. It
can be used as a terminal package to configure the anemometers
WINDVIEW software is available free from the Gill website
http://gillinstruments.com/main/software.html. It provides a means of viewing data and providing a
simple data logging function.
WinConvert software is available free from the Gill website
http://gillinstruments.com/main/software.html. It provides a means of converting data gathered in
binary format and converting it to a user readable format.
陕西威瑞仪器仪表有限公司 生产代理销售:实验检测设备气象科学仪器设备
Tel:18966887800 Web:www.xavery.cn Email:[email protected]

R3-50, R3-100 and R3A-100 Doc. No 1210-PS-0015 Issue 1 March 2017
___________________________________________________________________________________________
Page 4
3 PACKING LIST
Item Part Number Model Supplied
R3-50 R3-100/R3A-100
R3 Anemometer As Shown 1210-00-086 1210-00-033/1210-00-059
Mounting Kit 1255-10-057
20-way Hirose Connector 020-01559
Installation CD 1000-10-034
Power & Communications
Interface Analogue Output
(PCIA) 1189-PK-020
Flight Case 1210-30-074
4-way Connector (for PCIA) 020-00978
Mains Lead (for PCIA) 026-00244
4 OPTIONAL EXTRAS
Item
Part Number
Sensor Input Unit – Power/data to anemometer,
6 off 14 bit analogue inputs, 1 PRT input 1210-PK-016
Power & Communications Interface – PCIA,
Anemometer Power Supply & Communications,
including Analogue & Digital Outputs 1189-PK-020
Power & Communications Interface – PCI,
Anemometer Power Supply & Communications,
Digital Output Only 1189-PK-021
Cable assembly anemometer to sensor input
unit – 5m cable for power & comms to connect
R3 to SIU 1210-00-011
Gill Instruments Anemometer Cable (RS422 &
Power) 1086-M-043/XXm
20-way Hirose Connector 020-01559
陕西威瑞仪器仪表有限公司 生产代理销售:实验检测设备气象科学仪器设备
Tel:18966887800 Web:www.xavery.cn Email:[email protected]

R3-50, R3-100 and R3A-100 Doc. No 1210-PS-0015 Issue 1 March 2017
___________________________________________________________________________________________
Page 5
5 PRINCIPLE OF OPERATION
Figure 1 Time of Flight details
The R3 measures the times taken for an ultrasonic pulse of sound to travel from an upper
transducer to the opposite lower transducer, and compares it with the time for a pulse to travel from
lower to upper transducer.
Likewise times are compared between each of the other upper and lower transducers.
As Figure 1 shows, the air velocity along the axis between each pair of transducers can then be
calculated from the times of flight on each axis.
This calculation is independent of factors such as temperature.
From the three axis velocities, the wind speed is calculated, as either signed U, V, and W, or as
Polar and W.
It can be seen from Figure 1 that the speed of sound in air can be calculated from the times of flight.
From this the sonic temperature can be derived from the formula TS1 = C12 / 403
Where
TS1 =Sonic temperature
C1 = Speed of sound
Note the formula does not account for the effect of Humidity
Crosswind correction is applied to results.
陕西威瑞仪器仪表有限公司 生产代理销售:实验检测设备气象科学仪器设备
Tel:18966887800 Web:www.xavery.cn Email:[email protected]

R3-50, R3-100 and R3A-100 Doc. No 1210-PS-0015 Issue 1 March 2017
___________________________________________________________________________________________
Page 6
6 TECHNICAL SPECIFICATION
Parameter R3-50 R3-100/R3A-100
Outputs
Data Output rates
From 0.4 to 50Hz
From 0.4 to 100Hz
Measurement Rate 50Hz
(Full 3axis measurement)
100Hz
(Full 3axis measurement)
Format UVW or Polar (ASCII or Binary) UVW or Polar (ASCII or Binary)
Wind Speed
Range 0 - 45 m/s 0 - 45 m/s
Resolution 0.01m/s 0.01m/s
Wind Speed Accuracy * <1%RMS @ 12m/s <1%RMS @ 12m/s
Wind Speed Offset <±0.01ms <±0.01ms
Direction
Range 0 – 359
0 – 359
Resolution 1
0
1
0
Directional Accuracy * <±1
RMS <±1
RMS
Speed of Sound Measurement
Measurement Rate 50Hz 100Hz
Range 300 -370 m/s 300 -370 m/s
Resolution 0.01 m/s 0.01 m/s
Accuracy * <
0.5% (For wind speeds <30ms) <
0.5% (For wind speeds <30ms)
Supply Input
Supply Voltage 9 to 30VDC 9 to 30VDC
Anemometer Supply Current <300mA for 12VDC Input
<150mA for 24VDC Input <300mA for 12VDC Input
<150mA for 24VDC Input
SIU Supply Current <200mA for 12VDC Input
<100mA for 24VDC Input <200mA for 12VDC Input
<100mA for 24VDC Input
Environmental
Operating Temperature -40
°
C to +60
°
C -40
°
C to +60
°
C
Storage Temperature -50
°
C to +75
°
C -50
°
C to +75
°
C
Altitude 0 to 3000m 0 to 3000m
Moisture/Dust Protection IP65 IP65
Humidity 5 % to 100 % 5 % to 100 %
Precipitation Operation up to 300 mm / hour Operation up to 300 mm / hour
EMC Emissions BS EN 50081 -1:1992
Immunity BS EN 50082 -1:1992 Emissions BS EN 50081 -1:1992
Immunity BS EN 50082 -1:1992
Input/Output Protection >0.8J >0.8J
Serial Interface
Electrical Interface Full Duplex RS422 Full Duplex RS422
Baud Rates 2400, 4800, 9600, 19200, 38400, 57600,
115200 2400, 4800, 9600, 19200, 38400, 57600,
115200
Format 8 data bits, 1 stop bit, No Parity 8 data bits, 1 stop bit, No Parity
Analogue Inputs
Sampling Rate: measurement 50Hz Synchronous to wind 100Hz Synchronous to wind
Diff. Input Voltage Range -5.000V to +5.000V -5.000V to +5.000V
Accuracy >0.05% of full scale >0.05% of full scale
Resolution 14 bits 14 bits
Common Mode Input Range >±8v >±8v
Input Impedance >1MΩ (Differential)
>1MΩ (Common Mode) >1MΩ (Differential)
>1MΩ (Common Mode)
PRT
Resolution 0.01
°
C 0.01
C
Measurement Accuracy <±0.1
°
C (-40 to +50
°
C)
<±0.1
°
C (-40 to +50
°
C)
<±0.15
°
C (+50 to +60
°
C) <±0.15
°
C (+50 to +60
°
C)
Anemometer Sync Output RS422 synchronous to Wind
Measurement RS422 synchronous to Wind
Measurement
* Accuracy specification R3-50 and R3-100 applies for wind speeds less than 32m/s and for wind incidence
up to ±20°.
* Accuracy specification R3A-100 applies for wind speeds less than 32m/s and for wind incidence <±150° in
the horizontal plane and up to ±50° from the horizontal.
陕西威瑞仪器仪表有限公司 生产代理销售:实验检测设备气象科学仪器设备
Tel:18966887800 Web:www.xavery.cn Email:[email protected]

R3-50, R3-100 and R3A-100 Doc. No 1210-PS-0015 Issue 1 March 2017
___________________________________________________________________________________________
Page 7
7 INSTALLATION
7.1 Installation Guidelines
As with any sophisticated electronics, good engineering practice should be followed to ensure
correct operation.
Always check the installation to ensure the R3 is not affected by other equipment operating
locally, which may not conform to current standards, e.g. radio/radar transmitters, boat
engines, generators etc.
Guidelines –
oAvoid mounting in the plane of any radar scanner – a vertical separation of at least 2m
should be achieved.
oRadio transmitting antennas, the following minimum separations (all round) are suggested.
VHF IMM – 1m
MF/HF – 5m
Satcom – 5m (avoid likely lines of sight)
Use cables recommended by Gill. If cables are cut and re-connected incorrectly (perhaps in a
junction box) then EMC performance may be compromised if cable screen integrity is not
maintained.
Earth loops should not be created – wire the system in accordance with the installation
guidelines.
Ensure the power supply operates to the R3 specification at all times.
Avoid turbulence caused by surrounding structures that will affect the accuracy of the R3 such
as trees, masts and buildings.
The World Meteorological Organisation makes the following recommendation:
The standard exposure of wind instruments over level open terrain is 10m above the ground.
Open terrain is defined as an area where the distance between the sensor and any obstruction
is at least 10 times the height of the obstruction.
If the sensor is to be mounted on a mast boom, part way up a tower or mast, then the boom
should be at least twice as long as the minimum diameter or diagonal of the tower. The boom
should be positioned on the prevailing wind side of the tower.
If mounted on a pole then as a guide the distance from an adjacent pole should be 10 times
the other pole diameter.
If mounting on a building then as a guide the sensor should be mounted at a height of 1.5
times the height of the building.
7.2 Mounting
Please see pages 9 to 11 for detailed information on the physical mounting of the R3.
7.3 Alignment
The anemometer has slotted fixing holes permitting ±5° rotation for alignment.
Figure 2 shows the direction and polarity of the U, V and W axis.
7.4 Polar definition
The wind speed in the UV plane, with direction in degrees from 0 to 359, with respect to the
Reference spar (which is normally aligned to North).
7.5 U, V, and W axes definition
+U is defined as towards the direction in line with the north spar as indicated in the diagram.
+V is defined as towards the direction of 90anti-clockwise from N / the Reference spar.
+W is defined as vertically up the mounting shaft.
Note, when the unit is configured for the ALIGN AXIS setting the UV definition rotates 30 degrees
anti-clockwise such that U is now in line with transducer axis 1.
陕西威瑞仪器仪表有限公司 生产代理销售:实验检测设备气象科学仪器设备
Tel:18966887800 Web:www.xavery.cn Email:[email protected]

R3-50, R3-100 and R3A-100 Doc. No 1210-PS-0015 Issue 1 March 2017
___________________________________________________________________________________________
Page 8
Figure 2a R3-50 and R3-100 U, V and W Axis Definition
Figure 2b R3A-100 with Asymmetric Head U, V and W Axis Definition
陕西威瑞仪器仪表有限公司 生产代理销售:实验检测设备气象科学仪器设备
Tel:18966887800 Web:www.xavery.cn Email:[email protected]

R3-50, R3-100 and R3A-100 Doc. No 1210-PS-0015 Issue 1 March 2017
___________________________________________________________________________________________
Page 9
7.6 Orientation
Normally the R3 is mountedvertically, ensuring a horizontal Measuring Plane.
However, the unit may be mounted with the Measurement Plane set to any required orientation,
provided the sealing gasket is fitted to the flange and provision is made to seal the M6 base
mounting nuts (i.e. with a rubber boot) to prevent water ingress. Attention to sealing is especially
important if the unit is to be used in an inverted position and it is advised to also use RTV
sealant around the base when unit is connected up so as to prevent water penetration through
cables/connectors or base screws etc.
7.7 Alignment and Dimensions
The reference north spar as indicated by a notch (that is in the direction line with north), which is
also indicated on the base of the unit by another notch.
Figure 3a R3-50 and R3-100 North Spar Alignment and Dimensions
陕西威瑞仪器仪表有限公司 生产代理销售:实验检测设备气象科学仪器设备
Tel:18966887800 Web:www.xavery.cn Email:[email protected]

R3-50, R3-100 and R3A-100 Doc. No 1210-PS-0015 Issue 1 March 2017
___________________________________________________________________________________________
Page 10
Figure 3a R3A-100 North Spar Alignment and Dimensions
陕西威瑞仪器仪表有限公司 生产代理销售:实验检测设备气象科学仪器设备
Tel:18966887800 Web:www.xavery.cn Email:[email protected]

R3-50, R3-100 and R3A-100 Doc. No 1210-PS-0015 Issue 1 March 2017
___________________________________________________________________________________________
Page 11
7.8 Mechanical installation
Before installing, it is strongly recommended that a bench test is carried out.
7.9 Location
Select a position so that the unit is clear of any structure, which may obstruct the airflow or induce
turbulence.
Do NOT mount the R3 in close proximity of high-powered radar or radio transmitters. A site survey
may be required if there is any doubt about the strength of external electrical noise.
7.10 Corrosion
The anemometer mounting base is anodised aluminium alloy and careful note should be taken of
the possibility of galvanic corrosion by incorrect mounting. It is vital that only stainless steel fixings
are used and that the instrument is insulated from the metal of the mounting surface with the rubber
gasket. This will ensure that the anemometer will provide long service under extreme conditions
e.g. marine.
7.11 Earthing
For maximum protection against lightning the anemometer must be earthed via its mountings. The
SIU and PCIA should be earthed using the earth studs provided.
To ensure correct operation, and for maximum protection against lightning, the anemometer MUST
be correctly grounded (earthed) via its mountings. Inadequate grounding will degrade anemometer
performance, particularly in the presence of radio frequency interference.
The unit MUST be connected to an appropriate grounding point with a minimum of 6mm² copper
wire, via the M4 base screws. The primary earth for the anemometer must be provided via the base
screws and not via the cable screens.
陕西威瑞仪器仪表有限公司 生产代理销售:实验检测设备气象科学仪器设备
Tel:18966887800 Web:www.xavery.cn Email:[email protected]

R3-50, R3-100 and R3A-100 Doc. No 1210-PS-0015 Issue 1 March 2017
___________________________________________________________________________________________
Page 12
7.12Mounting Base
7.13Flange Mounting
Mount the unit to a suitable surface, using the flange gasket and the M6 nuts, bolts and washers
provided, ensuring that the clearance for the connector is maintained as shown on Figure 4.
Figure 4 Flange Mounting
陕西威瑞仪器仪表有限公司 生产代理销售:实验检测设备气象科学仪器设备
Tel:18966887800 Web:www.xavery.cn Email:[email protected]

R3-50, R3-100 and R3A-100 Doc. No 1210-PS-0015 Issue 1 March 2017
___________________________________________________________________________________________
Page 13
7.14Cabling
Ensure that strain relief measures are employed when installing the cables. Do not allow the whole
weight of a cable to be applied to the connector.
An RS422 compatible cable should be used, with the number of twisted pairs matching the
application.
Generic description – Twisted pairs with drain wire, screened with aluminised tape, with an overall
PVC sheath.
Typical Wire size 7/0.2mm (24AWG), 22AWG wire may also be used.
The table shows some suitable manufacturers’ references; other manufacturers’ equivalents can be
used.
No. of pairs
Gill ref.
Belden ref.
Batt electronics ref.
9 026 - 02663 8774 91009
The cable allows for the connection of all: -
Power inputs.
Digital data inputs and outputs.
Other example twisted pair screened cable types (24AWG) are:-
No. of
pairs
Gill ref.
Belden ref.
Batt electronics ref.
2 - 9729 -
3 026 - 02660 9730 91030
4 026-03156 9728 91199
6 - 9731 91031
7.15Cable length
The maximum cable length is dependent on the chosen communication format (RS232, RS422 or
RS485), the baud rate, and, to a lesser extent, on the cable type and the local electrical ‘noise’
level.
The above table shows the typical maximum lengths at the given baud rates, using the
recommended cable. If any problems of data corruption etc. are experienced, then a slower baud
rate should be used. Alternatively, a thicker or higher specification cable can be tried.
Communication format
Baud rate
Max. cable length
RS232 (PCIA Output) 9600 6.5 m (20 ft) or if using Cat 5 cable see
manufacturers recommendations
RS422 9600 1 km (3200 ft)
Analogue outputs - voltage N/A 6.5 m (20 ft)
陕西威瑞仪器仪表有限公司 生产代理销售:实验检测设备气象科学仪器设备
Tel:18966887800 Web:www.xavery.cn Email:[email protected]

R3-50, R3-100 and R3A-100 Doc. No 1210-PS-0015 Issue 1 March 2017
___________________________________________________________________________________________
Page 14
7.1620 Way Hirose Connector
1 Pin Connections, rear of 20-way Hirose 2. Pin Connections, contact side of 20-way Hirose
Pin Number
Designation
1 Reserved
2 RS422 Tx+
3 RS422 Tx-
4 RS422 Rx+
5 RS422 Rx-
6 Supply +ve
7 Reserved
8 Reserved
9 Chassis
10 Anemometer Sync -
11 Not Connected
12 Not Connected
13 Digital 0v
14 Supply –ve
15 Reserved
16 Reserved
17 Reserved
18 Anemometer Sync +
19 Reserved
20 Reserved
Assembly of the 20-way Hirose connector is shown below:
The outer sheath needs to be cut back by 45mm and the individual wires need to have their
insulation stripped back by 3mm.
陕西威瑞仪器仪表有限公司 生产代理销售:实验检测设备气象科学仪器设备
Tel:18966887800 Web:www.xavery.cn Email:[email protected]

R3-50, R3-100 and R3A-100 Doc. No 1210-PS-0015 Issue 1 March 2017
___________________________________________________________________________________________
Page 15
8 OPERATION
8.1 Overview
Data output rates up to 100Hz (model dependant).
Measurement of wind velocities to 45ms.
Wind speed accuracy < 1% RMS.
Configuration carried out via serial port and stored in non-volatile memory.
High speed, full duplex RS422 interface, operating up to 115200 baud.
Background diagnostics providing the user with the confidence that the unit is operating
correctly.
Optional Sensor Input Unit providing six differential 14 bit analogue inputs and one PRT100
input.
Optional Power & Communications Interface with 4 Analogue outputs representing wind speed
and Speed of Sound, or Sonic Temperature.
8.2 Operating modes
The anemometer has two operating modes:
1. Measurement mode - This is the normal mode of operation, which is the default mode from
power up.
2. Interactive mode - This allows the anemometer to be configured and interrogated.
8.3 Measurement Mode
The principle of operation is described in Section 5 (page 5). The parameters sampled are
determined by the anemometer’s configuration and consist of:
1. Wind velocity (axis velocities are always sampled)
2. Speed of Sound (SoS)
3. Analogue Inputs (6)
4. Absolute Temperature (PRT100)
The way in which the results are calculated, formatted and reported depends upon the configuration
of the anemometer.
8.4 Sampling
Wind velocity, SoS and analogue inputs are sampled every 10ms, in a fixed sequential pattern. The
PRT100 is sampled every 40ms. The measurement sequence is shown in Drawing Number 1210-
K-068 on page 52.
8.5 Averaging (and Output Rate)
These samples are block averaged before being converted into results. For wind speed, Speed of
Sound and analogue inputs the number of samples used in the block average can be set to
between 1 and 250 (R3-100, R3A-100) or 2 and 250 samples (R3-50).
Output rate frequency is calculated from 100/Average setting.
E.g. Default Average Setting is 5 therefore Output Rate = 100/5 = 20Hz.
The corresponding maximum number of PRT100 samples per result is 62.
陕西威瑞仪器仪表有限公司 生产代理销售:实验检测设备气象科学仪器设备
Tel:18966887800 Web:www.xavery.cn Email:[email protected]

R3-50, R3-100 and R3A-100 Doc. No 1210-PS-0015 Issue 1 March 2017
___________________________________________________________________________________________
Page 16
8.6 Wind Measurement, SoS and Temperature Reporting Format
The wind measurement can be output in one of the following formats:
1. U, V & W, calibrated (ms)
2. U, V & W, uncalibrated (ms)
3. Polar & W, calibrated (° & ms)
4. Polar & W, uncalibrated (° & ms)
5. Axis velocities, uncalibrated (ms)
In U, V,W modes the alignment of the U and V axes can be selected as follows:-
Axis U in line with Axis 1 when the anemometer is viewed from above.
Spar U is in line with the main spar when viewed from above. In this configuration U, V, W are
labelled U', V', W'.
The U, V, W axis alignment options are shown in the relevant U, V, W axis definition drawing on
page 8, figure 2.
The axis alignment can be selected using the Configuration menu and the ALIGNUVW command if
using your own PC software.
The speed of sound measurement results can be output in one of the following formats:
1. Speed of Sound (ms)
2. Sonic Temperature (K)
3. Sonic Temperature (°C)
Speed of sound measurements can be disabled.
The absolute temperature measurement results can be output in one of the following
formats:
1. Absolute Temperature (K)
2. Absolute Temperature (°C)
Absolute temperature measurements can be disabled.
8.7 Analogue Input Reporting Formats
If ASCII format is selected, analogue input measurements are output in volts to 4 decimal places. If
binary format is selected, analogue input measurements are output in 2's complement.
The number of analogue inputs to be measured can be set from 0 to 6.
8.8 Diagnostics
The system reports error codes if a failure is detected of the ultrasonic transducers, non-volatile
memory or PRT.
8.9 Confidence Tone
This function is enabled by default, normal instrument operation is indicated by a repetitive audible
tone from within the anemometer.
To turn off the Confidence Tone place the unit into Interactive Mode and use the command CTONE
DISABLE.
8.10Result Reporting
The selected parameters are blocked together along with the diagnostic results and block control
information to form a result message. The result message can either be in a Binary or ASCII format.
In the ASCII format the fields can be padded to form a fixed field size if required. The way the result
message is transmitted is dependent on the reporting mode:
1. Continuous mode - the result message is transmitted immediately after calculation.
2. Polled mode - the host pc requests data from the anemometer. The anemometer responds
by sending the current result message.
陕西威瑞仪器仪表有限公司 生产代理销售:实验检测设备气象科学仪器设备
Tel:18966887800 Web:www.xavery.cn Email:[email protected]

R3-50, R3-100 and R3A-100 Doc. No 1210-PS-0015 Issue 1 March 2017
___________________________________________________________________________________________
Page 17
8.11Interactive Mode
Interactive mode is entered from measurement mode, by sending the anemometer the IM
command (see Para 14.2). In this mode the user can communicate with the anemometer, issuing
configuration commands to the anemometer, or requesting information from the anemometer.
8.12Configuration Commands
Configuration commands (see Para 14.2) allow the user to configure the anemometer as required.
The configuration parameters are held in non-volatile storage, allowing the anemometer to retain its
current configuration when powered down.
8.13Default Configuration Command Settings
Factory settings are:-
AVERAGE 5
WINDREP UVW CAL
SOSREP SONICTEMP K
ABSTEMP OFF
ANAIP DDDDDD (DISABLED)
AOPFSD 30
POLARWRAP 360
STRFMT ASCII UNPAD
ASCTERM CRLF
ECHO ON
MSGMODE CONT
BAUD 9600
CTONE ON
ALIGN AXIS
INST OFF
8.14Default Output Data String
The Structure of the Factory R3 Default Output Data String is as follows:-
Status Codes, U, V, W, Speed of Sound, Checksum.
01,00,-00.04,+00.00,+00.03,293.94,1E
02,28,-00.04,+00.00,+00.03,293.94,17
03,00,-00.04,-00.02,+00.03,293.94,18
04,00,-00.05,-00.02,+00.04,293.94,19
05,00,-00.04,-00.03,+00.03,293.95,1E
06,01,-00.05,-00.02,+00.04,293.94,1A
8.15Interrogation Commands
Interrogation commands allow the user to request various information from the anemometer.
E.g. ?, CONFIG, EXIT, HELP, IM, SN, VER and VERIFY.
See Para 14.2.
陕西威瑞仪器仪表有限公司 生产代理销售:实验检测设备气象科学仪器设备
Tel:18966887800 Web:www.xavery.cn Email:[email protected]

R3-50, R3-100 and R3A-100 Doc. No 1210-PS-0015 Issue 1 March 2017
___________________________________________________________________________________________
Page 18
9 CONNECTION TO A PC OR OTHER DEVICE
Connection to a PC or other device requires the use of:
1. Either a standard PCI or PCIA
2. Or a suitable alternative power supply and RS422 conversion unit, which meets the
specification of the anemometer.
The PCIA supplies power for the anemometer and provides conversion of the RS422 signal sent by
the anemometer and the RS232 signal required by a PC. The PCIA requires connection to a mains
power supply or DC.
The anemometer outputs data in RS422 format, which can be reconstituted to analogue via the
optional PCIA.
Baud rate options are:
1. 2400
2. 4800
3. 9600
4. 19200
5. 38400
6. 57600
7. 115200 (Note: if changing a unit to 115200 Baud rate ensure that the connecting device
supports 115200 baud e.g. RS422 converter, PC/Laptop etc.).
Data format:
8 data, 1 stop, no parity.
9.1 Anemometer Connector / SIU Power and Data Connector
Hirose 20 way socket
Connector pin Designation
1 Reserved
2 RS422TXB (Data from anemometer)
3 RS422TXA (Data from anemometer)
4 RS422RXB (Data to anemometer)
5 RS422RXA (Data to anemometer)
6 Supply V+
7 Reserved
8 Reserved
9 Chassis
10 Anemometer Sync-
11 Not used
12 Not used
13 Digital 0V, signal ground
14 Supply V-
15 Reserved
16 Reserved
17 Reserved
18 Anemometer Sync +
19 Reserved
20 Reserved
The above voltages are referenced to signal ground.
陕西威瑞仪器仪表有限公司 生产代理销售:实验检测设备气象科学仪器设备
Tel:18966887800 Web:www.xavery.cn Email:[email protected]

R3-50, R3-100 and R3A-100 Doc. No 1210-PS-0015 Issue 1 March 2017
___________________________________________________________________________________________
Page 19
10 CONNECTING R3 TO A PC USING RS422
R3 Connector
PC with
RS422 to
RS232/USB convertor
Signal Names
20 way Pin
No’s Signal Name
RS422 Tx+ 2 RS422 Rx+
RS422 Tx- 3 RS422 Rx-
RS422 Rx+ 4 RS422 Tx+
RS422 Rx- 5 RS422 Tx-
Digital 0v 13 Signal Gnd
Supply V+ 6 + DC Supply (9-30v)
Supply V- 14 - DC Supply (0v)
10.1Connecting R3 to a PC via Optional Power and
Communications Interface (PCI 1189-PK-021 or PCIA 1189-
PK-020)
Dependent upon system requirements the R3 unit can be operated with the Power and
Communications and Interface unit (PCI) or Analogue Output version (PCIA), which can be ordered
as an optional extra. Connect R3 via RS422 port; then connect computer to RS232 port on
PCI/PCIA.
10.1.1 Environmental
The Desktop PCI/PCIA is intended for use in a protected environment and provides interfacing to a
single anemometer. RS232 and RS422 ports are provided. The PCI/PCIA is not intended for
outdoor use.
R3
20 Way Connector
PCI
15 Way D Type
Connector
PCI RS232
9 Way D Type
Connector
Computer
9 Way D Type
Connector
Signal
Names
Pin
No’s
Pin
No’s
Signal
Name
Signal
Name
Pin
No’s
Pin
No’s
Signal
Name
TX (+) 2 2 RXB (+)
TX(–) 3 9 RXA (–) DCD 1
TX 2 2 RX
RX (+) 4 3 TXB (+)
RX (–) 5 10 TXA(–)
RX 3 3 TX
DTR 4
GND 5 5 GND
DSR 6
Digital 0v 13 4 DIGITAL
0V RTS 7
CTS 8
RI 9
POWER V+ 6 5 POWER
V+
POWER 0V 14 11 POWER
0V
陕西威瑞仪器仪表有限公司 生产代理销售:实验检测设备气象科学仪器设备
Tel:18966887800 Web:www.xavery.cn Email:[email protected]
This manual suits for next models
5
Table of contents
Other Gill Instruments Measuring Instrument manuals

Gill Instruments
Gill Instruments 1561-PK-020 User manual

Gill Instruments
Gill Instruments Windobserver 65 User manual

Gill Instruments
Gill Instruments WindObserver II User manual

Gill Instruments
Gill Instruments 1360-PK-022 User manual

Gill Instruments
Gill Instruments WindObserver II User manual

Gill Instruments
Gill Instruments WindObserver II User manual

Gill Instruments
Gill Instruments HS-50 User manual

Gill Instruments
Gill Instruments MetPak II User manual