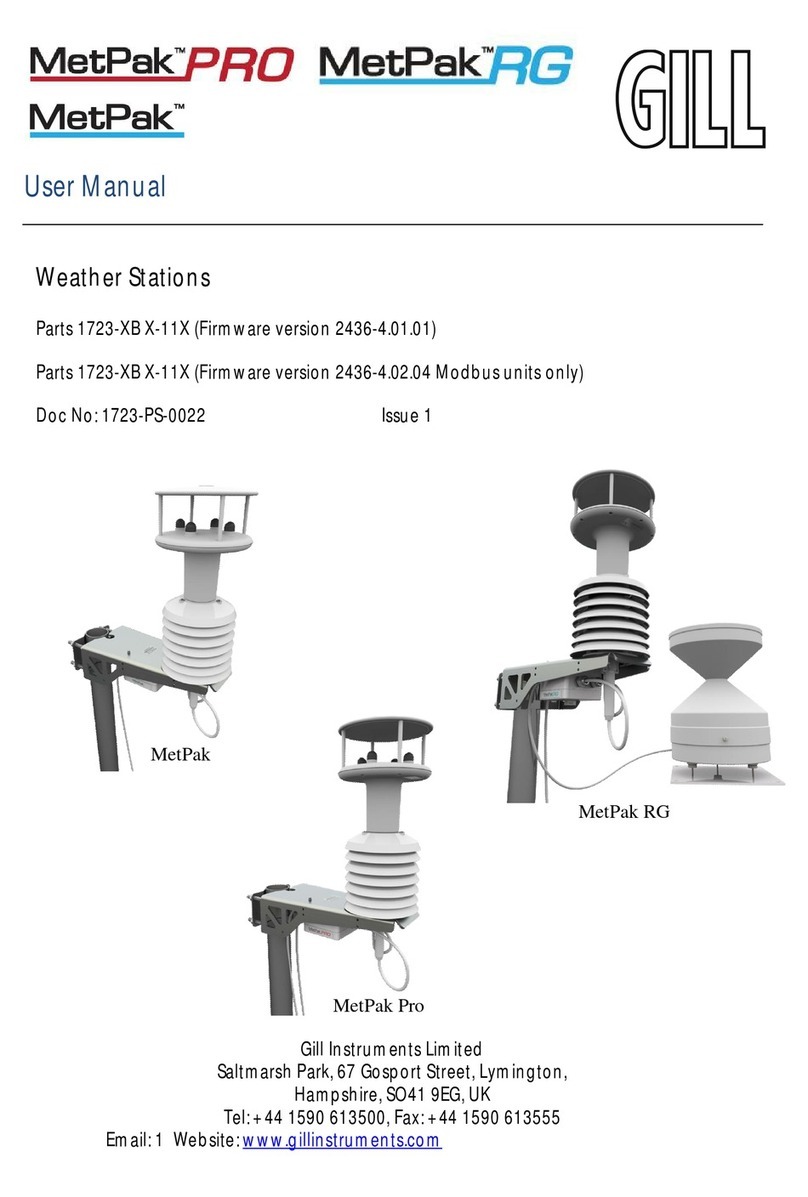
Gill Instruments MetPak RG User manual

User
Manual
MetPak RG
Weather Station
Doc No. 1723-PS-0013
Issue 1
MetPak RG Part: 1723-3B-2-111

Foreword
©2011 Gill Instruments Ltd. All rights reserved.
Thank you for purchasing the MetPak RG manufactured by Gill Instruments Ltd.
To achieve optimum performance we recommend that you read the whole of this
manual before proceeding with use.
Gill products are in continuous development and therefore specifications may be
subject to change and design improvements without prior notice.
The information contained in this manual remains the property of Gill Instruments
and should not be copied or reproduced for commercial gain.
Guarantee
For terms of guarantee, please contact your supplier.
Warranty is void if the coloured Wind Sensor security seal is damaged or broken,
or the Wind Sensor transducer caps have been damaged.
Trademarks
Microsoft and Windows are registered trademarks of Microsoft Corporation.
All other brands and product names are trademarks or registered trademarks of
their respective owners.
Cautions and Notes
The following symbols are used in this guide:
CAUTION. This indicates an important operating instruction that should be
followed to avoid any potential damage to hardware or property, loss of data,
or personal injury.
NOTE. This indicates important information to help you make the best use of this
product.
Applicable Parts
MetPak RG Part 1723-3B-2-111

Contents
MetPak RG User Manual
Last Change ©Gill Instruments Ltd
12 March, 2013 Page 1
Contents
1. Introduction.........................................................................................................1
1.1 Principle of Operation......................................................................................................2
1.1.1 Wind Speed and Direction Sensor..................................................................... 2
1.1.2 Radiation Shield................................................................................................ 3
1.1.3 Temperature and Relative Humidity Sensor with Dewpoint Output.................... 3
1.1.4 Barometric Pressure.......................................................................................... 3
1.1.5 Rain Sensor (DIG1 Input)..................................................................................3
1.2 Abbreviations.................................................................................................................. 4
2. Installation...........................................................................................................5
2.1 Pre-Installation Checks...................................................................................................5
2.2 Installation....................................................................................................................... 6
2.2.1 Bench System Test........................................................................................... 6
2.2.2 Bench Test Equipment Required.......................................................................6
2.2.3 Cabling.............................................................................................................. 6
2.2.4 Communication and Power Connections........................................................... 9
2.2.5 Digital Rain Gauge Connections......................................................................13
2.2.6 Mounting MetPak RG...................................................................................... 14
2.2.7 Mounting the Rain Gauge................................................................................16
3. Operation...........................................................................................................19
3.1 Start Guide....................................................................................................................19
3.2 MetView........................................................................................................................ 21
3.2.1 Opening MetView............................................................................................ 21
3.2.2 Scanning for Devices....................................................................................... 22
3.2.3 The MetView Console ..................................................................................... 23
3.2.4 MetView Console Display Options................................................................... 25
3.2.5 MetView Gauge Ranges and Graphs.............................................................. 26
3.2.6 Data logging.................................................................................................... 28
3.3 MetPak RG Configuration ............................................................................................. 31
3.4 Configuring MetPak RG with MetSet............................................................................. 33
3.4.1 Opening MetSet .............................................................................................. 33
3.4.2 MetSet Editing Screen..................................................................................... 35
3.4.3 Monitoring MetPak RG Output Data Using HyperTerminal.............................. 40
3.4.4 Configuring MetPak RG for SDI-12.................................................................. 42
3.4.5 SDI-12 Commands.......................................................................................... 42
3.4.6 Safe Mode.......................................................................................................46

Contents
MetPak RG User Manual
©Gill Instruments Ltd Last Change
Page 2 12 March, 2013
4. Troubleshooting................................................................................................48
4.1 Fault-Finding................................................................................................................. 48
4.2 Servicing....................................................................................................................... 49
4.3 Bench Tests.................................................................................................................. 49
5. Maintenance ......................................................................................................51
5.1 Wind Sensor (WindSonic)............................................................................................. 51
5.2 UV Shield (RM Young Model 41003)............................................................................ 51
5.3 HygroClip for Temperature, Humidity and Dewpoint (Rotronic Model HC2-S3).............51
5.4 Barometer (on Hub PCB).............................................................................................. 52
5.5 Rain Gauge................................................................................................................... 52
5.6 Spare Parts................................................................................................................... 54
5.7 Returning the MetPak RG............................................................................................. 54
6. Technical Information..........................................................................................i
6.1 Specification .................................................................................................................... i
6.2 MetPak RG Hub PCB Connections.................................................................................iv
6.3 Electrical Conformity Certificate ......................................................................................vi
Figures
Figure 1 MetPak RG Parts 1
Figure 2 Compass points 2
Figure 3 Internal view of the hub box 9
Figure 4 Hub Box with Digital Pec fitted. 10
Figure 5 Connection of Gill USB Cable (Part No. 1723-10-051) 10
Figure 6 RS232 connections 11
Figure 7 RS422 connections 11
Figure 8 RS485 Connections 12
Figure 9 SDI-12 connections 12
Figure 10 MetPak RG DIG 1 Rain Gauge Connections 13
Figure 11 Correct Mounting Position for MetPak RG 15
Figure 12 Opening MetView Screen 21
Figure 13 Scanning for MetPak RG Devices 22
Figure 14 The MetView Console 23
Figure 15 MetView Gauge Range 26
Figure 16 MetView Graph 27
Figure 17 Setting up data logging 28
Figure 18 Opening MetSet Screen 34

Contents
MetPak RG User Manual
Last Change ©Gill Instruments Ltd
12 March, 2013 Page 3
Tables
Table 1 Abbreviations 4
Table 2 Recommended Belden cable types 7
Table 3 Maximum cable lengths for supported communication and sensor network 7
Table 4 Connection status indicators 23
Table 5 MetView scale and unit options 25
Table 6 MetView averaging options 25
Table 7 Max/min markers 25
Table 8 MetView Screen Settings Options 25
Table 9 Default configuration settings 31
Table 10 MetPak RG Commands 41
Table 11 Common problems and their solution 48
Table 12 Status codes as output with the MetPak RG data string 49
Table 13 HygroClip connections (6-way connector J1) iv
Table 14 WindSonic anemometer connections (8-way connector J4) iv
Table 15 PC communications (8-way connector, J5) v
Table 16 Digital Switch Input (2-way connector, J8) v

Contents
MetPak RG User Manual
©Gill Instruments Ltd Last Change
Page 4 12 March, 2013
Intentionally Blank

Contents
MetPak RG User Manual
Last Change ©Gill Instruments Ltd
12 March, 2013 Page 1
1. Introduction
MetPak RG is a compact and lightweight multi-sensor instrument that measures
the most essential weather parameters. Gill ultrasonic technology, as used in the
proven WindSonic instrument, measures wind speed and direction. Temperature
and Humidity are measured and Dewpoint calculated using an industry standard
probe housed in a naturally aspirated radiation shield. Barometric pressure is
measured using an industry standard sensor.
The customer is able to add one supplied digital contact closure rain gauge.
The MetPak RG combines all the instrument data into a single combined data
string. This may be configured for digital ASCII RS232/RS422/RS485 (2 wire point
to point) and digital SDI-12 outputs.
The instrument uses a rugged mounting clamp that attaches to any vertical pipe up
to 58mm (2.3 inch) diameter.
An electrical Hub box is fitted to the mounting bracket for termination of the Rain
Gauge Cable and Power/Data cable.
Figure 1 MetPak RG Parts
Gortex Vent for
Barometric
Pressure Sensor
Wind Speed and
Direction Sensor
Radiation Shield
Temperature and
Relative Humidity
Sensor
Hub Box
Mounting Bracket
Rain Gauge

Contents
MetPak RG User Manual
©Gill Instruments Ltd Last Change
Page 2 12 March, 2013
1.1 Principle of Operation
1.1.1 Wind Speed and Direction Sensor
The MetPak RG uses the WindSonic wind speed and direction sensor. The
WindSonic measures the times taken for an ultrasonic pulse of sound to travel from
the North transducer to the South transducer, and compares it with the time for a
pulse to travel from S to N transducer. Likewise times are compared between West
and East, and E and W transducer.
If, for example, a North wind is blowing, then the time taken for the pulse to travel
from N to S will be faster than from S to N, whereas the W to E, and E to W times
will be the same. The wind speed and direction can then be calculated from the
differences in the times of flight on each axis. This calculation is independent of
factors such as temperature.
Figure 2 Compass points
Figure 2 shows the compass point and polarity of U and V if the wind components
along the U and V axis are blowing in the direction of the respective arrows.

Contents
MetPak RG User Manual
Last Change ©Gill Instruments Ltd
12 March, 2013 Page 3
1.1.2 Radiation Shield
The Multi-Plate Radiation Shield protects temperature and relative humidity
sensors from error-producing solar radiation and rain. This shield relies on a
combination of plate geometry, material and natural ventilation to provide effective
shielding.
1.1.3 Temperature and Relative Humidity Sensor with
Dewpoint Output
The Rotronic HygroClip module is a complete
instrument, with integrated temperature
compensation. Calibration data is maintained
within the integrated electronics. It provides
digital output signals for Relative Humidity,
Temperature and Dewpoint to the MetPak RG
Hub box.
Position of Temperature and Relative Humidity
Probe in the Radiation Shield.
1.1.4 Barometric Pressure
Barometric pressure output is provided by a solid-state device fitted on to the
circuit board in the MetPak RG Hub box. Vent to atmosphere is via a Gortex filter
which also protects the pressure sensor from the effects of wind and rain.
1.1.5 Rain Sensor (DIG1 Input)
Rainfall is measured by the well-proven tipping bucket method.
Rain is collected by a funnel and is passed to one of the two
buckets situated at either end of a short balance arm. The
balance arm tips when the first bucket is full, emptying this
bucket and positioning the second bucket under the funnel. The
tipping process repeats indefinitely as long as the rain
continues to fall, with each tip corresponding to a fixed quantity
of rainfall; at each tip the moving arm forces a magnet past a
reed switch, causing contact to be made for a few milliseconds.
The Rain Gauge is connected to the MetPak RG Digital input, which detects when
two dedicated terminals are short circuited (less than 1k ohm).

Contents
MetPak RG User Manual
©Gill Instruments Ltd Last Change
Page 4 12 March, 2013
1.2 Abbreviations
Table 1 Abbreviations
Item
Meaning
ASCII American Standard Code for Information Interchange
C Centigrade
CAL Calibration
CD Compact Disc
COM Communications
CR Carriage Return
CSV Comma Separated Variable
ETX End of String
F Fahrenheit
FPM Feet per Minute
HF High Frequency
HPA Hecto-Pascals
HTML Hyper Text Markup Language
Hz Hertz
IMM International Maritime Mobile
In Hg Inches of Mercury
K Kelvin
KPH Kilometres per Hour
KTS Knots
LF Line Feed
M Bar Milli Bars
Max Maximum
MF Medium Frequency
Min Minimum
Mm Hg Millimetres of Mercury
MPH Miles per Hour
MS Microsoft
MS Metres per Second
NSEW North South East West
NVM Non-Volatile Memory
PC IBM compatible Personal Computer
ROM Read Only Memory
RS232 Communications standard
RS422 Communications standard
Rx Receive
RXD Received Data
SDI-12 Serial – Data Interface standard for microprocessor based
sensors
STX Start of String
Tx Transmit
TXD Transmitted Data
VHF Very High Frequency
WMO World Meteorological Organisation

Contents
MetPak RG User Manual
Last Change ©Gill Instruments Ltd
12 March, 2013 Page 5
2. Installation
MetPak RG has been designed to meet and exceed the stringent standards listed
in its specification (see Para 6.1).
2.1 Pre-Installation Checks
MetPak RG Wind Sensor and Hub Box.
As with any sophisticated electronics, good engineering practice should be followed to
ensure correct operation:
Ensure the MetPak RG Wind Sensor will not be affected by other equipment operating
locally, which may not conform to current standards, e.g. radio/radar transmitters,
generators etc.
Avoid mounting in the plane of any radar scanner – a vertical separation of at least 2m
should be achieved.
When installing MetPak RG near radio transmitting antennas, ensure that the
mounting position fulfills the following minimum separations (all round):
VHF IMM – 1m
MF/HF – 5m
Satcom – 5m (avoid likely lines of sight)
Use cables recommended by Gill (see Para 2.2.3). If cables are cut and re-connected
incorrectly (perhaps in a junction box) then EMC performance may be compromised if
cable screen integrity is not maintained.
Avoid earth loops – wire the system in accordance with these installation guidelines.
Ensure that the power supply operates to the MetPak RG specification (see Para 6.1)
at all times.
Avoid turbulence caused by surrounding structures that will affect the accuracy of the
sensors such as trees, masts and buildings. The WMO make the following
recommendations. The standard exposure of wind instruments over level open terrain
is 10m above the ground. Open terrain is defined as an area where the distance
between the sensor and any obstruction is at least 10 times the height of the
obstruction.
Keep away from building exhaust vents, machinery and motors.
Rain Gauge
The site chosen to install the rain gauge will depend in part on the application to which
it is being put and in part on the particular circumstances at the site. But if possible site
the rain gauge so that the distance between the rain gauge and an obstruction, such
as Trees or buildings is at least as great as twice the height of the obstruction. If the
application is very specific, such as monitoring a building site, then the siting of the
rain gauge is largely prescribed by use.
NOTE:
No two rain gauge designs are ever likely to produce identical results, and identical
rain gauge can give slightly different catches even when sited close to each other.
Customers with 2 or more sets of equipment must not swap around rain gauges with
MetPaks without using MetSet to change the calibration figure.

Contents
MetPak RG User Manual
©Gill Instruments Ltd Last Change
Page 6 12 March, 2013
2.2 Installation
2.2.1 Bench System Test
Prior to physically mounting the MetPak RG in its final location, we strongly
recommend that a bench system test is carried out to confirm the system is
configured correctly, is fully functional and electrically compatible with the selected
host system and cabling (preferably utilising the final cable length). The required
data format, units, output rate, and other options should also all be set up at this
stage.
Note that MetPak RG is supplied with a matching Rain Gauge and its tip calibration
factors will have been pre-programmed into the MetPak hub box. If a replacement
Rain gauge is used then the Hub box will need re-programming using Gill MetSet
Software with the new tip calibration factor (if this has changed).
2.2.2 Bench Test Equipment Required
1723-3B-2-111 MetPak RG set for RS232 communication (factory default setting)
and matching Rain Gauge.
1723-10-051 MetPak RG RS232 to USB 1.8M configuration cable with integral
5v power or alternatively use RS232, RS232 converter and
separate 5v to 30 dc power supply.
ES-U-1001-A EasySynch RS232 to USB adaptor or equivalent (if not using Gill
part 1723-10-051) or connect directly to an RS232 COM port.
Power Supply 5V to 30Vdc at 100mA if required.
Belden 9503 3 pair communications and power cable (if not using Gill Part 1723-
10-051), length as required.
Digital Multimeter capable of measuring resistance and dc volts.
Gill MetSet and MetView Software supplied on the MetPak RG CD or download
from. http://www.gill.co.uk/main/software.html
2.2.3 Cabling
MetPak RG has five communication connection options:
USB (using the 1.8m Gill USB cable, Part No. 1723-10-051).
RS232
RS422
RS485 (two wire point to point).
SDI-12
MetPak RG has a Rain Gauge Digital Input connection:
Digital Switch (DIG1)
It is important that the cable is appropriate for the chosen connection option. The
following sections describe the recommended types and maximum lengths of cable
in each case.

Contents
MetPak RG User Manual
Last Change ©Gill Instruments Ltd
12 March, 2013 Page 7
NOTE. A 15-metre, 6-pair cable (wires stripped at each end) suitable for
RS232/RS422 or SDI-12 communication is available from Gill Instruments (Part
No. 1723-10-053).
Cable Type Data Comms
Wire type: 24AWG
Wire size: 7x32 AWG.
Cable outer diameter: 6-8mm (to match the hub box gland).
For RS422/485 operation the cable should contain twisted pairs screened to match
the application.
Cable Type Rain Gauge
Wire type: 22AWG
Wire size: 7x30 AWG.
The cable should contain a twisted pair screened.
NOTE: The Rain Gauge supplied with MetPak RG has a 6 Metre cable connected
to it ready to wire into the MetPak RG hub box.
The following table shows an example manufacturers’ reference; other
manufacturers’ equivalents can be used.
Table 2 Recommended Belden cable types
Application No. of Pairs Belden Ref.
Rain Gauge Connection 1 8761
SDI-12 or RS485 2 9729
Digital RS232 3 9503
Digital RS422 4 9504
Cable length
The maximum cable length is dependent on the chosen communication method.
The following table shows the maximum cable lengths for the supported
communication protocols at the given baud rates, using the recommended cable. If
any problems of data corruption etc. are experienced, then a slower baud rate
should be used. Alternatively, a higher specification cable can be tried.
Table 3 Maximum cable lengths for supported communication and sensor network
Communication format Baud rate Max. cable length
RS232 19200 6.5M
RS422/485 19200 1000M
SDI-12 1200 90M
Digital Switch Input Not Applicable Switch contact and cable
resistance to be less than
1k ohm

Contents
MetPak RG User Manual
©Gill Instruments Ltd Last Change
Page 8 12 March, 2013
Cabling (unused wires)
Any unused wires in the connecting cables should be connected to ground
preferably at the user equipment end.
Cabling protection
The Cable should be secured:
With cable clamps or equivalent at regular intervals such that the hub
box cable gland does not support the cable weight.
Away from the mounting bolts to prevent chaffing of the cable.
NOTE. Install appropriate strain relief support to the cable. If possible, pass the
cable through the mounting pole.
Earthing
To ensure correct operation and for maximum protection from lightning, a separate
lightning rod system is recommended to protect the system.
You can also earth the MetPak RG through its mountings or by connecting a
grounding cable (minimum of 6mm² copper wire) to a spare MetPak RG metalwork
bolt hole. Clean off any paint that might prevent a good connection.
When you connect the communications cable ensure that the screen has a
connection to the hub box case.
Routing Cables through the Hub Box Glands
NOTE: The MetPak RG Hub Box cable glands contain spring loaded metal leaves
that are designed to make a ground contact with cables that have an overall braid
screen. Care is therefore required when inserting and removing cables through the
glands to prevent damage to the metal leaves.

Contents
MetPak RG User Manual
Last Change ©Gill Instruments Ltd
12 March, 2013 Page 9
2.2.4 Communication and Power Connections
To connect the MetPak RG Power and Communications cable:
1. Open MetPak RG’s hub box by unfastening the four screws.
2. Locate connector J5 (see Figure 3). Carefully pull the connector off its circuit
board pins.
3. Strip the cable wires to 8mm.
4. Pass the cable through one of the gland nuts (please refer to the 2nd NOTE
on Page 8).
5. Connect your cable as shown in the following diagrams:
Gill USB Cable Figure 5
RS232 Figure 6
RS422 Figure 7
RS485 Figure 8
SDI-12 Figure 9
6. Attach the cable’s screen wires to the terminal post (see Figure 3).
7. After connection, securely tighten the gland nut to prevent moisture ingress.
NOTE. Ensure that MetPak RG is configured for the chosen communications
method
Figure 3 Internal view of the hub box
J4 Pin 1 J5 Pin 8 J5 Pin 1 Hex Terminal
Post
J1 Pin 6 J5, showing RS232 to USB
Configuration Cable Wires

Contents
MetPak RG User Manual
©Gill Instruments Ltd Last Change
Page 10 12 March, 2013
Figure 4 Hub Box with Digital Pec fitted.
USB Lead Connection (COMMS set for RS232)
Connect MetPak RG to a PC USB port using the Gill Configuration Cable 1723-10-051.
J5 Pin 1 2 3 4 5 6 7 8
Colour None None Yellow Orange None None Black Red
Figure 5 Connection of Gill USB Cable (Part No. 1723-10-051)
NOTE:- If upon connecting the USB lead to a PC the driver is not found by the PC, then
the appropriate driver to match the PC Windows version may be downloaded from:-
http://www.ftdichip.com/Drivers/VCP.htm
Connect to
Hub box J5

Contents
MetPak RG User Manual
Last Change ©Gill Instruments Ltd
12 March, 2013 Page 11
Digital Output RS232 Connections (COMMS set for RS232)
This is the MetPak RG default communication configuration setting.
J5 Hub Box
8 Way Push fit Block PC 9 Way D Type
Connector
Signal names Terminal
Nos. 3 Pair Cable Pin
No’s Signal
Names
RS232 TX
RS232 RX 3
4 2
3 RXD
TXD
Signal Ground 2 5 Ground
Chasis Ground Terminal
Post Screen wires
NA Chassis
Ground
V supply –
V supply + 7
8 –
+ DC Power
supply
Figure 6 RS232 connections
Digital Output RS422 Connections (COMMS set for RS422)
This is not the default communications setting; ensure the MetPak RG has been
configured for this output requirement before wiring to a user device.
J5 Hub Box
8 Way Push fit Block RS422 to RS232 or
USB Converter
Signal Names Terminal
Nos. 4 Pair Cable Signal Names
RS422 TX +
RS422 TX – 6
3 RX +
RX –
RS422 RX +
RS422 RX – 5
4 TX +
TX –
Signal 0v 2 Signal Ground
Chassis
Ground Terminal
Post Screen wires
Chassis Ground
V Supply –
V Supply + 7
8 –
+ DC Power Supply
Figure 7 RS422 connections

Contents
MetPak RG User Manual
©Gill Instruments Ltd Last Change
Page 12 12 March, 2013
Digital Output RS485S 2 Wire Point to Point Connections
(COMMS set for RS485P2W)
This is not the default communications setting; ensure the MetPak RG has been
configured for this output requirement before wiring to a user device.
Note that it is not possible to network other devices on this 2-wire RS485
link.
J5 Hub Box
8 Way Push fit Block RS485 to RS232
or USB Converter
Signal Names Terminal
Nos. 2 Pair Cable Signal Names
RS485 TX +
RS485 RX+ 6
5 RS485TX/RX+
RS485 TX –
RS485 RX – 3
4 RS485TX/RX–
Signal 0v 2 Signal Ground
Chassis
Ground Terminal
Post Screen wires
Chassis ground
Power 0v
Power +ve 7
8 –
+ DC Power
Supply
Figure 8 RS485 Connections
Digital Output SDI-12 Connections (COMMS set for SDI12)
This is not the default communications setting; ensure the MetPak RG has been
configured for this output requirement before wiring to a user device.
Figure 9 SDI-12 connections
J5 Hub Box
8 Way Push fit Block SDI-12 Device
Signal
Names Terminal
Nos. 2 Pair Cable Signal Names
SDI-12 1 SDI-12
Signal Ground 2 Signal Ground
Chassis
Ground Terminal
Post Screen wires
Chassis Ground
V Supply –
V Supply + 7
8 –
+ DC Power
Supply

Contents
MetPak RG User Manual
Last Change ©Gill Instruments Ltd
12 March, 2013 Page 13
2.2.5 Digital Rain Gauge Connections
Rain Gauge Digital Switch Connection (DIG 1)
J8 Hub Box
2 Way Terminal Block Digital Switch e.g.
Rain Bucket
Signal Names Terminal
Nos. Supplied 6M Cable Signal Names
DIG 1
GND 2
1 Switch Contact
Return Switch Contact
Chassis
Ground Terminal
Post Screen Wire Chassis Ground
Figure 10 MetPak RG DIG 1 Rain Gauge Connections
To connect the Rain Gauge 6 Metre lead to the Hub Box.
1. Open MetPak RG’s hub box by unfastening the four screws.
2. Locate connector J8 (see Figure 3).
3. Pass the cable through one of the gland nuts (see Note below).
4. Connect the cable as detailed in Figure 10.
5. Attach the cable’s screen wire to a terminal post.
6. After connection, securely tighten the gland nut to prevent moisture ingress.
7. NOTE: The MetPak RG Hub Box cable glands contain spring loaded metal
leaves that are designed to make a ground contact with cables that have an
overall braid screen. Care is therefore required when inserting and removing
cables through the glands to prevent damage to the metal leaves.
J8 Terminal 1
J8 Terminal 2
Rain Gauge
Cable Entry
Gland.
Clear
Black
Rain Gauge
Connections

Contents
MetPak RG User Manual
©Gill Instruments Ltd Last Change
Page 14 12 March, 2013
2.2.6 Mounting MetPak RG
MetPak RG uses a mounting clamp suitable for attaching to a vertical pipe with a
diameter of 30-58mm (1.2 to 2.3 inches). When mounting MetPak RG, consider the
position, orientation and alignment of the unit.
Note that the mounting pipe should first be degreased and when assembling the
MetPak clamp assembly the outer clamp nuts need to be tightened evenly to a
torque figure of 3 Nm.
The moving plate part of the clamp needs to be reversed for poles below 38 mm
diameter.
Mounting Bracket Assembly Exploded View
Mounting Bracket Assembled View
Earthing Point for supplied
screw/washer/tag
Table of contents
Other Gill Instruments Weather Station manuals
Popular Weather Station manuals by other brands

La Crosse Technology
La Crosse Technology WS-9035U instruction manual

Marathon
Marathon Berlin user manual

La Crosse Technology
La Crosse Technology WA-1240U owner's manual

smart home
smart home 888R25 user manual

Oregon Scientific
Oregon Scientific TREVISO BAR986HGA user manual

La Crosse Technology
La Crosse Technology S84107 user manual

Emos
Emos ESW5003 user manual

Eurochron
Eurochron EFUS 750 operating instructions

Unit Connection Technology
Unit Connection Technology WS037C user manual

La Crosse Technology
La Crosse Technology WS-2814U-IT Operation manual

Oregon Scientific
Oregon Scientific BAR339DP user manual

Braun
Braun BC13-DCF user manual