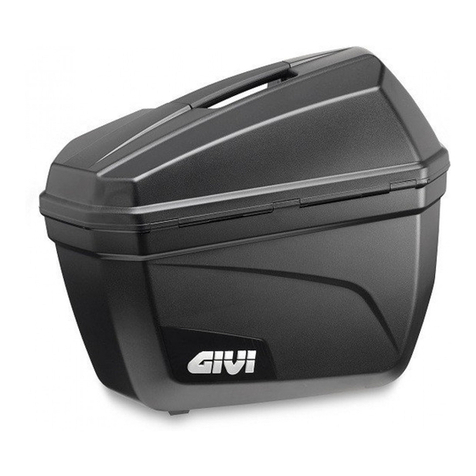
GIVI TREKKER OUTBACK User manual

©Copyright 24/07/2014 AR-Rev00
VALIGIA LATERALE - SIDE CASE - VALISES LATERALES - SEITENKOFFER - MALETAS LATERALES - LADO CASOS
1/5
ISTRUZIONI DI MONTAGGIO - MOUNTING INSTRUCTIONS
INSTRUCTIONS DE MONTAGE - BAUANLEITUNG
INSTRUCCIONES DE MONTAJE - INSTRUÇÕES DE MONTAGEM
TREKKER OUTBACK
SIZES
495
387
306
SIZES
495
387
246
SECURITY
LOCK
SECURITY
LOCK
CAPACITY
VOLUME
37
lt
MAX. LOAD
10
Kg
MAX. LOAD
10
Kg
VOLUME
48
lt
OBK37AL/R
OBK48AL/R
10Kg MAX
120Km/h MAX
APERTURA DEL COPERCHIO - LID OPENING - OUVERTURE DU COUVERCLE
DECKELÖFFNUNG - APERTURA DE LA TAPA - ABERTURA DA TAMPA

©Copyright 24/07/2014 AR-Rev00
VALIGIA LATERALE - SIDE CASE - VALISES LATERALES - SEITENKOFFER - MALETAS LATERALES - LADO CASOS
2/5
ISTRUZIONI DI MONTAGGIO - MOUNTING INSTRUCTIONS
INSTRUCTIONS DE MONTAGE - BAUANLEITUNG
INSTRUCCIONES DE MONTAJE - INSTRUÇÕES DE MONTAGEM
TREKKER OUTBACK
AGGANCIO - FASTENING - EINKLINKEN - ACCROCHAGE - ENGANCHE - FIXAÇÃO
CLACK! > OK
CLACK! > OK
VERDE - GREEN
VERT - GRÜN
VERDE - VERDE
ROSSO - RED
ROUGE - ROT
ROJO - VERMELHO
OK
NO
. Verificare il corretto aggancio della valigia assicurandosi che entrambe i meccanismi siano scattati (fig. B) e che i cursori, posti sulla cornice del PL (fig. D), siano
diventati VERDI.In caso contrario aprire il coperchio ed esercitare pressione con entrambe le mani (fig. E) in prossimità del meccanismo non ancora scattato, fino al
CLACK e alla comparsa del VERDE sul cursore.Si raccomanda, inoltre, di chiudere la serratura ed estrarre la chiave prima di mettersi in marcia.
. Always ensure the correct hooking of the bag, making sure both gears click shut (image B) and the sliders placed on the PL frame (image D), are green.
Otherwise, please open the lid and using both hands (image E) near the gear which is still open, apply pressure until you hear a ”click” and the slider becomes green.
Furthermore, we recommend closing the lock every time and removing the key before starting the engine.
. Vérifier le bon engagement de la valise, que les deux mécanismes sont bien enclenchés (Fig. B) et que les curseurs, sur le cadre de la PL (Fig. D) sont en vert.
Sinon, ouvrez le couvercle et appliquer une pression avec les deux mains (fig. E) dans le voisinage du mécanisme non encore enclenché, jusqu’au CLAC et au chan-
gement du curseur au vert.
Il est également recommandé de fermer le verrou et de retirer la clé avant de partir.
. Bitte überprüfen den Koffer auf korrekte Befestigung: beide Mechanismen müssen eingerastet (Bild B) und die Schalter,auf dem PL Rahmen (Bild D) auf Grün sein.
Sollte das nicht der Fall sein, öffnen Sie bitte den Deckel und drücken Sie mit beiden Händen (Bild E) in der Nähe des Mechanismus, der nicht eingerastet ist, bis Sie
ein “Klack” hören und das Grün auf dem Schalter zu sehen ist.
Wir weisen Sie außerdem darauf hin, das Schloss zu schließen und die Schlüssel zu entfernen bevor Sie
abfahren.
. Verificar el correcto enganche de la maleta asegurándose que ambos mecanismos se disparan (fig.B) y que
los cursores, puestos en el marco del PL (fig.D), están en VERDE.
En caso contrario, abrir la tapa y ejercer presión con ambas manos (fig.E) cerca del mecanismo que todavía
no se ha disparado, hasta el CLACK y la aparición del color VERDE en cursor.
Se recomienda, además, cerrar la cerradura y extraer la llave antes de empezar a conducir.
. Verificar a correta fixação do baú ao suporte, garantindo que ambos os mecanismos estão acionados ( Fig.
B) e que os cursores no quadro do PL ( Fig. D) estão na posição verde.
Em caso contrário, abrir a tampa e aplicar pressão com ambas as mãos ( Fig. E) na proximidade do mecani-
smo que não está travado, até ocorrer CLACK e o cursor ficar na posição verde.
Também é recomendado fechar a trava de abertura do baú e remover a chave antes de sair.
fig. A fig. B
fig. C
fig. D

©Copyright 24/07/2014 AR-Rev00
VALIGIA LATERALE - SIDE CASE - VALISES LATERALES - SEITENKOFFER - MALETAS LATERALES - LADO CASOS
3/5
ISTRUZIONI DI MONTAGGIO - MOUNTING INSTRUCTIONS
INSTRUCTIONS DE MONTAGE - BAUANLEITUNG
INSTRUCCIONES DE MONTAJE - INSTRUÇÕES DE MONTAGEM
TREKKER OUTBACK
SGANCIO- DETACHING - ABNEHMEN - DÉCROCHAGE - DESENGANCHAR - SEPARAR
fig. F fig. G
. Ruotare la chiave in posizione orizzontale, sganciare la valigia tenendo tirata la leva di figura F;
. Turn the key to the horizontal position, release the suitcase pulling the lever (figure F);
. Tournez la clef en position horizontale, détacher la valise en tirant le levier (figure F)
. Drehen Sie den Schlüssel in horizontale Position, nehmen Sie den Koffer ab indem sie am Hebel (Bild F) ziehen;
. Gire la llave a la posición horizontal, desenganchar la maleta (Fig. F);
. Gire la llave na horizontal posicion, desenganchar a maleta (Fig. F);
RIMOZIONE COPERCHIO - COVER REMOVAL - RETRAIT DU CAPOT
ENTFERNEN DER ABDECKUNG - EXTRACCIÓN DE LA CUBIERTA - REMOVER A TAMPA
fig. H fig. I fig. L
. Aprire il coperchio e rimuovere le cordine dalle carrucole (fig. H, I). Premere il pulsante “PRESS” e rimuovere il coperchio (Fig. L).
. Open the lid and remove the cords (Fig. H, I). Press the “PRESS” button and remove the lid (Fig. L).
. Ouvrir le couvercle et détacher le fil de retenue du couvercle (fig H,I) appuyer sur le bouton « PRESS » et libérer le couvercle .
. Öffnen Sie den Deckel und demontieren Sie die Fangbänder von den Rollen (Bilder H, I). Drücken Sie den „PRESS“ Druckknopf und nehmen Sie den
Deckel ab (Bild L).
. Abra la tapa y quite los cables (Fig. H, I). Pulse el botón “PRESS” y quitar la tapa (Fig. L).
. Abrir a tampa e retirar os fios (fig. H, I). Pressione o botão “PRESS” e retire a tampa (Fig. L).

©Copyright 24/07/2014 AR-Rev00
VALIGIA LATERALE - SIDE CASE - VALISES LATERALES - SEITENKOFFER - MALETAS LATERALES - LADO CASOS
4/5
ISTRUZIONI DI MONTAGGIO - MOUNTING INSTRUCTIONS
INSTRUCTIONS DE MONTAGE - BAUANLEITUNG
INSTRUCCIONES DE MONTAJE - INSTRUÇÕES DE MONTAGEM
TREKKER OUTBACK
MANUTENZIONE DELLA VALIGIA - MAINTENANCE OF THE SUITCASE - MAINTENANCE DE LA VALISE
AUFRECHTERHALTUNG DES KOFFERS - MANTENIMIENTO DE LA MALETA - MANUTENÇÃO DA MALA
fig. M fig. N
fig. P
. Un uso prolungato delle valigie può causare infiltrazioni di sporco e fango all’interno dei meccanismi di aggancio. Per un’accurata pulizia svitare le
viti, interne alla valigia, evidenziate in figura M e rimuovere i carter neri evidenziati in figura N. Eliminare lo sporco, aiutandosi anche con acqua, ed
eventualmente lubrificare i meccanismi della leva di sgancio (Fig. O) e le molle dei 2 catanacci poste all’interno del carter centrale (Fig.P).
. Extended use of the bags can cause infiltration of dirt and mud inside the locking mechanisms. For proper cleaning, unscrew the screws shown in the
figure M and remove covers blacks shown in Figure N. Remove dirt, even with the aid of water, and possibly lubricate the mechanisms of the release
lever (Fig. O) and the springs of 2 hooks placed inside the central casing (Fig.P).
. Un usage prolongé de la valise peut entrainer des infiltrations de boues ou de saletés à l’intérieur du mécanisme de fixation. Pour un nettoyage en
profondeur enlever les vis (fig M) et démonter le mécanisme (fig N). Eliminer les saletés, si besoin en nettoyant à l’eau, et éventuellement lubrifier le
mécanisme des crochets de verrouillage (fig O) et les ressorts (fig P) situés à l’intérieur du carter central.
. Eine lange Verwendung der Koffers kann das Eindringen von Schmutz und Dreck in den Befestigungsmechanismen verursachen. Für eine sorgfältige
Reinigung lösen Sie die Schrauben im Bild M und nehmen Sie das schwarze Gehäuse (Bild N) ab. Entfernen Sie den Schmutz mit Wasser, eventuell
schmieren Sie den Mechanismus des Auslösungshebels (Bild O) und die Federn der 2 Riegel in dem Zentralgehäuse (Bild P).
. El uso prolongado de las bolsas puede causar la infiltración de suciedad y barro dentro de los mecanismos de bloqueo. Para una limpieza adecuada,
aflojar los tornillos que se muestran en las figuras M y retirar la tapa negros que se muestran en la Figura N. Eliminar la suciedad, incluso con la ayuda
de agua, y posiblemente lubricar los mecanismos de la palanca de liberación (fig. O) y los muelles de 2 ganchos colocados en el interior del cárter
central (fig.P).
. O uso prolongado dos sacos podem causar infiltração de poeira e lama dentro dos mecanismos de bloqueio. Para uma limpeza adequada, desaper-
tar os parafusos mostrados nas figuras M e remova as tampas negros mostrados na Figura N. Remover a sujidade, mesmo com o auxílio de água
e, possivelmente, lubrificar os mecanismos da alavanca de libertação (fig. ó), e as molas de dois ganchos colocada no interior da caixa de protecção
central (Fig.P).
fig. O
. IL PRODOTTO CHE HA APPENA ACQUISTATO È FRUTTO DI UN PROCESSO PRODUTTIVO ARTIGIANALE: LE VALIGE VENGONO MONTATE E COLLAUDATE SINGOLARMENTE DA PERSONALE SPECIALIZZATO.
LA PRESENZA DI PICCOLI SEGNI O DISOMOGENEITÀ SULLA SUPERFICIE DELLE VARIE PANNELLATURE IN ALLUMINIO SONO DA RITENERSI NORMALI.
. THE PRODUCT YOU HAVE JUST PURCHASED IS THE RESULT OF A CRAFT PRODUCTION : THE CASES ARE ASSEMBLED AND INDIVIDUALLY TESTED BY QUALIFIED PERSONNEL.
THE PRESENCE OF SMALL MARKS OR UNEVENNESS ON THE SURFACE OF VARIOUS ALUMINUM PANELS SHOULD BE CONSIDERED NORMAL.
. LE PRODUITQUEVOUSAVEZACHETÉ A ÉTÉFABRIQUÉARTISANALEMENT: LES VALISESSONTASSEMBLÉES ET TOUJOURSTESTÉESPAR NOTREÉQUIPE QUI ESTTRÈSQUALIFIÉE.
LA PRÉSENCE DES PETITES ONDULATIONSSURLA SURFACE EN ALUMINIUMESTNORMALE.
. DER ARTIKEL, DEN SIE SOEBEN ERWORBEN HABEN, IST AUS EINER HANDWERKLICHEN PRODUKTION: DIE KOFFER WERDEN EINZELN VOM FACHPERSONAL MONTIERT UND GEPRÜFT.
EINIGE KLEINE ZEICHEN ODER UNEBENHEITEN AUF DER OBERFLÄCHE DER ALU-PANELEN SIND ALS NORMAL ZU BETRACHTEN.
. EL PRODUCTO QUE APENAS HA ADQUIRIDO ES FRUTO DE UN PROCESO PRODUCTIVO ARTESANAL: LAS MALETAS SON MONTADAS Y APROBADAS SINGULARMENTE DEL PERSONAL ESPECIALIZADO.
LA PRESENCIA DE PEQUEÑAS SEÑALES O FALTA DE HOMOGENEIDAD EN LA SUPERFICIE DE DISTINTOS PANELES DE ALUMINIO DEBEN CONSIDERARSE NORMALES.
. O PRODUTO QUE VOCÊ ACABOU É RESULTADO DE UMA PRODUÇÃO ARTESANAL: OS BAÚS SÃO MONTADOS E TESTADOS INDIVIDUALMENTE POR PESSOAL QUALIFICADO.
A PRESENÇA DE PEQUENAS MARCAS OU IRREGULARIDADES NA SUPERFÍCIE DOS PAINÉIS DE ALUMÍNIO DEVE SER CONSIDERADO NORMAL.

©Copyright 24/07/2014 AR-Rev00
VALIGIA LATERALE - SIDE CASE - VALISES LATERALES - SEITENKOFFER - MALETAS LATERALES - LADO CASOS
5/5
ISTRUZIONI DI MONTAGGIO - MOUNTING INSTRUCTIONS
INSTRUCTIONS DE MONTAGE - BAUANLEITUNG
INSTRUCCIONES DE MONTAJE - INSTRUÇÕES DE MONTAGEM
TREKKER OUTBACK
Per la natura stessa della materia prima utilizzata facciamo presente che durante l’utilizzo
potrebbero presentarsi delle alonature o macchie sulla superficie. Questo fenomeno può acca-
dere specialmente durante la percorrenza di strade con sale, sabbia o fango. Queste alonature
non possono essere considerate difettosità del prodotto ma sono da ritenersi caratteristica del
materiale utilizzato. Si possono tuttavia prevenire pulendo regolarmente le superfici con normali
spray lubrificanti incolore, il velo protettivo rende più difficile l’aggressione chimica da parte di
agenti esterni. Lo stesso prodotto può essere usato anche a posteriori per attenuare eventuali
macchie comparse dopo l’utilizzo delle borse in ambienti aggressivi. In questo caso si consiglia di
pulire preventivamente le borse con acqua e sapone neutro per togliere tutti i residui di sporco,
e dopo la completa asciugatura l’applicazione di prodotti lubrificanti utilizzando un panno asciutto
e morbido.
“By the very nature of the raw material used for these hard bags, we inform you that rings or
spots may arise on the surface during their use. This can happen especially by riding in roads
with salt, sand or mud. These rings cannot be considered as flaws of the product but as cha-
racteristic features of the material used. However it is possible to avoid it, regularly cleaning the
surfaces with colourless lubricating spray, adds a protective layer which prevents the hard bags
being damaged by the external chemical agents. The same product can also be used retrospec-
tively to remove any stains appear after the use of bags in aggressive environments. In this case,
you should first clean the bags with water and mild soap to remove all traces of dirt, and after
completely drying you should apply the lubricating product using a soft, dry cloth.”
«Par la nature même de la matière première qu e nous utilisons, des stries ou des taches
peuvent survenir sur la surface lors de l’utilisation. Cela peut se produire en particulier lors de
l’utilisation sur des routes avec du sel, du sable ou de la boue. Ces halos ne peuvent pas être
considérés comme un défaut mais sont dus aux caractéristiques du matériau utilisé. Il est tou-
tefois possible d’ éviter cela en nettoyant régulièrement les surfaces avec spray de graissagein-
colore. La couche de protection rend plus difficile l’attaque chimique par des agents extérieurs.
Le même produit peut également être utilisé de manière rétrospective pour atténuer les taches
apparues après l’utilisation des valises dans des environnements agressifs. Dans ce cas, vous
devez d’abord nettoyer les valises avec de l’eau et du savon doux pour enlever toute trace de
saleté et, après séchage complet, pulvériser du graisser et essuyer à l’aide d’un chiffon doux et
sec.
Durch die Beschaffenheit der verwendeten Materialien können sich im Laufe der Zeit kleine Rin-
ge oder Punkte auf der Oberfläche bilden. Dieser Effekt tritt insbesondere bei der Verwendung
auf mit Salz gestreuten Straßen, aber auch im Sand, Matsch oder Schlamm auf. Diese Ringe
oder Punkte sind keine Defekte des Produkts, sondern charakteristisch für die verwendeten
Materialien. Durch regelmäßige Reinigung der Oberflächen mit einem transparenten Spray Sch-
mierstoff lässt sich dieser Effekt weitestgehend vermeiden, da hierdurch ein dünner Schutzfilm
gegen äußere, chemische Einflüsse entsteht. Die gleichen Produkte können auch verwendet
werden, um Schmutzränder nach Verwendung der Koffer in aggressiven Umgebungen zu
entfernen. Hierzu sollten die Koffer zuerst mit Wasser und milder Seife gereinigt werden um
sämtlichen Schmutz zu entfernen, und nach vollständiger Trocknung den Schmierstoff mit einem
weichen, trockenen Tuch aufgetragen werden.
“Por la propia naturaleza de la materia prima utilizada constatamos que durante el uso podrían
presentarse halos o manchas en la superficie. Este fenómeno puede ocurrir especialmente
durante el recorrido en carreteras con sal, arena o barro. Estos halos no deben considerarse un
defecto del producto sino una característica del material utilizado. No obstante, se puede preve-
nir puliendo regularmente la superficie con spray lubricante incoloro, la capa de protección hace
que sean más difíciles las agresiones químicas por parte de agentes externos. El mismo produc-
to puede utilizarse también para atenuar manchas aparecidas después del uso de las bolsas
en ambientes agresivos. En este caso aplicar y dejar secar el producto lubricante, retirando el
sobrante utilizando un paño suave y seco, y paralelamente se aconseja limpiar la bolsa con agua
y jabón neutro para quitar todos los residuos de suciedad”
Pela própria característica da matéria-prima utilizada para estas malas rígidas, nós informamos
que anéis ou manchas podem surgir na superfície durante o uso. Isso pode acontecer principal-
mente após a utilização do produto pilotando em estradas com sal, areia ou barro. Estes anéis
ou manchas não podem ser considerados defeito do produto, mas características da matéria-
prima utilizada. No entanto, é possivel evitar isso, limpando regularmente as superficies com
lubrificante spray incolor, proporcionando uma camada de proteção que evita que as malas
rigidas sejam danificadas pelos agentes quimicos externos. Os mesmos produtos citados podem
ser utilizados de forma reversa para remover as manchas que aparecem após o uso das malas
rigídas em ambientes agressivos. Neste caso, você deve primeiro limpar as malas rigídas com
sabão neutro para remover todos os vestigios de sujeira, os secando completamente. Após a
secagem, você deve aplicar o lubrificante spray com um pano macio e seco.
ATTENZIONE - WARNING - AVERTISSEMENT - WARNUNG - ADVERTENCIA - ADVERTÊNCIA
IT
EN
P
ES
DE
FR
Table of contents
Other GIVI Motorcycle Accessories manuals
Popular Motorcycle Accessories manuals by other brands

DYNATEK
DYNATEK D35-1 installation instructions

Nolan
Nolan N87 PLUS Safety and instructions for use

hepco & becker
hepco & becker 6509502 00 01 Mounting instructions

Livall
Livall BH6X Series quick start guide

hepco & becker
hepco & becker 6304536 00 05 Assembly instructions

gilles.tooling
gilles.tooling AS 31 GT Series installation manual