EVERGLADETM LITTER BIN
4
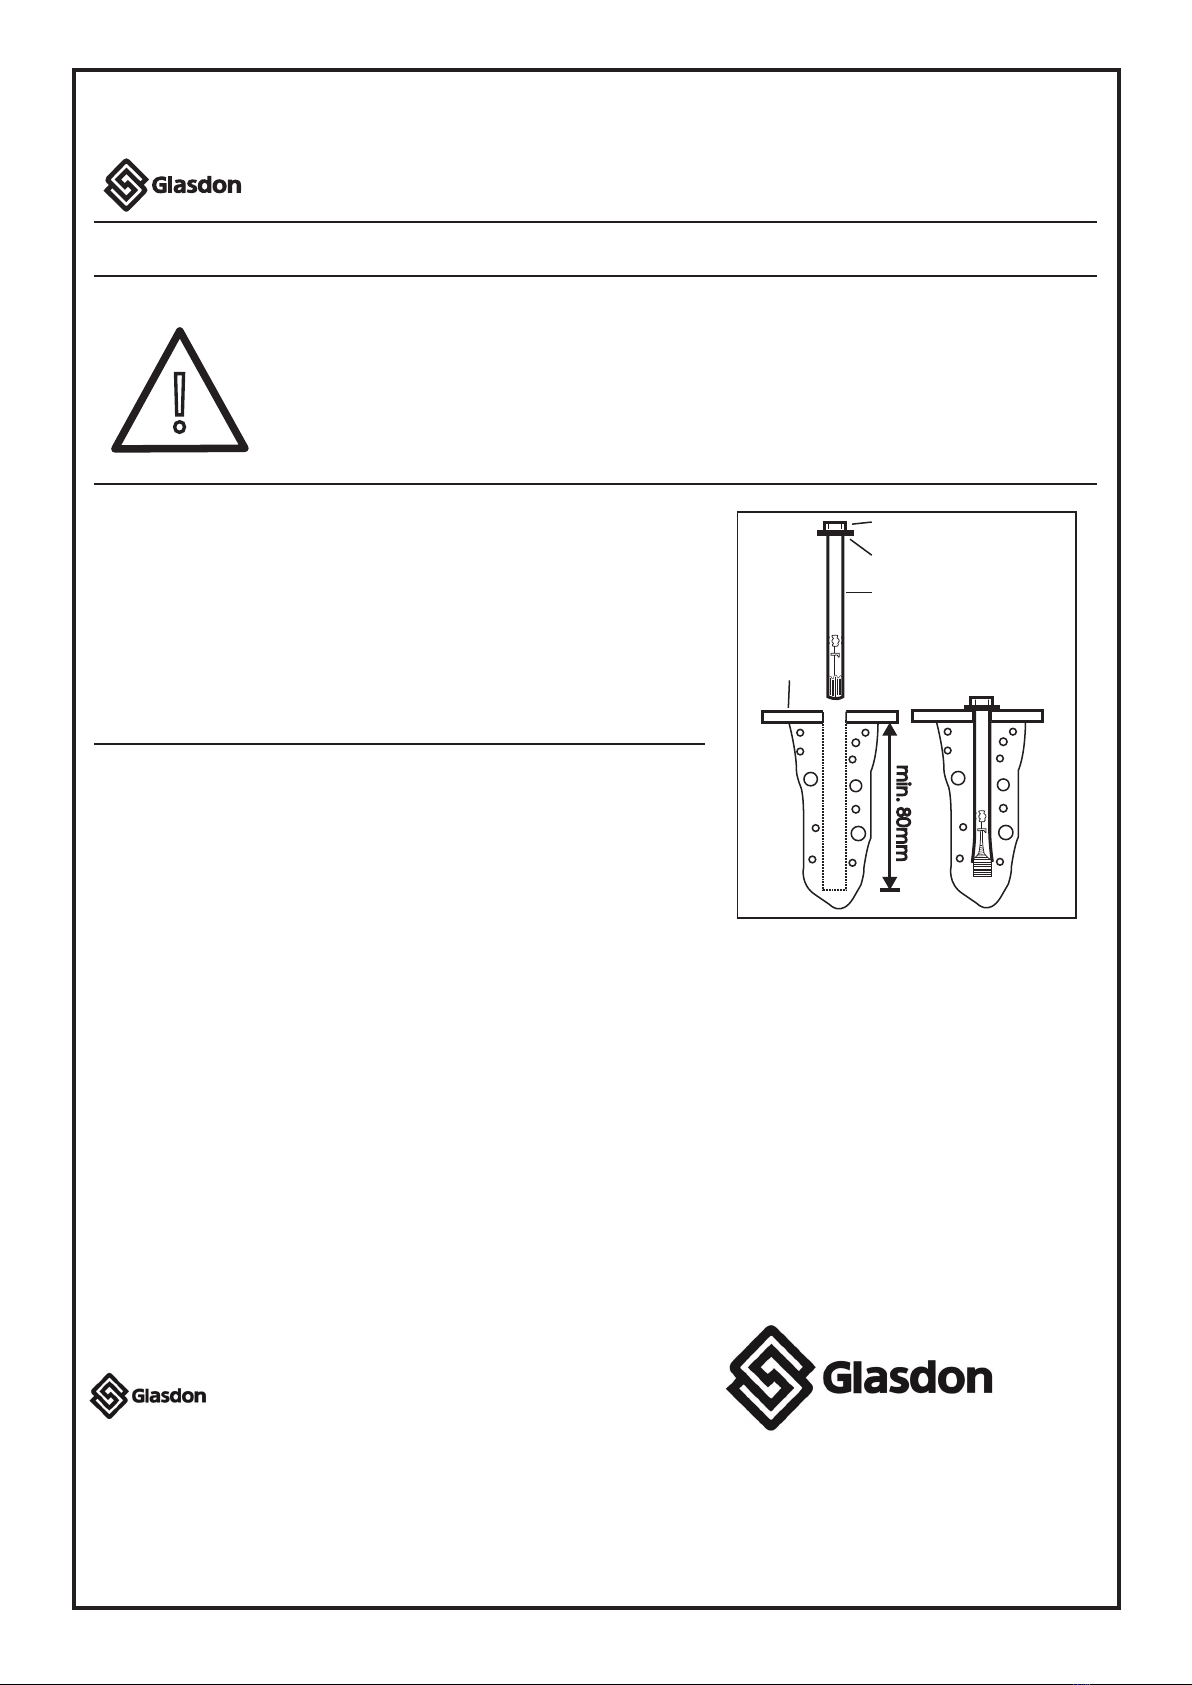
min. 80mm
M10 x 100mm hex head screw
M10 x 30mm washer
anchor sleeve
bin base
Instructions For Concrete/Paving Fixing Kit
KIT CONTENTS
- 4 Ground Bolts
EQUIPMENT REQUIRED
- Drill
- 12mm Masonry Drill Bit
- 17mm Socket Wrench/Spanner
- Hammer
Ensure that personnel carrying out this installation have the relevant qualications/
certicates.
Ensure that all relevant personnel read the points listed within this leaet and that a
copy is given to staff involved with the installation and maintenance of this product.
Please refer to ‘The Manual Handling Operations Regulations 1992’.
Glasdon recommends that a full Health and Safety analysis is carried out prior to
installation.
Note: Always check thoroughly for buried services
!
1. Place bin in the desired position onto a prepared concrete
foundation or concrete paving.
2. Ensure there is a minimum distance of 110mm from the
centre of the intended xing point and the edge of the
foundation/slab.
3. Mark the four outer hole positions from the inside of the bin.
4. Remove the bin and drill the marked holes with a 12mm masonry drill bit to a minimum depth of
80mm, or through the paving slab.
5. Ensure the holes are free from any obstructions and debris caused by drilling.
6. Reposition bin so that the holes in the bin and the drilled holes are aligned, then insert all four
Ground Bolts.
7. Ensure the washer is in positon at the top of the Bolt and tap down all xings using a hammer.
8. Tighten up all the Bolts using a 17mm socket wrench/spanner until tight and the bin is secured
soundly (maximum recommended torque setting is 40Nm).
Glasdon U.K. Limited
Preston New Road
BLACKPOOL
Lancashire FY4 4UL
Tel: 01253 600410
Fax: 01253 792558
web: www.glasdon.com
AND EVERGLADE ARE TRADEMARKS OF GLASDON GROUP OR ITS
SUBSIDIARIES IN THE U.K. AND OTHER COUNTRIES
•A planned maintenance schedule of regular inspection is recommended, replacing
components as necessary.
• Replacement components are available direct from GLASDON UK LIMITED.
• GLASDON UK LIMITED cannot be held responsible for claims arising from incorrect
installation, unauthorised modifications or misuse of the product.
Issue 1 November 2012 C000/0436
© Copyright 2012
Glasdon UK Ltd reserve the right to alter specifications without prior notice.