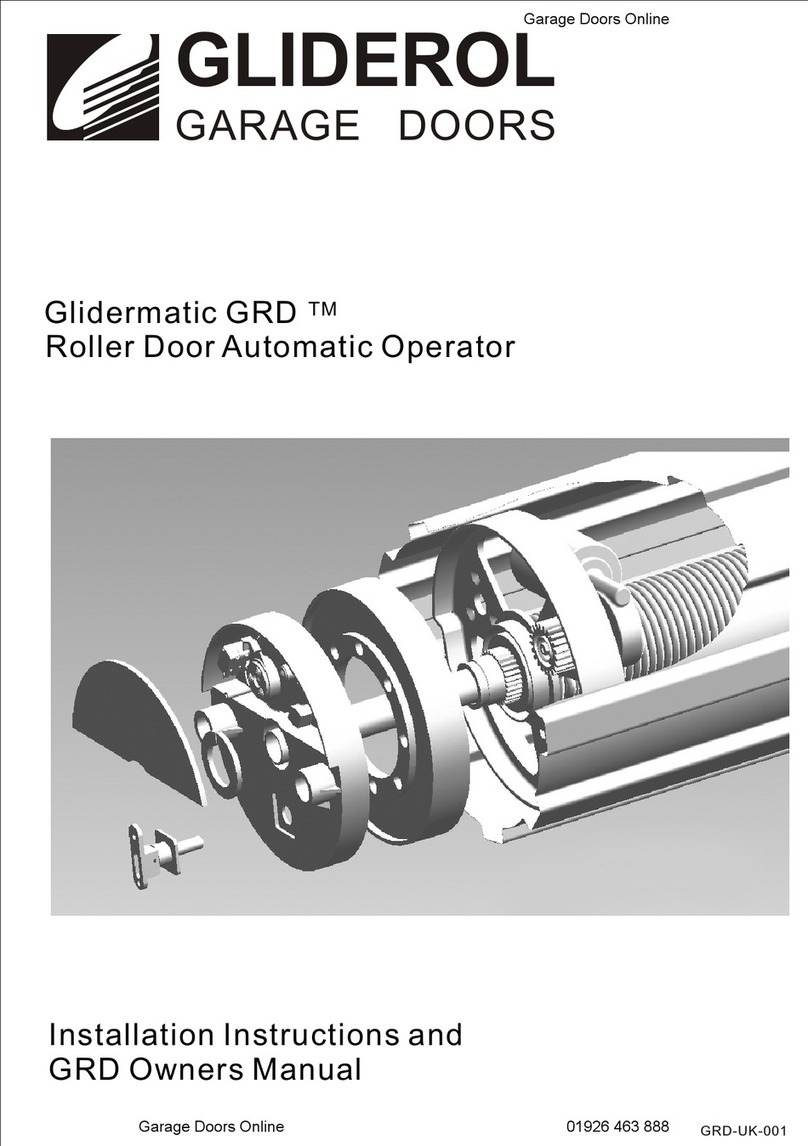
Gliderol Glidermatic GTS+ Quick start guide

Glidermatic GTS+ Installation Instr uctions & ow ner’s manual Page 1
Glidermatic GTS+
Heavy Duty Automatic Tilt and Sectional Door
Operator
Installation Instructions and
Glidermatic GTS+ Owners Manual

Glidermatic GTS+ Installation Instructions & owner’s manual Page 2
Glidermatic GTS+ Assembly (Exploded View)

Glidermatic GTS+ Installation Instr uctions & ow ner’s manual Page 3
Stage 1 - Install the Lintel Bracket
It is essential the door header be substantial as nearly all the force generated by the
opener is concentrated via the header bracket.
Det ermine the centre of the door and continue t his vertical line through the header.
Open t he Door and find the highest point to which t he top of the door reaches, using an
appropriat e st raight edge and level.
Transfer this height to t he header and lower the door.
Increase the dist ance from this height by 30mm if possible.
Grab t he lintel bracket and place the flat bot t om of t he flanges at t he height det ermined,
fixing wit h screws (not supplied).
Note: Headroom requirements and the need to avoid obstructions sometimes makes
it necessary to move the bracket higher.
Stage 2 - Attach Track to Power Unit
Place t he track end over the geared shaft of t he power unit and slide down.
Ensure t rack and unit are correctly aligned.

Glidermatic GTS+ Installation Instr uctions & ow ner’s manual Page 4
Stage 3 - Lock Track to Power Unit
Place t he 2 x ‘U’ brackets over t he t rack and slot holes into threaded st uds.
Place and tighten brackets with M 6 nut s provided.
Stage 4 - Attach Track to Lintel Bracket
Slot the ot her end of the t rack between the flanges of the inst alled lint el bracket.
Insert large pin provided and lock wit h ‘R’ Clip.

Glidermatic GTS+ Installation Instr uctions & ow ner’s manual Page 5
Stage 5 - Attach Bracket and Arms to Carriage
Assemble com ponent s below t o the carriage (at tached t o t he track).
All fast eners provided.
Stage 6 - Measure Height of Ceiling
Raise the track and power unit and rest it above the roller t racks.
M anually slide the carriage back t o t he power unit.
Raise the door t o the open position.

Glidermatic GTS+ Installation Instr uctions & ow ner’s manual Page 6
Stage 7 - Secure the Power Unit
Cut t he ‘L’ bracket s to the measured length (as per stage 6).
Find secure inst allation point in ceiling.
Attach ‘L’ bracket s to pow er unit with t he remaining M 8 fasteners (supplied
Inst all power unit to ceiling. (Fasteners not supplied).
NOTE: Ensure the track is line up centre with the door.
Stage 8
-
Install flat Hinge to Door
Slide door back down t o t he closed position.
M anually move the carriage back to the Lint el bracket end and lock into one of the m anual lock holes’.
Attach t he flat hinge bracket to the door, as per the guide on t he next page.
M easure height of ceiling to the bott om of t he track.
This distance will be required for t he length of the ‘L’ brackets.
Note:
While fixing t he Hinge bracket and connecting pusher arm and boom erang arm together make sure the carriage pin
engages t o one of t he t hree holes on the shaft w hilst the door in fully close position, this gives the option to lock t he door
in manual operation.

Glidermatic GTS+ Installation Instr uctions & ow ner’s manual Page 7
Note: If the bracing is fit ted t o t he top panel w here applicable as show n above, make sure t he boom erang arm does not
touch t he bracing during the normal operation of the door, if it does int erfere adjust the position of the hinge bracket on
the vert ical st ile to ensure there is no interference.
Bracing if applicable

Glidermatic GTS+ Installation Instr uctions & ow ner’s manual Page 8
PCB Index
1 M ot or Connect or 5 Hall Connector
2 Transformer Connector 6 Control Panel Connector
3 Wireless Phot ocell Connector 7 EAS Receiver Connector
4 Ext ernal Light Connector 8 External I/ O Terminal

Glidermatic GTS+ Installation Instr uctions & ow ner’s manual Page 9
User Interface
Transmitter Coding – By Controller
1. Press and hold [ENTER] for 2 seconds t o ent er menu selection
2. Using [UP] and [DOWN] to select Learn opt ion, and press [ENTER]
3. While the [INDICATOR] is lit, press the desired operation key on transmit ter
4. A beep will signal for successful coding. Tw o beeps signal for a transm it ter already in memory
5. Unit w ill automatically exit the setup aft er 3 seconds
Transmitter Coding – By Transmitter
1. Using an already programmed transmitter, press and hold OPEN
& STOP keys simultaneously for 2 seconds
2. Unit will beep three times to signal for Learn M ode
3. Press the desired operation key on t he new transmit ter
4. A beep will signal for successful coding. Two beeps signal for a
transmitter already in memory
5. Unit will automatically exit the setup after 3 seconds
OPEN / M ENU
UP
STOP / M ENU ENTER
CLOSE
/ M ENU
DOWN
M ENU
SETTING INDICATOR
[KEY1] STOP
[KEY2] OPEN
[KEY3] CLOSE

Glidermatic GTS+ Installation Instr uctions & ow ner’s manual Page 10
Transmitter Key Setting
1. Press and hold [ENTER] for 2 seconds t o ent er menu selection
2. Using [UP] and [DOWN] to select Key option, and press [ENTER]
3. [INDICATOR] will lit to show current key configuration
4. Using [UP] and [DOWN], select the desire transmitter key setting
from the below options
Single Button Configuration: Any one of t he three buttons in the transmitter can be used t o
control all three functions Stop/ Open/ Close. Useful w hen one transmitter can operate more
than one door and a m aximum of three doors.
5. Press [ENTER] to confirm selection, and a beep will signal for successful setup.
Transmitter Code Erase
1. Press and hold [ENTER] for 2 seconds t o ent er menu selection
2. Using [UP] and [DOWN] to select Learn opt ion
3. To erase all transm it ter code in mem ory, press and hold [ENTER] for 5 seconds
4. When [INDICATOR] diminishes, all codes have been erased
KEY 2
K
EY
1
K
EY
3
[KEY1]
Stop/ Open/ Close
[KEY1] STOP
[KEY2] OPEN
[KEY3] CLOSE
OPEN / STOP / CLOSE
Three Button Configuration: Each but t ons in the transmitter can be used t o control
individual functions like functions St op/ Open/ Close of eth same door.

Glidermatic GTS+ Installation Instr uctions & ow ner’s manual Page 11
Limit Setting – By Controller
1. Press and hold [ENTER] for 2 seconds t o ent er menu selection
2. Using [UP] and [DOWN] to select Limit option, and press and hold [ENTER] until all menu LEDs
blink
3. While the menu LEDs blink, proceed t o setup the TOP limit, by using transmitt er’s OPEN & CLOSE
keys, and confirm TOP lim it position by pressing STOP key
4. Then set t he BOTTOM lim it , also by using t ransmit t er’s OPEN & CLOSE keys, and confirm
BOTTOM limit position by pressing STOP key
5. Once limits are set, the unit will automatically perform a full calibration cycle
6. When the door is closed after calibration, the limits are successfully setup
Limit Resetting – By Transmitter
1. Using an already programmed transmitter, press and hold OPEN
& CLOSE keys sim ult aneously for 10 seconds
2. While the menu LEDs blink, proceed t o setup the TOP limit, by
using transmitt er’s OPEN & CLOSE keys, and confirm TOP limit
position by pressing STOP key
3. Then set t he BOTTOM lim it , also by using t ransmit t er’s OPEN & CLOSE keys, and confirm
BOTTOM limit position by pressing STOP key
4. Once limits are set, the unit will automatically perform a full calibration cycle
5. When the door is closed after calibration, the limits are successfully setup
Force Setting
1. Press and hold [ENTER] for 2 seconds t o ent er menu selection
2. Using [UP] and [DOWN] to select Force option, and press [ENTER]
3. [INDICATOR] will lit to show current force configuration
4. Using [UP] and [DOWN], to adjust the force in the below manner
6. Press [ENTER] to confirm selection, and a beep will signal for successful setup.
Increase – Low Sensitivity
Decrease – High Sensitivity
[KEY1] STOP
[KEY2] OPEN
[KEY3] CLOSE

Glidermatic GTS+ Installation Instr uctions & ow ner’s manual Page 12
Automatic Closing Setting
1. Press and hold [ENTER] for 2 seconds t o ent er menu selection
2. Using [UP] and [DOWN] to select Auto option, and press [ENTER]
3. [INDICATOR] will lit to show current configuration
4. Using [UP] and [DOWN], to adjust the aut omat ic closing set ting in the below manner
80s
70s
60s
50s
40s
30s
20s
10s
OFF
Above shows a setting for 50s aut omat ic closing
5. Press [ENTER] to confirm selection, and a beep will signal for successful setup.
LED Control
Under 3 Keys transmit ter mode, the LED can be switched on and off using the STOP key. This will
also output t o the EXTLIGHT terminal on-board.
Vacation M ode
Transm it ter signal can be locked out by pressing STOP & CLOSE keys simult aneously and holding it
for 3 seconds on the t ransmitter. To deactivate, press t he same keys again and hold it for 3 seconds.
Key Ring Transmitter
Battery Type 3V CR2016x2 (Lithium Cell)
To replace batt eries:
1. Remove the screw on the back case.
2. Replace t he old bat t eries w it h new ones (3V CR2016x2) and ensure plastic strip remain int act in clip.
3. Locate back of case and secure with screw.
Plast ic St rip
Note: If Auto Close is enabled it is important to fit an
auxiliary safet y device like Photo beams to avoid human
entrapment or door accident ly hitting any object.

Glidermatic GTS+ Installation Instr uctions & ow ner’s manual Page 13
Photo Sensor Connection Diagram
External W all Switch Connection Diagram
External Light Connection Diagram
(Optional Interface Board Required)

Glidermatic GTS+ Installation Instr uctions & ow ner’s manual Page 14
Technical Specifications:
CHARACTERISTICS SYM BOL M IN. TYP. M AX. UNIT
Input Volt age 218 240 262 VAC
System Power Dissipation 100 W
Transformer Power 100 VA
Transformer Output Voltage TR 21.6 24 26.4 VAC
Work Volt age of M ot or M OTOR 18 24 34 VDC
Lamp Power LED1~LED6
0.36 W
Buzzer Voltage BZ1 12 VDC
Fuse FUSE 15 A
Carrier Frequency Range Handset 389.9 390 390.1 M Hz
M odulation Handset AM
Deviation Handset 100 100 KHz
RF Output Power Handset 8 uW
Transm it ter Batt ery Handset 6 VDC
Demodulation M ode RF1 AM
Receiver Sensitivit y RF1 ‐90 ‐100 dB
Date Rate RF1 1K Hz
Operation Temperature ‐20 25 85 ℃
Output Volt age in circuit
board
terminal (0.5 amps M ax)
12 V

Glidermatic GTS+ Installation Instr uctions & ow ner’s manual Page 15
Plug-in EAS Receiver (Optional)
1. Remove the screw and motor cover
2. Remove the LED lens and tw o screws
3. Lift up the control panel cover to find the PC board

Glidermatic GTS+ Installation Instr uctions & ow ner’s manual Page 16
4. Plug the EASreceiver into the EASreceiver sockets properly
5. Replace control panel cover, LED lens and mot or cover and secure wit h screws
EAS Receiver Index
GHI Transmitter Coding
1. Press and hold [1] SW1, until [2] LED blinks twice
2. Press buttons 4& 5 simultaneously on the GHI t ransmitter to code
3. [2] LED w ill blink twice to confirm successful programming
GHI Transmitter Code Erase
1. Press and hold [1] SW1 continuously, unt il [2] LED blinks and goes out finally
2. Aft er [ 2] LED goes out , all codes have been erased
1
2
3

Glidermatic GTS+ Installation Instr uctions & ow ner’s manual Page 17
GHI Transmitter Key Setting
GHI transmit ter operation key can be set using [3] SW 2, by referring to t he below dip switch
configuration t able
Dip Switch
Key
1 2 3 4
ON OFF OFF OFF Button 1
OFF ON OFF OFF Button 2
ON ON OFF OFF Button 3
OFF OFF ON OFF But ton 4
ON OFF ON OFF But ton 5
OFF ON ON OFF Shift + Button 1
ON ON ON OFF Shift + Button 2
OFF OFF OFF ON Shift + Button 3
ON OFF OFF ON Shift + Button 4
OFF ON OFF ON Shift + Button 5

Glidermatic GTS+ Installation Instr uctions & ow ner’s manual Page 18
The Glidermatic brand and it s complete product range is w holly ow ned and operated by Gliderol Garage Doors.
M anufact urers Product W arrant ies Stat ement
Our goods com e wit h guarant ees t hat cannot be excluded under the Australian Consumer Law. You are entit led t o a replacement or refund for a
major failur e and for com pensation for any other r easonably foreseeable loss or damage. You are also entitled to have the goods repaired or
replaced if t he goo ds fail t o b e of accep tabl e qualit y and the failur e does no t am oun t t o a m ajor failure.
In addi tion, w e o ffer our Gli der ol W arrant y as set o ut bel ow . The benefit s given t o you b y our Glider ol W arrant y are i n addit ion t o o th er right s and
rem edies you may have under the Australian Consum er Law. Our Gliderol Warranty does not exclude, restrict or m odify any such statutory r ight s or
rem edies which cannot be excluded.
For pr odu ct s sold and inst alled by Glider ol, t he Gli der ol W arrant y extends t o cover def ect s of m anu facture and cost s o f deliver y and/ or r e-
instal lat ion o f any pro duct repair ed or rep laced under t he t er ms of t he Glider ol W arrant y. In all ot her circumstances, w her e t he pro duct s ar e
supplied by a third par ty, t he Glider ol W arranty covers def ects of m anufacture only and does not include costs of reinstallat ion or delivery.
This is not int ended to exclude, restrict or m odify any right or r emedy to w hich you may otherw ise be entit led in respect of delivery or re-
installation under t he Australian Consum er Law .
Sche dule of W arrant y Period for Individual Component s
Our Glidero l W arr ant y appli es for th e per iods (t he Ap plicable W arrant y Period) stat ed as fol low s:
Gliderol Panelglide Sectional Overhead Door
1 year on all component s, labour & w orkm anship, if fit ted by an authorised Gliderol Distributor or Gliderol Technician.
3 m ont hs war rant y on spr ing t en sio n.
1 year on part s only, if fit t ed b y part ies ot her t han an au th orised Glidero l Dist rib ut or or Glid erol Technician.
Glidero l str ongly recom mends t hat t he Glid erol Panelglide Sect ional Overhead Door b e serviced by an aut hor ised Glider ol Distr ib ut or or Glid erol
Technician ever y 18-24 m ont hs t o ensure longevit y of t he pr od uct s life.
Gliderol Timba-glide/ Aluglide Sectional Overhead Door
1 year on all component s, labour & w orkm anship, if fit ted by an authorised Gliderol Dist ribut or or Glider ol Technician.
(Excludes tim ber sur face coat ings applied by a third part y ot her than Gliderol, w hich have no warranty).
3 m ont h w arr ant y o n spr ing t ension.
1 year on part s only, if fit t ed b y part ies ot her t han an au th orised Glidero l Dist rib ut or or Glid erol Technician.
Gliderol strongly recom m ends that the Glider ol Timba-glide/ Aluglide Sectional Overhead Door be serviced by an authorised Gliderol Distribut or or
Gliderol Technician every 12-18 m onths t o ensur e longevity of the products life.
Gliderol GTS 2000 & GTS+ Sectional Overhead Door Operator
Dom estic / Resident ial use –
GTS 2000 & GTS+ - 5 years on m ot or only. 1 year on all com po nent s, labour & w or kmanship, i f fi tt ed by an aut hor ised Gliderol Distri bu tor or
Gliderol Technician. (Excludes bat ter ies, fuses & light s globes, which have no warranty)
GTS+ Optima - 5 years on m ot or only. 1 years on elect ronics, com ponent s, labour & w orkmanship, if f it ted by an authorised Gliderol Distributor or
Gliderol Technician.
(Exclud es bat t eri es, f uses & light s glob es, w hich have no warr ant y)
1 year on part s only on GTS+ 2000, GTS+ and GTS+ Opt im a, if f it t ed by par ties o t her t han an au thori sed Glid erol Distr ibu tor or Glid erol Technician.
Gliderol strongly recomm ends t hat the Gliderol GTS+ 2000, GTS+ & GTS+ Optim a Sect ional Overhead Door Operator be serviced by an aut horised
Glidero l Distr ibut or or Glider ol Technician every 18-24 m ont hs t o ensur e lo ngevit y o f t he prod uct s li fe.
Product W arrant y Condit ions
W arrant y Condit ions
1. Subject t o the follow ing specific lim itations and except ions, and in addit ion to all right s and remedies to which you m ay be entitled under t he
Australian Consum er Law , Gliderol w arrant s all new doors, mot ors and electr onic com ponents of Glider ol's manufacture, sold and installed by
Gliderol, to be free from defect in workmanship under norm al use and service for the Applicable Warrant y Period prescribed above.
2. During the Applicable Warranty Period, Gliderol will m ake good any def ect as described in clause 1 above by repairing or replacing the aff ected
product or par t (at its option) PROVIDED THAT notice of any claim ed defect in m aterials or w orkmanship in or resulting from installation of any door
shall have been given t o Glider ol w ithin t he period from dat e of installation as prescribed above.
3. For pr oducts sold t hr ough or inst alled by an aut horised Glid erol Dist ribu tor or ot her par ty (ot her t han an accr edit ed Inst aller Cont ract or
nom inated by Gliderol), our Glider ol Warranty covers only defects of manufacture and does not include:-
• Any defects caused by or r elat ed to t he installat ion of that product , nor
• The cost of delivering or r e-installing a product that is r epaired or replaced.
This limit at ion does not exclude, restrict or m odify any right or remedy to w hich you may otherw ise be entitled in respect of delivery or re-
installation under t he Australian Consum er Law or other applicable law s, which m ay not be excluded.
4. Our Gliderol W arrant y does not apply t o any defect, loss or dam age arising or caused directly or indirectly by or as a result of :-
(i) Any m asonry r endered or ot her surfaces cracking or collapsing during installat ion of t he door
(ii) Any defect or det erioration of tim ber including dr ying out aft er installation
(iii) Any weakening or collapse of the structure t o which t he doors are affixed occurring any tim e after installation
(iv) Any damage t o or deterioration in t he condition of t he doors occurring in transit by custom er nominat ed or appoint ed carrier or occurring aft er
delivery and prior t o installation
(v) Any defect (including defect s in com ponent parts or accessories) rising from or at t ributable t o t he failure to carry out normal preventive
m aint enance or adj ustm ent
(vi) To any additional defect damage or deterioration arising from or attributable to the operation of the door af t er it is known t o be defective
(vii) Any d oor bei ng in st all ed w it hi n 800 m et res o f t he sea or ot her bo dy of w at er of eq uival ent or great er salt concent rat ion or in an area subject
to industrial fall out
(viii ) Any faul t or sur ge in cust om er’s elect ricit y supply
(ix) The door striking an imm ovable object dur ing travel

Glidermatic GTS+ Installation Instr uctions & ow ner’s manual Page 19
Pr oduct W arrant y Con dit ion s Con t..
5. Items excluded from our Gliderol Warranty ar e:
(i) Bat t eries
(ii) Fuses
(iii) Globes
(iv) Sensit ivit y ad just ments
6. Water dam age voids the Gliderol W arranty on all electronic components.
7. While Glider ol doors are long lasting and hard w earing under norm al condit ions our Glider ol Warranty does not extend t o inher ent defects in
steel or o ther m ater ial used in t he m anufact ur e. Glid erol w ill ho wever , w her e possi ble, procur e and assign t o t he cust om er t he b enefit o f t he
warranty of t he m anufact urer of the steel or ot her m at erial.
8. If Gliderol has at r equest of a cust om er pr ocur ed paint ing, pow der coat ing or ot her surface applicat ion t o it s pr oduct, t he Glider ol W arrant y d oes
not ext end t o such pain ti ng, pow der -coat ing or ot her sur face application. For t his purpose, Gliderol at all t im es act s as agent of cust om er . Gliderol
may, as a service to t he custom er but w it hout any legal obligat ion t o do so, assist custom er t o obtain redress in r espect of any defect .
9. Except as is pr ovided by t he Gliderol Warranty and subject t o any rights or remedies t o w hich you may be ent itled under t he Australian Consum er
Law or ot her applicable law which may not be excluded, , t his Gliderol W arranty supersedes and excludes all representations, w arrant ies and
conditions w het her expressed or im plied by law and Gliderol shall have no liabilit y or ot herw ise t han herein provided f or any loss and damage
(including consequent ial loss and dam age, loss of use or profit s) by reason of delay, defective or faulty m at erials or workmanship, negligence or any
act, m at t er or t hi ng do ne per mi tt ed or om it t ed t o be do ne by Glidero l.
10. Gliderol reserves t he right t o t ouch up on sit e Color bond an d or pr e-paint ed sur faces on i ts r ange of garage doors bu t, n o r espo nsibili ty w ill be
taken for t he possibility of any paint rubs or scuffing on the internal w ash coat f inish or ext ernal painted sur face.
11. To make a claim under our Glider ol Warrant y:
(a) if you purchased your product dir ectly fr om Gliderol, you m ust send your claim t o one of t he addresses listed at the end of this warrant y; or
(b) if yo u pur chased yo ur pr od uct f rom an aut hor ised Glid erol Distr ibut or or ot her non -Glider ol ent it y, you m ust m ake your claim t hr ough t hat
auth or ised Distr ibut or or ot her non-Gli derol ent it y.
Proof of purchase M UST be provided at the t im e of the Gliderol Warranty claim.
Any cost incurr ed by you in m aking a claim under our Glider ol Warrant y w ill be borne by you.
12. The Gliderol Warranty is given by:
Name: Glider ol International Pty Lt d
Company address: 32 Jacobsen Crescent, Holden Hill SA 5088
Company t elephone number: +61 8 8360 0002
Com pany em ail address: int@gliderol.com.au
CONDITIONS OF SALE AND INSTALLATION DIRECTLY FROM GLIDEROL
1. The f ollow ing condit ions of sale and inst allat ion ap ply only t o prod uct s sol d dir ect ly b y Glid erol. These cond it ions do n ot apply t o t he sale of
product s by aut hor ised Gli der ol Distr ibut ors or ot her non-Gli der ol enti ti es.
2. THIS ISA QUOTATION ONLY – recommending type and size of doors suitable f or the job. Confirmat ion as an or der should be given by custom er t o
Gliderol’s Represent at ive or t o Gliderol’s Office, “ in writing” w her eupon t his quotat ion shall become a Cont ract for Sale and w here applicable also a
contract for Installat ion.
3. The det ails given in the quotat ion are subject t o any alt eration or preparation to be carried out by custom er as specied on front of t his quotation.
4. Where openings are not complete or actual accurat e m easur ements cannot be taken on site, the Glider ol Doors sizes and costs given in t his
quotation are estimated only and w ould be subject t o r evision w hen accurat e measur ements can be taken on com plet ion of t he opening.
5. M anufact ure of Glider ol Doors w ill not comm ence unt il accur at e sit e m easur em ent s ar e avai lable and can be checked.
6. W her e Glid erol Door s are m ade t o sui t fl oor l evels, lint el height s or o penin g sizes guaran teed by t he cust om er, an y depar t ure f rom t he given
sizes will be the responsibility of t he custom er as w ill any costs involved in alt eration of m ade-up Gliderol Doors.
7. Any delivery, and/ or installation dates given ar e approxim at e only and Gliderol accepts no liabilit y for delay from any cause whatsoever. If by any
reason or Act of God, war, governm ent or semi-government enactm ent, regulat ion or restriction, lock-out, strike, industrial disput e, fire, t em pest,
flood, failur e or inability to obt ain licenses, t ransport or mater ials or any other cause beyond Gliderol’s contr ol of delivery or installat ion is delayed
Gliderol m ay ext end t he t im e of delivery or installation or if Glider ol is unable t o deliver or install, the contract shall be voidable at Gliderol’s opt ion
with no right to eit her part y for damage, loss, cost or expense.
8. If t hese condi tions o f sale (w hich shall only be vari ed, m od ified or r escind ed by w rit t en agr eem ent execut ed by Glider ol ) shall diff er in any
respect fr om t he cust om er’s accept ance or confir mat io n t hen t hese condit ions shall pr evail.
9. This quo tat ion is open for accept ance for a p erio d o f 60 days fr om t he dat e of quot at ion. Accept ance t her eaf ter w ill be at t he o pt ion of Glider ol
and subj ect t o it s w rit t en agr eem ent .
10. PRICE VARIATION: The prices quot ed are based on current list prices for Gliderol Doors and M aterial and Labour at dat e of quotation. Any
variation in these prices before com pletion of the Contract would be to customer’s account.
11. TERM S OF PAYM ENT: (i) Unless specfically varied in writ ing by Gliderol the t erms of paym ent are in full on delivery (ii) If credit is extended the
term s of paym ent are Net t 7 days. (iii) Default in paym ent in accordance w ith invoiced t erms for payment w ill result in the custom er becoming
liable t o pay all Glider ol' s r ecovery cost s and in ter est fixed at 5% of invoice valu e. (iv) The cust om er ackn ow ledges t hat all r igh t t it le and in ter est in
the goods particularised her eon shall remain the propert y of t he vendor M anufacturer until such t ime as paym ent in full has been made. At any
time af t er delivery and prior to paym ent the vendor, Glider ol shall have the right t o ent er into and upon any premise upon which t he goods may be
stor ed or i nst alled and rem ove sam e w it hout it s incurr ing any liabili ty in relat ion t her et o an d t he cust om er hereb y appoint s t he vend or
M anufacturer his or her servant agent and at t or ney for the such purposes. (v) Deposit is non-r efundable if t he job is cancelled by t he
cust om er/ cust om ers’ agent if t he d oor has com m enced m anufact ur e.
12. To secur e t o Gliderol t he paym en t of t he price t he cust om er as o wn er l essee or t enant of t he pr emises her eby char ges th e cust omers in ter est in
t he pr em ises w it h t he paym en t of t he price. Gliderol m ay at any t im e aft er (but not befor e) default by t he cust om er lodge a caveat over t he
cust om ers int er est i n t he pr emi ses.
13. Any discount applicable will not be granted if the account is unpaid aft er 7 days.
14. Gliderol does n ot it self carry o ut in st allat io n but w ill nom inat e an accredit ed Installer Cont ract or t o carry ou t th e w ork on it s behalf. Installatio n
is t hen a m att er of separ at e cont ract w it h t he Inst aller w hose par t icular s ar e eit her pr ovided in t hi s Quo tat ion or w ill be pr ovided upo n con-
firm at ion by the customer. Gliderol has taken all reasonable care to ensure t hat any Installer Contractor nominat ed is compet ent, experienced and
skilled in t he installat ion of Gliderol’s doors. Glider ol w ill at all times use it s influence t o ensure any installation com plaint is dealt wit h prom pt ly and
resolved t o t he r easonabl e sat isfact io n o f t he custom er . The cust om er’ s att ent io n is also dir ect ed t o t he t erm s of t he w arr ant y herei n.
15. The installation costs cover only the w ork specified on the quot ation and do not, unless specially stated, include r ectificat ion of existing out-of-
square openings or r emoval of old doors and fit tings or electricity or gas fit tings or the like.
16. Whilst reasonable care will be taken w hile drilling and fixing, Gliderol and its Installers will not be responsible for the failur e, from any cause
whatsoever, of any masonry or rendered sur faces while drilling or fixing by cracking or collapsing.
17. The Term “ Take down old doors” or sim ilar w ords used in t his quotation refers only to t he taking of old doors off t he structure and does NOT in
any w ay im ply r em oval or t aking aw ay of any old d oors from the pr op erty or of disposing of such d oors.

Glidermatic GTS+ Installation Instr uctions & ow ner’s manual Page 20
W arranty Form
Name Address
Product Type Installation Date
Supplier (Dist ributor)
Installer Phone No
Address
Installers Signature
NOTE: THIS FORM M UST BE COMPLETED BY THE INSTALLER AND PRODUCED AS PROOF OF PURCHASE DATE WHEN
M AKING A SERVICE CALL UNDER WARRANTY, OTHERWISE SUCH CALLS ARE LIABLE TO SERVICE CHARGES.
FOR SALES AND SERVICE, CONTACT
GLIDEROL INTERNATIONAL PTY LTD ABN 92 007 928 949
Head Office
Gliderol Garage Doors
32 Jacobsen Crescent , Holden Hill, SA 5088
Phone (08) 8360 0000 Fax (08) 8261 9700
Victoria
Gliderol Garage Doors
23 Kitchen Road, Dandenong, VIC 3175
Phone (03) 9793 5455 Fax (03) 82619700
New South W ales
Gliderol Garage Doors
45 Summit Street , Smit hfield, NSW 2164
Phone (02) 9725 1033 Fax (02)9725 1115
Queensland
Gliderol Garage Doors
241 Elliot Road, Banyo,QLD 4014
Phone (07) 3260 9000 Fax (07) 3260 9055
W estern Australia
Gliderol Garage Doors
48 Luisini Road Wangara WA, 6065
Phone (08) 9408 4427 Fax (08) 9309 2777
OR YOUR LOCAL SUPPLIER
Other manuals for Glidermatic GTS+
2
Table of contents
Other Gliderol Door Opening System manuals
Popular Door Opening System manuals by other brands

Pamex
Pamex GHFA590 installation instructions

CDV Group
CDV Group DIGIWay DWS102 Series Use and installation manual

Relcross Door Controls
Relcross Door Controls 9130 installation instructions

Stanley
Stanley QDC-200 installation instructions

RESQTEC
RESQTEC 2064.100M.BS user manual

Excel
Excel XL8500 Series Installation