Step 1
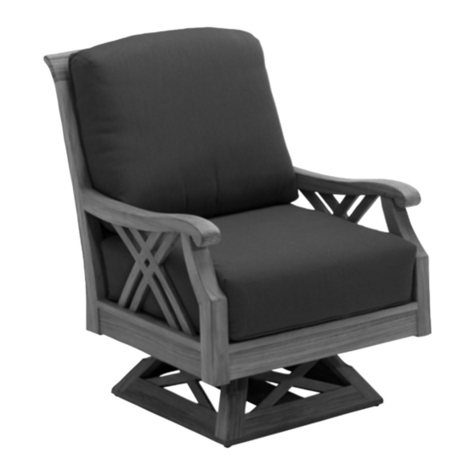
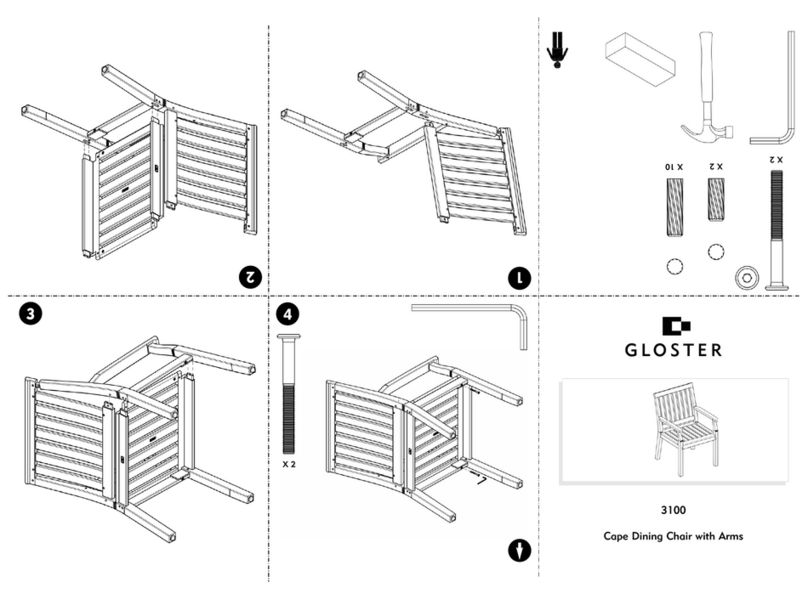
Lay the seat section flat on a protected level surface. Place the back section onto the seat
section (concave side facing forward) and secure with the two screws ‘A’ from underneath
the chair. Tighten using the 4mm Allen key provided.
Step 2
Turn the seat/back assembly onto its side and insert Cross Pin ‘B’ into the hole in the cross
brace of the back section. Place a leg/armrest section into position ensuring that the dowels
fit into the cross brace of the back section as well as the four holes in the seat section.
Insert a Brass Hollow Rod ‘C’ into the leg/armrest section as indicated. Insert Bolt ‘D’ into
the same hole as well as Brass Dome Head ‘F’ on the back of that hole. Bolt ‘D’ should
screw into the Brass Dome Head ‘F’. Tighten using the 5mm Allen key provided. Insert Bolt
‘E’ into the hole in the armrest. It should locate in the metal cross pin ‘B’. If necessary turn
the end of the cross pin with a screwdriver. Tighten using the 5mm Allen key provided.
Step 3
Turn the chair over and fit the remaining leg/armrest in the same way.
Footstool
Secure the legs to the footstool by inserting Brass Hollow Rods ‘C’ into the holes. Then
insert Bolts ‘D’ into the same holes with the Brass Dome Heads ‘F’ on the back of the
holes. Bolt ‘D’ should screw into the Brass Dome Head ‘F’. Tighten using the 5mm Allen
key provided.
ENGLISH
Etape 1
Posez l'assise à plat sur une surface sans aspérités. Montez le dossier (côté concave vers
l'avant), et fixez le dossier avec les vis (A) sous l'assise. Serrez avec la et la clef Allen 4mm
fournie.
Etape 2
Basculez l'ensemble assise / dossier sur le côté, et insérez la cheville filetée (B) dans le trou
du croisillon du dossier. Positionnez l'accoudoir sur l'assise et le dossier et vérifiez que les
tenons s'alignent parfaitement dans les trous du croisillon et les 4 trous de l'assise. Insérez
la tige creuse en laiton (C) dans l'accoudoir / pied comme indiqué. Insérez le boulon (D)
dans le même trou et également le bouchon en laiton (forme de dôme) (F). Le boulon (D)
devrait se visser dans le bouchon (F). Serrez avec la clef Allen 5mm fournie. Insérez le
boulon (E) dans le trou de l'accoudoir ; le boulon devrait s'attacher à la cheville filetée (B).
Si nécessaire, tournez la cheville avec un tournevis. Serrez avec le clef Allen 5m fournie.
Etape 3
Répétez les instructions pour l'autre pied/accoudoir.
Repose-pieds
Attachez les pieds au repose-pieds en insérant les tiges creuses en laiton (C) dans les trous.
Insérez les boulons (D) dans les mêmes trous et également les bouchons en laiton (forme
de dôme) (F). Les boulons (D) devraient se visser dans les bouchons (F). Serrez avec la clef
Allen 5mm fournie.
FRANÇAIS
Stap 1
Leg de zitting plat op een beschermde ondergrond. Plaats de rugleuning op de zitting
(ronde zijde naar voor gericht), maak deze vast met de bijgeleverde bouten (A) langs de
onderzijde van de zitting. Draai aan met de bijgeleverde 4mm inbussleutel.
Stap 2
Leg het reeds gemonteerde geheel op een zijkant en plaats de pen (B) in de opening in de
dwarssteun van de rugleuning. Plaats nu een poot/armleuning combinatie; zorg ervoor dat
alle pennen goed aansluiten op de voorziene openingen, zowel in de dwarssteun als in de 4
openingen in de zitting. Plaats de holle messing staafjes (C) in de poot /armleuning
combinatie zoals aangegeven. Plaats bout (D) in dezelfde opening en daarna ook nog
messing dop (F). Bout (D) zou in messing dop (F) moeten draaien. Draai aan met de
bijgeleverde 5mm inbussleutel. Plaats bout (E) in de opening in de armleuning; deze zou in
de eerder geplaatste dwarspen (B) gevezen moeten worden. Draai de metalen pen indien
nodig met een schroevendraaier. Draai aan met de bijgeleverde 5mm inbussleutel.
Stap 3
Draai de zetel om en herhaal de procedure om ook de andere zijkant aan de zitting en
rugleuning vast te maken.
Voetstuk
Maak de poten aan de voetenbak vast door de holle, messing staafjes (C) in de voorziene
openingen te plaatsen. Daarna de bouten (D) in dezelfde openingen te plaatsen en
uiteindelijk de messing doppen (F) op het uiteinde van de openingen. Bout (D) zou in de
messing dop (F) moeten draaien. Draai aan met de bijgeleverde 5mm inbussleutel.
NEDERLANDS
Schritt 1
Legen Sie die Sitzfläche auf eine geschützte Oberfläche. Legen Sie nun das Rückenteil an
die Sitzfläche, die konkav gewölbte Seite nach vorne. Sichern Sie dies mit den Schrauben
‘A' unterhalb des Stuhls. Ziehen Sie diese mit dem beigefügten 4mm Imbusschlüssel fest.
Schritt 2
Legen Sie die Sitz/ Rückenteilkonstruktion auf die Seite und stecken Sie den Metall
Kreuzdübel ‘B’ in das Loch der Querstrebe, die sich am Rückenteil befindet. Legen Sie die
Armlehne/ Stuhlbein in Position, stellen Sie dabei sicher, dass die Dübel mit den Löchern
der Querstrebe sowie den 4 Löchern am Sitz übereinstimmen.
Stecken Sie den holen Messingstab ‘C' in die Armlehnen/ Stuhlbeinkonstruktion. Befestigen
Sie das Ganze, indem Sie die Schraube ‘D’ und den Messingschraubkopf ‘F’ in das gle-
iche Loch eindrehen. Schraube ‘D’ sollte dabei in den Messingschraubkopf ‘F’ eingedreht
werden. Ziehen Sie alles mit dem beigefügten 5mm Imbusschlüssel festziehen.
Stecken Sie nun die Schraube ‘E’ in das Loch, dass sich in der Armlehne befindet. Diese
Schraube sollte in den metallenen Kreuzdübel "B" einrasten. Falls nötig, schrauben Sie diese
mit dem Schraubenzieher fest. Ziehen Sie nun alle Schrauben mit dem beigefügten 5mm
Imbusschlüssel fest.
Schritt 3
Drehen Sie nun die Stuhlkonstruktion um und wiederholen Sie Schritt 2 zum Anbringen der
zweiten Armlehne.
Fußteil
Legen Sie die Beine an das Fußteil und stecken Sie die Messingstäbe ‘C' in die Löcher.
Stecken Sie dann die Schrauben ‘D’ zusammen mit den Messingschraubköpfen ‘F’ in die
gleichen Löcher. Schrauben ‘D’ sollten dabei in die Messingschraubköpfe ‘F’ eingedreht
werden. Ziehen Sie nun alles mit dem beigefügten 5mm Imbusschlüssel fest.
DEUTSCH
