Go BlueConnect User manual

Version of this manual: 2.2 en
www.go-
sys.de
Manual
BlueConnect Modules

BlueConnect
GO Systemelektronik GmbH Faluner Weg 1 24109 Kiel Germany Tel.: +49 431 58080-0 Fax: -58080-11 Page 2 / 26
www.go-sys.de info@go-sys.de
Copyright
According to the protective notes of DIN ISO 16016
"The reproduction, distribution and utilization of this document as well as the communication of its contents
to others without express authorization are prohibited. Offenders will be held liable for the payment of dam-
ages. All rights reserved in the event of patent, utility model or design registration."
Changes
GO Systemelektronik GmbH retains the right to modify the contents of the manual without prior notice.
Liability exclusion
GO Systemelektronik GmbH takes no responsibility for correct system operation under all possible operating
conditions. It is not possible to guarantee that the software will function completely without error under all
possible circumstances. GO Systemelektronik GmbH therefore disclaims all liability for any direct or indirect
damage resulting from system operation or the contents of this manual.
Product observance
Within the scope of our obligation for product observance GO Systemelektronik GmbH will endeavour to warn
third parties about all identified dangers which could arise from the interaction between hardware and soft-
ware and from the use of other components. Effective product observance is only possible with adequate
information from the end user about the planned field of application and the hardware and software used.
If the conditions of use change or if the hardware or software is changed, due to the complex relationships
between hardware and software, it is no longer possible to describe all possible dangers and their effects on
the total system, in particular on our system. This manual does not describe every possible property and
combination of the system. For further information, please contact GO Systemelektronik GmbH.
Manufacturer’s declaration
When installing the system it is necessary to ensure correct electrical connection, protection against moisture
and foreign bodies and excessive condensation, and system heating which can arise from both correct and
incorrect use. It is the responsibility of the installer to ensure that the correct installation conditions are pro-
vided.
© GO Systemelektronik GmbH
Faluner Weg 1
24109 Kiel
Germany
Tel.: +49 431 58080-0
Fax: +49 431 58080-11
www.go-sys.de
info@go-sys.de
Creation date: 6.10
.2021
Version of this manual: 2.2 en
Article number of this manual: DOC 486 C000-E-2.2-BDA
File name: DOC 486 C000-E-2.2-BDA BlueConnect.pdf

BlueConnect
GO Systemelektronik GmbH Faluner Weg 1 24109 Kiel Germany Tel.: +49 431 58080-0 Fax: -58080-11 Page 3 / 26
www.go-sys.de info@go-sys.de
Table of Contents
1 Introduction ....................................................................................................................................................................................................3
2 Description of the BlueConnect Modules ......................................................................................................................................................4
2.1 System Setup Examples..........................................................................................................................................................................4
3 Technical Data and Connections...................................................................................................................................................................5
3.1 Opening the Module Housing.................................................................................................................................................................5
3.2 Cable Connections, Switch Positions and LEDs ....................................................................................................................................6
3.3 PIN Assignment .......................................................................................................................................................................................9
3.4 PIN Assignment CAN bus at the BlueBox ...............................................................................................................................................9
4 Configuring the BlueConnect Modules with the Program Modbus Tool.exe............................................................................................10
4.1 Preparation ...........................................................................................................................................................................................10
4.2 The Start Window..................................................................................................................................................................................11
4.3 The Info Window....................................................................................................................................................................................11
4.4 The Calibration Window .......................................................................................................................................................................12
4.4.1 The Calibration Table....................................................................................................................................................................13
4.5 Configuring the Sensor Modules ..........................................................................................................................................................14
4.5.1 The Parameter Window ................................................................................................................................................................14
4.5.2 The Calibration Window O2 ..........................................................................................................................................................15
4.5.3 The Measurement Value Recording Window...............................................................................................................................16
4.6 Configuring the Current Input Module.................................................................................................................................................17
4.7 Configuring the Current Output Module..............................................................................................................................................18
4.8 Configuring Older Bus Modules............................................................................................................................................................19
5 Modbus Address Overview of the Sensor Modules......................................................................................................................................20
Appendix A – Interior Cover Stickers...............................................................................................................................................................24
Appendix B – EU Declaration of Conformity...................................................................................................................................................26
1 Introduction
This manual describes the BlueConnect Modules of GO Systemelektronik.
BlueConnect Modules are available in four basic variants: as Sensor Module, Bus Module, Current Module and
RS232 Module. At the completion of this manual, the following types of design were available:
Sensor Module
Article No.
Bus Module
Article No.
Oxygen + Temp.
486 C000-4
Oxygen
pH + Temp. 486 C000-5 Conductivity 486 C000-MOD
ISE + Temp. 486 C000-7 Oil in Water and Turbidity
ORP + Temp. 486 C000-9 Turbidity (flow through) 486 C000-TURB
Current Modules Article No.
Current Input 486 C000-mAI
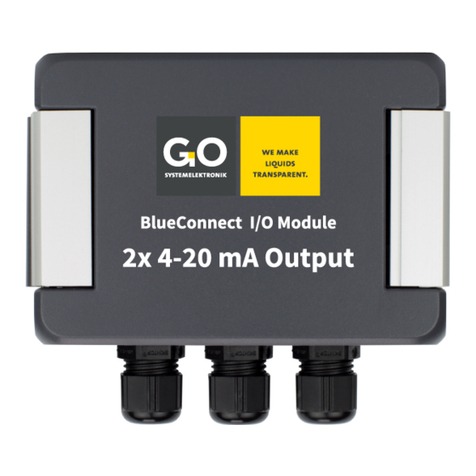
Current Output 486 C000-mAO
RS232 Module
Article No.
486 C000-RSXX
The type of version can be found on the sticker on
the front of the housing or via the article num-
ber on the type plate on the right-
hand side of the
housing .
The products of GO Systemelektronik are constantly being developed, therefore deviations between this
manual and the delivered product can result. Please understand that no legal claims can be derived from the
contents of this manual.

BlueConnect
GO Systemelektronik GmbH Faluner Weg 1 24109 Kiel Germany Tel.: +49 431 58080-0 Fax: -58080-11 Page 4 / 26
www.go-sys.de info@go-sys.de
2 Description of the BlueConnect Modules
The BlueConnect Modules
•Transmit the measured values of analog sensors via CAN bus and Modbus.
•Transmit the measured values of Modbus sensors via CAN bus.
•Transmit the measured values of sensors to a PLC.
•Control a RS232 Interface via CAN bus.
•Transmit the current values of analog current outputs via CAN bus and Modbus.
•Control an RS232 interface via CAN bus.
BlueConnect Modules are available in four basic variants: as S
ensor Module, Bus Module, Current Module and
RS232 Module.
The necessary settings are made with a PC using the enclosed BlueConnect configuration program.
see 4 Configuring the Sensor Modules with the Modbus Tool.exe
The BlueConnect Modules must be installed in such a way that they are not exposed to direct sunlight,
rain or snow. Direct sunlight can lead to extreme temperatures, which significantly reduces the service
life of electronic components.
2.1 System Setup Examples
Connection of analog sensors to a PLC system
Connection of analog sensors and Modbus sensors to a BlueBox System
Connection of analog sensors with additional power supply to a BlueBox System

BlueConnect
GO Systemelektronik GmbH Faluner Weg 1 24109 Kiel Germany Tel.: +49 431 58080-0 Fax: -58080-11 Page 5 / 26
www.go-sys.de info@go-sys.de
3 Technical Data and Connections
General Information
Voltage supply 10 – 32 VDC
Power consumption
Sensor Modules: typical 1 W
Bus Modules: typical 1 W + Sensor consumption
Current Input Module: typical 1 W
Current Output Module: typical 2 W
RS232 Module: typical 1 W + Sensor consumption
Dimensions (WxLxH) 120 x 60 x 85 mm
Weight 0.35 kg
IP protection code IP66
Ambient temperature -10 to +45 °C
Interfaces – depending on version
CAN bus Protocol is subset of CAN 2.0
Modbus Modbus RTU via serial interface RS485
RS232
Serial interface RS232
Current input Resistance 50 Ω4 – 20 mA
Current Output Resistance < 600 Ω4 – 20 mA
Earth the module. This is the only way to ensure trouble-free measuring operation.
The earth connection is located on the left side of the housing.
3.1 Opening the Module Housing
Turn the housing bracket to the right.
Loosen the screws (Torx T20).
Open housing cover to the left.
Sticker with pin assignment and termination
see Appendix A – Interior Cover Stickers

BlueConnect
GO Systemelektronik GmbH Faluner Weg 1 24109 Kiel Germany Tel.: +49 431 58080-0 Fax: -58080-11 Page 6 / 26
www.go-sys.de info@go-sys.de
3.2 Cable Connections, Switch Positions and LEDs
•The module-specific assignment is shown on the sticker on the inside of the housing cover.
•Both the CAN bus and the Modbus are terminated at the factory.
Exception see next but one page
Notes on termination of older BlueConnect Modules
Earth the module. This is the only way to ensure trouble-free measuring operation.
Sensor Module
Bus Module
Current Input Module
2x 4 – 20 mA

BlueConnect
GO Systemelektronik GmbH Faluner Weg 1 24109 Kiel Germany Tel.: +49 431 58080-0 Fax: -58080-11 Page 7 / 26
www.go-sys.de info@go-sys.de
Current Output Module
2x 4 – 20 mA
RS232 Module
RS232: Setting the COM Port with the DIP switches
A
B
C
D
COM1
COM2
COM3
COM4
COM5
COM6
LED-Functions LED Power: Supply voltage is present
LED 1: Flashing –
frequency 0.5 Hz, main processor is in operation
LED 2: Data transmission Modbus/RS232
LED 3: Data transmission CAN bus

BlueConnect
GO Systemelektronik GmbH Faluner Weg 1 24109 Kiel Germany Tel.: +49 431 58080-0 Fax: -58080-11 Page 8 / 26
www.go-sys.de info@go-sys.de
Functionality of the cable clamp
Notes on termination of older BlueConnect Modules
Older modules have no slide switches on the board.
With older BlueConnect Senor and Bus Modules, the termination of CAN bus and Modbus is done
via the configuration program Modbus Tool.exe.
see 4.7 Configuring Older Bus Modules
Older modules are not terminated at the factory.
If there is no possibility to terminate the CAN bus via the configuration program:
CAN bus termination by means of a resistor of approx. 120 Ω on the open terminals for CAN-H and
CAN-
L on slot X4. Modbus termination by means of a resistor of approx. 120 Ω on the open term
i-
nals for TX/RX+ and TX/RX- on slot X3.
Example CAN bus
!
X4
GND
Power
CAN-L
CAN-H
≈120 Ω

BlueConnect
GO Systemelektronik GmbH Faluner Weg 1 24109 Kiel Germany Tel.: +49 431 58080-0 Fax: -58080-11 Page 9 / 26
www.go-sys.de info@go-sys.de
3.3 PIN Assignment
If the two terminals of slot X9 are not occupied, the open input must be terminated with a resistance of
approx. 1.2 kΩ (except for O2/Temp, here approx. 27 k Ω).
3.4 PIN Assignment CAN bus at the BlueBox
BlueBox T4
Panel socket (M12, female)
1CAN-H
2CAN-L
3+24 VDC
4GND 24 V
Mainboard of the BlueBox R1 – Slot X07
++ +
YE/GN
WH
TR
(
+
)
RD
GN
RD
GN
BN
OR
BK
WH
BN
BK
BU
RD
PK
WH
BN
BN
GY
BU
BK
WH
WH
BN
(
O2+
)
BU
(
O2-
)
BK
BK
PE
pH+
pH–
IN-2
IN-1
IN–
IN+
OUT–
OUT+
PE
GND
Power
TX/RX–
TX/RX+
PE
GND
Power
RX
TX
GND
Power
CAN-L
CAN-H
PE
+
–
X9X8X9X8 X9X8
X9 SensorX8 SensorX9X8 X9X8
X3 Modbus X3 Modbus X3 Modbus X3 Modbus X3 Modbus
X3 RS232
pH-Glass/Temp.
Modbus Cond.
461 2092
Modbus BlueTrace
461 6200 (Oil)
461 6780 (Turb.)
Modbus O2
461 4610
Modbus Turb.
461 6732
O2/Temp.
X4 CAN bus
X8/X9 Current input X6/X7 Current input
ISE Temp.pH-Glass Temp. ORP Temp.
1 2
34
WH
YE
GN
BN
CAN bus X071 2 3 4
CAN-H
CAN-L
+24 V
GND
see also Appendix A – Interior Cover Stickers

BlueConnect – Configuring the Modules
GO Systemelektronik GmbH Faluner Weg 1 24109 Kiel Germany Tel.: +49 431 58080-0 Fax: -58080-11 Page 10 / 26
www.go-sys.de info@go-sys.de
4 Configuring the BlueConnect Modules with the Program Modbus Tool.exe
This chapter describes the operation of the BlueConnect configuration program Modbus Tool.exe of
GO Systemelektronik with the article number 420 6500 in software version 1.01. For example, you can use it
(depending on the type of module and sensor) to read out sensor information, assign a Modbus address,
calibrate the sensor and display measurement values.
On older Sensor and Bus Modules without slide switches, the Modbus (RS485) and the CAN bus can be
terminated.1
The configuration of the Modbussensors of GO Systemelektronik is described in the
enclosed Manual Modbus Tool.exe for GO Modbus Sensors.
The calibration of the sensor modules can also be carried out via the menu operation on
the BlueBox and with the BlueBox PC Software.
The configuration of the Bus Module Turbidity flow through (Article No. 486 C000-TURB)
is done at the BlueBox.
The configuration of the RS232 module is done via DIP switches.
see 3.2 Cable Connections, Switch Positions and LEDs there RS232 Module
Decimal separator is the comma; if a full stop is entered, an error message appears.
The program is executable under Windows 7 and newer. An Installation is not necessary, the program starts
when Modbus Tool.exe is called up.
The program automatically detects the connected modules with their sensors.
Modbus Tool.exe is included with every BlueConnect Module.2
4.1 Preparation
In order for your PC to communicate with a Modbus
sensor,
you need a converter from RS485 to USB and driver software.
As an example, here is the Modbus USB3converter of GO Sys-
temelektronik (Article No. 486 S810) with the driver soft
ware
at:
https://ftdichip.com/drivers/d2xx-drivers there „D2XX Drivers“
The driver software creates a virtual COM Port in the Win
dows
system – in this example "USB Serial Port (COMn)".
Converter Slot X1
connected with
BlueConnect Module Slot X3
In case of communication problems:
•Check the earthing of the converter.
•Install the latest driver software.
Slot X2 (RS485 BlueSense) is used to connect Modbus sensors
with BlueSense terminal socket connectors.
Board of the converter module
Opening the converter housing: see 3.1 Opening the Module Housing
1see also 3.2 Cable Connections, Switch Positions and LEDs there Notes on termination of older BlueConnect Modules
2If not, contact GO Systemelektronik.
3USB 2.0 and newer

BlueConnect – Configuring the Modules
GO Systemelektronik GmbH Faluner Weg 1 24109 Kiel Germany Tel.: +49 431 58080-0 Fax: -58080-11 Page 11 / 26
www.go-sys.de info@go-sys.de
4.2 The Start Window
The Modbus connection window opens. Click on button <Start> .
The Select Port window opens with a selection option for the CON Ports existing on your computer. Here
you must select the correct COM Port for communication with the converter.
The program detects the connected BlueConnect Module.
Via <Change COM Port> you can change the COM Port.
The default Modbus Slave ID of a BlueConnect Sensor Module is 1 and
does not need to be changed.∗
4.3 The Info Window
After the program has detected the connected module (here Redox/ORP), the module info window opens.
∗In special cases contact GO Systemelektronik.
COM 1 selected
Serial Communication
Modbus
Start
Reset to 1
Change COM Port
Change ID
Search for Sensor/Module
Modbus Slave ID
File
Modbus Tool 1.00
COM 1 selected
Serial Communication
Modbus
BlueConnect Redox
Info
Parameter
Calibration
Measuring
Data Processing
Data
Device
Firmware Version
Serial Number
Modbus Slave ID
Baudrate
Production Date
BlueConnect Redox
2.12
99
1
9600
11.6.2021
File
Modbus Tool 1.01
The COM Port of the converter is displayed in the Windows Device Manager: USB Serial Port (COM
n
)

BlueConnect – Configuring the Modules
GO Systemelektronik GmbH Faluner Weg 1 24109 Kiel Germany Tel.: +49 431 58080-0 Fax: -58080-11 Page 12 / 26
www.go-sys.de info@go-sys.de
4.4 The Calibration Window
A calibration compares the value pairs of the measured sensor raw values∗and allocated reference values
from calibration liquids. These value pairs are taken as points in a coordinate system. The curve of a 1. to 5.
Order polynomial is placed through these points as accurately as possible, this is how the calibration polyno-
mial is created.
Example with a 2. Order polynomial:
The calibration of the sensor modules can also be carried out via the
menu operation on the BlueBox and with the BlueBox PC Software.
∗A raw sensor value is the uncalibrated sensor reading.
Calibration table
Calibration coefficients

BlueConnect – Configuring the Modules
GO Systemelektronik GmbH Faluner Weg 1 24109 Kiel Germany Tel.: +49 431 58080-0 Fax: -58080-11 Page 13 / 26
www.go-sys.de info@go-sys.de
4.4.1 The Calibration Table
There are two ways to enter the raw values:
•manual input – gives the possibility to calculate hypothetical calibrations
•measurement value transfer – current measured raw values for the actual calibration
The reference values are always entered manually. You can set up to 10 value pairs.
„measured value [ppm]“ is the reference value from a calibration liquid.
Manual input∗: not activated: Measure
After opening the calibration view the
calibration table has
only one row. Click the cursor into the “raw value” cell and
enter the first raw value, click the cursor into the “measured
value” cell and enter the first reference value, or vice versa.
Measurement value transfer: activated: Mea
sure
After first opening the calibration view the calibration table
has only one row. Click the cursor on the first row pushbu
t-
ton : As long as the row pushbutton is active the cu
r-
rent measurement raw value appears in the “raw value”
cell. Click the cu
rsor into the “measured value cell” and
enter the first reference value.
To create a new row
, click the cursor into the last row with
an entry and press the ENTER-key.
To delete a row
, delete all row entries and click in another
row.
Order: Order means the order/degree of the calibration polynomial.
Click on one of the Order buttons 1 to 5 to get the best fit.
The graph of the calibration polynomial is displayed.
apply coefficients
Writes the calculated coefficient values into the module memory.
∗Decimal separator is the comma; if a full stop is entered, an error message appears.
Row pushbuttons

BlueConnect – Configuring the Sensor Modules
GO Systemelektronik GmbH Faluner Weg 1 24109 Kiel Germany Tel.: +49 431 58080-0 Fax: -58080-11 Page 14 / 26
www.go-sys.de info@go-sys.de
4.5 Configuring the Sensor Modules
4.5.1 The Parameter Window
RS485 / CAN Termination
Switches the termination of the Modbus (RS485) and the CAN bus on/off.
Applies only to older BlueConnect Modules, the newer ones are terminated with slide switches on the
board, see 3.2 Cable Connections, Switch Positions and LEDs there alsoNote on termination of older
BlueConnect Modules. Newer modules with slide switches ignore the setting.
O2 Selection whether the measurement value is displayed in mg/l or % saturation.
Only visible with O2 sensors.
Coefficients
Calibration coefficients, the displayed values are from the Calibration
function, see 4.4 The Calibration Window.
Writes the input settings into the module memory.
Decimal separator is the comma; if a full stop is entered, an error message appears.
COM 1 selected
Serial Communication
Modbus
BlueConnect O2
Info
Parameter
Calibration
Measuring
Data Processing
Data
RS485 / CAN Termination on o ff
O2 mg/l %
write changes
Coefficients Turbidity
-4,975610E-01
1,488027E+00
-9,711752E-02
0,000000E+00
0,000000E+00
0,000000E+00
A0
A1
A2
A3
A4
A5
Coefficients Temperature
-4,975610E-01
1,488027E+00
-9,711752E-02
0,000000E+00
0,000000E+00
0,000000E+00
A0
A1
A2
A3
A4
A5
File
Modbus Tool 1.01
write changes

BlueConnect – Configuring the Sensor Modules
GO Systemelektronik GmbH Faluner Weg 1 24109 Kiel Germany Tel.: +49 431 58080-0 Fax: -58080-11 Page 15 / 26
www.go-sys.de info@go-sys.de
4.5.2 The Calibration Window O2
The calibration of the O2 sensor is a two-point calibration (calibration degree 0 poly-
nomial). One point is the zero point, the other is determined by the saturation in air
(100 %) or a pair of measured values from the measurement value of the sensor and
the measurement value of a reference measurement device in the same measure-
ment medium.
Starts and stops the measurement display,
the measurement values are displayed every second.
Saturation calibration
Prerequisite: Setting O2 Unit % see 4.5.1 The Parameter Window
1. Click on <Start>.
2. Hold the oxygen sensor in the air.1
Wait at least 10 minutes until the displayed values are stable.
3. Click on <100% Calibration>.
4. The calibration is completed.
Reference calibration
Prerequisite: Setting O2 Unit mg/l see 4.5.1The Parameter Window
1. Click on <Start>
2. Immerse the oxygen sensor in your measurement medium and wait,
until the displayed values are stable.
3. Entering2the oxygen content of the measurement medium according to the
reference measuring device
4. Click on <mg/l Calibration>.
5. The calibration is completed.
1The galvanic cell for oxygen measurement is located at the bottom of the sensor body, the temperature sensor is near the
center. Therefore, a saturation calibration in the air can only be carried out when the entire sensor body has reached the tem-
perature of the ambient air. The larger the difference in temperature between the measuring medium and the ambient air, the
greater the time required for a temperature adjustment (30 minutes or more, if applicable).
The temperature adjustment can be accelerated by immersing the sensor in water, which has approximately the temperature
of the ambient air, before performing the saturation calibration.
Moreover, abrupt temperature changes (e.g., by direct exposure to the sun) must be avoided.
2Decimal separator is the comma; if a full stop is entered, an error message appears.
Serial Communication
Modbus
BlueConnect O2
Info
Parameter
Calibration
Measuring
Data Processing
Data
Oxygen mV
Reference [mg/l] mg/l
Temperature °C read
mg/l Calibration
Oxygen mV
Temperature °C read
100% Calibration
read
read
Saturation calibration Reference calibration

BlueConnect – Configuring the Sensor Modules
GO Systemelektronik GmbH Faluner Weg 1 24109 Kiel Germany Tel.: +49 431 58080-0 Fax: -58080-11 Page 16 / 26
www.go-sys.de info@go-sys.de
4.5.3 The Measurement Value Recording Window
Starts and stops the running measurement display.
Interval
Drop-down field for input/selection
of the recording interval
Opens a window for entering the storage path of a csv file. After
the file has been created, the recording of the measurement
values into the csv file starts.
The button changes to:
At the bottom right of the program window this appears:
Click on <Stop> stops the data recording.
COM 1 selected
Serial Communication
Modbus
BlueConnect Redox
Info
Parameter
Calibration
Measuring
Data Processing
Data
Sensor live data
Redox
Temperature
Data Logger
1 s
save (csv format)
Interval
read
File
Modbus Tool 1.00
read
read
1 s
save (csv format)
save (csv format)
Data Logger running Stop

BlueConnect – Configuring the Current Input Module
GO Systemelektronik GmbH Faluner Weg 1 24109 Kiel Germany Tel.: +49 431 58080-0 Fax: -58080-11 Page 17 / 26
www.go-sys.de info@go-sys.de
4.6 Configuring the Current Input Module
The Current Input Module has two current inputs with 4 – 20 mA. For calibration of the current inputs see 4.4
and 4.4.1.
Parameter window of the Current Input Module
Coefficients Calibration coefficients, the displayed values are from the Cali-
bration function, see 4.4 The Calibration Window.
Writes the input settings into the module memory.
Decimal separator is the comma; if a full stop is entered, an error message appears.
COM 1 selected
Serial Communication
Modbus
BlueConnect Current In
Info
Parameter
Calibration
Measuring
Data Processing
Data
write changes
Coefficients Current 1
-4,975610E-01
1,488027E+00
-9,711752E-02
0,000000E+00
0,000000E+00
0,000000E+00
A0
A1
A2
A3
A4
A5
Coefficients Current 2
-4,975610E-01
1,488027E+00
-9,711752E-02
0,000000E+00
0,000000E+00
0,000000E+00
A0
A1
A2
A3
A4
A5
File
Modbus Tool V1.06
write changes

BlueConnect – Configuring Older Bus Modules
GO Systemelektronik GmbH Faluner Weg 1 24109 Kiel Germany Tel.: +49 431 58080-0 Fax: -58080-11 Page 18 / 26
www.go-sys.de info@go-sys.de
4.7 Configuring the Current Output Module
The Current Input Module has two current outputs with 4 – 20 mA. For calibration of the current outputs see
4.4 and 4.4.1.
Parameter window of the Current Output Module
Coefficients Calibration coefficients, the displayed values are from the Cali-
bration function, see 4.4 The Calibration Window.
Writes the input settings into the module memory.
Current Output
For test purposes, you can enter input values here.
By clicking on the module outputs the corresponding
current value. Resetting to the operating state is done by dis-
connecting the module from the supply voltage.
Decimal separator is the comma; if a full stop is entered, an error message appears.
COM 1 selected
Serial Communication
Modbus
BlueConnect Current Out
Info
Parameter
Calibration
Measuring
Data Processing
Data
write changes
setset
Coefficients Current 1
-4,975610E-01
1,488027E+00
-9,711752E-02
0,000000E+00
0,000000E+00
0,000000E+00
A0
A1
A2
A3
A4
A5
Coefficients Current 2
-4,975610E-01
1,488027E+00
-9,711752E-02
0,000000E+00
0,000000E+00
0,000000E+00
A0
A1
A2
A3
A4
A5
Current Output 1 Current Output 1
File
Modbus Tool V1.06
write changes
set

BlueConnect – Configuring Older Bus Modules
GO Systemelektronik GmbH Faluner Weg 1 24109 Kiel Germany Tel.: +49 431 58080-0 Fax: -58080-11 Page 19 / 26
www.go-sys.de info@go-sys.de
4.8 Configuring Older Bus Modules
Older BlueConnect Bus Modules do not have slide switches on the board. Here, the termination is done via
the Parameter Window.
RS485 Termination
Selection Modbus (RS485) termination selection on/off
CAN Termination
Selection CAN bus termination on/off
Writes the selected termination into the module memory.
Only applies to older BlueConnect Bus Modules, the newer ones are terminated with slide
switches on the board, see 3.2 Cable Connections, Switch Positions and LEDs there also
Notes
on termination of older BlueConnect Modules. Newer modules with slide switc
hes ignore the
setting.
With older BlueConnect Bus Modules, connected Modbus sensors are not automatically detected. The
appropriate sensor identifier must be selected via the drop-down menu.
Writes the selected sensor identifier into the module memory.
COM 1 selected
Serial Communication
Modbus
BlueConnect Modbus-CAN
Info
Parameter
RS485 Termination on o ff write
CAN Termination on o ff write
writeSensor
Turbidity GO flow through
BlueEC
BlueTrace Oil in Water
Optical O2
BlueTrace Turbidity
File
Modbus Tool 1.00
write
write

BlueConnect – Modbus-Addresses Sensor Modules
GO Systemelektronik GmbH Faluner Weg 1 24109 Kiel Germany Tel.: +49 431 58080-0 Fax: -58080-11 Page 20 / 26
www.go-sys.de info@go-sys.de
5 Modbus Address Overview of the Sensor Modules
BlueConnect O2 486 C000-4 – Modbus Address Overview
31.8.2021
Address
Parameter name
Range
Meaning
Data type
Authorisation
0x00 Device ID 104 104 – BlueConnect O2 Short R
0x01 Firmware Version 100 – 9999 100 = 1.00, 2410 = 24.1 Short R
0x02 Serial No. 0 – 65535 Serial number Short R
0x03 Modbus Slave ID 1 – 230 Modbus Address Short R/W
0x04 Baud rate 0 – 2 0 = 9600 8N1 Short R
0x05 Production date ddmmyyyy Date Short x 2 R
Address Parameter name Range Meaning Data type Authorisation
0x14 A0 0 – 0xffffffff Cal Coefficient 32 Bit Float R/W
0x16 A1 0 – 0xffffffff 32 Bit Float R/W
0x18 A2 0 – 0xffffffff Air Pressure 32 Bit Float R/W
0x1A
A3
0 – 0xffffffff
Salinity
32 Bit Float
R/W
0x1C A4 0 – 0xffffffff 32 Bit Float R/W
0x1E A5 0 – 0xffffffff 32 Bit Float R/W
Address Parameter name Range Meaning Data type Authorisation
0xD0 Measuring Unit 0 – 1 0: mg/l
1: %
Short R/W
Address Parameter name Range Data type Authorisation
0x101 O2 [mg/l or %] 0 – 0xffffffff 32 Bit Float R
0x104 Temperature [°C] 0 – 0xffffffff 32 Bit Float R
Note on 32 bit Float data (MSB = 0xByte4, LSB = 0xByte1),
The Receiving sequence of the values (Hex) is: 0x [Byte2] [Byte1] [Byte4] [Byte3]
Other manuals for BlueConnect
1
Table of contents
Other Go Control Unit manuals
Popular Control Unit manuals by other brands

olympia electronics
olympia electronics GR-8600 Series Installation, Programming, Use

DM Engineering
DM Engineering Mic Pro user guide

Ross Controls
Ross Controls DM2C Series manual

Maico
Maico AZV 100 Mounting and operating instructions

Akerstroms
Akerstroms Trux 700 user manual

Afriso EURO-INDEX
Afriso EURO-INDEX TAS 03 operating instructions