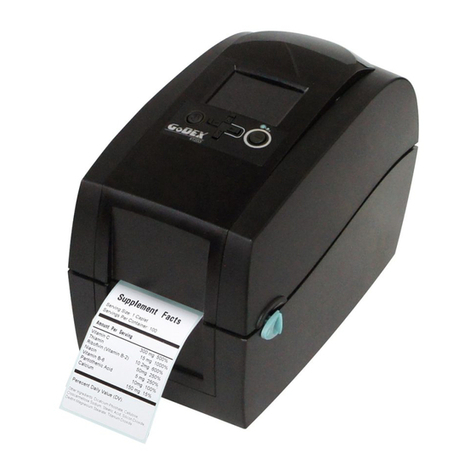
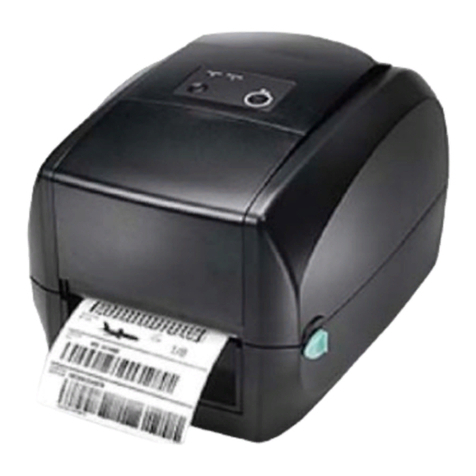
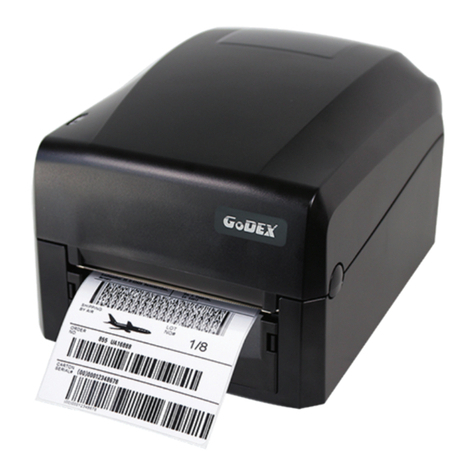
Godex G E300 User manual

G E300/ G E330
THERM A L LA BEL PRINTER
USER M A NUA L
User Manual
Version
Issue Date
P/N
: GE300 series
: Rev 1.1
: 2019.01.30
: 920-017511-00

C o nte nts
G E300/ G E330 USER MANUAL
C O NTENTS
1
The rm a l La be l Printe r
001
1.1
1.2
Bo x C o nte nt
G e tting To Kno w Yo ur Printe r
001
002
2
Printe r Se tup
004
2.1
2.2
2.3
2.4
2.5
2.6
2.7
O p e n The Printe r C o ve r
O p e n The Printing Me c ha nism
Lo a d ing The Rib b o n
Lo a d ing The La b e l Ro ll
Insta lling The La b e l Sup p ly Hub
C o nne c ting The Printe r To The Ho st C o mp ute r
Insta lling The Drive r
004
004
005
009
012
013
015
3
O p e ra tio n Pa ne l
018
3.1
3.2
3.3
LED O pe ra tio n Pa ne l
Erro r Ale rts
La b e l C a lib ra tio n a nd Se lf Te st Pa g e
018
019
020
4 Ne tSe tting For Ethe rne t 021
4.1
4.2
Insta lling The Ne tSe tting So ftwa re
The Inte rfa c e o f Ne tSe tting
021
022
5 Ma inte na nc e a nd Adjustm e nt 029
5.1
5.2
C le a ning The Print He a d
Tro ub le sho o ting
029
030
Ap pe ndix
Pro d uc t Spe c ific a tio ns
Inte rfa c e

De c la ra tio n
G E300/ G E330 USER MANUAL
FC C C O MPLIANC E STATEMENT
FO R AMERIC AN USERS
This e q uip me nt ha s b e e n te ste d a nd fo und to c o mp ly with the limits fo r a C LASS A d ig ita l d e vic e ,
p ursua nt to Pa rt 15 o f the FC C Rule s. The se limits a re d e sig ne d to p ro vide re a so na b le p ro te c tio n
a g a inst ha rmful inte rfe re nc e whe n the e q uip me nt is o p e ra te d in a c o mme rc ia l e nviro nme nt. This
e q uipme nt g e ne ra te s, use s, a nd c a n ra d ia te ra d io fre q ue nc y e ne rg y a nd , if no t insta lle d a nd use d
in a c c o rd a nc e with the instruc tio ns, ma y c a use ha rmful inte rfe re nc e to ra d io c o mmunic a tio ns.
O p e ra tio n o f this e q uip me nt in a re sid e ntia l a re a is like ly to c a use ha rmful inte rfe re nc e in whic h c a se
the use r will b e re q uire d to c o rre c t the inte rfe re nc e a t o wn e xp e nse .
EMS AND EMI C O MPLIANC E STATEMENT
FO R EURO PEAN USERS
This e q uip me nt ha s b e e n te ste d a nd p a sse d with the re q uire me nts re la ting to e le c tro ma g ne tic
c o mp a tib ility b a se d o n the sta nd a rd s EN 55022:1998+A1:2000+A2:2003, C ISPR 22,
C la ss A EN 55024: 1998+A1: 2001+A2: 2003, IEC 61000-4 Se rie s EN 61000-3-2/ 2000&EN 61000-3-3/ 1995.
The e q uip me nt a lso te ste d a nd p a sse d in a c c o rd a nc e with the Euro pe a n Sta nd a rd EN55022 fo r the
b o th Ra d ia te d a nd Co nd uc te d e missio ns limits.
G E300 SERIES
TO WHIC H THIS DEC LARATIO N RELATES
IS IN C O NFO RMITY WITH THE FO LLO WING STANDARDS
EN55022: 1998, C LSPR 22, C la ss A/ EN55024: 1998/ IEC 61000-4 Se ria l/ EN61000-3-2: 2000/ EN 6100-3-3:
1995/ C FR 47, Pa rt 15/ C ISPR 22 3rd Ed itio n: 1997, C la ss A/ ANSI C 63.4: 2001/ C NS 13438/ IEC 60950-1: 2005
(EN 60950-1: 2006+A11: 2009)/ G B4943: 2001/ G B9254: 1998/ G B17625.1: 2003/ EN60950-1: 2001
**** Da ng e r o f e xp lo sio n if b a tte ry is inc o rre c tly re p la c e d . Re p la c e o nly with the e q uiva le nt typ e re c o mme nd e d b y
the ma nufa c ture r.
**** Disp o se o f use d b a tte rie s a c c o rd ing to the ma nufa c ture r’ s instruc tio ns.
****O nly use with d e sig na te d p o we r sup p ly a d a p te r mo d e l.
**** Cha ng e s o r mo d ific a tio ns no t e xp re ssly a p p ro ve d b y the p a rty re sp o nsib le fo r c o mp lia nc e c o uld vo id the use r's
a utho rity to o p e ra te the e q uip me nt.
C a utio n
Caution: Equipment is intended for installation in Restricted Access Location. Only instructed persons
and skilled persons should be allowed to install, replace, or service this equipment.
Hot parts!
Burned fingers when handing the parts
Wait one-half hour after switching off before handing parts
Sa fe ty instruc tio ns
G E300/ G E330 USER MANUAL
SAFETY INSTRUC TIO NS
Ple a se re a d the fo llo wing instruc tio ns c a re fully.
1. Ke e p the e q uip me nt a wa y fro m humid ity.
2. Be fo re yo u c o nne c t the e q uipme nt to the p o we r o utle t, p le a se
c he c k the vo lta g e o f the p o we r so urc e .
3. Ma ke sure the p rinte r is o ff b e fo re p lug g ing the p o we r c o nne c to r
into the p o we r ja c k.
4. It is re c o mme nd e d tha t yo u c o nne c t the p rinte r to a surg e
p ro te c to r to p re ve nt p o ssib le tra nsie nt o ve rvo lta g e d a ma g e .
5. Be c a re ful no t to g e t liq uid o n the e q uip me nt to a vo id e le c tric a l
sho c k.
6. Fo r sa fe ty a nd wa rra nty re a so ns, O NLY q ua lifie d se rvic e p e rso nne l
sho uld o p e n the e q uipme nt.
7. Do no t re p a ir o r a d just e ne rg ize d e q uipme nt und e r a ny
c irc umsta nc e s.

GE300 Thermal Label Printer
1Barcode Printer
1.1 Box Content
Please check that all of the following items are included with your printer.
001
USB Cable
CD
Including QLabel software
and G300 user manual.
Ribbon Module
Empty Ribbon Core
Ribbon
Power Adapter
Power Cord
AC Adapter
Label Supply Module
Label Supply Hub
Label Stock
G300 Quick Guide
GE300 series
Label Stopper Plate
* Package content and Logo style may vary per region.

Fro nt Vie w
1Ba rc o d e Printe r
1.2 G e tting To Kno w Yo ur Printe r
002
De vic e Ove rvie w
Re a r Vie w
TO P C O VER
C O VER O PEN BUTTO NS
Re le a se b utto ns fo r o p e ning the printe r c o ve r
LED INDIC ATO R
FEED BUTTO N
LED O PERATIO N PANEL
ETHERNET PO RT
PO WER SLO T
PO WER SWITC H
- O N
- O FF
FAN-FO LD LABEL INSERT
Fe e d slo t fo r c o ntinuo us la b e ls
USB PO RT
SERIAL PO RT

1Barcode Printer
Open The Printer Cover
RELEASE LATCH(Left)
RELEASE LATCH(Right)
RIBBON REWIND WHEEL
HOLDER OF RIBBON REWIND CORE
003
Open The Printing Mechanism
LABEL GUIDE(Right)
PLATEN
LABEL GUIDE(Left)
PRINTING MECHANISM
RIBBON SUPPLY
WHEEL
HOLDER OF
RIBBON SUPPLY CORE
PRINT HEAD
LABEL SENSOR

2Printer Setup
2.1 Open The Printer Cover
Pressing The Cover Open Buttons
Place the printer on a flat surface. Open the printer cover by pressing the release buttons on both sides of the printer
housing and lift the cover.
004
COVER OPEN BUTTONS
Release buttons for opening the printer cover.
Pressing the button
Pressing the button
Lift the printing mechanism
Pressing
Pressing
RELEASE CATCHES
2.2 Open The Printing Mechanism
Pressing The Release Catches
Release and lift the printing mechanism.

2Printe r Se tup
2.3 Lo a d ing The Rib b o n
005
A Ne w Ribbo n Mo dule Insta lla tio n
NEW RIBBO N EMPTY RIBBO N C O RE
Wind the rib b o n a ro und the c o re
1. Atta c h the rib b o n to the e mp ty rib b o n c o re with the a d he sive strip a t the e nd o f the rib b o n.
2. Wind the rib b o n a ro und the e mp ty rib b o n c o re fo r 2 to 3 c irc le s.
Stic k o n e mp ty rib b o n c o re
No tc h o n le ft side
A NEW RIBBO N MO DULE
RIBBO N SUPPLY
RIBBO N REWIND
3. A rib b o n mo d ule is a sse mb le d a s b e lo w.

2Printe r Se tup
006
2. The n p la c e the le ft-ha nd sid e o f the rib b o n.
Lo a d The Rib b o n O n The Printe r
Fo r Rib b o n Sup ply Mo d ule
1. Pla c e the rig ht-ha nd sid e o f rib b o n first.
RIBBO N SUPPLY MO DULE
Rig ht sid e
Push the rib b o n to tig hte n
the sp ring o f the ho ld e r
HO LDER
SPRING O F HO LDER
Alig n the rib b o n c o re
to the ho ld e r
Le ft sid e
NO TC H O F RIBBO N C O RE
SPO KE
G EAR
Ro ta te the g e a r fo r a lig nm e nt
if ne c e ssa ry
Alig n the no tc h o f the rib b o n c o re to the sp o ke

2Printe r Se tup
007
3. C lo se the p rinting me c ha nism to c o mp le te the rib b o n sup p ly mo d ule lo a d ing .
Lo a d The Rib b o n O n The Printe r
Fo r Rib b o n Re wind Mo d ule
RIBBO N REWIND MO DULE
1. Pla c e the rig ht-ha nd sid e o f e mp ty rib b o n c o re first.
Rig ht sid e
Alig n the e mp ty rib b o n c o re
to the ho ld e r
HO LDER
Push the e mp ty rib b o n c o re
to tig hte n the sp ring o f the ho ld e r
SPRING O F HO LDER
C lo se the p rinting me c ha nism

2Printe r Se tup
008
2. The n p la c e the le ft-ha nd sid e o f the e mp ty rib b o n c o re .
4. Rib b o n lo a d ing c o mp le te d .
3. Turn the rib b o n re wind whe e l to tig hte n the rib b o n until it ha s no w rinkle s.
RIBBO N REWIND WHEEL
Wind to b a c k
Le ft sid e
Le ft sid e
SPO KE
NO TC H O F RIBBO N C O RE
Alig n the no tc h o f e mp ty rib b o n c o re
to the sp o ke

2Printe r Se tup
2.4 Lo a d ing The La b e l Ro ll
009
A Ne w La b e l Ro ll Mo dule Insta lla tio n
LABEL STO C K LABEL SUPPLY HUB
1. Pla c e the la b e l sto c k o n the la b e l sup p ly hub , a tta c h the la b e l g uid e p la te s to the la b e l sto c k ho ld e r.
Pla c e o n the rib b o n hub
A NEW LABEL RO LL MO DULE
2. A la b e l ro ll mo d ule is a sse mb le d a s b e lo w.

2Printer Setup
010
Load The Label Roll Module On The Printer
1. Release the printing mechanism and lift it.
2. Place the label roll module on the printer.
Place on the printer
Open the printing mechanism
3. Pass the label through the printing mechanism.
Through the printing mechanism

2Printe r Se tup
011
4. Pa ss the la b e l thro ug h the la b e l g uid e s a nd a d just the la b e l g uid e to the la b e l wid th. The la b e l g uid e will he lp to
p re ve nt the la b e l swa ying .
5. C lo se the p rinting me c ha nism a nd to p c o ve r to c o mple te the la b e l lo a d ing .
LABELG UIDES
Thro ug h the la b e l g uid e s
Clo se the p rinting me c ha nism

2Printe r Se tup
2.5 Lo a d ing The La b e l Supply Hub
012
1" Cores
Lo a d ing the la b e l sup p ly hub fo r 1" c o re s.
1.5" Cores
Lo a d ing the la b e l sup p ly hub fo r 1.5" c o re s.

2Printe r Se tup
2.6 C o nne c ting The Printe r To The Ho st C o mp ute r
013
1. Ple a se ma ke sure tha t the p rinte r is switc he d o ff.
2. C o nne c t the p o we r c o rd to the AC a d a p te r.
AC ADAPTER
PO WER C O RD
C o nne c t the ja c k o f the p o we r a d a p te r to the p rinte r a nd c o nne c t the p lug o f the p o w e r a d a p te r to the so c ke t
o f the wa ll.
G E300 THERMAL LABEL PRINTER
PO WER ADAPTER
THE WALL
SO C KET
SLO T
JAC K
PLUG
※This e q uip me nt must b e e a rthe d . The p o we r p lug must b e c o nne c te d to a p ro p e rly wire d e a rth g ro und so c ke t o utle t.
An imp ro p e rly wire d so c ke t o utle t c o uld pla c e ha za rd o us vo lta g e s o n a c c e ssib le me ta l p a rts.

2Printe r Se tup
014
3. C o nne c t the USB/ p a ra lle l c a b le to the p rinte r a nd ho st c o mp ute r.
4. Switc h o n the p rinte r. The LED ind ic a to r sho uld no w lig hts up .
G E300 THERMAL LABEL PRINTER
USB C ABLE
PC
SO C KET
USB PO RT
PLUG
PLUG
Switc h o n
LED INDIC ATO R

2Printe r Se tup
2.7 Insta lling The Drive r
015
1. Inse rt the p ro d uc t CD in the CD/ DVD drive o f the ho st c o mp ute r a nd o p e n the "Se a g ull Drive rs" fo ld e r o n the C D.
Se le c t the ic o n fo r the d rive r file a nd c lic k it to sta rt the insta lla tio n.
2. Fo llo w the instruc tio ns o n the sc re e n. The Drive r Wizard g uid e s yo u thro ug h the insta llatio n p ro c e dure .
Se le c t "Insta ll p rinte r d rive rs".
3. Spe c ify yo ur p rinte r mo d e l.
Godex GE300

2Printe r Se tup
016
4. Spe c ify the p o rt use d to c o nne c t the p rinte r to the ho st c o mp ute r.
6. Onc e the insta llatio n is c o mple te , a summa ry o f the printe rse tting s is d isplaye d.
Che c k whe the r the printe r se tting s a re c o rre c t a nd c lic k "Finish" to sta rt c o p ying the d rive r file s.
Wait until c o p ying is c o mple te , the n finish the insta llatio n.
5. Ente r a p rinte r na me a nd a ssig n the a p p ro p ria te rig hts.
Godex GE300
Godex GE300
Godex GE300
This manual suits for next models
1
Table of contents
Other Godex Label Maker manuals

Godex
Godex DT2L User manual

Godex
Godex EZ-DT-2 User manual

Godex
Godex EZ6000i Series User manual

Godex
Godex GE300 User manual

Godex
Godex DT Series User manual

Godex
Godex EZ-DT User manual

Godex
Godex C690LJ User manual

Godex
Godex AG3000T User manual

Godex
Godex STE5 User manual

Godex
Godex EZ6000 Plus Series User manual

Godex
Godex DT4C User manual

Godex
Godex EZ6000 Plus Series User manual

Godex
Godex RT700 SERIES User manual

Godex
Godex LZX400i User manual

Godex
Godex EZ-4TT Plus User manual

Godex
Godex DT200 Series User manual

Godex
Godex ZX1000i+ Series User manual

Godex
Godex ZX1000i Series User manual

Godex
Godex HD830i User manual

Godex
Godex BP1000i Series User manual