Godin 325101 User manual

1
The Colonial Wood Stove Ref: 325101
Technical Specifications:
55L x 35H X30D (cm)
Adjusting the pace: thermostatically
Weight: 130kg
Power: 9.5kW
* With a load of 4.8kg of wood moisture of 12% and a calorific value of 15.7MJ/kg

2
Instructions for the Installer
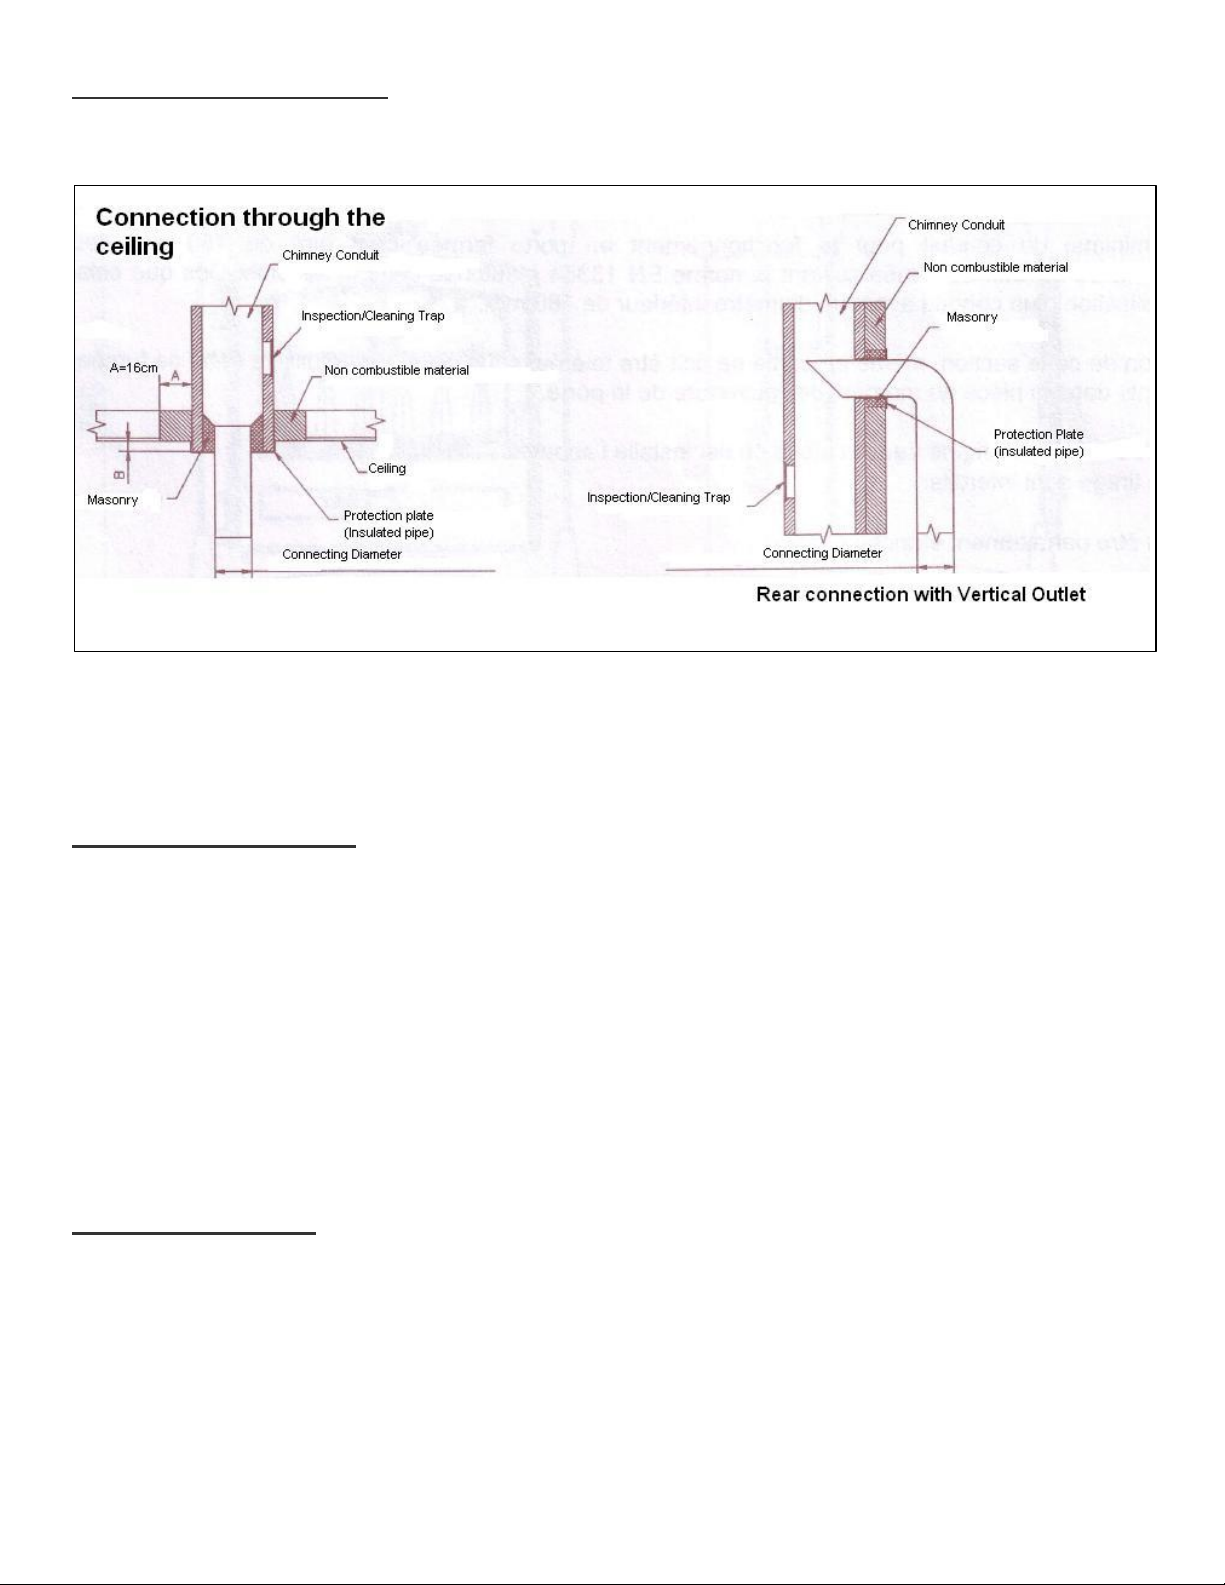
- Always respect the rules in force in the country in which the device is installed. In France, the
drainage systems of the combustion products is in conformity with the DTU 24.1 in February 2006.
- Make sure the flue is in a good condition. Its role is crucial. It will influence the final result by
ensuring the supply of primary air in homes and extracting the gas combustion.
The most common problem experienced is due to chimney failures.
- A good chimney must be a poor conductor of heat and able to retain its heat well.
- The minimal diameter of the flue for operation with closed door is 150mm, can be subject to the
sizing of pipe smoke, according to EN 13384.1 authorizes this dimension. As soon as possible, we
recommend the use of a flue having an inside diameter of 180mm.
-Not a single reduction of the flue, even at the top outlet is permissible as it may cause a reduction of
fume exhaust, which can provoke some down draught in the room when opening the door.
-The chimney must originate from the same place in which the unit is installed.
- Check the air intakes are free from obstruction.
- The flue must be perfectly sealed.
-The flue pipe or tubing used must be designated G, that is to say of fire resistant material. Equipment
must be connected to the designated 50deg C above the temperature declared for the device
regardless of the connected mode.
-The height must not be lower than 5 meters with a reasonable upper clearance in fresh air of 0.40m
minimum above the pitch of the roof or from any other obstacle at a distance of no less than 8m from
the conduit.
-The draught should be between 1.5mm CE and 2mm CE during normal functioning, and dropping to
0.5mm CE on slow running. The draught must not come down below 1.2mm CE in normal running
mode.
.-If the cross section of the flue/chimney is oversized, heating up the volume will be too large and the
draw will not establish itself normally.
All casing shall be consistent with the DTU 24.1. The design responds to the precise rules for
calculating (EN 13384.1) that only a professional is able to define.
-Do not use clay flue accessories having an outlet section of 2.5dm2 minimum.
-It is recommended to fit a well sealed cleaning trap at more or less 50cm below the heater outlet.
-Before connecting, make sure that the chimney is perfectly clean; if necessary have the chimney
swept.
-The appliance to be installed according to the current DTU specifications in force, and installation by
a qualified professional. All local and national regulations must be respected.
-The extractors used in the same room or in the same space that the heater is situated, can
dangerously disrupt the operation of it.
-The simultaneous operation of other devices in the same space as the unit can generate
disturbances of circulation.
-Never block the air intake of the room and install it in a manner that it cannot be obstructed, the
heater takes air from the room therefore it is necessary to ensure sufficient air intake from outside.
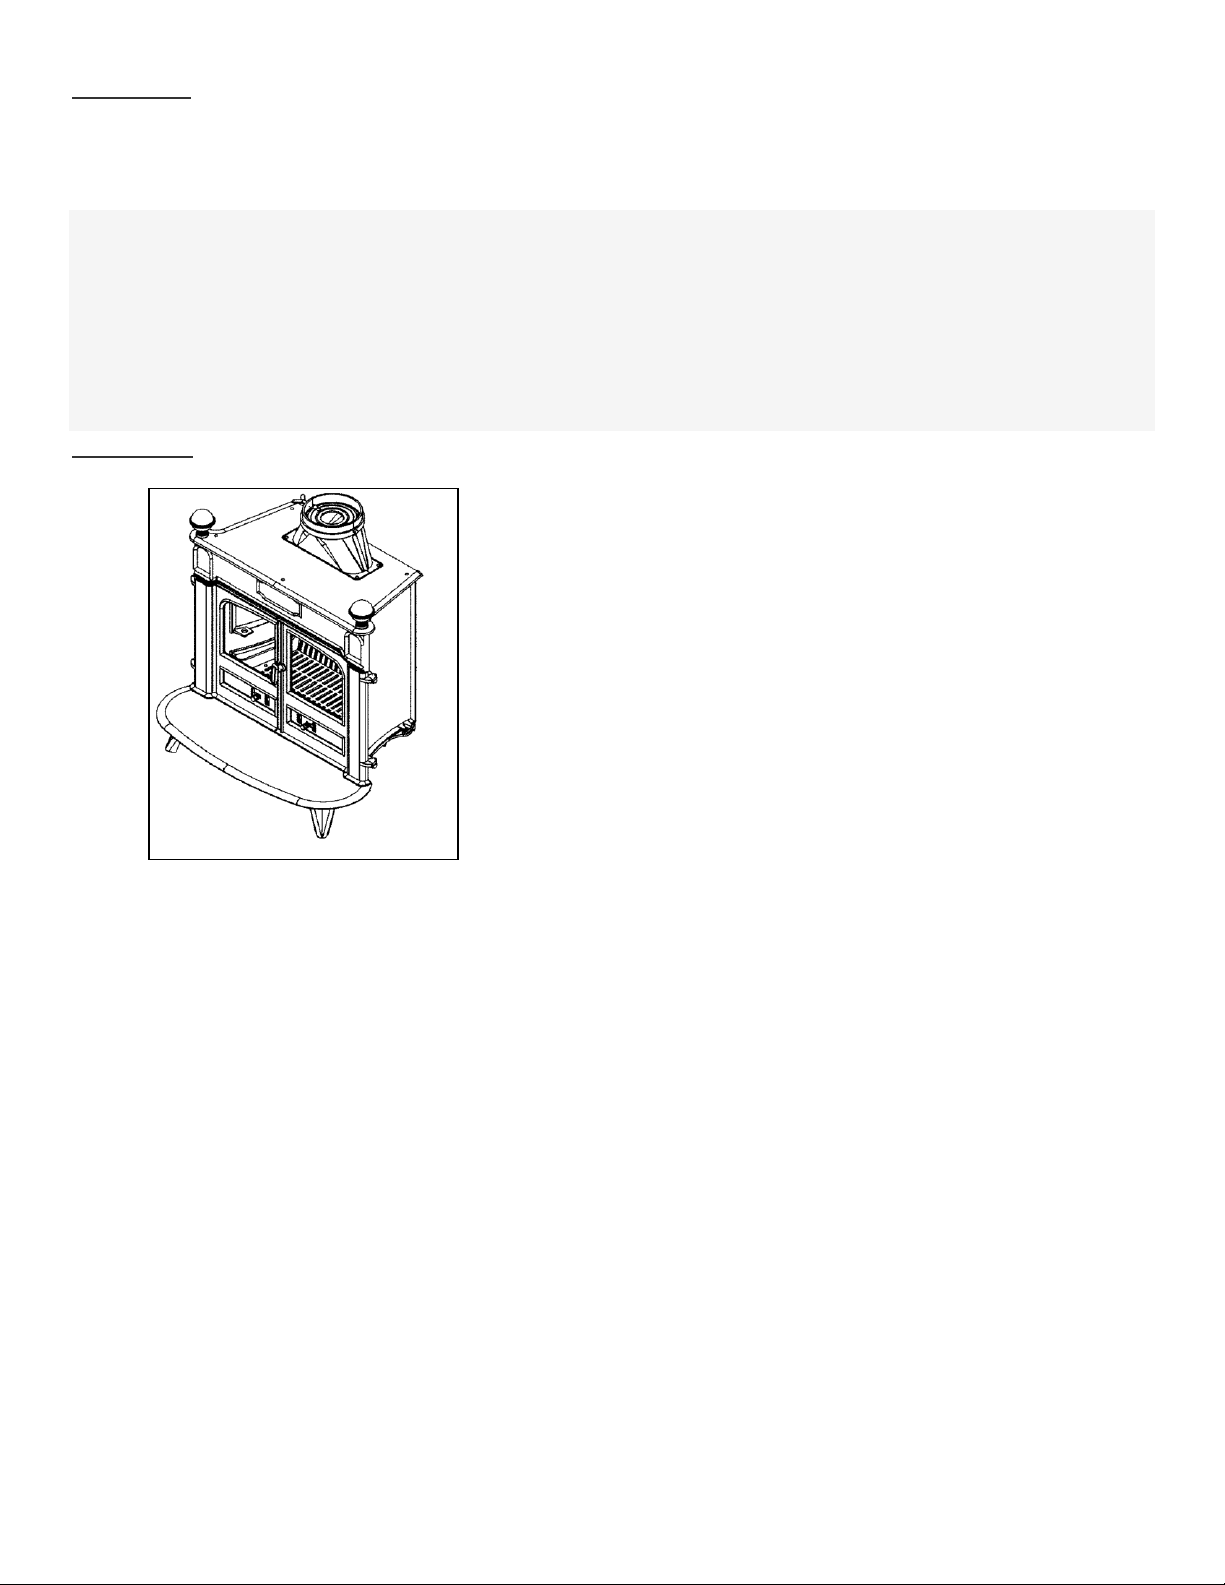
-The factory fits the spigot at the rear of the appliance. It can be connected directly to a chimney by a
horizontal pipe. It can also be connected on top and in that case, interchange the plate and the
spigot.

3
Important:
if the floor is made of flammable materials, it is necessary to protect it with some insulation e.g. tiles,
up to at least 40cm in front of the heater. Preferably use enameled flue pipes –as they resist
corrosion very well. Their length should be as short as possible, so that the heated fumes are used to
make a draught.
-The back wall must not be of flammable materials. If it is it must be protected sufficiently and
effectively.
-walls on the left or right of the device should be at a distance of at least 50cm from the unit, if they
constitute combustible material.
-In the case of a traditional stove, the ceiling must be located at least 80cm to the top of the unit.
-The device radiates naturally and all combustible materials (wood chairs, sofas ...) facing the front of
the device should be at least at a distance of 150cm.
Assembly:
1) Open the box and remove the flap resting on the top of the
unit.
2) Lift the cardboard, flatten it and use it as a work surface.
3) Open the doors and remove the package that contains the
following accessories:
-nozzle - 3 feet - the buffer nozzle
the cover-screw
4) Lay the device on its back.
5) Insert the flap into its slot in the front of the unit and secure
with four screws 6x20.
Then attach the two sides.
6) Attach the legs in their home with a 6-point and screw up the
device.
7) The spigot can be attached either from above or from the back.
Seal the spigot carefully before securing. use 4 screws 6x20, a good seal must be obtained.
Proceed the same with the plate to close the opening not used.
NB: the key to operate the damper on the spigot can be positioned right or left.

4
Connection to the chimney:
Example of connection of the chimney pipe
It should connect the device in accordance with the DTU 24.1. The safety distances between outer
walls of the flue pipe and chimney pipe of any combustible materials. (A) must conform to the
requirements of this standard. They depend on the particular type of duct, its thermal resistance, its
temperature class.
Instructions for the user:
-Before using the product, read the instructions and recommendations carefully.
-The unit can be equipped with an adjustable height grid for grilling.
-The device must be installed in accordance with national regulations in force in the country where it
is installed.
-It is recommended to be installed by a professional.
-Make sure the air intake is free from obstruction.
-The device must be connected to a chimney flue not serving other heaters.
-Never bring unauthorized modification on the device.
-The device is not planned to operate with an open door.
-All surfaces of the heater are active surfaces (hot), it is imperative to take all precautions to avoid
burns.
-Take all precautions to keep children and the elderly away to prevent accidents.
Ignition - adjustment:
-Always follow instructions
-During the first lighting of your unit, use small loads as to verify that the unit is functioning properly.
-Gradually increase the amount of logs over the next few days.
-Never use the heater as an incinerator.
- Only use the recommended fuel.
-Never use the unit with the door open

5
-Do not use the heater if the glass is broken or cracked. First do all necessary replacements.
-After a long period in which the unit has not been used, make sure that there are no obstructions in
the chimney.
Caution:
-Operating at a normal pace, the handle must not be handled manually. Use the glove to perform the
task. In addition, the combustion chamber and the ashtray compartment must remain tightly sealed to
avoid the discharge of smoke.
Keep the door closed during operation/functioning.
-The loading is done through the front door.
-For normal pace, use 3 or 4 logs and adjust to the position 2 or 3.
Note: The duration of idling will depend on the timber used and circulation. Do not load fuel more
than 25cm high.
Loading: Recommendation very important:
To load, the fire should be low enough. .
Always open the door very slowly to allow the draw to establish itself and thus avoid the discharge of
smoke.
Importance of fuel:
If you feel the unit is not heating efficiently then:
-Either there is insufficient burning fuel or the fuel being burnt does not possess enough energy.
- Burn only dry wood we recommend wood that is around 2 years old or 36 months will be even
better.
In principle all wood has the same calorific value for the same weight.
Hard wood will be better because it is denser and often less humid.
The humidity in wood alternates from 15% for dry wood and up to 50% for wet wood.
It requires lots of energy to evaporate the water.
The available calories for burning are 3600 per kilo for dry wood with 15% humidity. The calories will
only be 1500 per kilo for wood with 50% humidity.
The use of wet wood also creates condensation in the chimney, it could cause the chimney to clog
and possibly cause chimney fires.
De-Ashing:
Once in the morning at the time of restart and then once in the evening .
Empty once every two to three days following the use of the heater.
Never let the ash pile up until it touches the grate, consequently the grate will not cool down and will
deteriorate.
Sweeping:
Sweep your chimney at least once a year. Check the condition
Check to make sure that the heaters door seals are in a good condition.
Replace it if necessary.

6
Maintenance:
Have your appliance checked by a qualified person at least once a year. Never clean the glass while
the unit is still hot.
Caution:
When using your heater for the first time, it is necessary to run a low fire, allowing parts to expand
normally. The handles get hot during normal functioning.
Maintenance of cast iron and steel:
Any steel or cast iron stove requires minimum maintenance, after winter, during the hot season, in
order to preserve its durability. Indeed, when a stove works, there is no possibility of oxidation of the
parts. It only occurs during a prolonged stop. The cast iron parts can be maintained using black
graphite paste (Ref: 0012). This is applied cold, for it is dry, polish with a soft cloth. High temperature
paint (grey cast iron ref 0001) aerosol can also be used to obtain a better finish on the parts. Ensure
that before applying the paint, all traces of oxidation have been removed using an emery cloth.
The cast iron stoves with any exterior enameled finish require maintenance inside the home.

7

8
WARRANTY CONDITIONS
Any warranty is subject to: correct installation, use and maintenance of the unit.
Parts that are in direct contact with high temperatures and that could undergo distortions caused
by wear and tear are guaranteed for 1 year. This includes:
1. Decorative panels, side panels, grates.
2. Guide plates, air channels and fire-bricks.
3. Door hinges and handles.
4. Fans and thermostats.
Wood-burning Inserts and closed fireboxes have a 5 year warranty excluding all the parts (as
described above) that are in direct contact with high temperatures, where it is 1 year.
Only the parts/s that are deemed to have failed will be covered by the warranty.
Parts not covered by warranty:
1. GLASS –ceramic glass can withstand temperatures of up to 750°C. The glass can only
break because of a mechanical shock while using or handling the appliance.
2. Glass seals and ceramic rope seals are considered wear and tear items.
The following will invalidate any warranty:
1. Damage caused by burning fuels other than those for which the unit is intended.
2. Any defect or deterioration caused by a fall, shock, negligence or lack of supervision and
maintenance.
3. Deterioration of parts caused by abnormal conditions (backdraft, dampness, temperature
shock).
4. Abnormal usage of the unit (using a unit with the door open, running it on maximum for
extended periods).
5. Any modifications or transformations made to the unit and non-compliance with installation
norms.
Table of contents
Other Godin Wood Stove manuals
Popular Wood Stove manuals by other brands

ADURO
ADURO H3 LUX user manual

Harrie Leenders
Harrie Leenders Boxer Plus installation instructions

ACR STOVES
ACR STOVES Woodpecker Stoves WP4 Technical manual

Warmington
Warmington Tasman 46L Fire installation instructions

Kuma Stoves
Kuma Stoves Wood Classic Installation and operating instructions

Lopi
Lopi Answer Wood Stove owner's manual

Osburn
Osburn Beyond Fire 1700 Installation and operation manual

Vogelzang International
Vogelzang International VG2020 manual

Storch Kamine
Storch Kamine MAGNA SE user manual

Harvia
Harvia 36 Pro Instructions for installation and use

ADURO
ADURO 4 user manual

Nibe
Nibe Flakt Contura C600 Lighting instructions