Contents
1. Before You Hit the Road 2
1.1 Safety notice 2
1.2 Names and functions 4
2. Before the First Ride 5
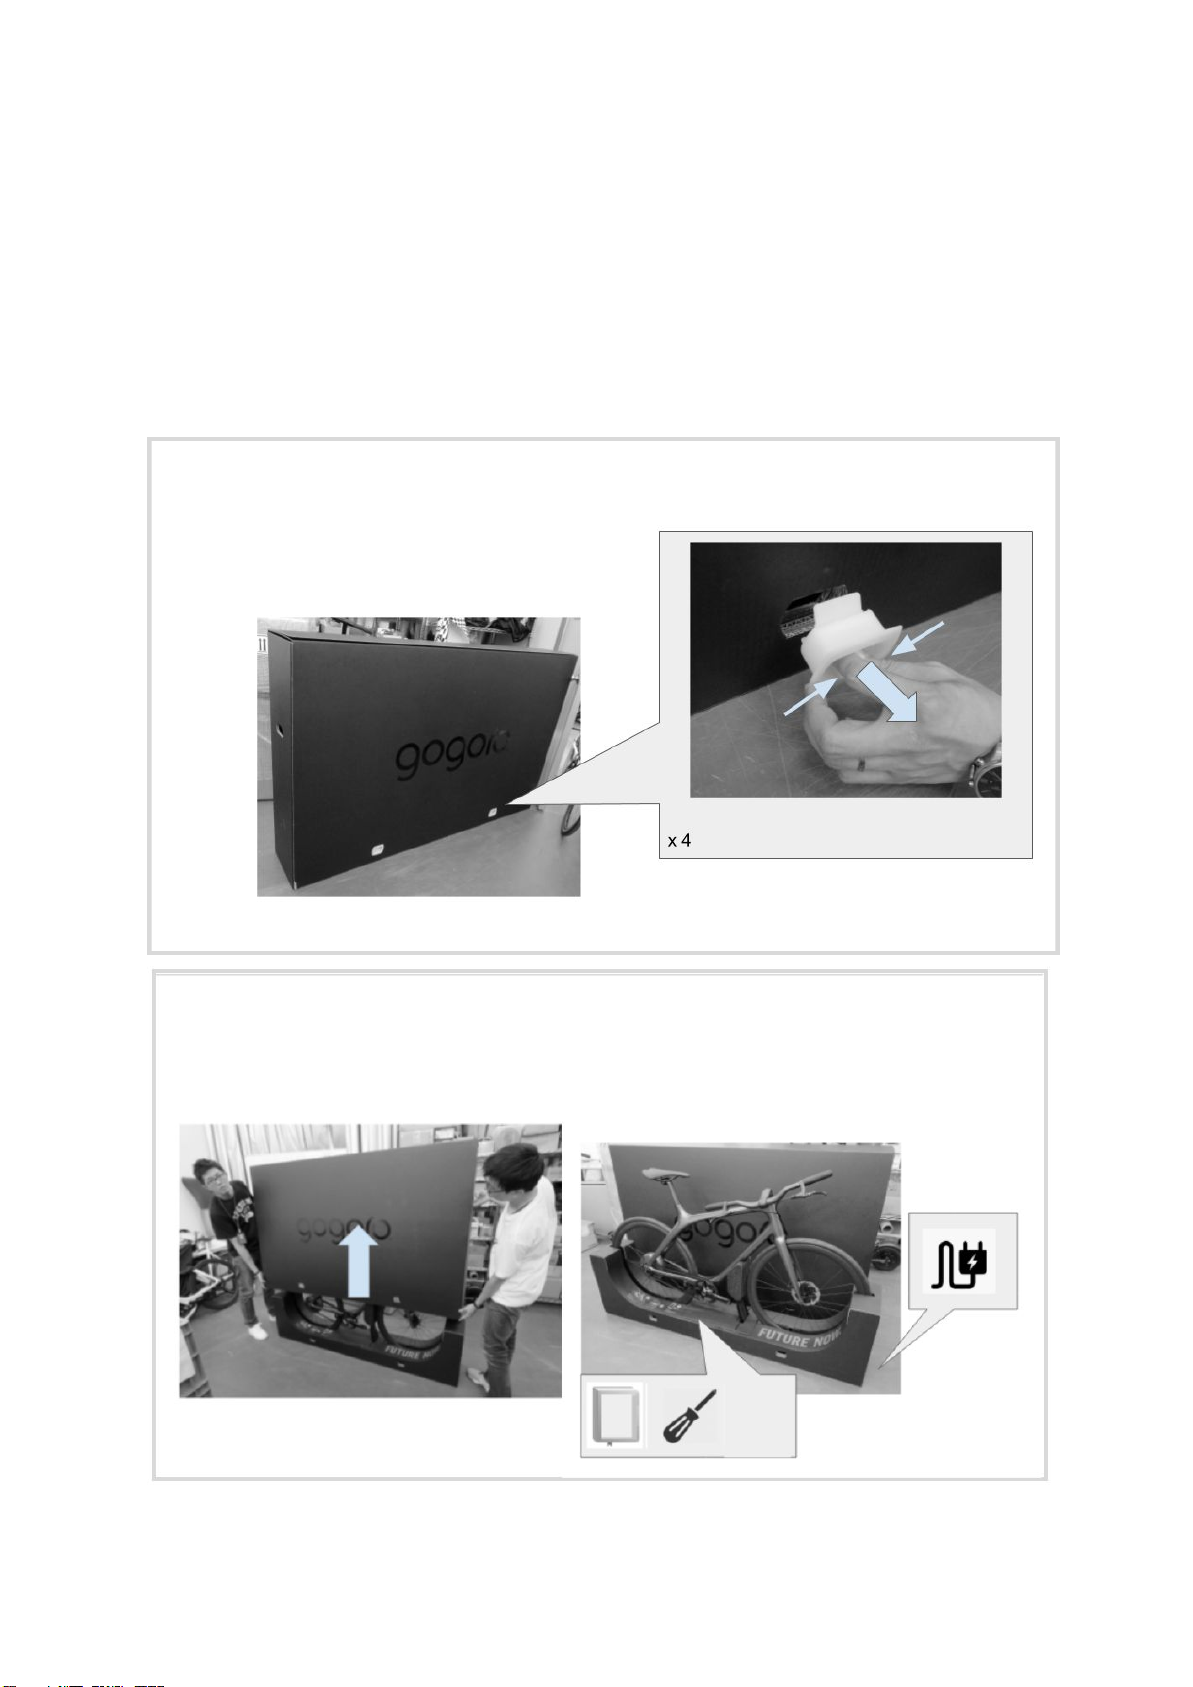
2.1 Open the box 5
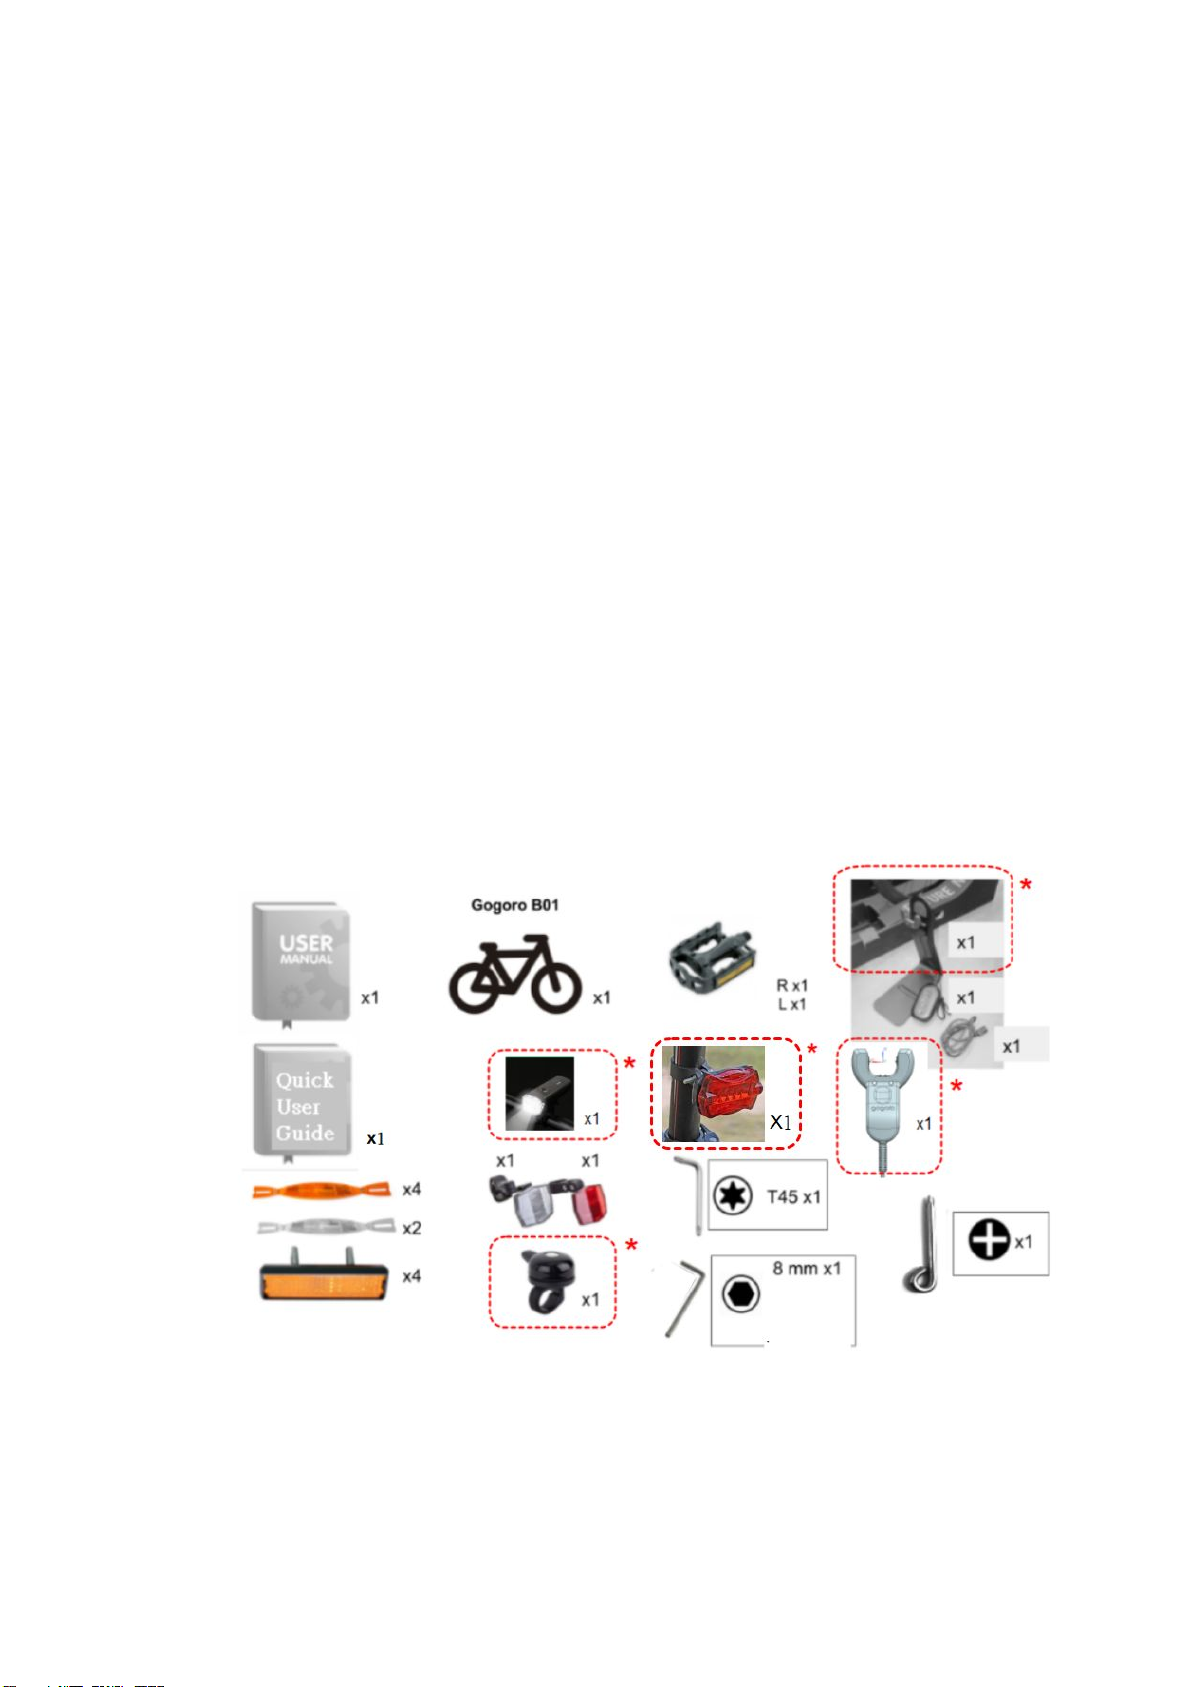
2.2 Check content 6
2.3 Basic installation and adjustment 7
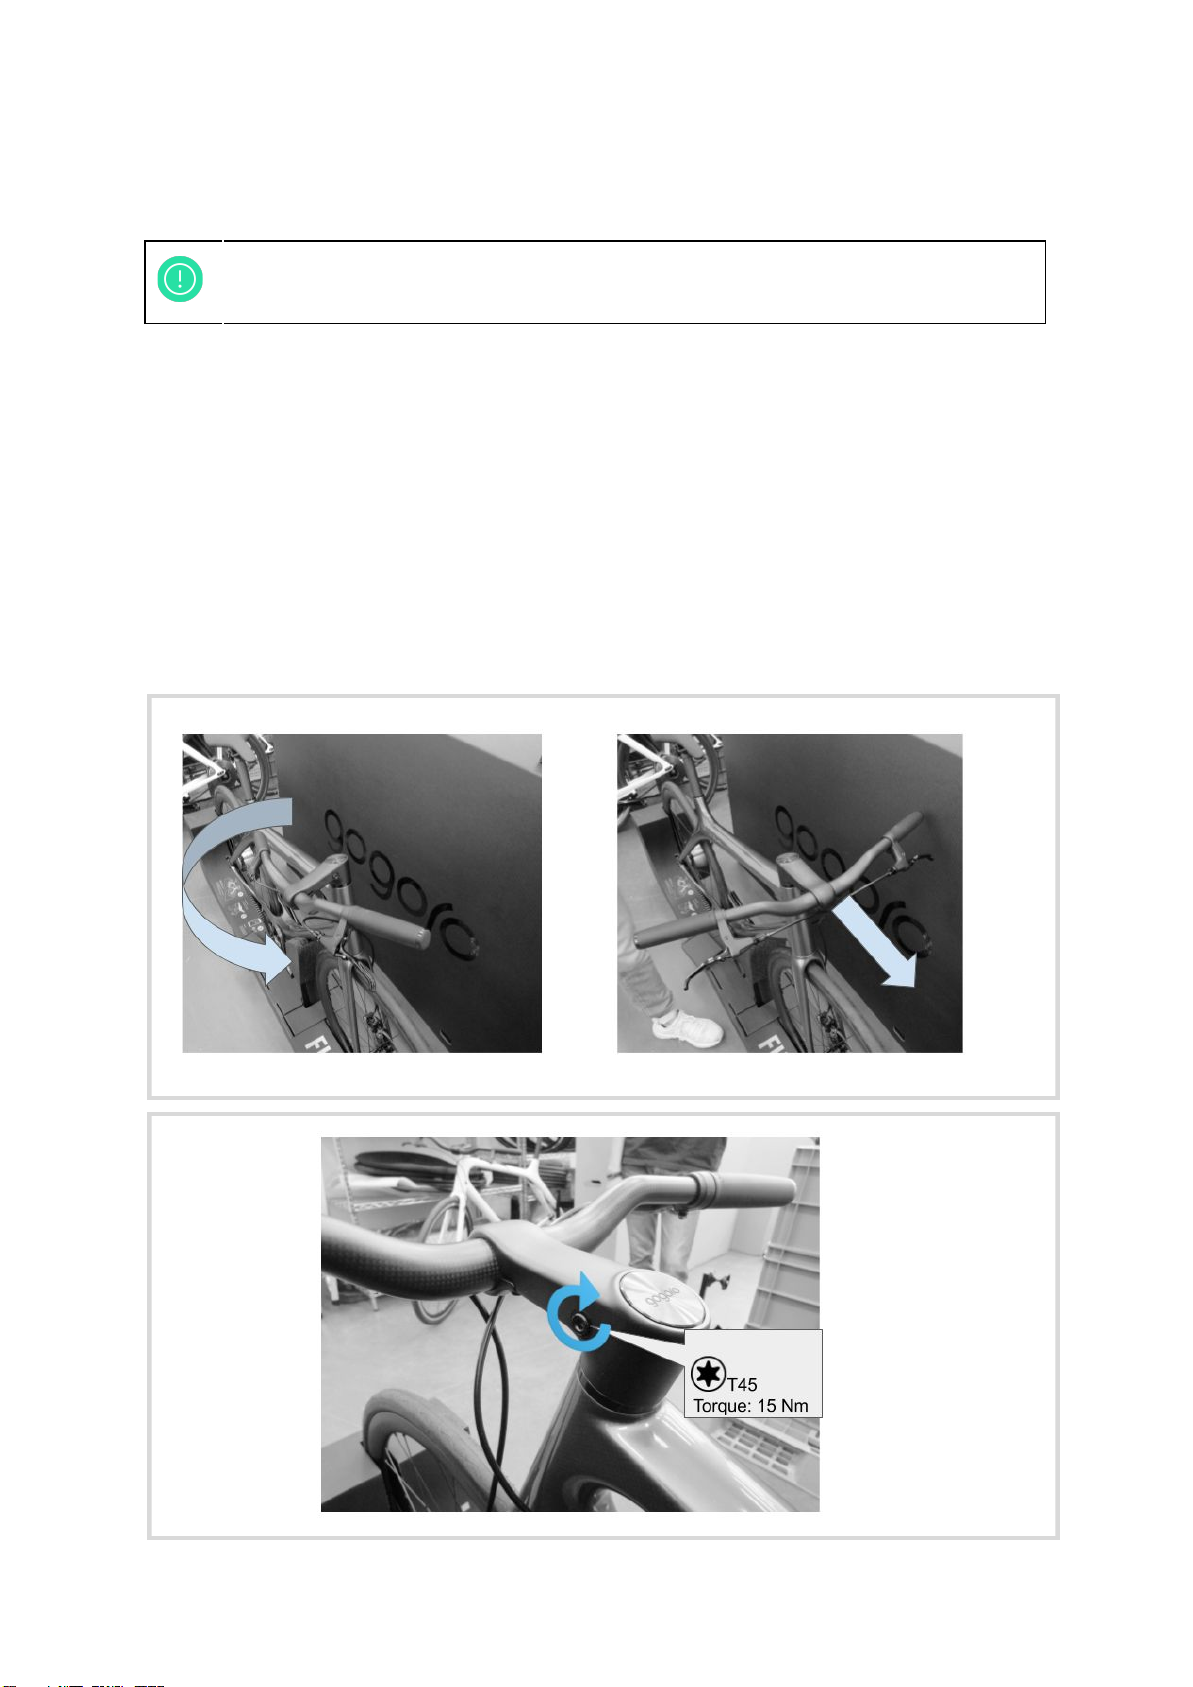
2.3.1 Handle bar settings 7
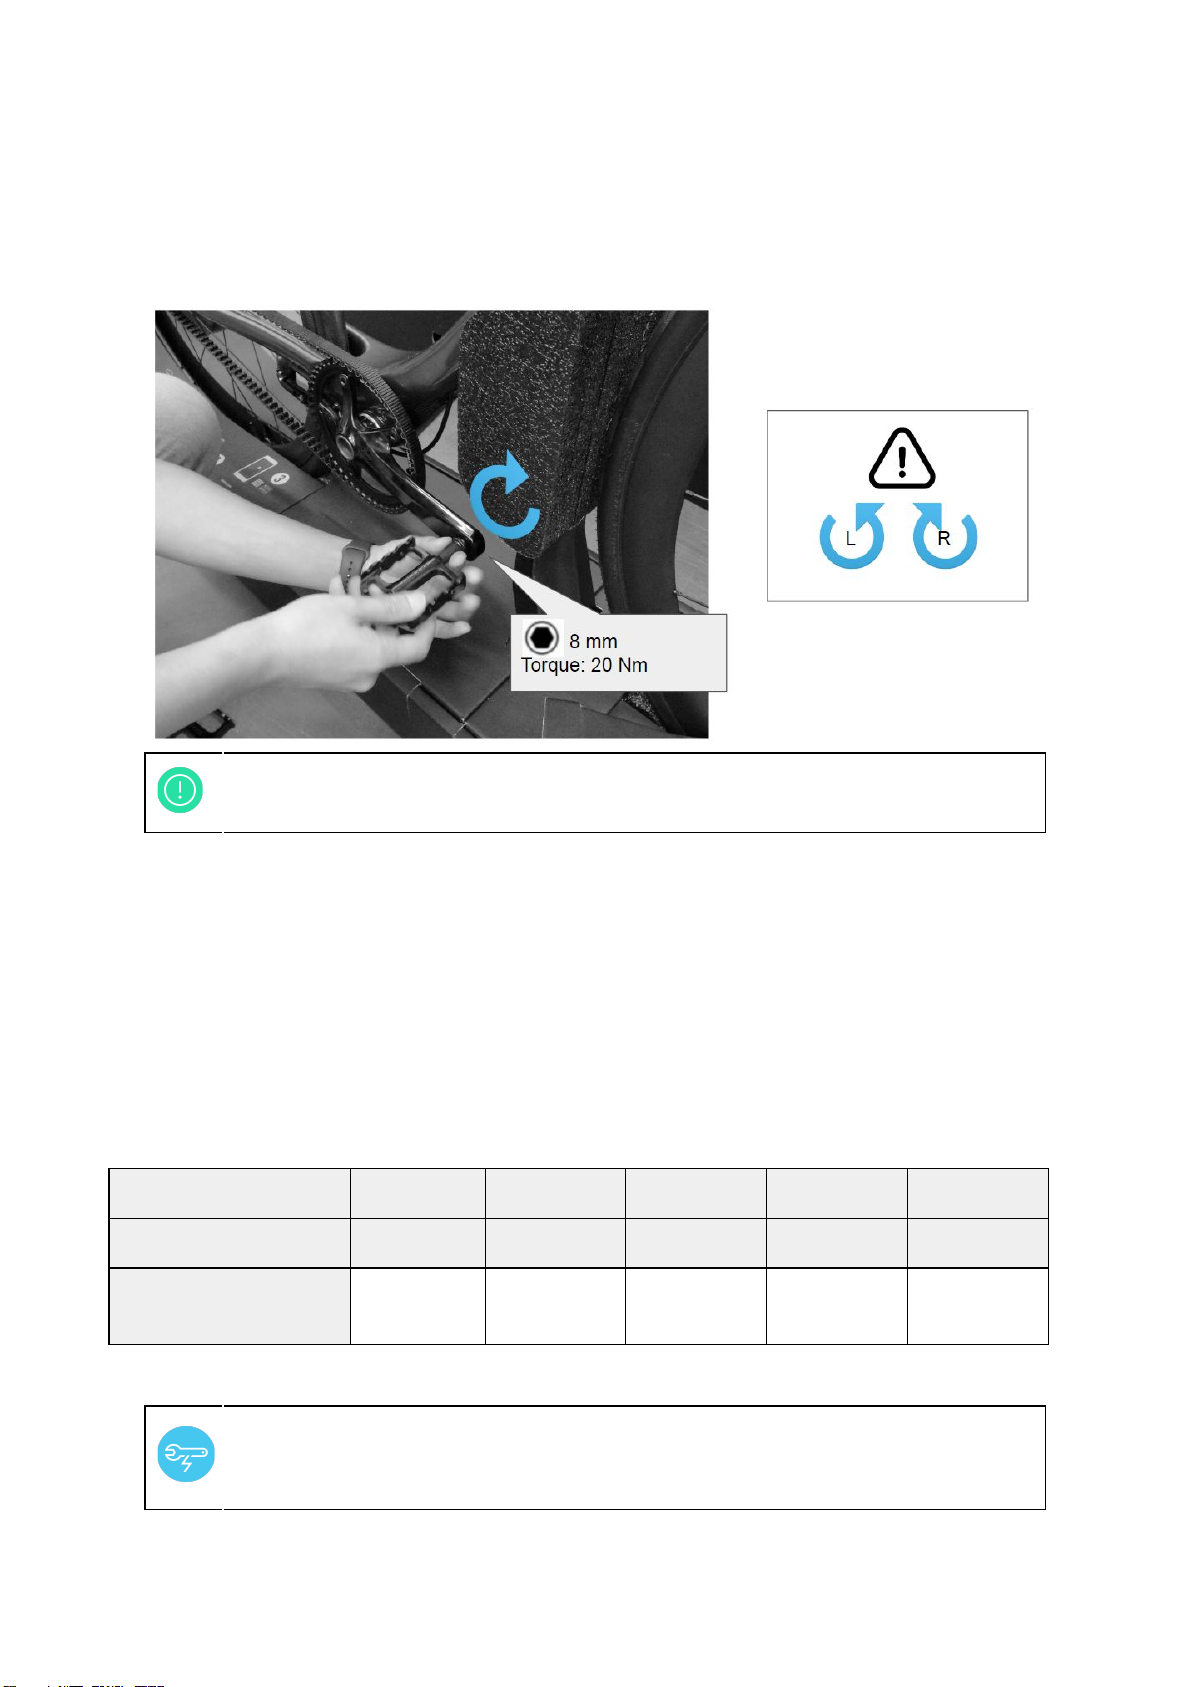
2.3.3 Pedal installation 8
2.3.4 saddle height settings 8
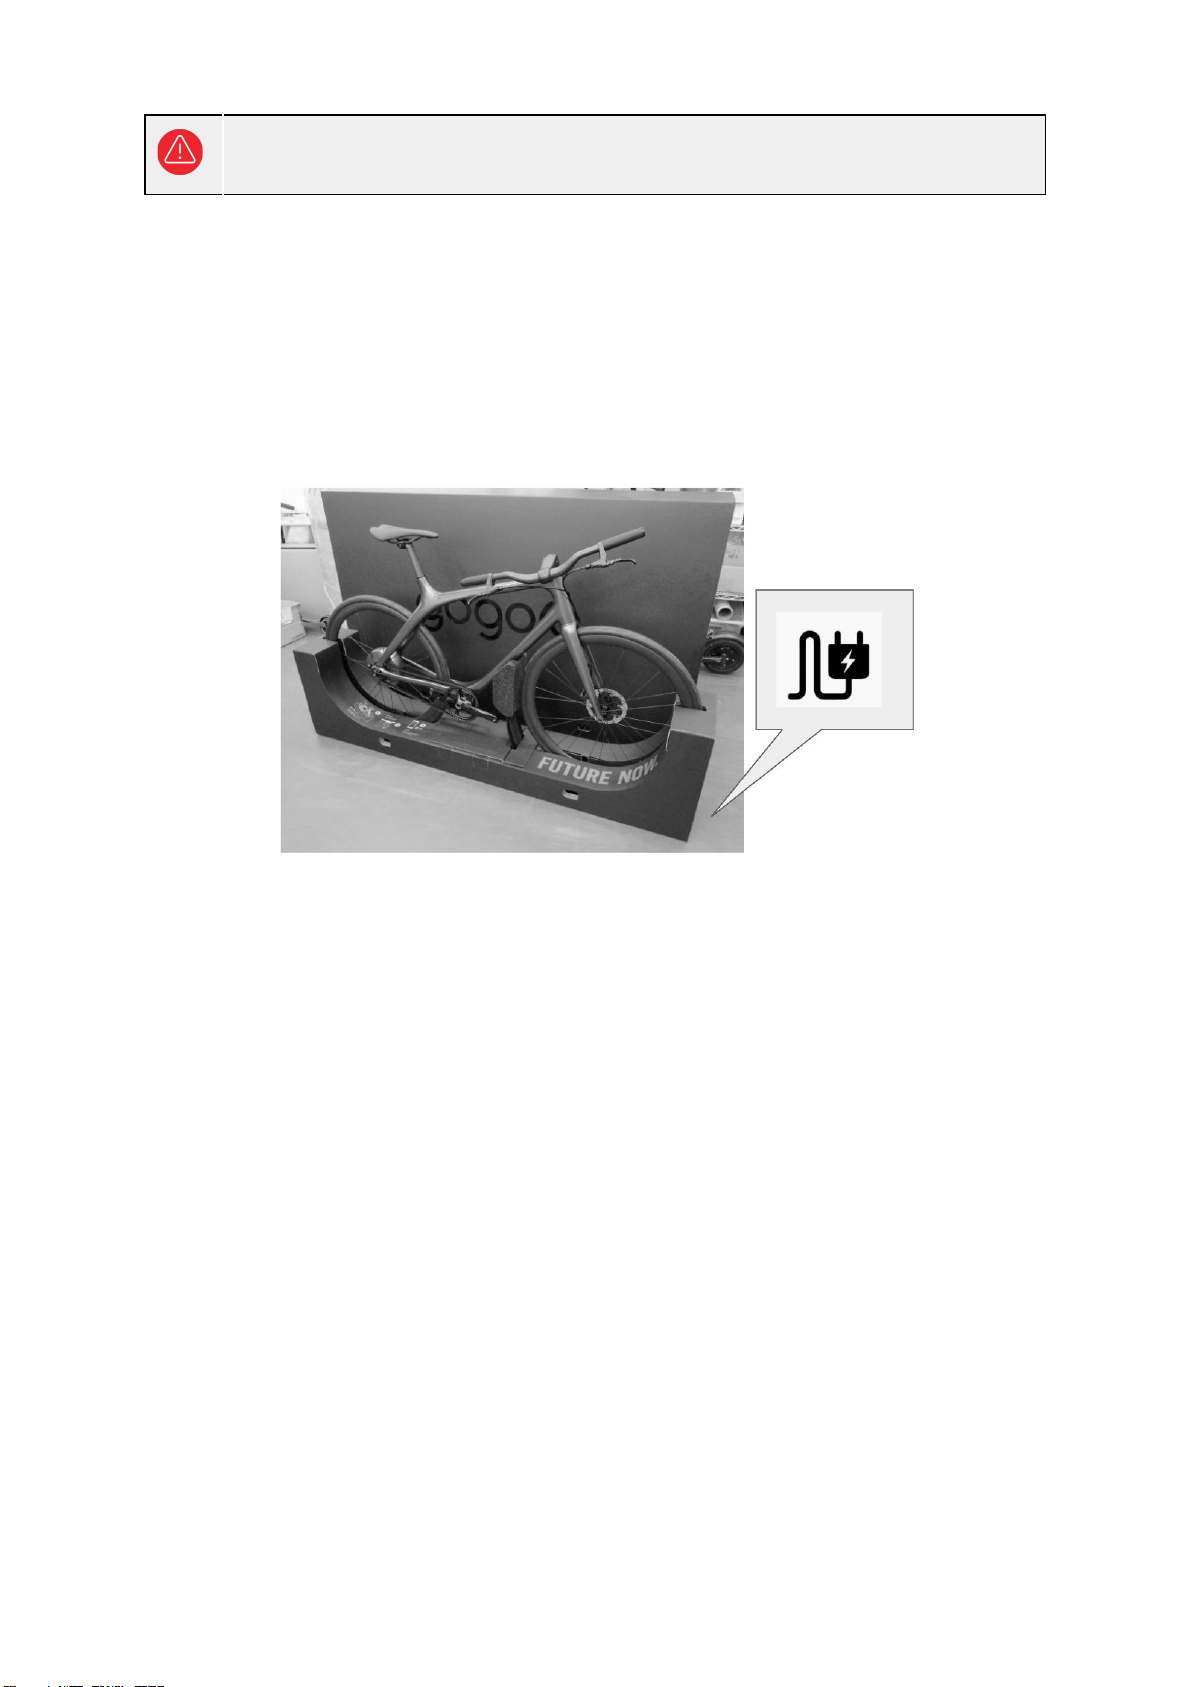
2.3.5 Take out the charging stand. 9
2.4 Wake up your Gogoro B01 and charge the battery 9
2.5 APP Setting 10
2.5.1 Download and install the Gogoro Smartwheel APP 10
2.5.2 Sign up or sign into the Gogoro Smartwheel APP 11
2.5.3 Pair the Gogoro B01 with your account 12
3. Unlock, Turn on and Ride 13
3.1 Unlock it and turn it on 13
3.2 Assist power adjustment 13
3.2.1 Electric assistance is triggered by pedaling 13
3.2.2 Assistance level adjustment 14
4. Turn off and Lock 15
4.1 Manually turn it off 15
4.2 Auto lock 16
5. Charging 16
6. Hibernation Mode 17
7. Storage and Shipping 17
8. Maintenance 17
8.1 Check the following before every ride 17
8.2 Daily care and cleaning 18
8.3 Advanced adjustment 19
8.3.1 Saddle height / placement adjustment 19
8.3.2 Transmission belt tension adjustment 19
8.3.3 Brake lever setting 20
8.3.4 Torque values for threaded fasteners 20
9. Troubleshooting 20
10. LED Signal List 23
1