Goldmaster Gold Star 3D Scanner User manual

USER MANUAL
GOLD STAR
3 SYSTEMS
Overview
Dear customer, thank you for choosing GOLD STAR Device.
This product contains 3 systems which will allow you to detect the presence of
underground gold & Treasures & cavities.
GOLD STAR Device designed to help you discover GOLD, SILVER, BRONZ, and
CVITY…
In addition, it can confirm your target and identify the type underground .

USER MANUAL
Warnings!
Please be sure that all precautions taken against all risks.
Do not use your device while it is raining or on extremely wet ground.
Turn on your device after you make sure that all parts are in place.
Make sure that battery of your device is fully charged before working on it.
If the device shows you empty battery sign on the screen you should
disconnect the battery and recharge it.
We recommend reading the user manual before start working on the device to
avoid mistakes doing the work on the device.
Main unit of the device is under warranty against all electronic breakdowns
for two (2) years.
Damages caused by user errors (like opening the main unit, hits, harms etc.)
are not within this warranty.
Battery and antenna are also not within this warranty.
The tablet which come with the device is not under the warranty
You should follow the instructions in this user manual strictly to minimize the
possible faults and to use your device correctly.
The device battery needs 4 hours charging to be fully charged.
The device battery can works for 8 to 10 Continuous hours.
You should use the charger which comes with the device only.
The red light on the charger means that the charger is working correctly.
The green light on the charger means that the battery is fully charged.
The Bluetooth will show on the tablet after you select the 3D SYSTEM.
THE BATTERY DETEAILS:
7.2 VOLTAGE–2500 MAH
THE CHARGER DETAILS:
8.4 VOLTAGE–1000 MAH

USER MANUAL
1- Open the device by the on off button after you connect all the parts of this system
and the device will start working immediately.
-1- -2-
2- Select the language that you wish
From the options by pressing on the
Up / down buttons to move between
The options and the OK button to
Conform your favorite language.

USER MANUAL
3- After selecting the language , you will get the systems menu which contain 3
systems and the settings option as below :
-1- -2-
3-1 presses on the down button to get to the settings option and after that press OK to enter
the settings
3-2 you will see the options available (light –sound –info)
You can adjust the light by pressing on the OK button
Also you can adjust the sound by pressing on the OK button
3-3 if you press on the (info) option you will see the details of the device
(Origin of the device –factory name –the serial number of the device as in the following)
After you adjust the settings you can return to the systems menu by pressing on the back
button and your setting will be saved automatically
NOTE: EVERY TIME YOU CLOSE THE DEVICE THE SETTINGS WILL RESET

USER MANUAL
1- LONG RANGE SYSTEM
TO DETECT GOLD TREASURES / NUGGETS –BRONZ - SILVER
This system designed to cover vast areas and its depth is up to 35 M under the
ground and Front Range of 1,200 meters.
THE PARTS OF THE LONG RANGE SYSTEM “
DEVICE HOLDER
Main Unit
ANTENNAS BATTERY

USER MANUAL
1- After selecting the LONG RANGE SYSTEM
The metals menu that the device search for it will pop up:
2- After you select the metal you want to discover the front range menu will pop up :
3- Select the front range you want to reach from the front range Menu and then the
search will begin and this screen will appear on the device
-1- -2-
After you see the above screen on the device the indicator will start moving and making a
sound which will conform that the device start to send signals and receive it back
And when the device turn to the right or the left, you must follow the device movement,
which will guide you toward the target location

USER MANUAL
HOW TO CARRY AND USE THE DEVICE
In the beginning, the user must be trained on the proper way to hold the device and balance with
it. It is preferable that these exercises be performed when the device is turned off.
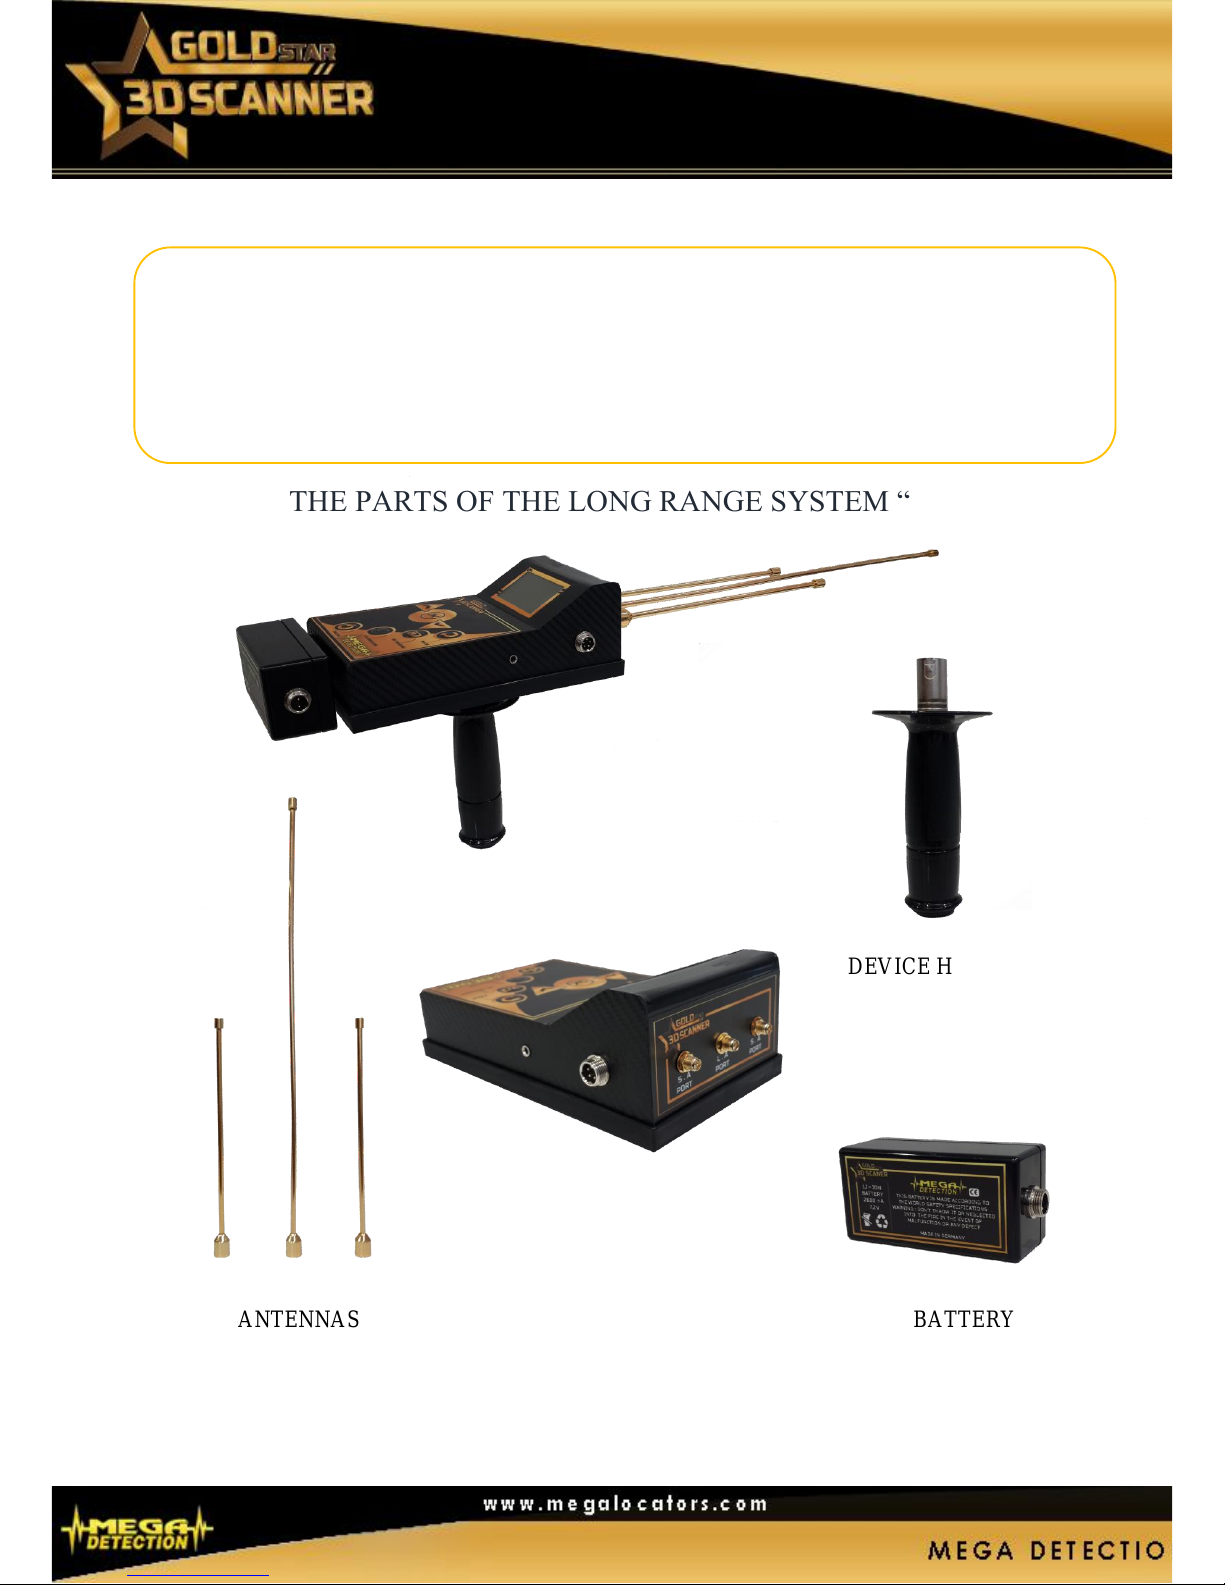
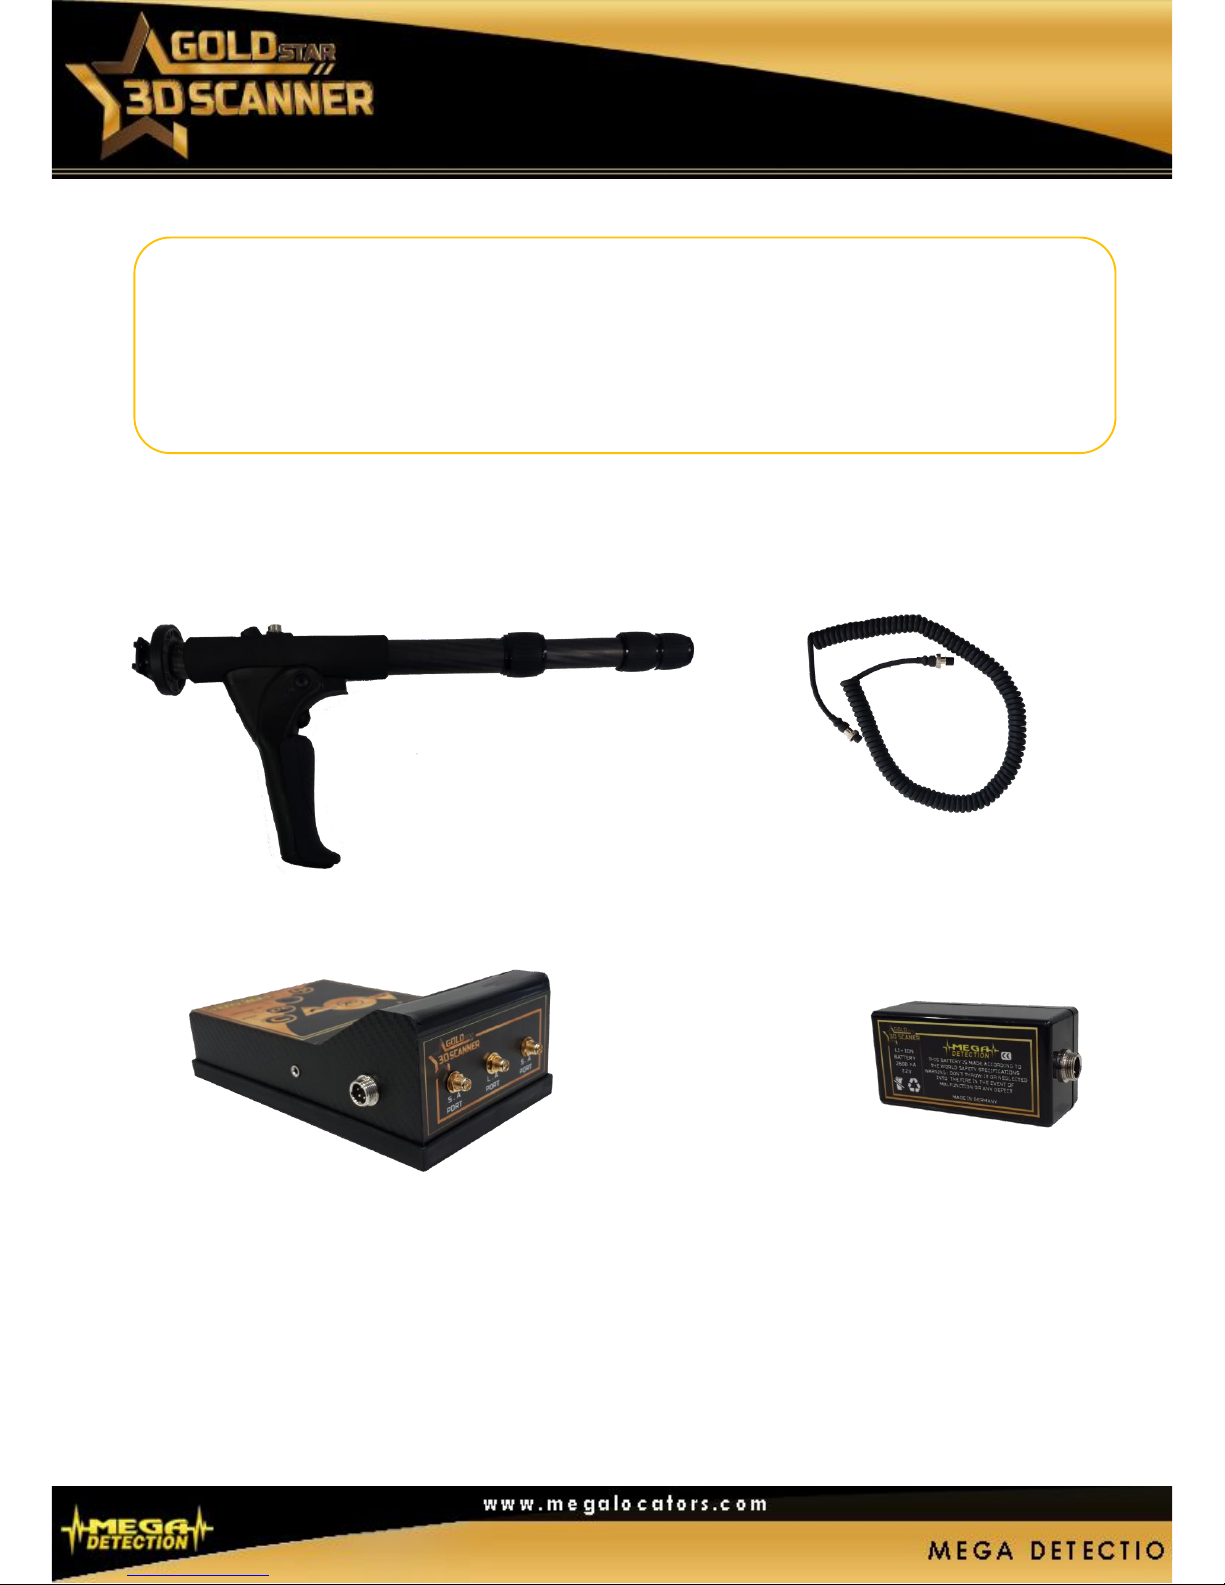
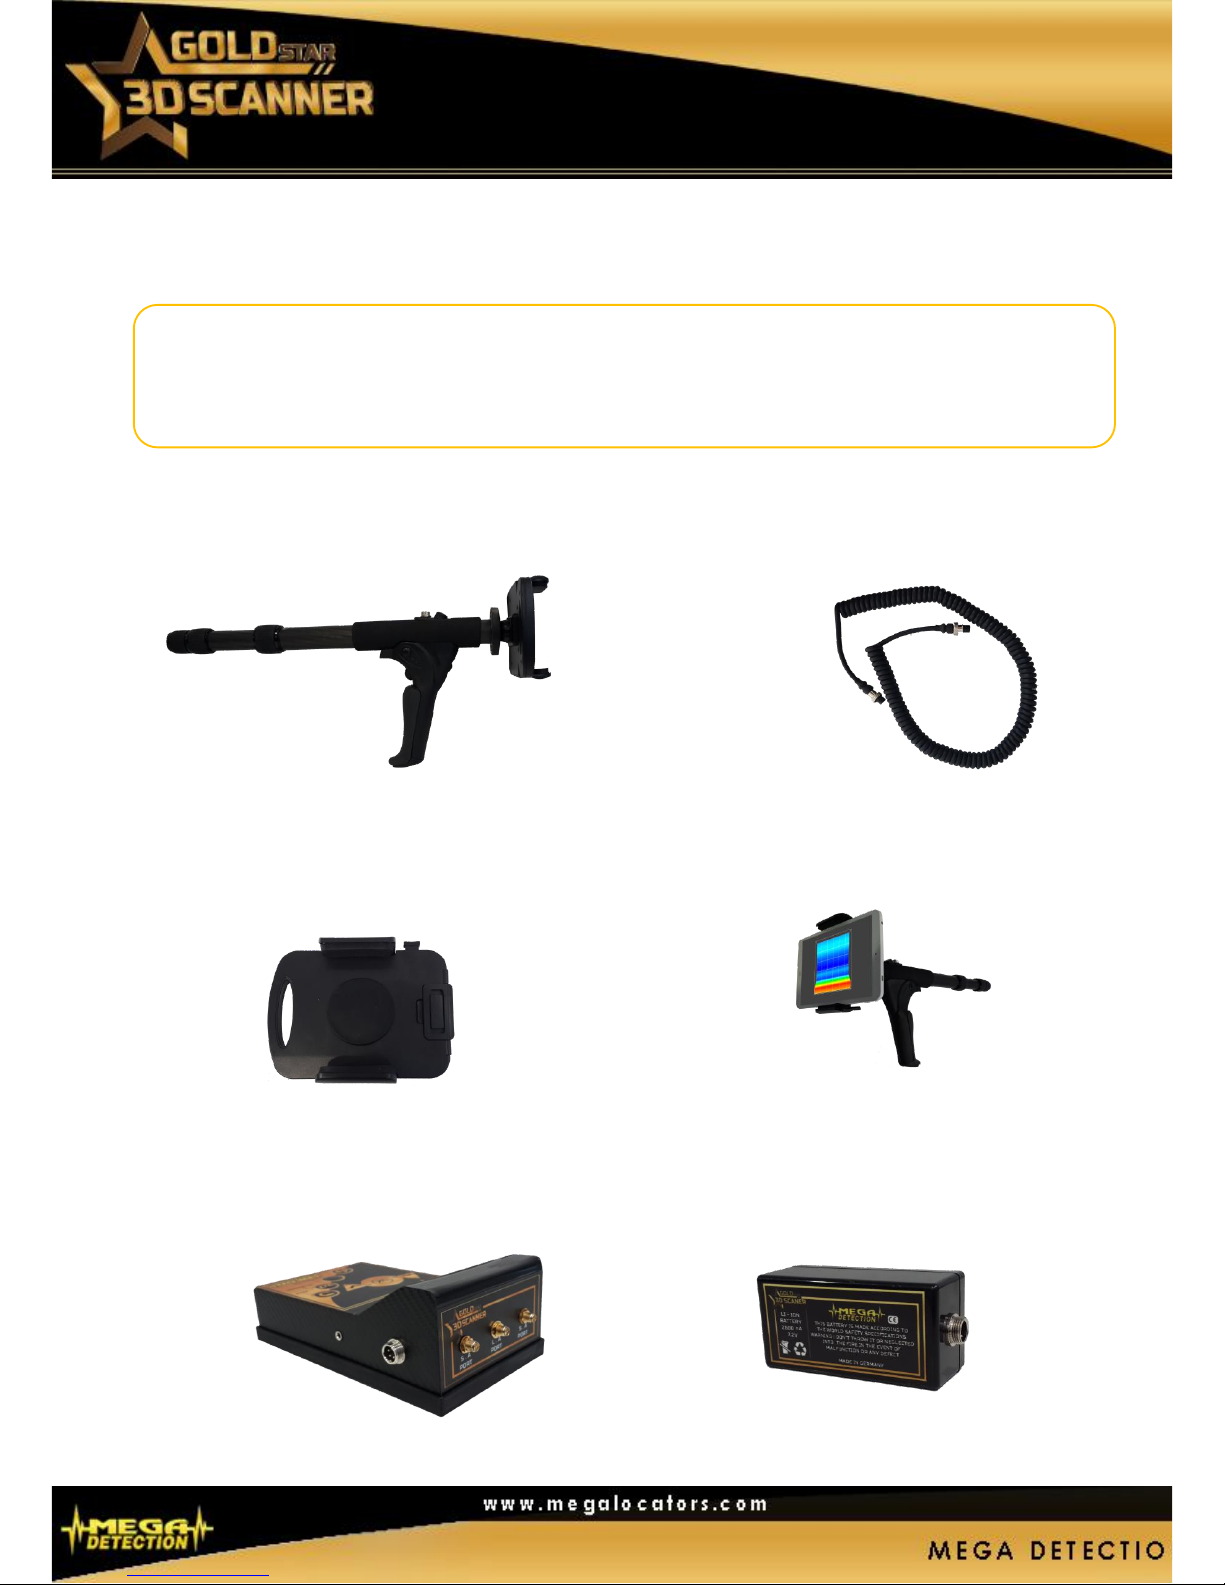
First, the three antennas must be installed in the front port of the main unit and the handle should
be placed under this unit
You must train on the balance of the search antennas in parallel so that they remain constant
while walking with the device where you have to hold the device from the handle, which is
installed under the main unit and direct the front mounted antennas horizontally, and this process
performed easily and simply by repeating it more than once and in this way the user will master
the method of keeping the device and balance with it.
This operation is done only to get used to properly loading the device for correct and guaranteed
results.
The main unit of the device on which the search antennas are installed is moving towards the
target location and has the ability to move freely for the search and give accurate results. The user
should hold the handle of the device in a position that enables him to use the device comfortably
also must take into account the terrains and ground conditions, so that the device will not vibrate
and that its balance will not be lost.
Open your feet to the right and left, hold your arm, and the way you move will be by moving the
hip. In this way, there will be better chances to maintain balance more easily.
If you tilt your hands to one side, of course, the balance of the main unit will be lost without any
precision toward tilt direction. (Please continue to train until the balance is complete, before you
start searching for treasures and real goals)
It would be useful to conduct more than one search in the same area in order to understand
whether you are on the right target path.

USER MANUAL
2- MAGNETOMETER SYSTEM
TO DETECT METALS AND CAVITY UNDER THE Ground
This system designed to detect under the sensor directly and the depth is up to 35
M under the ground.
Parts of magnetometer system
Magnetometer Connection Cable
Battery Main Electronic Unit

USER MANUAL
Magnetometer Systems Using Steps:
1 - After the installation of the battery on the main unit and the handle of the magnetic sensor is
disassembled and the rings along the sensor are loosened to increase its length and then tighten it
to secure it
2 - Connect the power cable to the outlet on the main unit of the device and the other end of the
cable to the outlet in the sensor (magnetometer)
3 –Then turn the device on and select “Magnetometer” from the Systems menu
4 - The indicator shows the presence of a Cavity or Metal as shown below:
:
5 - The sensor is directed downwards and if the magnetometer is passed over a magnetic metal, it
is shown on the indicator indicating the presence of a metal as follow
:
6 - In case of passing over an underground cavity such as a cellar, tunnel or grave... The indicator
Cavity as follows:

USER MANUAL
3D IMAGING SYSTEM
This system was designed to perform a three-dimensional survey of the soil layers through the
sensor and display the scanned data as 3D images on the companion Tablet PC through the
advanced analytical software
Parts of 3D Imaging System
Connection Cable Sensor with Tablet base
Tablet PC Tablet Base
Battery Main Electronic Unit

USER MANUAL
Steps for using of 3D Imaging System:
1 - After the installation of the battery on the main unit and the handle of the magnetic sensor is
disassembled and the rings along the sensor are loosened to increase its length and then tighten it
to secure it
2 - Connect the power cable to the outlet on the main unit of the device and the other end of the
cable to the outlet in the sensor (magnetometer)
3 -The base of the tablet shall be installed at the end of the sensor at its appropriate location and
the Tablet PC shall be placed above the base.
4- Then turn the device on and select “3D - Imaging” from the Systems menu
5 - The communication between the sensor and the tablet done via Bluetooth, where the
computer recognizes the device and the communication between the two devices to transfer data
from the sensor to the analytical program installed on the tablet PC
6 - The sensor is directed downward and the 3D Imaging button on the main instrument panel is
used to measure and scan the area under the sensor. It is preferable to have one measurement
every 30 cm on one line and then move to another line and so on to scan the area selected for the
search (usually rectangular area)
Note: During a single measurement process, the sensor must be at the same distance from the
ground and in general we prefer about 5-15 cm from the surface of the earth if possible.
If you run over stones, wood, or long grass, start scanning with the probe higher than in the
beginning. Under such conditions, you may need to start scanning the probe at a height of 50 cm
and keeping it at this level during the entire scanning process. If it is important to maintain the
constant height because this will eliminate many errors, as a general rule we do not change the
height during the scan because it may create unnecessary errors.
7 - With each measurement process, the point under the sensor is scanned and the data is
transferred to the tablet. The scanning data is displayed on the analytical program that is installed
on tablet PC as three-dimensional figures
8 - When finishing the scanning the search area, the user can view the 3D representation of the
scanned area on the 3D analysis program

USER MANUAL
Using the MEGA DETECTION software for 3D analysis installed on the Tablet PC, the
user can learn the targets underground and analyze them visually through the three-
dimensional graphics that represent the scanning data of the soil layers and it is easy to
know the size, shape and depth of the discovered target before the drilling.
Table of contents
Other Goldmaster Metal Detector manuals