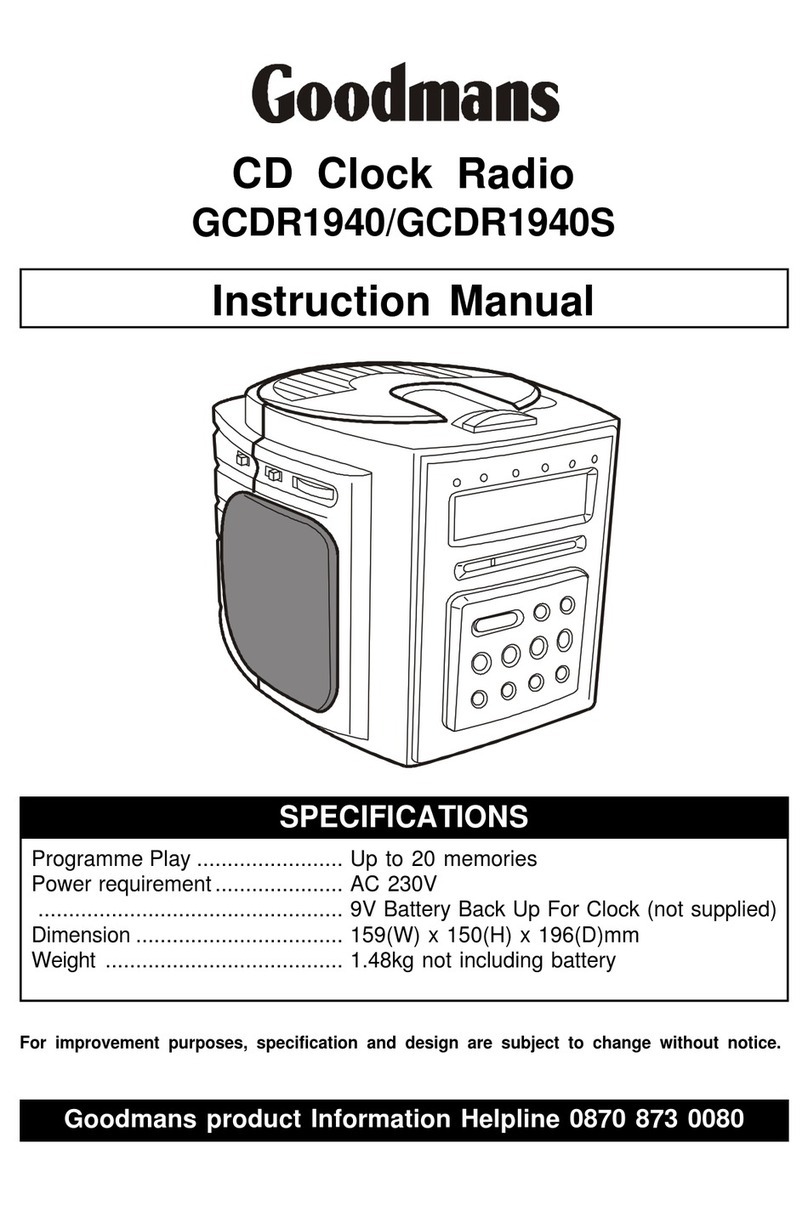
Goodmans GCDR1965R User manual

GCDR1965R
Instruction Manual
Alarm Clock Radio CD Player
Programme play...............................Up to 20 memories
earphone output...............................20mW
Power supply....................................AC 230V-50Hz
3 x AAA Battery Clock Memory
Dimension.......................................170(W)X195(D)X185(H)mm
Weight.............................................1.90kg not including battery (Main Unit)
For improvement purposes, specification and design are subject to chande without notice
SPECIFICATIONS

Important safeguards.........................1-2
Power Sources.....................................3
play maintenance .................................3
disc cleaning, power failure ...................4
TABLE OF CONTENTS SAFETY PRECAUTIONS
Remote control locations.......................5
Location of controls...............................6
Setting the clock. ..................................7
Alarm function.... ..................................7
Display high / low dimmer.......................8
Function operation................................8
Radio operation....................................8
CD operation........................................8
Play mode function ...............................9
Sleep function.. ....................................9
Listen the music by using headphone....10
Production specifications. ....................11
Wake up to Radio, CD & Alarm................8
Snooze function.. .................................9
Mute function.......................................9
Programme play operation...................10
Troubleshooting guide.........................12
WARNING
To prevent fire or shock harzard, do not
expose The unit to rain or moisture.
To avoid electrical shock, do not open the
cabinet. Refer servicing to qualified
personnel only.
1. As the laser beam used in this
compact disc player is harmful to the
Eyes, do not attempt to disassemble
the casing.
2. Stop operation immediately if any
liquid or solid object should fall into
the cabinet. Unplug the unit and have
it checked by qualified properly.
3. Do not touch the lens or poke at it. If
you do, you may damage the lens and
the player may not operate properly.
4. Do not put anything in the safety
Slot. If you do, the laser diode will be
ON when the lid is still opened.
5. This unit employs a laser. The use of
controls or adjustments or
performance of procedures other
then those specified herein may
result In exposure to hazardous
Radiation
Player operation
1
1.IMPORTANTSAFEGUARDS
Foryourconvenience amainsplug withafuse has beenfittedtothisappliance.Foryoursafetyplease observe thefollowing.
1.Shouldthe fusefail inthe plug removethe plug fromthe wall socketand replacethe fusewitha3AmpASTAapproved toBS1362
fuse.
2.Neverusethe plug withoutthe fusecoverfitted.Replacementfusecoversareavailablefromyourdealerormostelectricalretail
outlets.
3.IFthe mainsplug iscutoff fromthe cable,rewirethe replacementplug inaccordancewiththe instruction given inthismanual.
4.CAUTION:Underno circumstancesshouldthe discarded plug be inserted intothe mainssocket. Topreventasock hazardcarefully
disposeofthe discarded plug.Donotleavethe plug lying around wherechildren mightsee it.
WARNING:Topreventfireofshock hazarddo notexposethisunittorainormoisture.
CAUTION:DANGEROUSVOLTAGES EXISTINSIDETHISUNIT,DONOTREMOVE COVER(ORBACK).NOUSER
SERVICEABLEPARTSINSIDE.REFERSERVICINGTOQUALIFIEDSERVICEPERSONNELDISCONNECTFROM
MAINSSUPPLYWHENNOTINUSE.
MAINSPLUGWIRINGDETAILS
accordancewithfollowing wiring codes:Thewiresinthismainsleadarecolouredinaccordancewiththe
following wiring codes:
Blue-------------------------------------------Neutral
Brown----------------------------------------live
Thewiresinthismainsleadmustbeconnectedtotheterminals
intheplugsas follow:
BlueWire-----------------------------------NorBlack
BrownWire--------------------------------LorRed
Onlya3Ampfuse shouldbefittedintheplugora5Ampfuseat
thedistribution board.
WARNING:UNDERNOCIRCUMSTANCES MUSTTHELIVE ORNEUTRALWIRES BE
CONNECTEDTOTHEEARTHTERMINALINA3-PINMAINSPLUG.
Thissymbolmeansthatthisunitisdoubleinsulated.
Anearthconnection isnotrequired.
CAUTION
CLASS 1LASERPRODUCT
UseofControlsoradjustmentsorperformance
ofproceduresotherthan thosespecified herein
mayresultinhazardousradiation exposure.
CLEANING
Always disconnectunitfrompowersupplybefore
attempting toclean it.
Usesoft clothmoistened withsoapywater,wipe
gently.
Donotusesolventsorabrasivematerial.
LASERSAFETY
Thisunitemploys alaser.Onlyqualified service
personnelshouldattemptrepair.
DANGER:INVISIBLELASERRADIATION
WHENOPENAND INTERLOCKFAILEDOR
DEFEATED.AVOIDDIRECTEXPOSURETO
BEAM.
CAUTION:HAZARDOUSLASERRADIATION
WHENOPENAND INTERLOCKDEFEATED.

2
Yourhearingisveryimportant to you andto ussopleasetakecarewhen operatingthis
equipment. The followingguidelinesareprovidedforyourinformation.
ESTABLISHASAFESOUND LEVEL
˜Overtimeyourhearingwill adaptto continuousloudsoundsandwill givethe
impression that the volumehasinfact been reduced.What seemsnormalto you may
infact beharmful.To guardagainstthisBEFOREYOURHEARINGADAPTSset
the volumeat alowlevel.
˜Slowlyincreasethe leveluntil you can hearcomfortablyandclearlyandwithout
distortion.
˜Damageto yourhearingisaccumulativeandisirreversible.
˜Anyringingordiscomfortinthe earsindicatesthat the volumeistoo loud.
˜Rememberlisteningforprolongedperiodof timeat highvolumelevelswill harmyour
hearing.
Once you have establishedacomfortable listening level, DONOTINCREASE
THESOUND LEVELFURTHER.
The followinglistof typicalsoundlevelsmayassistyou inrecognisingjusthowloudyou
haveset the volumelevel.
DECIBEL
LeveldBExample
30dB
40
50
60
70
THEFOLLOWINGNOISE CAN BEHARMFULUNDERCONSTANTEXPOSURE
80dB
90
100
120
140
180
Quiet library,soft whisper.
Livingroom,fridgefreezerbedroomawayfromtraffic.
Normalconversation, quiet office, light traffic.
Electricsewingmachine.
Vacuumcleaner,hairdryer,noisy restaurant.
Averagecitytraffic, alarmclockbuzzerat 1Metre, foodmixer.
Motorcycle, heavy goodsvehicle, petrollawnmower.
Pneumaticdrill,chainsaw,garbagetruck,discotec/night-club.
Rockbandconcert, thunderclap,fasttrainpassingby.
THRESHOLDOFPAINGunshot, jet plane takingoff.
Rocket Launchingpad.
2.IMPORTANTNOTES
2
GoodmansProductInformation Helpline0870 873 0080
www.goodmans.co.uk

3
3.POWERSOURCES
1.Plug the AC230VPowerCordintoan AC
householdoutlet.
2.Forbatteryback up,insertthree (3xAAA)
1.5Vbatteries(notincluded)intothe battery
compartmentobserving correctpolarities.
Note:Thisisan optionalfeature,no batteryis
needed fornormaloperation.
Powerconnection
4.PLAYERMAINTENANCE
IMPORTANT:DisconnectfromMains
Supplybeforecleaning.
Wipe withasoft cloth.If the cabinetisverydirty,
dampen the clothwithaweaksolution ofneutral
detergentand water,and then wipe clean.
Cleaning theCabinet
Adirtylenswill causesound skipping and,ifthe
lensisverydirty,the CD maynotwork.Open
the disc coverand clean the lensasfollow:
DustDryParticles
Using acameralensbrush/blower,blowon the
lenscoupletimes,then wipe itlightlywiththe
brushtoremovedust. Then,blowon the lens
oncemore.
Fingerprints
If the lenscannotbe cleaned byusing abrush/
blower,useadrycotton swab.
Cleaning theLens

4
5.DISCCLEANING, POWERFAILURE
1.Tohandleadisc useonlyone ofthe two
following methods.
Note:Donottouchthe rainbow-coloured side.
2.Towipe adisc,useonlyasoft cloth.Donot
usebenzene orthinnerwhichwill damage
the disc.The disc shouldalways be wiped in
astraightline fromthe centretothe edge.It
shouldneverbe wiped inacircularmotion.
3.Neverplacethe disc on otherequipmentor
nearanyheatsource.Avoidpositionswhere
the disc wouldbe subjected todirectsunlight
forlong periods.
Cleaning theDisc
When ACpowerisinterrupted,bothtimeand
alarmsettingswill be lost(unless 3xAAA
batteries(notsupplied)areinstalled)afterpower
isrestored The digitaldisplaywill flashtoshow
powerwasinterrupted.Afterapowercutthe
timeand alarmsettingsmustbe reset.
Powerfailure
Batteryback up
1.Electronicproductsshouldneverbe
subjected toextremetemperaturesnorhigh
humiditytoensuregood performanceand a
long life-time.The clock radioshouldnotbe
placed inbathing areas,oraround stoves
and radiators,etc.Always leavesufficient
spacearound the unitforventilation.
2.If necessary,onlyclean the cabinetofthe
unitwithasoft dampened pieceofcloth.(be
surethe ACpowercordisunplugged from
the outlet)Neveruseapolishorastrong
detergentforcleaning sincethiscan damage
the finishofthe cabinet.
Maintenance and care
Tokeep alarmtimeand timeofdaysettingsin
memoryduring abriefpowerfailureor
accidentalunplugging ofthe powercord,install
3xAAA batteries(notsupplied)intothe Bat-
teryCompartmenton the rearofthe unit.

1. POWER/AL. OFF BUTTON
2. STOP/CLO-ADJ BUTTON
3. PLAY MODE BUTTON
4. MUTE BUTTON
5. SLEEP BUTTON
6. CD PLAY/PAUSE BUTTON
7. MIN/SKIP/SEARCH DOWN BUTTON
8. HOUR/SKIP/SEARCH UP BUTTON
9. VOLUME DOWN BUTTON
10. VOLUME UP BUTTON
5
5.REMOTE CONTROL LOCATION
1
2
3
4
6
8
10
5
7
9
Press down of the compartment cover,
and slide the cover off to open the
compartment. Place the two (UM4),
(AAA), (R03) batteries in the remote
control according to the polarity
markings ("+" and "-") inside the
compartment and on the batteries. Place
the cover over the compartment, press
down lightly, and push it upward until it
snaps on .
NOTE : Remove the batteries from the
remote control if not in use for long
period of the time. Do not mix normal
batteries with rechargeable batteries,
when the batteries become weak, remote
control will not function and replace with
new batteries.
** BATTERIES NOT INCLUDED **

6
6.LOCATION OF CONTROLS
1. CD DOOR
2. SNOOZE BUTTON
3. SPEAKER
4. STANDBY/MUTE LED INDICATOR
5. CD DISPLAY BUTTON
6. ALARM 1 BUTTON
7. ALARM 2 BUTTON
8. SLEEP BUTTON
9. FUNCTION LED INDICATOR
10. REPEAT/PROGRAM LED
INDICATOR
11. IR SENSOR
12. STANDBY/AL.OFF BUTTON
13. PHONES JACK
14. FUNCTION BUTTON
15. LCD DISPLAY WINDOW
16. CD DOOR OPEN BUTTON
17. PROGRAM BUTTON
18. TUNING CONTROL KNOB
19. PLAY MODE BUTTON
20. DIMMER BUTTON
21. CLOCK ADJ/12/24 HOUR BUTTON
22. STEREO/RANDOM LED INDICATOR
23. SLEEP LED INDICATOR
24. PLAY/PAUSE BUTTON
25. STOP BUTTON
26. VOLUME UP BUTTON
27. VOLUME DOWN BUTTON
28.
29.
30. FM ANTENNA
31. BATTERY DOOR
32. AC POWER CORD
33. ALARM 1 INDICATOR
34. PM INDICATOR
35. ALARM 2 INDICATOR
MIN/SKIP/SEARCH DOWN
(I<<) BUTTON
HOUR/SKIP/SEARCH UP
(>>I) BUTTON
3
3
1
2
30
31 32
4
5
6
7
9
12
27
13
14
25
26
24
28
29
16
17
19
20
21
18
15
22
23
11
10
8
34
33 35

7
7.SETTING THE CLOCK
To set the correct "TIME":
1. Press the “CLOCK ADJUST/12/24
HOUR” for 2 seconds to adjust 12 hour
or 24-hour.(F1)
2. Press and hold the " CLOCK ADJUST
12/24 HOUR” button once, the
"HOUR and MIN DISPLAY" will flash.
3. Press the “
" and “
” buttons until the correct time is
shown on the display.(F2)
4. Press the “CLOCK ADJUST12/24
HOUR" button once again to confirm
the correct time and the“HOUR and
MIN DISPLAY” will not flash.(F3)
Note:
MIN/SKIP/SEARCH DOWN
(I<<) HOUR/SKIP/SEARCH UP
(>>I)
1. You can also press the
"STOP/CLO-ADJ. BUTTON" on
the remote control to adjust
the clock operation.
2. During in the CD mode. Press the
"CD DISPLAY" button once on the
unit, the clock display will change
into current track number, and
then it will return to the clock
display in a few seconds
Automatically.
8.ALARM FUNCTION
Press the "FUNCTION" selector button to RADIO, CD or Buzzer to make the desire ALARM
mode status.
To set the correct "ALARM 1" :
1. Press the "ALARM 1" button once on the unit. The “ALARM 1 LED INDICATOR" will light
on and the "HOUR & MINUTE LED INDICATOR" will flash too.
2. Press the “ " and “ ”
buttons to adjust the correct alarm time.
3. Press the "ALARM 1" button once again to confirm the "ALARM 1" function, the "HOUR &
MINUTE LED INDICATOR" will become to "CLOCK" display at once and the “ALARM 1
LED INDICATOR" will still light on the LED display.
To set the correct "ALARM 2" :
1. Press the "ALARM 2" button once on the unit. The “ALARM 2 LED INDICATOR" will light
on and the "HOUR & MINUTE LED INDICATOR" will flash too.
2. Press the “ " and “ ”
buttons to adjust the correct alarm time.
3. Press the "ALARM 2" button once again to confirm the "ALARM 2" function, the "HOUR
& MINUTE LED INDICATOR" will become to "CLOCK" display at once and the
“ALARM 2 LED INDICATOR" will still light on the LED display.
MIN/SKIP/SEARCH DOWN (I<<) HOUR/SKIP/SEARCH UP (>>I)
F1
F2
F3

10.DISPLAY HIGH / LOW DIMMER
9.WAKE UP TO RADIO, CD&ALARM
8
Press the "DIMMER" button to HIGH or LOW on the rear of the unit.
11.FUNCTION OPERATION
Select the UNIT FUNCTION by pressing the FUNCTION button repeatedly in STANDBY or
POWER ON mode.
1. Press the FUNCTION button once, the function indicator will light on in red colour and
the CD or ALARM mode will be on.
2. Press the FUNCTION button twice, the function indicator will light on in green colour
and the FM radio or ALARM mode will be on.
3. Press the FUNCTION button thrice, the function indicator will light on in orange colour
and the AM radio or ALARM mode will be on.
4. Press the FUNCTION button repeatedly, the function indicator will light off and the
ALARM BUZZER mode will be on only.
12.RADIO OPERATION
1. ALARM 1 and 2 are independent from Each other and can be individually set to wake to
MUSIC (CD/RADIO) or BUZZER.
2. If wake to MUSIC is used then ensure that the correct volume is set before setting the
ALARM 1 and 2. Also ensure that a CD disc is inserted if CD function is selected and that
the radio is tuned to a station if Radio is selected.
Press the FUNCTION button to RADIO mode.
MW
Turn the TUNING control to select the required
station. For operation on MW the set control a built-in ferrite aerial which is directional.
Therefore, the set should be positioned for the best signal strength.
FM
Turn the TUNING control to select the required station. Fully extend the FM antenna wire
and adjust its direction for the best FM reception. The STEREO/RANDOM LED INDICATOR
will light on the front panel of this unit.
13.CD OPERATION
Press the STANDBY/AL. OFF button to switch on the set. Press the "FUNCTION" button to
CD. Open the CD door. Insert the Compact Disc label side up and close the lid. The disc
will rotate briefly. The display will indicate the number of tracks on the disc. If the disc is
inserted incorrectly, the disc will not play. Press the "PLAY/PAUSE" button once to start
play. Adjust the volume control as required. To stop play, press the "STOP” button.

9
14.PLAY MODE FUNCTION
During in the CD mode :
You can select the "Repeat I Play", "Repeat All Play" and "Random Play" functions by
pressing the "PLAY MODE" button.
1. Press the “PLAY MODE" button once. The "REPEAT/PROGRAM LED INDICATOR" will
light
on and flash. Then the current track can be selected to play repeatedly by pressing the
PLAY/PAUSE button once.
2. Press the “PLAY MODE" button twice. The “REPEAT/PROGRAM LED INDICATOR" will
light on and not flash. Then the total number of the tracks can be selected to play
sequentially and repeatedly by pressing the PLAY/PAUSE button once.
3. Press the “PLAY MODE” button thrice. The "STEREO/RANDOM LED
INDICATOR" will light on and not flash. Then the current track can be selected to play
randomly by pressing the PLAY/PAUSE button once.
4. Press the “PLAY MODE" button continuously. The “STEREO/RANDOM LED INDICATOR"
will light off and the CD mode function will come to "NORMAL PLAY" again.
Note :
1. In any time, you can control the PLAY MODE function by pressing the“PLAY MODE"
button on the unit and remote control.
2. In any time, you want to stop the PLAY MODE function at once by pressing the "STOP”
button once on the unit and remote control.
15.SLEEP FUNCTION
16.SNOOZE FUNCTION
If you want to fall asleep to music . You may adjust the radio or CD player's sleep function
to play up to 90, 60, 30 and 15 minutes of music before shutting itself off automatically.
SNOOZE button - Press after the CD, radio or buzzer alarm sounds. The CD, radio or
buzzer alarm will go off and will come on again in approximately 6 minutes. You may repeat
this cycle several times during the 2 hour alarm cycle.
Note :
1. In any time, you can press the "STANDBY/AL. OFF" button once on the unit or remote
control to stop the "ALARM 1 or 2" function. The "AL 1" or "AL 2" LED INDICATOR will still
light on the LED display.
2. In any time, if you want to stop the "ALARM 1 or 2" function fully, you can press the
"ALARM 1 or 2" button once on the unit. The "AL 1" or "AL 2" LED INDICATOR will turn off
on the LED display. The function of the "ALARM 1 or 2" will cancel at once.
17.MUTE FUNCTION(remote control only)
If you press the MUTE button, the STANDBY/MUTE LED indicator will light on & the audio
output will be temporarily terminate. Then press the MUTE button again, the STANDBY
/MUTE LED indicator will light off & the audio output will continue as normal.

18.PROGRAMME PLAY OPERATION
10
1. Ensure the disc is stopped by pressing the “STOP" button, and then press the
"PROGRAM” button once.
2. Press the “ " and “ ”
buttons repeatedly until the track number for the selection to be programmed is shown.
3. Press the PROGRAM button to memories the track selection.
4. Repeat steps 3 and 4 to memories up to 20 tracks.
5. When the "PLAY/PAUSE" button is pressed, your
selections will start and “REPEAT/PROGRAM LED INDICATOR” will indicate on the front
panel of display.
The REPEAT/PROGRAM LED indicator will light on in green
colour on the display.
MIN/SKIP/SEARCH DOWN (I<<) HOUR/SKIP/SEARCH UP (>>I)
Note : During in the program mode.
1. Press the "PLAY MODE" button once, the "REPEAT/PROGRAM LED INDICATOR" will
change the colour from green to orange and flash. Then the unit will repeat the current
track.
2. Press the "PLAY MODE" button twice, the "REPEAT/PROGRAM LED INDICATOR" will
remain colour in orange and not flash. Then the unit will repeat all the total number of
tracks.
3. Press the "PLAY MODE" button thrice, the "REPEAT/PROGRAM LED INDICATOR" will
change the colour to green and not flash. The unit will return to play the program in
normally.
19.LISTEN THE MUSIC BY USING HEADPHONE
A 3.5 mm headphone socket is provided on the unit. You can use the headphone by
inserting the headphone jack to the socket.

System Compact disc digital audio system
Laser diode material : GaAIAs
Properties Wavelength :
Emission Duration : continuous
Laser out : <44.6µW
Error correction
Cross-interleave Reed-solomon code
D/A conversion
1-bit DAC 8 times oversampling
Laser diode
20-20,000Hz (+ 1/-3dB)
Properties
Below measurable limits
No. of channels
2 channels (stereo)
Output level
Earphone : 20 mW (32Ω )
Speakers
3 " 8Ω
x 2
Receiving bands MW/FM
Frequency range
MW 540 -1600 kHz
FM 88 -108 MHz
Power requirements AC 230V
4.5 Volt battery back-up
Power consumption
15W
Dimension
Approx. 170 (W) x 185 (H) x 195 (D) mm
Weight
Approx. 1.90Kg not including battery (Main Unit)
PICK-UP
AUDIO
GENERAL
RADIO
=790nm±25nm
11
20.PRODUCT SPECIFCATIONS
Goodmans Product Information Helpline 0870 873 0080
www.goodmans.co.uk
Due to the continual improvement of our products the specification are subject to change.

12
21.TROUBLESHOOTING GUIDE
Goodmans Product Information Helpline 0870 873 0080
www.goodmans.co.uk
Table of contents
Other Goodmans Clock Radio manuals

Goodmans
Goodmans GCR01 User manual

Goodmans
Goodmans GCR02 User manual

Goodmans
Goodmans 329796 User manual

Goodmans
Goodmans GCRUSB03 User manual

Goodmans
Goodmans GCR312BLK User manual

Goodmans
Goodmans NOD User manual

Goodmans
Goodmans GCR02 User manual

Goodmans
Goodmans GCR1872 User manual

Goodmans
Goodmans GCR01 User manual

Goodmans
Goodmans GCR02 User manual