4
IMPORTANTSAFEGUARDS
Before using this product please read this manual carefully
and save for future reference.
SAFETYINSTRUCTIONS
When using any electric appliance, basic precautions should
always be followed to reduce the risk of fire, electric shock and
injury, including the following:
1. Read the instructions carefully before use, and save them for future reference.
2. Make sure the power used is as indicated on the rating label.
3. Do not forget to unplug the appliance after each use.
4. Never activate the appliance without enough water.
5. Do not insert any object into the water reservoir opening or safety valve.
6. Always unplug the appliance when installing, removing, or placing components.
7. Unplug and let the appliance cool before cleaning.
8. Between uses, allow 15 minutes for cooling.
9. Close supervision is required when using near children.
10. This appliance is for adult use only. Persons under the age of 13 should not use this
product.
11. Never leave the appliance in use unattended.
12. Handle the blades with care as they are very sharp.
13. If the blades get stuck or are blocked, always unplug the appliance before removing the
blockage.
14. When steam cooking, the appliance gets very hot. Handle with caution.
15. Always use the handle to lift the blender jar.
16. Beware of the hot steam which rises from the jar and water tank when cooking or
removing the lid.
17. Do not use the appliance for anything but its intended use.
18. This appliance is intended for indoor, household use only.
19. Empty the water tank before storing the appliance.
20. Do not tilt or tip the unit or attempt to empty or fill it while it is operating.
21. If any component is damaged, do not use. Contact Customer Service.
Electromagnetic field (EMF)
This appliance complies with all standards relating to electromagnetic
fields (EMFs). It meets the safety rules established on the basis of current
scientific knowledge provided it is handled correctly and in compliance
with these instructions.
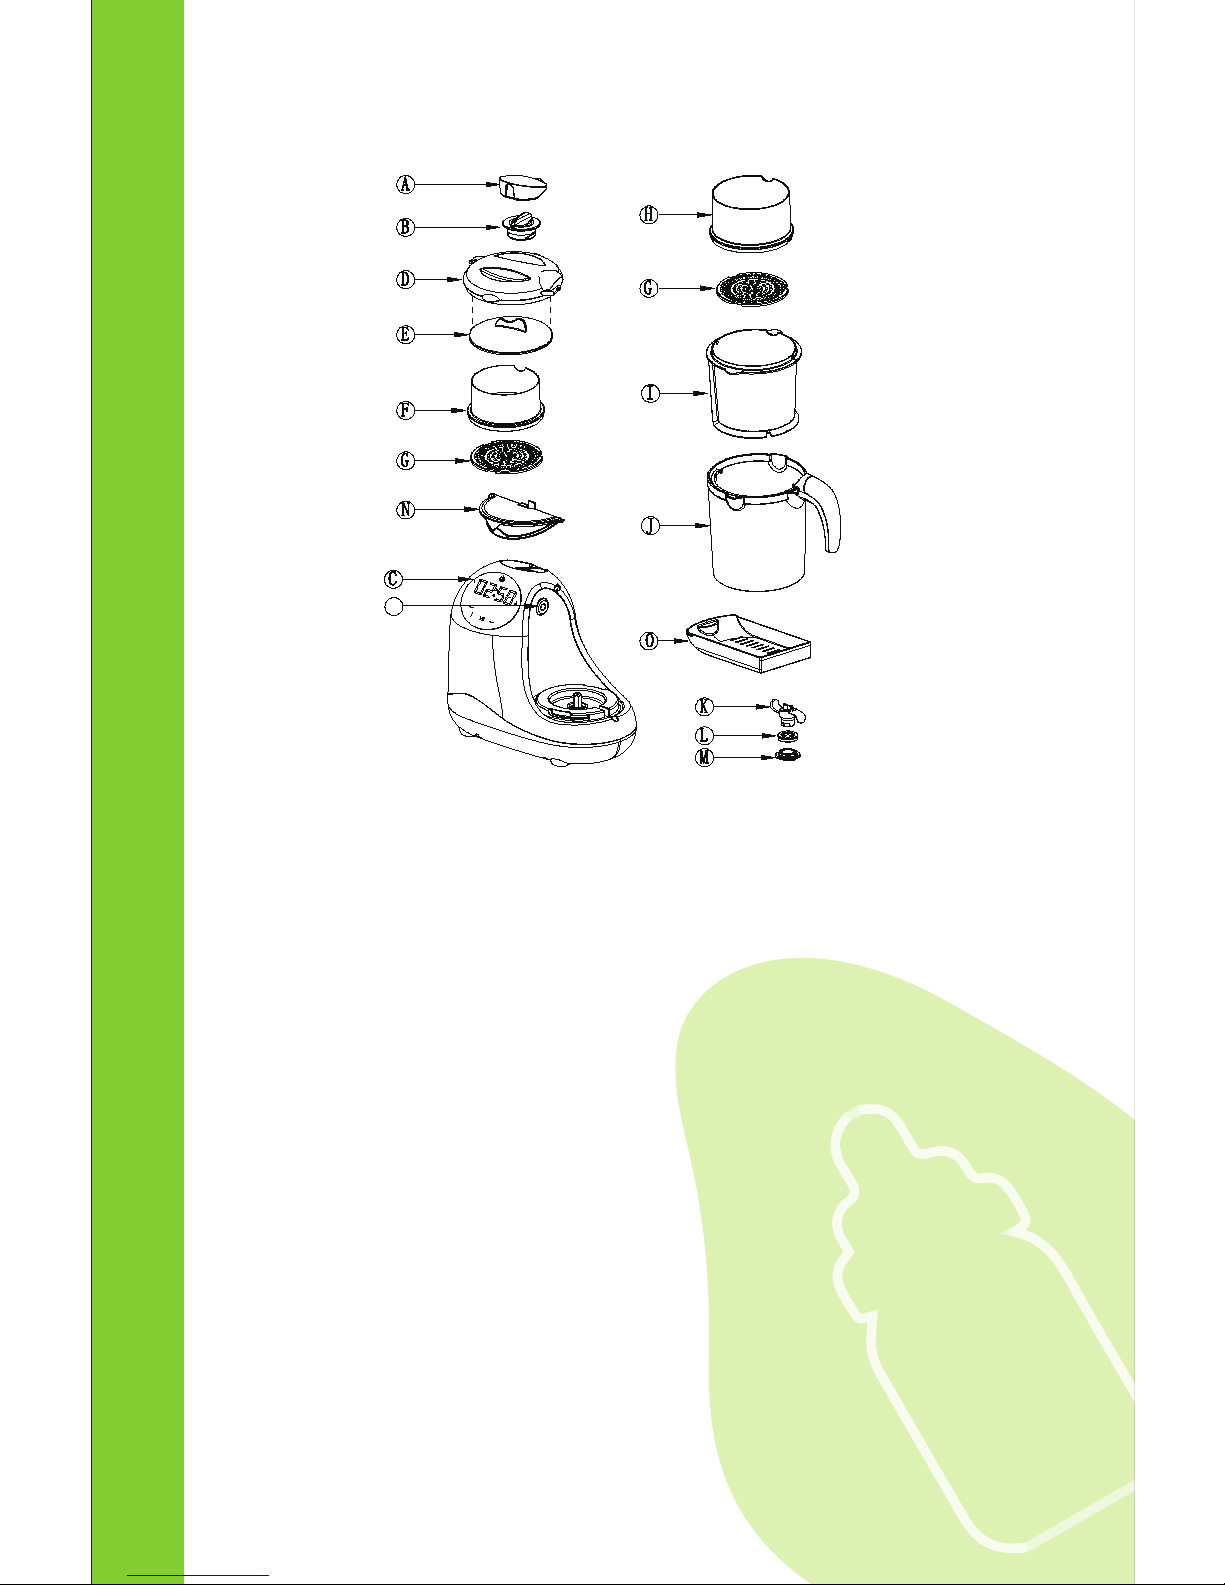
MULTIFUNCTION FOOD PROCESSOR
4