Gourmia GWT-230 User manual

Model# GWT-230
USER
MANUAL
ToastView
Mototoast
Toaster

Model: GWT-230
© 2016 Gourmia
www.gourmia.com
The Steelstone Group
Brooklyn, NY
All rights reserved. No portion of this manual may be reproduced by any means
whatsoever without written permission from The Steelstone Group, except for the
inclusion of quotations in a media review.
Although every precaution has been taken in the preparation of this manual, The
Steelstone Group assumes no responsibility for errors or omissions. Nor is any
liability assumed for damages resulting from the use of the information contained
herein. Although every eort has been made to ensure that the information
contained in this manual is complete and accurate, The Steelstone Group is not
engaged in rendering professional advice or services to the individual consumer;
further, The Steelstone Group shall not be held responsible for any loss or damage
allegedly arising from any information or suggestion in this manual.
Welcome to a Perfectly Toasted World
from Gourmia
Congratulations on your purchase of the ToastView Mototoast Toaster from
Gourmia, exclusively designed for the discerning customer!
If you are one the those who need to be in control and have their toast just
right our electronic ToastView Mototoast Toaster is just perfect for you. For
starters we’ve made away with that clumsy lever that needs to be pushed all
the way down to begin toasting. Our revolutionary, lever-free design slowly
lowers and raises your toast with just the push of a button. Also, you can easily
adjust the temperature as you watch your bread and bagels brown to
perfection through the windows on the sides of the unit. Its two wide slots are
ideal for toasting bread, buns, bagels and more. So pop in that toast and get
your day off to a toasty great start!!
The pages of this manual oer full and comprehensive instructions to guide
you through the functions and features of the ToastView Mototoast Toaster.
Inside this guide you will also nd information on its modes of operation,
complete step-by-step instructions for the operation, assembly, cleaning, and
maintenance of your appliance.
Please read all safety instructions thoroughly to ensure safe usage at all times.
Thank you for your purchase! We sincerely hope you will enjoy this as well as all
the many innovative products brought to you by our family at Gourmia.
Read this manual thoroughly
before using and save it for
future reference
2 3

IMPORTANT SAFEGUARDS
Before using the electrical appliance, the following basic precautions should
always be followed including the following:
1. Read all instructions.
2. Before use check that the voltage of wall outlet correspond to the one
shown on the rating plate.
3. Do not operate any appliance with a damaged cord or plug or after the
appliance malfunctions, or is dropped or damaged in any manner. Return
appliance to the nearest authorized service facility for examination, repair or
electrical or mechanical adjustment.
4. If the supply cord is damaged it must be replaced by the manufacturer or a
authorized agent or a qualified technician in order to avoid a hazard.
5. Unplug from outlet when not in use, before putting on or taking off parts,
and before cleaning.
6. Do not let cord hang over edge of table or hot surface.
7. Do not immerse the unite in liquid, or place in dishwasher.
Damage to the unit will occur if submerged in liquid.
8. Close supervision is necessary when your appliance is being used near
children or infirm persons.
9. Ensure fingers are kept well away from hot parts.
10. This appliance is not intended for used by persons (including children) with
reduced physical, sensory or mental capabilities, or lack of experience and
knowledge, unless they have been given supervision or instruction con-
cerning use of the appliances by a person responsible for their safety.
15. Children should be supervised to ensure that they do not play
with the appliance.
16. Do not operate the appliance for other than its intended use.
17. Do not use outdoors.
FOR HOUSEHOLD USE ONLY
TABLE OF CONTENTS
4 5
IMPORTANT SAFEGUARDS
TABLE OF CONTENTS
Know Your Toaster .........................6
Using The Toaster...........................7
Helpful Tips ..................................7
Cleaning And Maintenance ..........10
Warranty.....................................11

6 7
KNOW YOUR TOASTVIEW MOTOTOAST TOASTER
GETTING TO KNOW YOUR
TOASTVIEW MOTOTOAST
TOASTER
The ToastView Mototoast
Toaster comesfully assembled.
Two Toast Slots
With extra wide opening
for a wide variety
of toasting.
Windows Both Sides
Watching your toast
in progress allows you
to make adjustments
before its too late!
CONTROLS
Stop Heat Button
With Light Indicator
Power On/O Button
With Light Indicator
Light/Dark Control Dial
Crumb Tray
Slides in & out
from under the toaster
to enable easy cleaning
of the falling crumbs
Cord & Storage
Brackets
Cord wraps around
four convenient brackets
on the underside
of the unit

8 9
USING YOUR TOASTVIEW MOTOTOAST TOASTER
HELPFULL TIPS
HELPFULLTIPS
Your ToastView Mototoast Toaster may be used for one or two slices of
bread at a time.
The wide slots on the toaster can accommodate wide slices of bread,
bagel, buns and any other food item you wish to toast. However DO NOT
FORCE items into the slot as this will case the toaster to jam.
If bread does get stuck, rst close the unit, unplug it and allow it to cool o.
Once cooled, chances are the the the rack will retract enough for you to
remove the slices easily.
REMEMBER:
• Not all breads and bagels are the same - be ready to adjust the Min/Max
Contol Dial setting accordingly.
• Frozen or refrigerated bread will require more toasting time than a regular
room temperature slice.
SMOKING OR BURNING
It is common that the first time you use the toaster some slight smoking
and/or odor will be noticed. No need to worry ,it is normal with most new
appliances. Therefore, before actually using the toaster preheat it for
about 2 minutes without any bread inside to allow any dust that may have
accumulated to burn off.
Smoking and burning can also occur later after much use as crumbs accu-
mulate on the Crumb Tray. To avoid this, make sure to remove and empty
the Crumb Tray periodically.
If smoking occurs during use, press the STOP Button immediately.
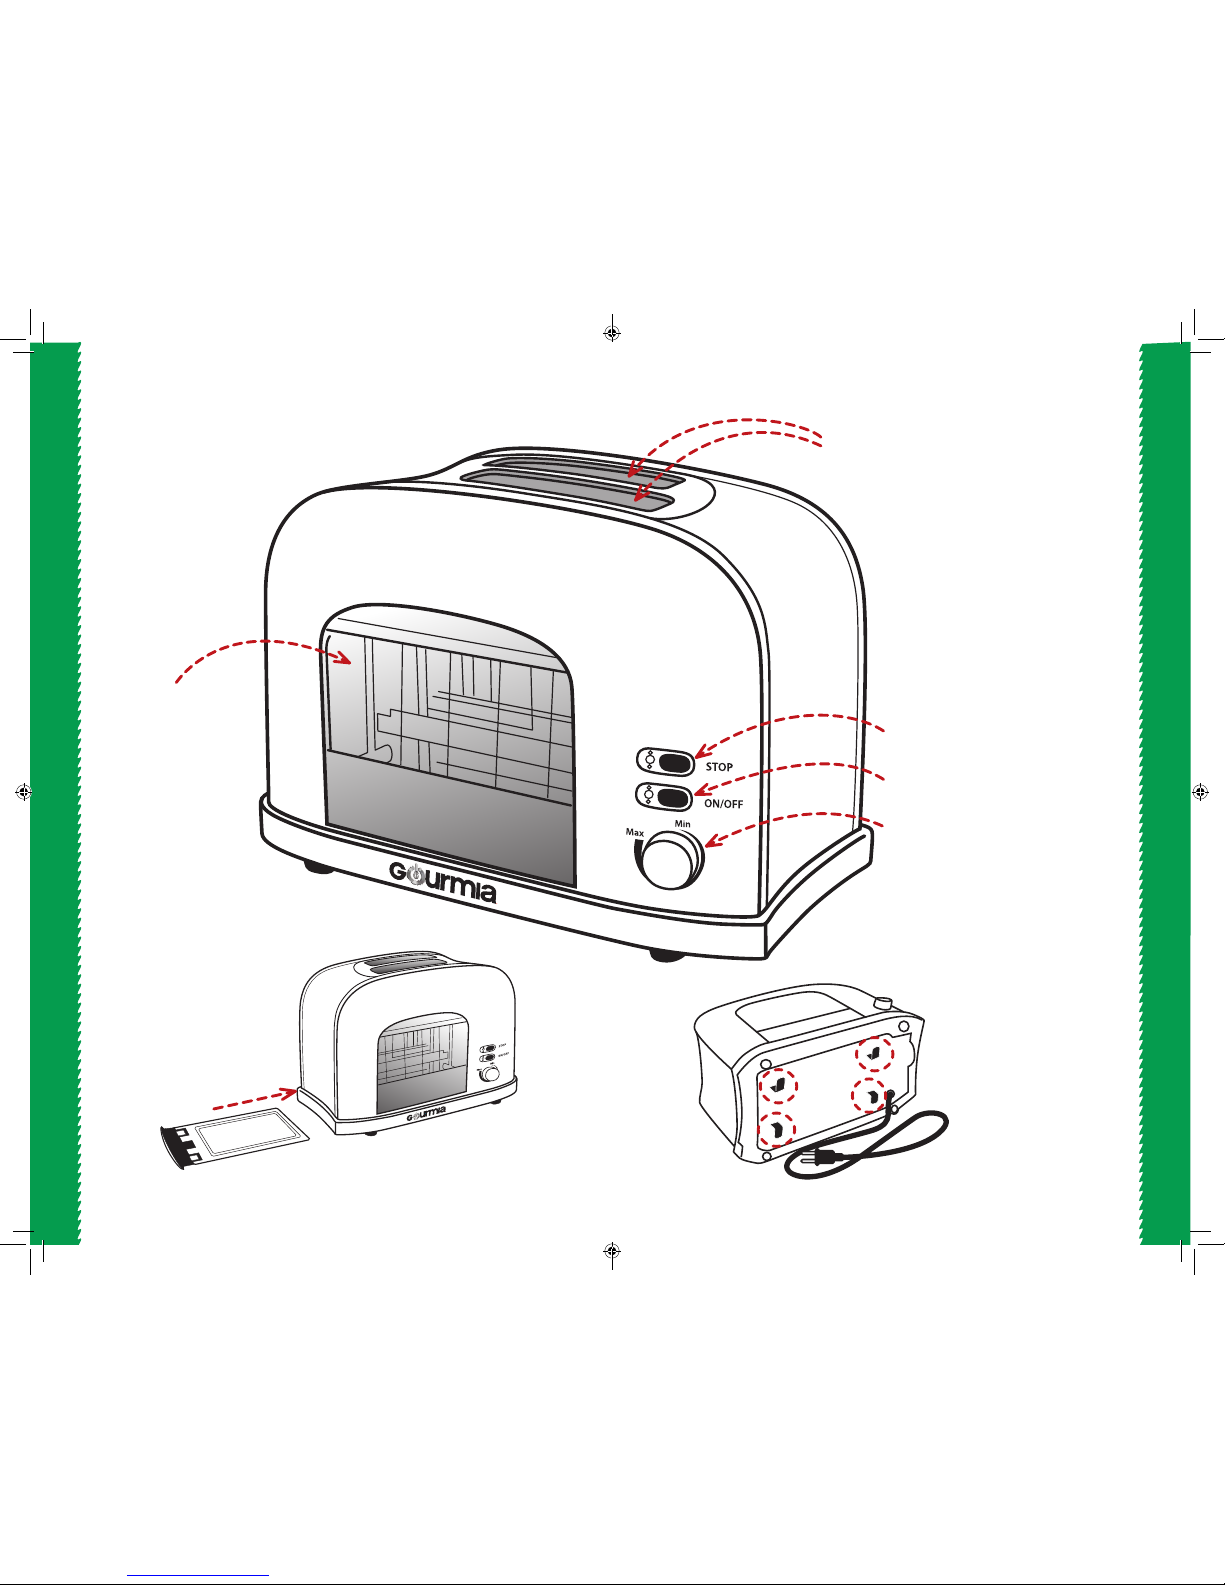
USING YOUR GOURMIA TOASTER
1. Place your ToastView Mototoast Toaster on a secure
stable surface near an electrical outlet.
2. Make sure that the cord is far away from any water
source.
3. Check the toaster slots that no foreign object is inside.
4. Plug the Toaster into the outlet.
5. The STOP HEAT light and the ON/OF Switch light will
flash three times and then go into standby mode.
6. You may now place either one or two slices of bread
(bagels, buns etc.) into the slot on the top of the toaster.
7. Select the desired heat setting using the Min./Max.
Control knob. Min = Light. Max = Dark.
8. Press the ON Button to begin toasting.
9. As soon as the toasting is complete the slices will
automati-cally be lifted up, and the power will turn off.
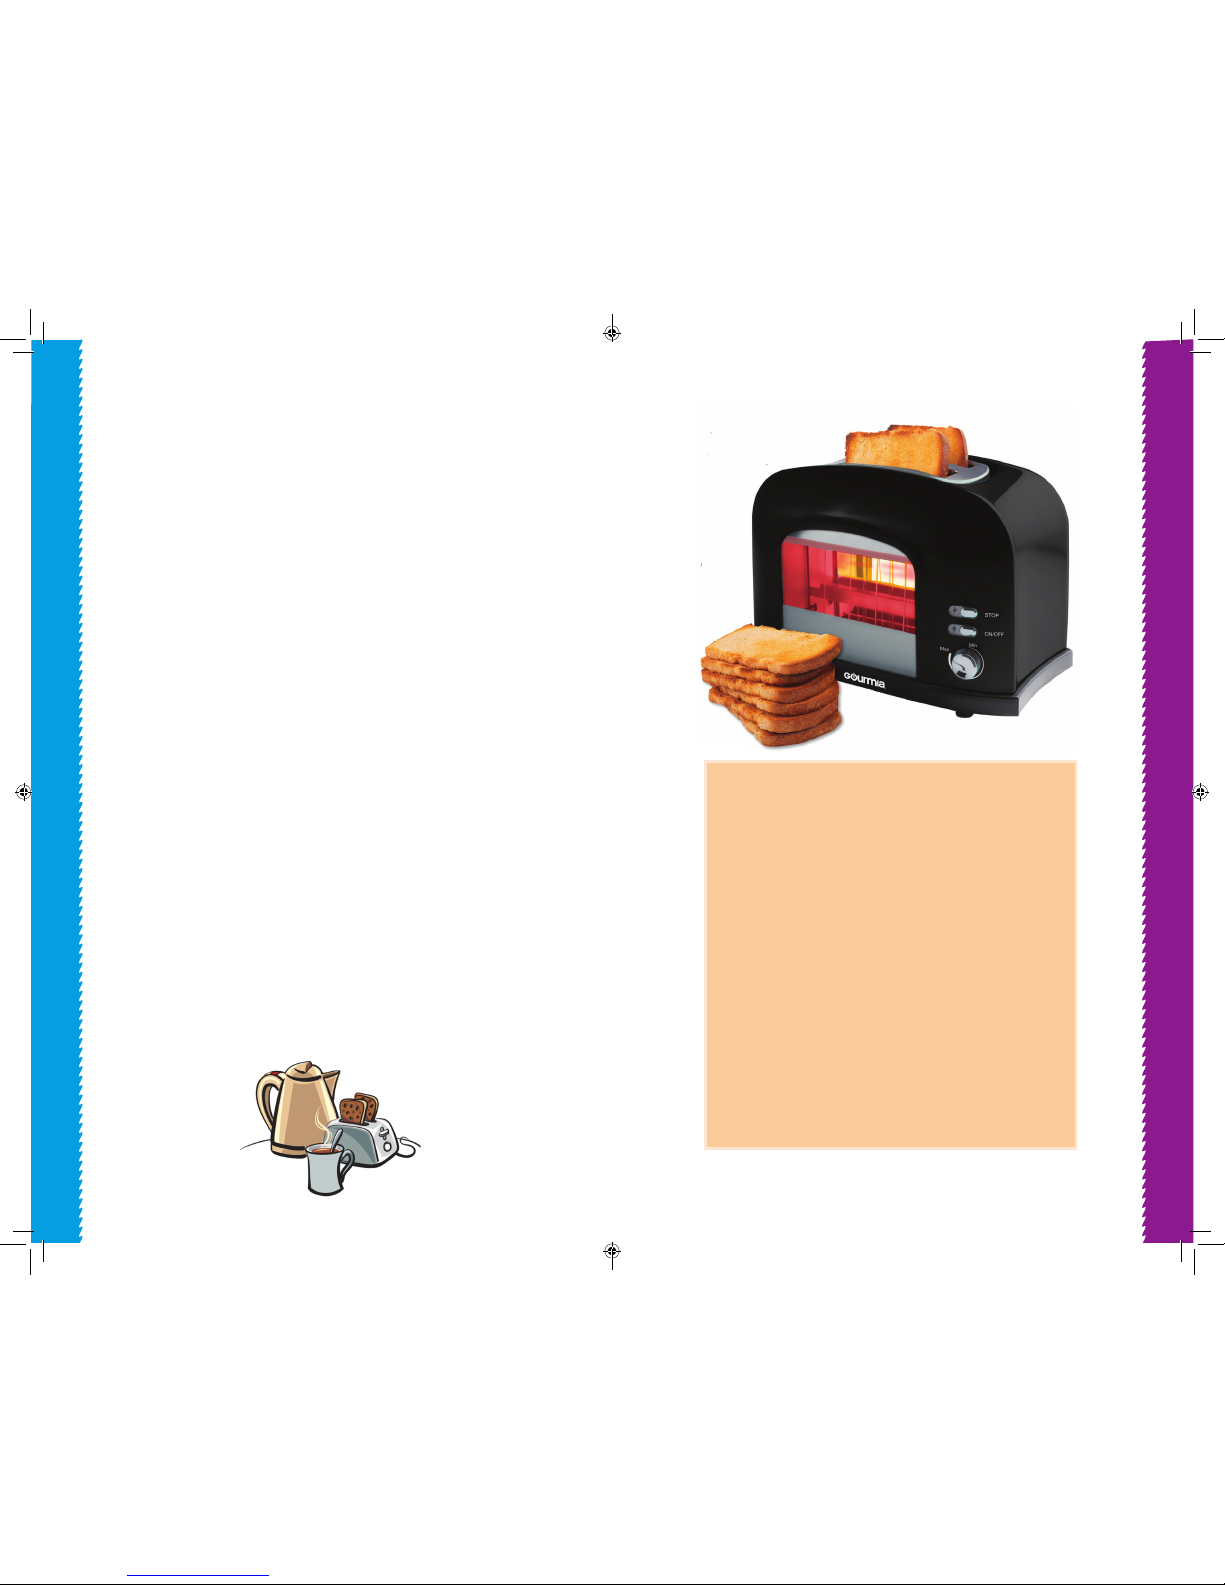
10. You can watch your bread as it toasts through the side
win-dows. If at anytime you want to stop the toasting,
just press the STOP Button.
11. Unplug the toaster and allow it to cool down
completely.
12. Once cool, you may remove the Crumb Tray at the
bottom left side of the toaster to clean it out.
13. Return the Crumb Tray in to the unit and store in safe
place.

10 11
CLEANING AND MAINTENANCE
WARRANTY & SERVICE
CLEANING AND MAINTENANCE
CAUTION:Make sure to unplug this appliance and let it cool down
completely before cleaning. To protect against electrical shock, do
not immerse cord, plug or the appliance body in water or liquid.
After each use, always make sure to rst remove the plug from wall
outlet.
Please follow these simple maintenance tips to prolong the life of
your Gourmia ToastView Mototoast Toaster .
1. Never place unit into a dishwasher.
2. Never soak it in water.
3. Use a soft damp cloth to clean the outer surface of the toaster.
4. Never use abrasive cleaning products to clean the toaster.
5. It is a good practice to remove and empty the Crumb Tray once a
week. Here too, use a soft damp cloth to clean its surface.
6. If bread gets jammed inside close the unit, unplug it and allow it to
cool off. Once cooled, it should be easier to remove the jammed bread
as the the cooled rack tends to retract a bit.
7. Do not try to remove the jammed slices by inserting a sharp or
pointed metal objects into the toaster as this could damage the heat-
ing elements.
9. Wipe the body with wet cloth and then dry it completely.
10. When not in use, store appliance in a secure, dry and cool place.
CAUTION:
NEVER PUT YOUR FINGER OR METAL OBJECT
INTO THE TOASTING SLOTS
WARRANTY & SERVICE
This Limited Warranty is for one full year from the date
of purchase. It is applicable to the original purchaser
only and is not transferable to a third party user. Repair
or replacement of defective parts is solely at the seller’s
discretion. In the event that repair isn’t possible, the
seller will replace the product/part. If product repair/
replacement won’t suce, the seller has the option of
refunding the cash value of the product or component
returned.
Product defects not covered under the Warranty
provisions include normal wear and damage incurred
from use or accidental negligence, misuse of instruction
specications or repair by unauthorized parties.
The manufacturing company is not liable for any
incidental or consequential damages incurred by such
circumstances.

FOR COSTOMER SERVICE
QUESTIONS OR COMMENTS
VISIT US @GOURMIA.COM
OR CALL 888.552.0033
Table of contents
Other Gourmia Toaster manuals
Popular Toaster manuals by other brands

MAXSTAR
MAXSTAR POP UP TOASTER CRISPZ PLUS user manual

Silvercrest
Silvercrest SDLTD 1400 A1 operating instructions

Silvercrest
Silvercrest STOCD 1000 A1 operating instructions

Silvercrest
Silvercrest STH 900 A1 Operating instructions and safety instructions

Silvercrest
Silvercrest STO 800 EDS A1 operating instructions

Silvercrest
Silvercrest STC 920 B1 operating instructions