Graham Field grafco GF-TX5 User manual
Transcutaneous Electrical
Nerve Stimulation
(TENS), Digital
Model GF-TX5
Operation Manual
GF-TX5-INS-LAB-RevH20
Read this manual before operating your GF-TX5.
Save this manual for future use.

2
CONTENTS
GENERAL DESCRIPTION ................................................................................................... 3
WHAT IS TENS? ............................................................................................................... 3
INDICATIONS AND CONTRAINDICATIONS........................................................................... 3
SAFETY ........................................................................................................................... 4
ABOUT THE DEVICE.......................................................................................................... 6
EXPLANATION OF KEY / KNOB CONTROL FUNCTIONS ........................................................ 7
ATTACHING THE LEAD WIRES........................................................................................... 8
ELECTRODE SELECTION AND CARE................................................................................... 8
TIPS FOR SKIN CARE ....................................................................................................... 8
CONNECTING THE DEVICE................................................................................................ 9
BATTERY INFORMATION................................................................................................. 10
CARING FOR YOUR DEVICE............................................................................................. 11
TROUBLESHOOTING....................................................................................................... 11
TECHNICAL SPECIFICATIONS.......................................................................................... 12
LIMITED WARRANTY...................................................................................................... 15
MANUEL D’UTILISATION EN FRANÇAIS............................................................................ 17
MANUAL DE OPERACIÓN EN ESPAÑOL............................................................................ 33

3
GENERAL DESCRIPTION
TENS, Transcutaneous Electrical Nerve Stimulation, is a method of relieving
symptomatic chronic intractable pain.
This unit is a dual-channel digital stimulator for active treatment application,
which has a Liquid Crystal Display indicating operation modes and output as
well as an 8-bit microcomputer for controlling the system.
The electronics of the unit create electric impulses; the intensity, duration,
frequency per second and modulation of these impulses can be adjusted.
WHAT IS TENS?
TENS is a treatment whereby electrical impulses are applied to nerves
through electrode pads placed on the skin. TENS is non-invasive and does not
use pharmaceuticals.
TENS uses a two-pronged approach to pain relief. First, sensory nerves
are targeted, stimulating them to block pain signals and prevent their
transmission to the brain. Second, TENS promotes the production of
endorphins — neurochemicals occurring naturally in the brain — which have
analgesic properties.
INDICATIONS AND CONTRAINDICATIONS
Read the operation manual before using this TENS device.
Federal law (USA) restricts this device to sale by or on the order of a
physician.
Indications
TENS is indicated to be used under a physician’s prescription for the
symptomatic relief of chronic intractable pain.
Contraindications
• Any electrode placement which applies current to the carotid (neck)
region.
• Patients with implanted electronic devices (for example, a pacemaker)
or metallic implants should not undergo TENS treatment without first
consulting a physician.

4
• Any electrode placement which causes current to flow transcerebrally
(through the head).
• The use of unit whenever pain symptoms are undiagnosed and the
etiology is unknown.
SAFETY
Always follow basic safety precautions, including the following:
WARNING: Indicates a potential hazard situation or unsafe practice that, if
not avoided, could result in death or serious personal injury.
CAUTION: Indicates a potential hazard or unsafe practice that, if not avoided,
could result in moderate or minor personal injury.
sNOTICE: Indicates a potential hazard or unsafe practice that, if not avoided,
could result in product or property damage.
Warnings
WARNING: Explosion hazard: Explosion hazard is possible if used in the
presence of explosives, flammable materials or flammable anesthetics.
WARNING: Heart disease: Caution should be used when applying the device to
patients suspected of having heart disease. Further clinical data is needed to
show if there are adverse side effects on individuals with heart disease.
WARNING: Keep this device out of the reach of children.
WARNING: The safety of the device during pregnancy or delivery has not been
established.
WARNING: Do not place electrodes on front of the throat. This may result in
spasms of the laryngeal and pharyngeal muscles.
WARNING: Do not place the electrodes over the carotid nerve.
WARNING: The device is not effective for pain of central origin (headaches).
WARNING: Avoid adjusting controls while operating machinery or vehicles.

5
WARNING: The device may interfere with electronic monitoring equipment
(such as ECG monitors and ECG alarms).
WARNING: Do not change any mode during treatment.
WARNING: Some patients may experience skin irritation or hypersensitivity
due to the electrical stimulation or electrical conductive medium. Using an
alternate conductive medium or alternate electrode placement can usually
reduce the irritation. Consult your physician / clinician before using an
alternative conductive medium or electrode placement.
WARNING: Electrodes should not be placed over the eyes, in the mouth, or
internally.
WARNING: The device has no curative value.
WARNING: TENS devices should be used only under the continued supervision
of a physician / clinician.
WARNING: TENS is a symptomatic treatment and as such suppresses the
sensation of pain which would otherwise serve as a protective mechanism.
WARNING: Cancer and Reproductive Harm - www.p65warnings.ca.gov.
Cautions and Adverse Reactions
CAUTION: Isolated cases of skin irritation may occur at the site of electrode
placement following long-term application.
CAUTION: If skin irritation occurs TENS treatment should be stopped and
electrodes removed until the cause of the irritation can be determined.
CAUTION: Effectiveness is highly dependent upon patient selection of a doctor
qualified in the management of pain patients.
CAUTION:
If the device treatment becomes ineffective or unpleasant,
stimulation should be discontinued until reevaluation by a physician / clinician.
CAUTION: Always turn the device OFF before applying or removing electrodes.

6
ABOUT THE DEVICE
This device is a battery-operated device that includes two controllable output
channels. This device creates electrical impulses in which intensity, duration,
and modulation can be altered. The device controls are easy to use and the
slide cover protects accidental changes in settings.
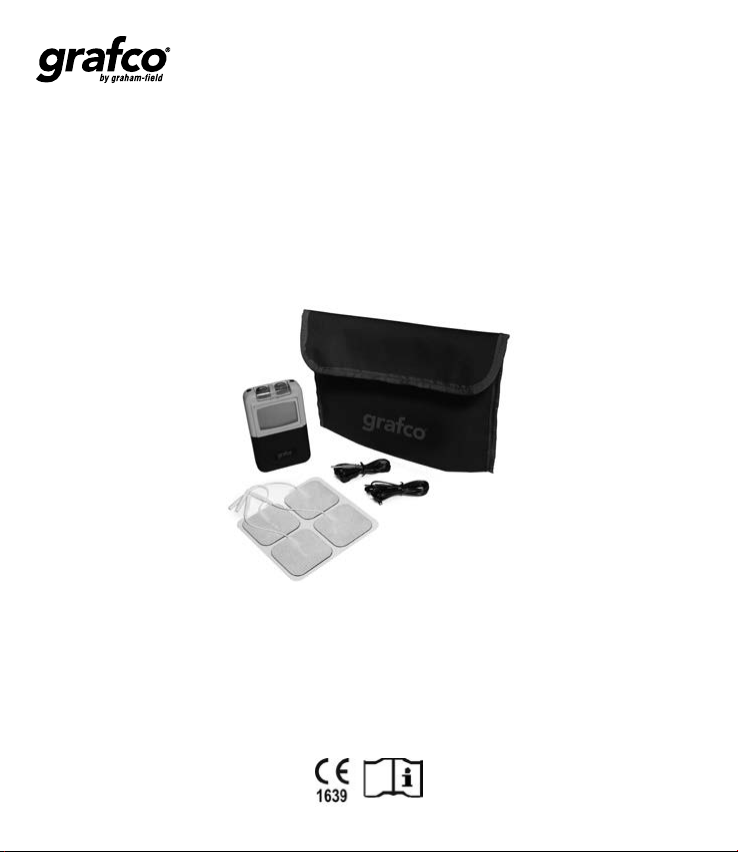
System Components
Your device will include the following components or accessories:
• TENS unit
• Carrying case
• Lead wires
• Operation manual
• Electrodes
Also required (not included): One 9-Volt alkaline or nickel-cadmium
rechargeable battery.
Device Controls
Ch1 ON/OFF and Intensity Control Knob
Ch2 ON/OFF and Intensity Control Knob
LCD Panel
Key Control (Push Buttons)
Slide Cover
Slide Cover
This cover located on the front of the unit conceals the controls for DOWN,
MODE, SET, and UP. Press the top portion of the cover and pull down in order
to open the cover.

7
EXPLANATION OF KEY / KNOB CONTROL FUNCTIONS
DOWN Key This key decreases the setting
when in Pulse Width Mode or
Pulse Rate Mode. *
This key regulates the number of pulse width or
pulse rate of the individual current pulses.
*Decrease by pressing the DOWN key: The width can be adjusted by 10uS/step.
The rate can be adjusted in 1-20Hz by 1Hz/step, 20Hz-150Hz by 5Hz/step.
MODE Key This key selects Timer Mode,
Stimulation Mode,
Alternate Mode,
Pulse Width Mode (uS) or
Pulse Rate Mode (Hz).
This key changes the treatment parameter.
Each time the MODE key is pressed, the next
parameter will display. The selected treatment
parameter in the current mode will ash.
SET Key This key switches between
the different settings in the
Timer Mode, Stimulation Mode,
and Alternate Mode treatment
parameters.
Each time the SET key is pressed, the
parameter will change to the next setting. The
selected mode setting will ash. When the
desired parameter is ashing, press the MODE
key to switch to the next treatment parameter.
The parameter just set will be displayed and
will no longer ash.
UP Key This key increases the setting
when in Pulse Width Mode or
Pulse Rate Mode. *
This key regulates the number of pulse width or
pulse rate of the individual current pulses.
*Increase by pressing the UP key: The width can be adjusted by 10uS/step.
The rate can be adjusted in 1-20Hz by 1Hz/step, 20Hz-150Hz by 5Hz/step.
Ch1 / Ch2
Knobs
Channel 1 and Channel 2
Intensity Control Knobs
These knobs control the strength of the
stimulation and also function as ON / OFF
controls.

8
ATTACHING THE LEAD WIRES
WARNING: Ensure the device is OFF before connecting the lead wires.
WARNING: Never insert the lead wire plug into an AC power supply socket.
Personal injury and/or damage to the TENS unit could occur.
sNOTICE: Use care when you plug and unplug the wires. Pulling on the lead
wire instead of its insulated connector may cause wire breakage.
The lead wires provided with the device insert into the ports located on the
top of the unit. If only one lead will be used, plug it into the channel 1 port.
After connecting the wires to the unit, attach each wire to an electrode.
Lead wires provided with the device are compliant with mandatory
compliance standards set forth by the FDA.
ELECTRODE SELECTION AND CARE
Using Electrodes
Use the electrodes as prescribed. Follow application procedures outlined in
electrode packaging to maintain stimulation and prevent skin irritation. The
electrode packaging provides instructions for care, maintenance, and proper
storage of electrodes.
TIPS FOR SKIN CARE
Good skin preparation is important for effective and comfortable use of your
TENS device.
• Always clean the electrode site with mild soap and water solution, rinse
well, and dry thoroughly prior to any electrode application.
• Any excess hair should be clipped, not shaved, to ensure good electrode
contact with the skin.
• If a skin treatment or preparation is recommended by your physician
/ clinician, apply the skin treatment as recommended, let dry, and
apply electrodes as directed. Following these recommendations will
both reduce the chance of skin irritation and extend the life of your
electrodes.

9
• Avoid excessive stretching of the skin when applying electrodes. Proper
application is best accomplished by applying the electrode, then
smoothly pressing it in place from the center outward.
• When removing electrodes, always remove by pulling in the direction of
hair growth.
• It may be helpful to rub skin lotion on electrode placement area when not
wearing electrodes.
CONNECTING THE DEVICE
Inserting the Battery
Turn the device to the OFF position before inserting or removing the battery.
When inserting the battery, ensure the battery polarity (+ and –) markings
match the markings on the device.
Preparing the Skin
Prepare the skin as previously described and according to the instructions
provided with your electrodes. Before attaching the electrodes, identify
the area that your physician / clinician has recommended for electrode
placement.
1. Connect the lead wires to the electrodes: connect the lead wires to the
electrodes before applying the electrodes to the skin.
WARNING: Ensure both Intensity Controls for Channel 1 and 2 are turned to
the OFF position (counterclockwise) before applying the electrodes.
2. Place electrodes on the skin: place the electrodes on the skin as
recommended by your physician / clinician.
3. Insert lead wire connector into the device: plug end of lead wire into the
channel output port (jack) to be used; push the plug in as far as it will go.
4. Select treatment settings: ensure your unit is still set to the proper
settings recommended by your physician / clinician.
5. Adjusting Channel Intensity Control: locate the Intensity Control Knob
(Channel 1 or 2) at the top of the unit. Slowly turn the Intensity Control
Knob clockwise until the stimulation is at the level recommended by your

10
physician / clinician. (If you don’t feel anything, turn the Knob OFF then
ON again and carefully turn the Control Knob until you feel a tingling or
slight twitch under or around the electrodes.) Always start with the lowest
setting and increase the intensity slowly.
If the stimulation levels are uncomfortable or become uncomfortable,
reduce the stimulation intensity to a comfortable level; or cease
stimulation and contact your physician.
6. Setting the Patient Compliance Counter:
a) To turn on the Patient Compliance Counter: While the unit is ON,
hold down the UP button and press the MODE button simultaneously.
b) To reset the Patient Compliance Counter: While the unit is ON, press
the UP button and the MODE button simultaneously (this will take
you into the Compliance Counter), then push the DOWN button and
press the MODE button simultaneously.
c) Press the UP and MODE buttons simultaneously to return to the
treatment status.
BATTERY INFORMATION
When the LCD (Liquid Crystal Display) low battery mark illuminates, the
battery has become too weak to power the unit, and the existing battery
should be replaced with a new battery. At this point, the unit will turn OFF
until a new battery is inserted.
sNOTICE: GF Health Products, Inc. recommends the use of only a 9V alkaline or
nickel-cadmium rechargeable battery with this device.
Replacing the Battery
When the LCD low battery mark illuminates, and the unit does not remain
illuminated once turned on, the battery should be replaced.
1. Turn unit OFF.
2. Remove the front panel cover by pressing on the top of the panel and
pressing down in order to slide the panel down. Continue sliding the
panel downwards until the panel is completely removed from the unit.
This will reveal the battery compartment.
Table of contents
Languages:
Other Graham Field Fitness Equipment manuals


