A) Fridge compartment
The fridge compartment defrosts
automatically. The thawed water runs to the
drain tube via a collection container at the
back of the appliance (Fig. 6).
During defrosting, water droplets may form at
the back of the fridge compartment where a
concealed evaporator is located. Some
droplets may remain on the liner and refreeze
when defrosting is completed. Do not use
pointed or sharp-edged objects such as
knives or forks to remove the droplets which
have refrozen.
If, at any time, the defrost water is not drained
from the collection channel, check that no
food particles have blocked the drain tube.
The drain tube can be cleaned with a cotton
bud or similar instrument.
Check that the tube is permanently placed with
its end in the collecting tray on the compressor
to prevent the water spilling on the electric
installation or on the floor (Fig. 7).
B) Freezer compartment
Defrosting is very straightforward and without
mess, thanks to a special defrost collection
basin.
Defrost the freezer twice a year or when a
frost layer of around 7 (1/4") mm has formed.
To start the defrosting procedure, switch off
the appliance at the socket outlet and pull out
the mains plug.
All food should be wrapped in several layers
of newspaper and stored in a cool place (e.g.
a fridge or a larder).
Containers of warm water may be placed
carefully in the freezer to speed up the
defrosting.
Do not use pointed or sharp-edged
objects, such as knives or forks to remove
the frost.
Never use hairdryers, electrical heaters or
other such electrical appliances for defrosting.
Sponge off the defrost water collected at the
bottom of the freezer compartment. After
defrosting, dry the interior thoroughly (Fig. 8).
Insert the plug into the wall socket and switch
on the electricity supply.
5
Replacing the interior light bulb
(Fig. 11)
In case that the light bulb is not working it is
easy to replace. First make sure that the
fridge/freezer is disconnected from the power
supply by removing the plug. Take a flat
screwdriver and keep it carefully without force
into the left gap between the lamp cover and
the internal cabinet. Then press the handle of
the screwdriver carefully to the left until you
notice that the left pin of the cover is
disengaged. Repeat this procedure on the
right gap, however now press the handle of
the screwdriver carefully to the right. If both
sides are loosened the cover can be removed
easily.
Ensure that the bulb is screwed securely into
the bulb holder. Plug the appliance into the
power supply. If the light is still not working,
replace the E14 screw-cap type 15 Watt
(Max) bulb from your local electrical store and
then fit it. Carefully dispose of the burnt-out
light bulb immediately.
If you have changed the light bulb please fix
the cover again in it’s former position. Take
care that the cover is closed correctly.
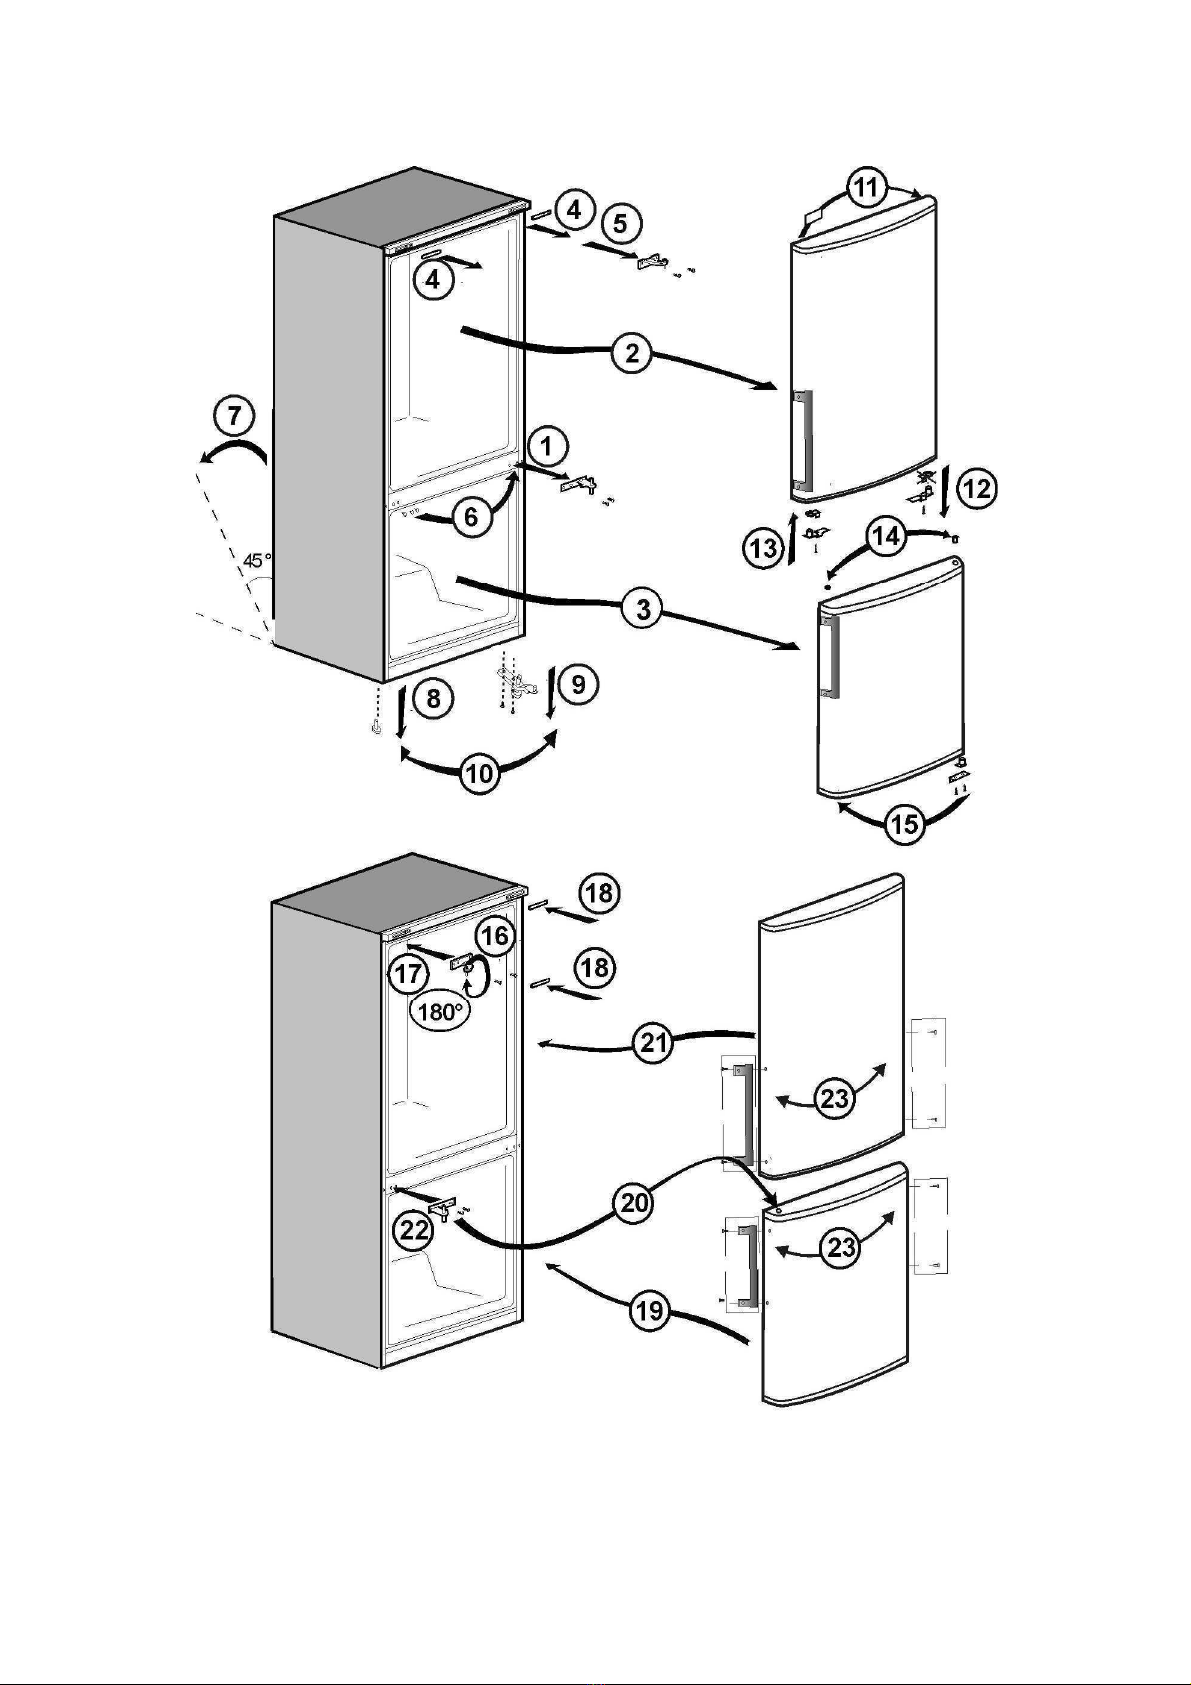
How to reposition the doors
Proceed in numerical order (Fig. 12).