manuals.online logo
Brands
  1. Home
  2. •
  3. Brands
  4. •
  5. Greenheck
  6. •
  7. Fan
  8. •
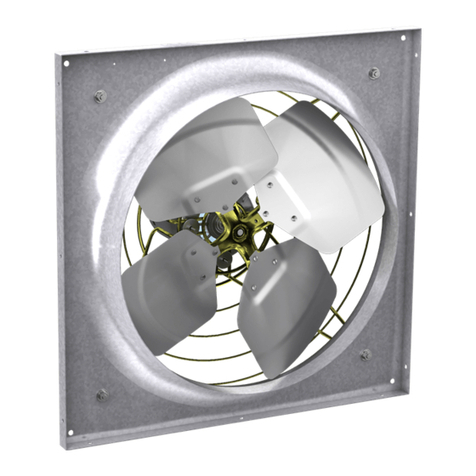
  9. Greenheck AE User manual

Greenheck AE User manual

This manual suits for next models

15

Other Greenheck Fan manuals

Greenheck ERV User manual

Greenheck

Greenheck ERV User manual

Greenheck SMD-302 User manual

Greenheck

Greenheck SMD-302 User manual

Greenheck MSCF-FC User manual

Greenheck

Greenheck MSCF-FC User manual

Greenheck QEID FJ User manual

Greenheck

Greenheck QEID FJ User manual

Greenheck FJC User manual

Greenheck

Greenheck FJC User manual

Greenheck ESD-635D User manual

Greenheck

Greenheck ESD-635D User manual

Greenheck FSD-312 User manual

Greenheck

Greenheck FSD-312 User manual

Greenheck AMPLIFY DM User manual

Greenheck

Greenheck AMPLIFY DM User manual

Greenheck CFSD-211 Installation and operating instructions

Greenheck

Greenheck CFSD-211 Installation and operating instructions

Greenheck FumeJet FJC-300 User manual

Greenheck

Greenheck FumeJet FJC-300 User manual

Greenheck G User manual

Greenheck

Greenheck G User manual

Greenheck MiniVent User manual

Greenheck

Greenheck MiniVent User manual

Greenheck XG-5700 User manual

Greenheck

Greenheck XG-5700 User manual

Greenheck SQ User manual

Greenheck

Greenheck SQ User manual

Greenheck MiniCore 5 User manual

Greenheck

Greenheck MiniCore 5 User manual

Greenheck SDPHE User manual

Greenheck

Greenheck SDPHE User manual

Greenheck SP110L User manual

Greenheck

Greenheck SP110L User manual

Greenheck WTHD series Instruction manual

Greenheck

Greenheck WTHD series Instruction manual

Greenheck SQ User manual

Greenheck

Greenheck SQ User manual

Greenheck FDR-510 User manual

Greenheck

Greenheck FDR-510 User manual

Greenheck ODFD Series User manual

Greenheck

Greenheck ODFD Series User manual

Greenheck ASSURE-120S-S1 User manual

Greenheck

Greenheck ASSURE-120S-S1 User manual

Greenheck ARC User manual

Greenheck

Greenheck ARC User manual

Greenheck APEX-200 User manual

Greenheck

Greenheck APEX-200 User manual

Popular Fan manuals by other brands

Minka Group minkaAire Wave F843 instruction manual

Minka Group

Minka Group minkaAire Wave F843 instruction manual

Airflow Adroit DV50 instruction manual

Airflow

Airflow Adroit DV50 instruction manual

Vornado 270 Series owner's guide

Vornado

Vornado 270 Series owner's guide

comfort air TH-10D instruction manual

comfort air

comfort air TH-10D instruction manual

Livoo DOM386 instruction manual

Livoo

Livoo DOM386 instruction manual

Holmes BLIZZARD HAOF-90 owner's guide

Holmes

Holmes BLIZZARD HAOF-90 owner's guide

Taurus GRECO 16 ELEGANCE manual

Taurus

Taurus GRECO 16 ELEGANCE manual

Quorum PINNACLE installation instructions

Quorum

Quorum PINNACLE installation instructions

Monte Carlo Fan Company 3DIR58RBD-V1 Owner's guide and installation manual

Monte Carlo Fan Company

Monte Carlo Fan Company 3DIR58RBD-V1 Owner's guide and installation manual

Craftmade UH52 installation guide

Craftmade

Craftmade UH52 installation guide

Jocel JVA030658 instruction manual

Jocel

Jocel JVA030658 instruction manual

MIKA MFB1211/GR user manual

MIKA

MIKA MFB1211/GR user manual

Harbor Breeze RLG52NWZ5L manual

Harbor Breeze

Harbor Breeze RLG52NWZ5L manual

Allen + Roth L1405 instruction manual

Allen + Roth

Allen + Roth L1405 instruction manual

ViM KUBAIR F400 ECOWATT Technical manual

ViM

ViM KUBAIR F400 ECOWATT Technical manual

HIDRIA R10R-56LPS-ES50B-04C10 user guide

HIDRIA

HIDRIA R10R-56LPS-ES50B-04C10 user guide

BLAUBERG Ventilatoren CENTRO-M 100 L user manual

BLAUBERG Ventilatoren

BLAUBERG Ventilatoren CENTRO-M 100 L user manual

Triangle Engineering HEAT BUSTER SPL Series owner's manual

Triangle Engineering

Triangle Engineering HEAT BUSTER SPL Series owner's manual

manuals.online logo
manuals.online logoBrands
  • About & Mission
  • Contact us
  • Privacy Policy
  • Terms and Conditions

Copyright 2025 Manuals.Online. All Rights Reserved.

®
Axial Exhaust and Supply Fans 1
®
Document 468411
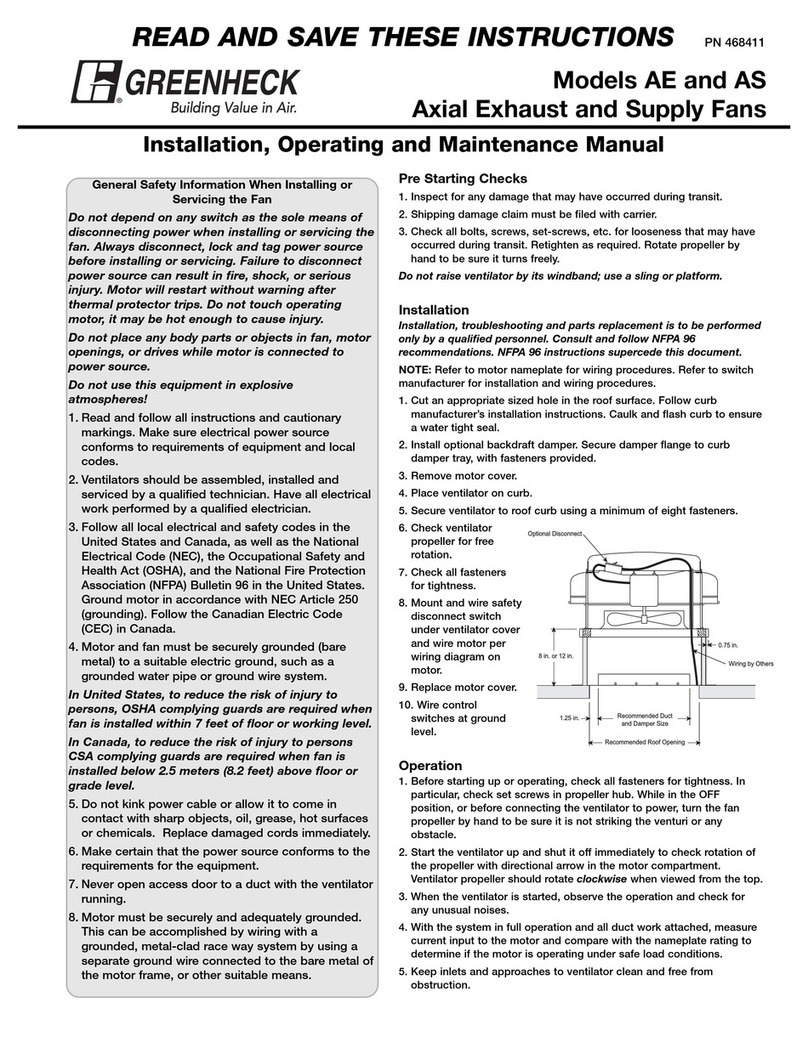
Model AE and AS
Axial Exhaust and Supply Fans
Installation, Operation and Maintenance Manual
Please read and save these instructions for future reference. Read carefully before attempting to assemble, install,
operate or maintain the product described. Protect yourself and others by observing all safety information. Failure
to comply with these instructions will result in voiding of the product warranty and may result in personal injury
and/or property damage.
General Safety Information
When Installing or Servicing the Fan
Do not depend on any switch as the sole means of
disconnecting power when installing or servicing the
fan. Always disconnect, lock and tag power source
before installing or servicing. Failure to disconnect
power source can result in fire, shock, or serious
injury. Motor will restart without warning after thermal
protector trips. Do not touch operating motor, it may be
hot enough to cause injury.
Do not place any body parts or objects in fan, motor
openings, or drives while motor is connected to power
source.
Do not use this equipment in explosive atmospheres!
1. Read and follow all instructions and cautionary
markings. Make sure electrical power source conforms
to requirements of equipment and local codes.
2. Ventilators should be assembled, installed and serviced
by a qualified technician. Have all electrical work
performed by a qualified electrician.
3. Follow all local electrical and safety codes in the United
States and Canada, as well as the National Electrical
Code (NEC), the Occupational Safety and Health Act
(OSHA), and the National Fire Protection Association
(NFPA) Bulletin 96 in the United States. Ground motor
in accordance with NEC Article 250 (grounding). Follow
the Canadian Electrical Code (CEC) in Canada.
4. Motor and fan must be securely grounded (bare metal)
to a suitable electric ground, such as a grounded water
pipe or ground wire system.
In United States, to reduce the risk of injury to persons,
OSHA complying guards are required when fan is
installed within 7 feet of floor or working level.
In Canada, to reduce the risk of injury to persons, CSA
complying guards are required when fan is installed
below 2.5 meters (8.2 feet) above floor or grade level.
1. Do not kink power cable or allow it to come in contact
with sharp objects, oil, grease, hot surfaces or
chemicals. Replace damaged cords immediately.
2. Make certain that the power source conforms to the
requirements for the equipment.
3. Never open access door to a duct with the ventilator
running.
4. Motor must be securely and adequately grounded.
This can be accomplished by wiring with a grounded,
metal-clad race way system by using a separate
ground wire connected to the bare metal of the motor
frame or other suitable means.
Pre-Starting Checks
1. Inspect for any damage that may have occurred during
transit.
2. Shipping damage claim must be filed with carrier.
3. Check all bolts, screws, setscrews, etc. for looseness that
may have occurred during transit. Retighten as required.
Rotate propeller by hand to be sure it turns freely.
Installation
Installation, troubleshooting and parts replacement is to
be performed only by a qualified personnel. Consult and
follow applicable building codes which will supercede this
document.
NOTE: Refer to motor nameplate for wiring procedures.
Refer to switch manufacturer for installation and wiring
procedures.
1. Cut an appropriate sized hole in the roof surface. Follow
curb manufacturer’s installation instructions. Caulk and
flash curb to ensure a watertight seal.
2. Install optional backdraft damper. Secure damper flange
to curb damper tray with fasteners provided.
3. Remove motor cover.
4. Place ventilator on curb.
5. Secure ventilator to roof curb using a minimum of eight
fasteners.
6. Check ventilator propeller for free rotation.
7. Check all fasteners for tightness.
8. Mount and wire safety disconnect switch under ventilator
cover and wire motor per wiring diagram on motor.
9. Replace motor cover.
10. Wire control switches at ground level.
Recommended Duct
and Damper Size
Recommended Roof Opening
1.25 in.
Wiring by Others
0.75 in.
8 in. or 12 in.
Optional Disconnect
468410 • AE and AS, Rev 3, March 2018 Copyright 2018 © Greenheck Fan Corporation2
As a result of our commitment to continuous improvement, Greenheck reserves the right to change specifications
without notice.
Specific Greenheck product warranties are located on greenheck.com within the product area tabs and in the
Library under Warranties.
®
Phone: 715.359.6171 • Fax: 715.355.2399 • Parts: 800.355.5354 • E-mail: [email protected] • Website: www.greenheck.com
Our Commitment
AMCA Publication 410-96, Safety Practices for Users and
Installers of Industrial and Commercial Fans, provides
additional safety information. This publication can be obtained
from AMCA International, Inc. at www.amca.org.
Greenheck Propeller Hooded Roof Fans catalog provides
additional information describing the equipment, fan perfor-
mance, available accessories, and specification data.
Troubleshooting
Problem Cause Corrective Action
Ventilator
Inoperative
Blown fuse or breaker Replace or repair motor
Defective motor Replace or repair
Incorrectly wired Shut power OFF and check wiring
for proper connections
Insufficient
Airflow
Blocked duct or clogged filters Clean or replace
Speed too slow Check for correct drives
Damper closed Inspect/repair damper
Incorrect propeller rotation Check motor wiring
Loose fitting duct sections
Check for secure connection
where duct permitting air loss
sections are joined (suggest duct
tape at seams for sealed closure)
Excessive
Noise or
Vibration
Loose propeller Tighten set screws
Accumulation of material on propeller Clean
Ventilator base not securely anchored Secure properly
Motor hood loose and rattling Tighten acorn nuts securing
motor hood
Fan propeller out of balance Replace propeller
Motor
Overloads or
Overheats
Propeller RPM too high Check drives
Shorted motor winding Replace motor
Incorrect propeller rotation Check motor wiring
Over/Under line voltage Contact power company
Maintenance
Disconnect and lockout power source
before servicing.
Uneven cleaning of the propeller will
produce an out-of-balance condition that
will cause vibration in the ventilator.
1. Keep inlets and approaches to ventilator
clean and free from obstruction.
Depending on the usage and severity
of the contaminated air, a regularly
scheduled inspection for cleaning the
fan propeller, ventilator, and surrounding
areas should be established.
2. Check for unusual noises when fan is
running.
3. Periodically inspect and tighten
setscrews.
4. Follow motor manufacturer’s instructions
for motor lubrication.
Parts List
Shroud
Propeller
Motor Cover
Isolator Kit
Motor
Conduit
Curb Cap/Venturi
Windband
Operation
1. Before starting up or operating, check all fasteners
for tightness. In particular, check set screws in
propeller hub. While in the OFF position, or before
connecting the ventilator to power, turn the fan
propeller by hand to be sure it is not striking the
venturi or any obstacle.
2. Start the ventilator up and shut it off immediately
to check rotation of the propeller with directional
arrow in the motor compartment. Ventilator propeller
should rotate counterclockwise on all models when
viewed from the top and clockwise for size 10 only.
3. When the ventilator is started, observe the operation
and check for any unusual noises.
4. With the system in full operation and all ductwork
attached, measure current input to the motor and
compare with the nameplate rating to determine if
the motor is operating under safe load conditions.
5. Keep inlets and approaches to ventilator
clean and free from obstruction.