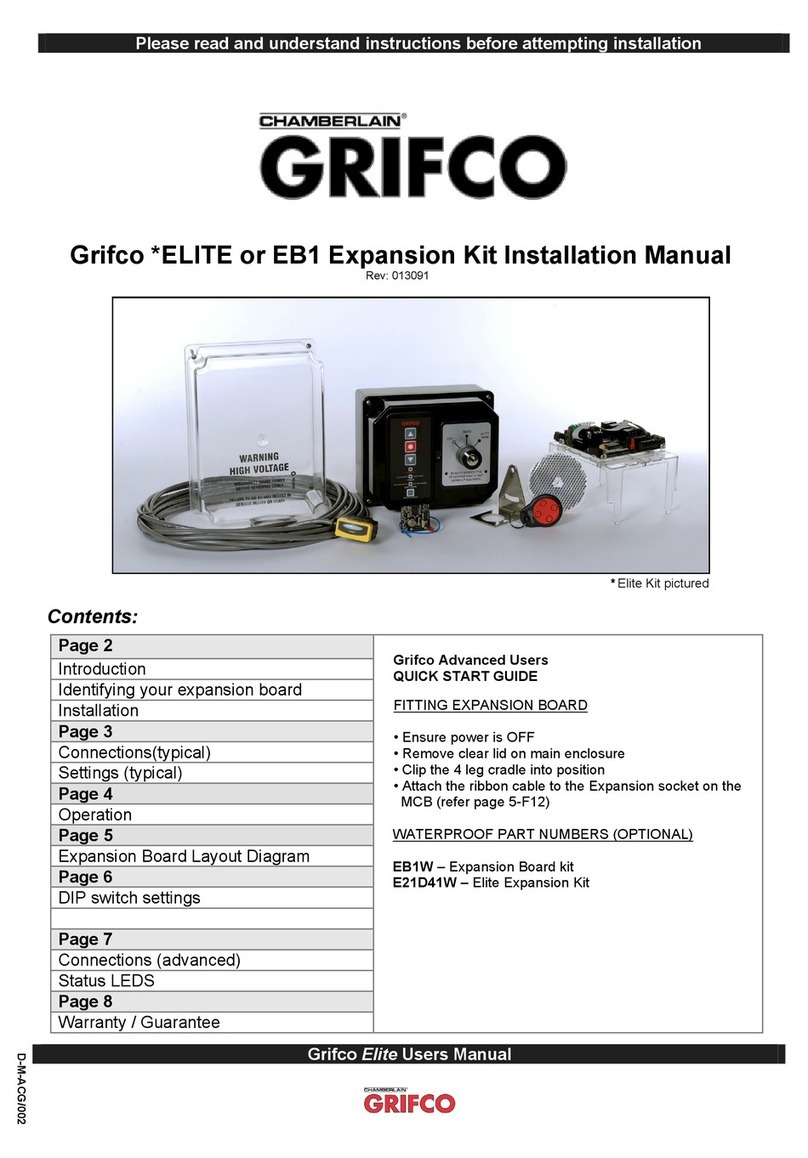
Grifco EB1 User manual

installaon and users manual for
EB1, EB1-G & EB1-GL
Expansion Board Upgrade
www.grifco.com.au
www.grifco.co.nz
D-M-ACG-073A 180117
Chamberlain Australia Pty Ltd
PO Box 1446, Lane Cove
NSW 1595, Australia
Phone toll free 1800 474 326
Chamberlain New Zealand Ltd
PO Box 100-221
North Shore 0745, New Zealand
Phone toll free 0800 653 667
Included with EB1
Expansion Board Kit
EB1 / EB1-G
EB1-GL
Included with EB1-GL

2
Safety symbol and signal word review
This commercial door opener has been designed and tested to oer safe service provided it is installed, operated, maintained
and tested in strict accordance with the instrucons and warnings contained in this manual.
WARNING
WARNING
CAUTION
Mechanical
Electrical
When you see this Signal Word on the following pages, it will
alert you to the possibility of damage to your commercial
door and/or the commercial door opener if you do not
comply with the cauonary statements that accompany it.
When you see these Safety Symbols and Signal Words on the
following pages, they will alert you to the possibility of
serious injury or death if you do not comply with the
warnings that accompany them. The hazard may come from
something mechanical or from electric shock.
SAFETY SYMBOL AND SIGNAL WORD REVIEW
WARNING: Important safety instrucons. It is important for the
safety of persons to follow all instrucons. SAVE these instrucons.
THESE ARE IMPORTANT SAFETY INSTRUCTIONS. FOLLOW ALL INSTRUCTIONS AS INCORRECT
INSTALLATION CAN LEAD TO SEVERE INJURY OR DEATH
Keep commercial door balanced. Scking or binding doors must be
repaired. Commercial doors, door springs, pulleys, brackets and
their hardware are under extreme tension and can cause serious
personal injury. Do not aempt to loosen, move or adjust them. Call
for commercial door service.
Disengage all exisng commercial door locks to avoid damage to commercial door.
Install the wall control (or any addional push buons) in a locaon where the
commercial door is visible during operaon . Do not allow children to operate push
buon(s) or remote control(s). Serious personal injury from a closing commercial door
may result from misuse of the opener.
Do not wear rings, watches or loose clothing while installing or
servicing a commercial door opener.
Permanently fasten all supplied labels adjacent to the wall control as a convenient
reference and reminder of safe operang procedures.
To avoid serious personal injury from entanglement, remove all
ropes connected to the commercial door before installing the door
opener.
Acvate opener only when the door is in full view, free of obstrucons and opener is
properly adjusted. No one should enter or leave the building while the door is in
moon.
Installaon and wiring must be in compliance with your local
building and electrical codes. Connect the power supply cord only to
properly earthed mains.
An electrician must disconnect electric power to the commercial door opener before
making repairs or removing covers.
Moisture and water can destroy the electronic components. Make
sure under all circumstances that water moisture or storage
moisture cannot penetrate the electronics. The same applies for
openings and cable entries.
If the supply cord is damaged, it must be replaced by the manufacturer or its service
agent or a similarly qualied person in order to avoid a hazard
A disconnecon device incorporated in the xed wiring must be provided in
accordance with the wiring rules of the country in which it is installed.
Aer the installaon a nal test of the full funcon of the system
and the full funcon of the safety devices must be done.
The actuang member of a biased-o switch is to be located within direct sight of the
door but away from moving parts. Unless it is key operated, it is to be installed at a
minimum height of 1500mm and not accessible to the public.
When operang a biased-o switch, make sure that other persons
are kept away.
Make sure that people who install, maintain or operate the door follow these
instrucons. Keep these instrucons in a safe place so that you can refer to them
quickly when you need to.
The opener cannot be used with a driven part incorporang a
wicket door (unless the opener cannot be operated with the wicket
door open).
If the opener is installed at a height less than 2.5 metres from oor level or any other
level from which the unit can be accessed (eg mezzanine) the installer is responsible
to t guards to the opener to prevent access to the chain drive.
Ensure that entrapment between the driven part and the
surrounding xed parts due to the opening movement of the driven
part is avoided
This appliance is not intended for use by persons (including children) with reduced
physical, sensory or mental capabilies, or lack of experience and knowledge, unless
they have been given supervision or instrucon concerning use of the appliance by a
person responsible for their safety. Children should be supervised to ensure that they
do not play with the appliance.
Motor may become hot during operaon. Appropriate clearance
and/or shielding should be supplied by the installer to ensure any
cabling, wiring and/or other items cannot come in contact with the
motor. If temperature rise exceeds 50⁰C all xed wiring insulaon
must be protected, for example, by insulang sleeving having an
appropriate temperature rang.

3
Congratulaons on your purchase of the Grifco® EB1 (-G/GL) Expansion Board Upgrade. The EB1 is a state-of-the-art door control
expansion module with feature packed electronics to enable upgrading of any eDrive (using EB1) door opener, or any installaon
that uses a GLMe2 or GLMe2L (using EB1-G/EB1-GL) type wall control.
The EB1 Expansion Board provides a range of features, including variable behaviours and 4 x status / output relays.
INTRODUCTION
The EB1 Expansion Board upgrade is designed to work with all eDrive (electronic limit) and all GLMe2/N (mechanical limit) main
control boards.
The EB1 will only work if a suitable Entrapment Protecon System is installed to enable latch closing behaviour. Refer to page 9
for more informaon.
Refer below for examples of compable product:
PLANNING
GLMe2, GLMe2L& GLMe2N
(used with mDrive and all other Grifco Mechanical Limit
eDrive and eDrive+2.0
(all models)
EB1 EB1-G
EB1-GL

4
MOUNTING
Follow the steps below to mount the relevant Expansion Board as required.
An electrician must disconnect electric power to the commercial door opener and control before removing or opening covers.
EB1 (includes high lid) EB1-G (no high lid included/required)
1
2
1
A
As shown in the relevant steps, the Expansion Board clips
into the Main Control Board (MCB) cradle via the 4 x legs
(refer Step A).
The ribbon cable is then plugged into the Expansion Socket as
marked on the MCB (refer Step B).
Aer connecon, proceed to the next page.
Remove and dispose
of low prole lid
Install EB1 (ref step A & B)
and t new high prole lid
Open door and
install EB1-G
B
If needing to remove the Expansion Board,
carefully are the clips open using a at
blade screwdriver Plug in cable as shown
“clip”
“clip”
Install EB1 (ref step A & B)
and t new high prole lid
1EB1-GL (includes high lid)

5
ELECTRICAL CONNECTION
The EB1(-G) control must:
be connected in accordance with the wiring rules of the country in which it is installed
not have control enclosures le open for extended periods (excess dust will void warranty)
CONNECTION DIAGRAM
COM & N/C - Trigger input
(refer sengs chart)
Mid limit by pass eDrive (N/O)
Mid/3rd limit GLMe2 (N/C)
Open
Status
Closed
Status
Door
moving
Status
Service
required
Status
External
Radio
Interface
Universal 6-pin
Receiver Input
Dedicated Automac
& Manual
(ref SW1 over page)
Auto close
5s-30s range
(Fit JP1 for 30s-5mins)
Control circuit baery back up input
NOT POWER OUTPUT!
DIP Switch Sengs
Refer chart next page
Connect to MCB
Automac Inputs
COM & N/O - Open input (or toggle if set)
COM & N/O - Close input
COM & N/O - Stop input
*Refer chart next page for
other behaviour sengs
The following pages detail the various sengs and conguraons necessary to set up
the EB1 to suit your installaon requirements.
ABCDEFGH
1
2
3
4
5
6
7
8
JP2 Jumper ed for GLMe2
Mechanical Limit Openers
*Jumper JP1 ed to
extend auto close me
to 5mins

6
The table below provides many variable seng behaviours to suit your door applicaon.
By default, the EB1 is delivered “Factory Set” to operate typical car park applicaons, as described below.
EB1 Factory Seng Descripon (Typical car park applicaon)
All wired and wireless user inputs will ONLY open the door. The door will then automacally close aer a user seable me.
An obstrucon or further user input during closing will command the door to fully open and then automacally close aer the set
me delay.
CONFIGURATION
EB setting Dipswitches Setting
EB mode source SW1
Factory Set> OFF AUTO / MAN combined (Controller, Wireless and all wired inputs active)
ON Use MANUAL-OFF-AUTO Switch
Auto Close Disable SW2
Factory Set> OFF Auto Close ENABLED (Note: Fit JP1 to extend timer range to 5mins. Refer page 5-H4)
ON Auto Close DISABLED
Obstruction Behaviour SW3 SW4
Factory Set> OFF OFF Stop and retract to last upper limit then Auto Close if enabled*
* If Door Close Retry is enabled (SW 5
off) door will close immediately after
obstruction behaviour concludes
OFF ON Stop and retract while obstruction remains*
ON OFF Stop with 2 second retract only, then Auto Close if enabled*
ON ON Stop then Auto Close if enabled*
Door Close Retry SW5
Factory Set> OFF Door will close after obstruct behaviour concludes
Following a user input to close, the door
will not attempt to re-close after an
obstruction, if Auto Close is not enabled
ON Door Close Retry DISABLED, only Auto Close will close the door after
obstruction behaviour, and time out concludes
Vehicle Close SW6
Factory Set> OFF Vehicle Close DISABLED
ON Door will close after obstruction clears, whilst open, opening or closing
Open Button Behaviour SW7 SW8
Factory Set> OFF OFF Door will go to open limit and remain (i.e. ignore Auto Close) while input
remains held. When released Auto Close will time out and close door
OFF ON Reverse direction during opening and closing
ON OFF Stop then reverse during opening, reverse during closing
ON ON Press to Stop, then again to reverse during opening and closing
Receiver Behaviour SW9 SW10
Factory Set> OFF OFF Open only, stop then reverse during closing
Wired Toggle Input on MCB also
adopts these behaviours OFF ON Reverse direction during opening and closing
ON OFF Stop then reverse during opening, reverse during closing
ON ON Press to Stop, then again to reverse during opening and closing
*Trigger Input Behaviour SW11 SW12
Factory Set> OFF OFF Close
* Trigger is 24VDC input
** When three limits are set open limit
becomes mid-limit. Fully open becomes
the “upper most” limit.
OFF ON Door will open to upper most limit (then Auto Close if enabled)
ON OFF Door will go to open limit** and remain while input remains held (then auto
close if enabled)
ON ON Custom Input via Parameters (Default - delay close as per timer pot)
Status Relay 3 Function SW13 SW14
Factory Set> OFF OFF ON when Door Moving
OFF ON ON when Door Moving, with 1Hz Oscillation
ON OFF ON Door Moving, 1 minute Time Extension
ON ON Custom (Default- on during obstruction, stays on for 2 sec after clear)
Status Relay 4 Function SW15 SW16
Factory Set> OFF OFF Relay is on when Service Required
OFF ON Relay flashes every second when service is required
ON OFF Unlock function
ON ON Custom Settings (Default – On if door has not closed for >5mins)

7
Door Acvaon Inputs (Key Switches, Card Readers, Loop Detectors etc)
For typical automated door applicaons, these wired inputs are generally required to acvate the door to open, and in some cas-
es close. For connecon detail refer to page 5-G1.
Trigger Input (Emergency inputs, Special applicaon funcons etc)
A trigger input can be installed to give more control over the eDrive or GLMe2 control. Once installed the trigger can be used to
open/close the door, go straight to third limit if set, hold open or delay close etc. By default the trigger is 24VDC input, however
by ng the “contact” jumper next to the terminals (Page 5-F3) you will switch to “voltage free” input. The behaviour of the trig-
ger is set via the on board dipswitches. Refer to Trigger Input Behaviour on page 6.
Status Relays
Four status relays located on the Expansion Board allow external devices, such as lights, sirens, locks etc to be acvated in various
ways. Relays 1 and 2 are set to acvate when the door is OPEN and CLOSED respecvely. Relays 3 and 4 can be congured via
dipswitches (refer page 6).
6 Pin Receiver / Antenna
Located on the expansion board is a 6 pinned header to suit third party 6 pin receiver cards (page 5-A5). Other hard wired radio
cards can be connected directly via the 3 posion External Radio terminals (page 5-A7).
An ANTENNA can be wired to the adjacent terminals (page 5-A4).
Extended Limit Input
eDrive
When using 3 limit posions (Ref. eDrive Manual), you can connect a dedicated input switch to the EXT.LIMIT terminals
(page 5-H3). A pulse at these terminals will send door to the upper most limit. This can be convenient where a door is used for
both passenger cars and large trucks (e.g. the truck would have a specic key switch to use for full opening of the door). Alterna-
vely, an external receiver module (P/N E8003) can be wired to these terminals to act as a dedicated “fully open” wireless input.
GLMe2
If using a third limit on a Grifco mDrive or other mechanical limit opener, this input will act as a N/C mid limit posion. To bypass
this limit, a Normally Open input will be required across these terminals whereby the input is acvated (latched or held) prior to
signalling the door to open. The input must remain bridged or held as the door passes the mid limit posion. Thereaer the input
can be released. Upon a closing acvaon, or Auto Close event, the door will proceed past the mid limit posion and on to the
fully closed posion.
CONNECTION OPTIONS
LED Description Colour Display Status Possible Solution
Close Red Solid ON =Closed
Flashing =Closing
Open Green Solid ON =Open
Flashing =Opening
Error Yellow Solid ON =EB failed Power OFF&ON if still error, replace EB
Communications Orange Solid ON =EB to MCB comms error Check ribbon connection or replace EB
“1 flash =
24vdc b/up power detect-
ed
Not an error, waiting for mains to re-
sume
“2 flash =Incompatible limits Reset limits
“3 flash =No limits Set Set Limits
“4 flash =MCB latch setting error Check DIP switches are on at MCB
“5 flash =EB ignored by MCB Check MCB for errors
STATUS TABLE

8
The EB1 may be connected through to diering types of Controller interfaces. This page describes the two main Controller types
that are typically used, and how they funcon. For more detailed informaon about the Controller funconality, refer to the rel-
evant manual provided.
Controller interface (C10A-X) as used on all eDrive Openers:
When the EB1 is ed, the C10A-X will operate in an “AUTO/MAN” mode. Note than many other Controller variants are available
that include Key Isolaon or, AUTO/OFF modes etc. Call 1800 GRIFCO or your local dealer for more informaon.
Controller interface as used on GLMe2, C21D and C41D:
The key switch modes are detailed below:
OFF: The control will not operate from any input source. WARNING!! THIS IS NOT POWER ISOLATION!!
AUTO: Isolates the Controller panel buons ONLY to prevent tampering (typical mode for car park environments)
All other inputs methods remain acve, e.g. wired and wireless access control devices
AUTO / MAN: Enables use of the Controller buons for the purposes of service or where persons may need to operate the
door from these push buons.
CONTROLLER INTERFACE
Controller Key Switch
Controller

9
Installing Entrapment Protecon Devices (may require terminal blocks P/N TBT2A-5)
Devices such as Infrared (IR) Beams and Safety Bump Edges allow safe automac or latch closing of the door and must be wired
directly into the MCB. Grifco® Entrapment Protecon Devices such as the Grifco® Protector System (GPS15 or GPS772*) and
Bump Edge are wired into the quick connect inputs located next to the door behaviour dip switches on the MCB (shown below).
Connecon overview:
IR1: Monitored Grifco® Protector System (P/N GPS15, GPS772*), or
NC (normally closed) contact input
IR2: Monitored Grifco® Protector System P/N GPS15 or GPS772*) or
NC (normally closed) contact input
* GPS15 and GPS772 Grifco Protector Systems are only compable with eDrive2 and GLMe2
models
VDC OUT: Accessory power 24Vdc - unregulated
(max 150mA)
BUMP: Monitored 8K2 Resistor type Bump Edge input.
Note: When installing Entrapment Protecon Devices ensure that the door is at the open limit posion.
Note: All Entrapment Protecon Devices need to be acvated once aer installaon to be learned correctly. Normally closed
Entrapment Protecon Devices and monitored Bump Edges require one simulated obstrucon to be learned by the opener.
Once learned, latch closing will be allowed when set.
If the status light is ashing 2 or 3 mes, there may be a connecon problem, or misalignment of an IR beam device.
With connecon of the Entrapment Protecon System complete, set the door behaviour DIP switch to latch down and up as
shown below. This will cause the door to latch both up and down. i.e. a momentary press of the up or down buon will cause the
door to run automacally to the fully opened or closed posion.
Test proper operaon of the installed Entrapment Protecon System by operang the door in the closing direcon and obstruc-
on the device. The door should stop and reverse to the open posion.
Erase Entrapment Protecon Devices
Press RST buon on the MCB for at least 10 seconds unl the green light blinks rapidly.
Reacvate Entrapment Protecon Devices
Re-install in accordance with the above instrucon as required.
ENTRAPMENT PROTECTION DEVICE CONNECTION
WARNING
Entrapment Protecon
The Entrapment Protecon System for your installaon will be determined by the funconal requirements of the door. To ensure
the installaon meets these requirements refer to AS/NZS 60335-2-103.
When using the Grifco® Protector System as part of the Entrapment Protecon System, ensure it is installed to detect a 100mm
high obstacle, ie; approx 80mm from the oor, and in accordance with installaon direcons supplied.
Consideraon should be given to the detecon of vehicles or other similar equipment. To provide adequate Entrapment Protec-
on an addional Grifco® Protector System may be required to be installed in a higher suitable posion, for example, approx
600mm from the ground.

10
ACCESSORIES
Depending on your applicaon requirements, some of the following accessories may be included with your equipment. Review
the following to determine if any of these items may be required to sasfy the customer needs if not already included.

11
NOTES

12
© 2017 The Chamberlain Group, Inc
CHAMBERLAIN LIMITED WARRANTY - Grifco Products
Chamberlain Australia Pty Limited / Chamberlain New Zealand Limited (Chamberlain) is commied to manufacturing and supplying high quality goods. As part of
this commitment, we seek to provide reliable service and support for our goods and are pleased to provide you, the original purchaser, with this Chamberlain
Limited Warranty.
We also provide the following statement as required by the Australian Consumer Law: In Australia, in addion to your rights under this Chamberlain Limited
Warranty, our goods come with guarantees that cannot be excluded under the Australian Consumer Law. You are entled to a replacement or refund for a ma-
jor failure and for compensaon for any other reasonably foreseeable loss or damage. You are also entled to have the goods repaired or replaced if the goods
fail to be of acceptable quality and the failure does not amount to a major failure.
Chamberlain’s warranty
Chamberlain warrants to the original purchaser of the Grifco product (Unit) that:
1 The Unit (excluding the electric motor) is free from defects in materials and workmanship for a period of 24 months from the date of purchase.
2 The electric motor is free from defects in materials and workmanship for a period of 12 months from the date of purchase.
During the applicable Chamberlain Warranty period, if you are concerned that the Unit or electric motor may be defecve, call our service centre on the toll free
number below before removing the Unit and a Chamberlain technician will diagnose the problem. Once the problem has been diagnosed, subject to your rights
under the Australian Consumer Law with respect to major failures, Chamberlain will provide you with:
1 parts for “do-it-yourself” repairs; or
2 shipping instrucons for a factory repair or replacement.
If a factory repair or replacement is required, provided the defecve part or Unit is returned to Chamberlain well-packaged and in accordance with Chamberlain’s
shipping instrucons, Chamberlain will, subject to your rights under the Australian Consumer Law with respect to major failures:
1 in relaon to the Unit (excluding the electric motor), repair or, at its opon where permissible, replace any defecve part or Unit (excluding the electric mo-
tor) and return it to you at no cost; and
2 in relaon to the electric motor, replace the electric motor and return it to you at no cost.
Where the Unit has been installed by an authorised installer, you must call them for prompt on-site service. Chamberlain will furnish replacement parts free of
charge through the authorised installer. A service fee for on-site service may apply.
Repairs and replacement parts provided under this Chamberlain Limited Warranty are provided free of charge and are warranted for the remaining poron of
the original warranty period.
This Chamberlain Limited Warranty provides benets which are in addion to your other rights and remedies as a consumer.
Exclusions
If our service centre determines that a warranty claim has been made in respect of a failure or defect arising under or out of any exclusion detailed below such
that the claim is not covered under this Chamberlain Limited Warranty, we may, subject to your other rights and remedies as a consumer, charge you a fee to
repair, replace and/or return the Unit to you.
This Chamberlain Limited Warranty does not cover any failure of, or defect in, the Unit due to:
1 non-compliance with the instrucons regarding installaon, operaon, maintenance and tesng of the Unit or of any product with which the Unit is used;
2 any aempt by a person other than an authorised installer to change sengs, repair, dismantle, reinstall or move the Unit to another locaon once it has
been installed;
3 tampering, neglect, abuse, wear and tear, accident, electrical storm, excessive use or condions other than normal commercial use;
4 use of the Unit in conjuncon with controls which have not been supplied, or pre-approved, by Chamberlain;
5 problems with, or relang to, the commercial door or commercial door hardware, including but not limited to the door springs, door rollers, door alignment,
hinges, guides, slats and drums; or
6 problems caused by electrical faults.
If this Chamberlain Limited Warranty does not apply, you may have rights available to you under the Australian Consumer Law.
Liability – Australia only
Except as set out in the Australian Consumer Law (being Schedule 2 of the Compeon and Consumer Act 2010) (as amended, consolidated or replaced):
1 all other guarantees, warranes and representaons in relaon to the Unit or its supply are excluded to the extent that Chamberlain can lawfully exclude
them; and
2 under no circumstances will Chamberlain be liable for consequenal, incidental or special damages arising in connecon with the use, or inability to use, the
Unit, other than those which were reasonably foreseeable as liable to result from the failure.
Liability – New Zealand only
Except as set out in the Fair Trading Act 1986 and the Consumer Guarantees Act 1993 (as amended, consolidated or replaced):
1 all other guarantees, warranes and representaons in relaon to the Unit or its supply are excluded to the extent that Chamberlain can lawfully exclude
them; and
2 under no circumstances will Chamberlain be liable for consequenal, incidental or special damages arising in connecon with the use, or inability to use, the
Unit, other than those which were reasonably foreseeable as liable to result from the failure.
Note
We request that you retain your sales docket or invoice as proof-of-purchase and aach it to this manual to enable you to establish the date of purchase in the
unlikely event of a warranty service being required. Chamberlain reserves the right to change the design and specicaons of the Unit without prior nocaon.
Some features or accessories of the Unit may not be available in certain markets or areas. Please check with your distributor.
New Zealand
Auckland phone 09 477 2823
Phone toll free 0800 653 667
Fax toll free 0800 653 663
Websites
www.grifco.com.au or www.grifco.co.nz
Chamberlain service centre contact details
Australia
Phone toll free 1800 474 326
Fax toll free 1800 888 121
Unit 1, 75 Epping Road
North Ryde, NSW 2113
Email
Other manuals for EB1
1
This manual suits for next models
2
Table of contents
Other Grifco Computer Hardware manuals