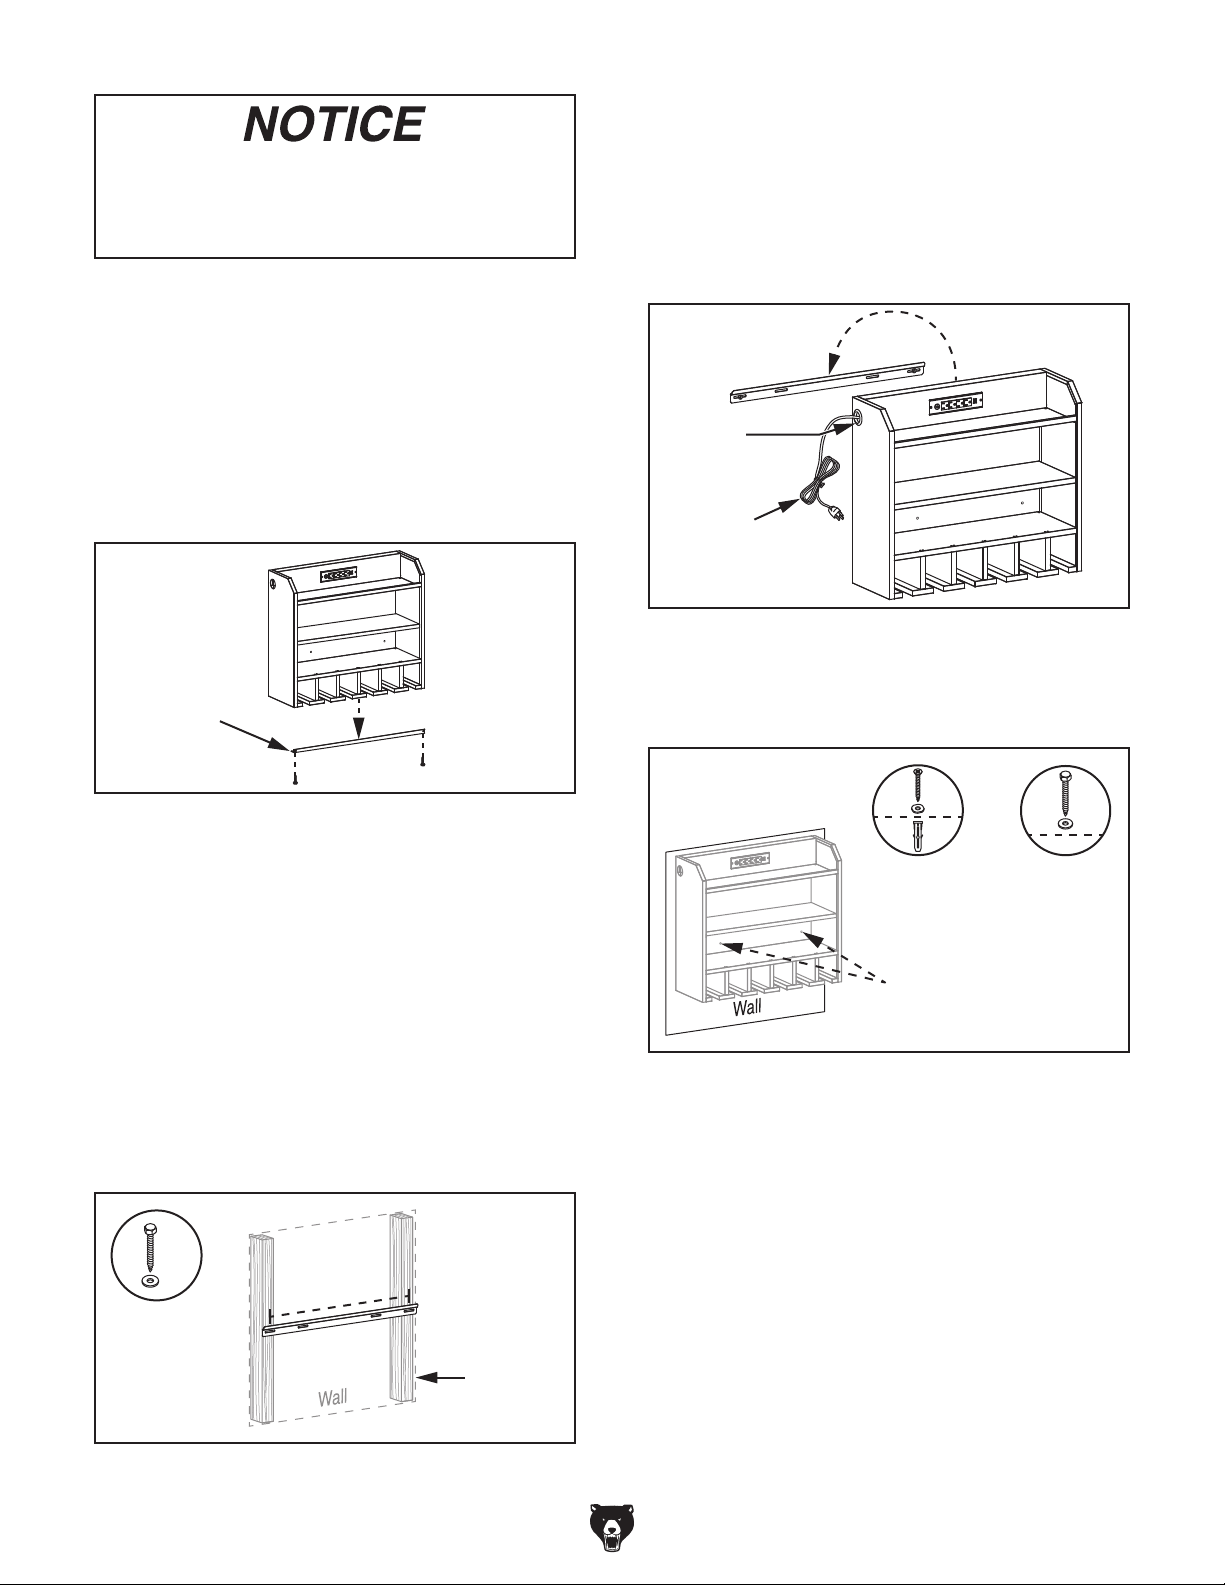
Figure 2. Typical 5-15 plug and receptacle.
Grounding Pin
Neutral Hot
5-15 PLUG
GROUNDED
5-15 RECEPTACLE
Serious injury could occur if you connect
machine to power before completing setup
process. DO NOT connect to power until
instructed later in this manual.
• Do not connect to plug receptacle via
extension cords or in series with other
power strips.
• Keep electrical connections clear of flam-
mable materials.
• Keep electrical connections dry. Do not
use in damp or wet conditions.
• Do not connect devices to power strip
that draw more than listed power strip
rating. Equipment must be used in accor-
dance with any instructions or labeling.
• Power strips are designed for use with
low-powered loads, such as battery char-
gers. Not designed for use with high-
powered loads, such as space heaters or
microwaves.
• Do not run cord under floor coverings or
where it may be tripped over.
• Not intended for outdoor use.
• Prevent unauthorized use by children or
untrained users.
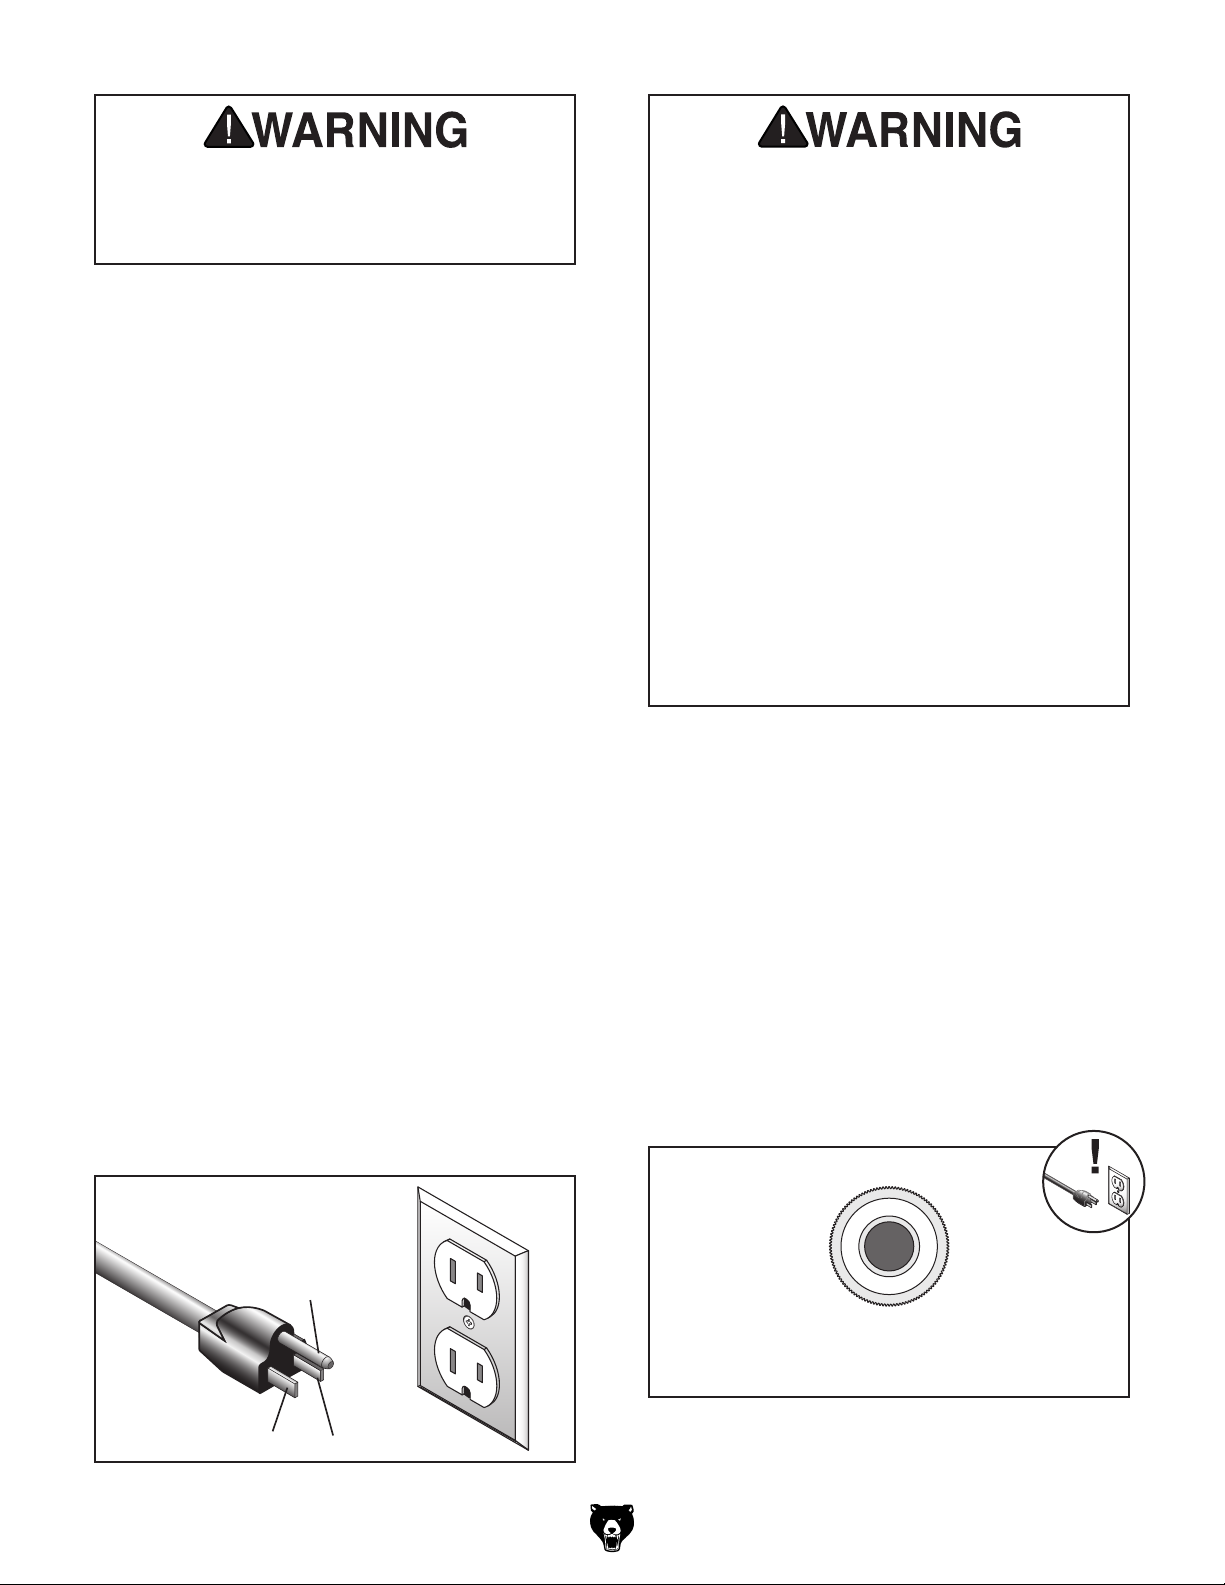
P
R
E
S
S
T
O
R
E
S
E
T
CIRCUIT BREAKER
Button
PRESS TO RESET
Figure 3. Resetting circuit breaker.
-2- Model T33899 (Mfd. Since 07/23)
Resetting Circuit Breaker
The Model T33899 includes a 12A circuit breaker
on the front of the power strip to help protect from
electrical failure.
To reset circuit breaker:
1. DISCONNECT STATION FROM POWER!
2. Disconnect any accessories connected to
charging station.
3. Press center circuit breaker button in until it
locks in place (see Figure 3).
4. Re-connect station to power supply.
110V Circuit Requirements
This charging station is prewired to operate on a
power supply circuit that has a verified ground and
meets the following requirements:
Nominal Voltage .................... 110V, 115V, 120V
Cycle ..........................................................60 Hz
Phase ........................................... Single-Phase
Power Supply Circuit ......................... 15 Amps
Plug/Receptacle ............................. NEMA 5-15
A power supply circuit includes all electrical equip-
ment between the breaker box or fuse panel in the
building and the power strip. The power supply
circuit used for this power strip must be sized to
safely handle the full-load current drawn from the
power strip for an extended period of time. (If this
power strip is connected to a circuit protected by
fuses, use a time delay fuse marked D.)
Grounding & Plug Requirements
This power strip MUST be grounded. In the event
of certain malfunctions or breakdowns, grounding
reduces the risk of electric shock by providing a
path of least resistance for electric current.
This power strip is equipped with a power cord
that has an equipment-grounding wire and a
grounding plug. Only insert plug into a matching
receptacle (outlet) that is properly installed and
grounded in accordance with all local codes and
ordinances. DO NOT modify the provided plug!