manuals.online logo
Brands
  1. Home
  2. •
  3. Brands
  4. •
  5. Grizzly
  6. •
  7. Grinder
  8. •
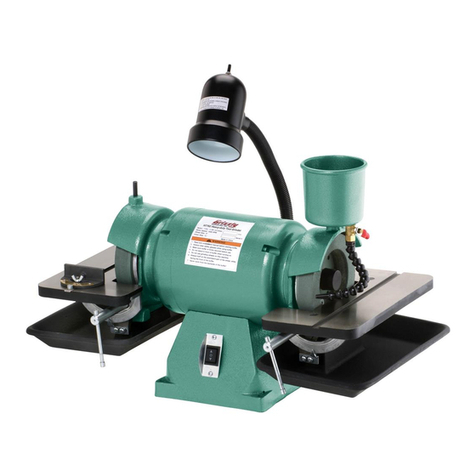
  9. Grizzly G9717 User manual

Grizzly G9717 User manual

Other manuals for G9717

2

Other Grizzly Grinder manuals

Grizzly H7758/H7759 User manual

Grizzly

Grizzly H7758/H7759 User manual

Grizzly G1036 User manual

Grizzly

Grizzly G1036 User manual

Grizzly G9928 User manual

Grizzly

Grizzly G9928 User manual

Grizzly H6193 User manual

Grizzly

Grizzly H6193 User manual

Grizzly T10875 User manual

Grizzly

Grizzly T10875 User manual

Grizzly G0688 User manual

Grizzly

Grizzly G0688 User manual

Grizzly G5963 User manual

Grizzly

Grizzly G5963 User manual

Grizzly H6156 Quick start guide

Grizzly

Grizzly H6156 Quick start guide

Grizzly H3117 User manual

Grizzly

Grizzly H3117 User manual

Grizzly H6155 Quick start guide

Grizzly

Grizzly H6155 Quick start guide

Grizzly H3172 User manual

Grizzly

Grizzly H3172 User manual

Grizzly G8601 User manual

Grizzly

Grizzly G8601 User manual

Grizzly G3622 User manual

Grizzly

Grizzly G3622 User manual

Grizzly G9960 User manual

Grizzly

Grizzly G9960 User manual

Grizzly H4380 User manual

Grizzly

Grizzly H4380 User manual

Grizzly H7757 User manual

Grizzly

Grizzly H7757 User manual

Grizzly G0897 User manual

Grizzly

Grizzly G0897 User manual

Grizzly T24463 User manual

Grizzly

Grizzly T24463 User manual

Grizzly H3368 Quick start guide

Grizzly

Grizzly H3368 Quick start guide

Grizzly G1806 User manual

Grizzly

Grizzly G1806 User manual

Grizzly H7759 Quick start guide

Grizzly

Grizzly H7759 Quick start guide

Grizzly H8124 User manual

Grizzly

Grizzly H8124 User manual

Grizzly T10097 User manual

Grizzly

Grizzly T10097 User manual

Grizzly H8213 User manual

Grizzly

Grizzly H8213 User manual

Popular Grinder manuals by other brands

Makita GA5040CN instruction manual

Makita

Makita GA5040CN instruction manual

Gude 20000 PRO Original operating instructions

Gude

Gude 20000 PRO Original operating instructions

Nesco FG-300 Care/use guide

Nesco

Nesco FG-300 Care/use guide

RIDGID R86047 Operator's manual

RIDGID

RIDGID R86047 Operator's manual

Holzmann MTY 8-70 user manual

Holzmann

Holzmann MTY 8-70 user manual

DeWalt DWE4557G instruction manual

DeWalt

DeWalt DWE4557G instruction manual

Meterk S1M-GW20-115 Translation of the original instructions

Meterk

Meterk S1M-GW20-115 Translation of the original instructions

U.S.SAWS SX65000C operating manual

U.S.SAWS

U.S.SAWS SX65000C operating manual

Parkside PWS 230 C3 Translation of the original instructions

Parkside

Parkside PWS 230 C3 Translation of the original instructions

SUHNER ABRASIVE ASC 9 Technical document

SUHNER ABRASIVE

SUHNER ABRASIVE ASC 9 Technical document

PTA P1322 Operation manual

PTA

PTA P1322 Operation manual

Craftsman CMCG400 instruction manual

Craftsman

Craftsman CMCG400 instruction manual

Crown CT13313 Original instructions

Crown

Crown CT13313 Original instructions

Parkside 280250 instructions

Parkside

Parkside 280250 instructions

Jet JPSG-618M1 Operating instructions and parts manual

Jet

Jet JPSG-618M1 Operating instructions and parts manual

Makita GA4030 instruction manual

Makita

Makita GA4030 instruction manual

DeWalt DWEN202 Original instructions

DeWalt

DeWalt DWEN202 Original instructions

Garrick BG8-UT instruction manual

Garrick

Garrick BG8-UT instruction manual

manuals.online logo
manuals.online logoBrands
  • About & Mission
  • Contact us
  • Privacy Policy
  • Terms and Conditions

Copyright 2025 Manuals.Online. All Rights Reserved.

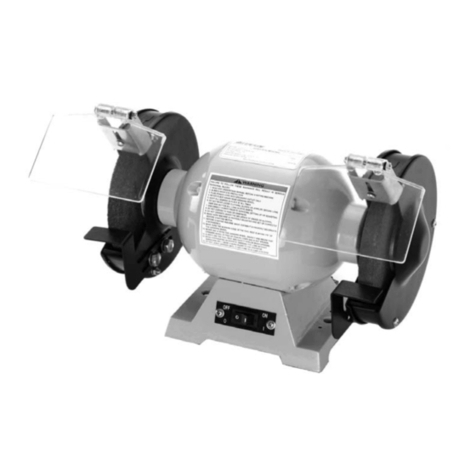
66""GGRRIINNDDEERR
MMOODDEELLGG99771177
IINNSSTTRRUUCCTTIIOONNMMAANNUUAALL
COPYRIGHT ©2000 BY GRIZZLY INDUSTRIAL, INC.
1821 VALENCIA ST., BELLINGHAM, WA 98227
WWAARRNNIINNGG::NNOOPPOORRTTIIOONNOOFFTTHHIISSMMAANNUUAALLMMAAYYBBEERREEPPRROODDUUCCEEDDIINNAANNYYSSHHAAPPEE
OORRFFOORRMMWWIITTHHOOUUTTTTHHEEWWRRIITTTTEENNAAPPPPRROOVVAALLOOFFGGRRIIZZZZLLYYIINNDDUUSSTTRRIIAALL,,IINNCC..
MARCH, 2000 PRINTED IN CHINA
ONLINE MANUAL DISCLAIMER
THE INFORMATION IN THIS MANUAL REPRESENTS THE CONFIGURATION OF THE MACHINE AS IT IS CURRENTLY BEING SHIPPED. THE MACHINE
CONFIGURATION CAN CHANGE AS PRODUCT IMPROVEMENTS ARE INCORPORATED. IF YOU OWN AN EARLIER VERSION OF THE MACHINE, THIS
MANUAL MAY NOT EXACTLY DEPICT YOUR MACHINE . CONTACT CUSTOMER SERVICE IF YOU HAVE ANY QUESTIONS ABOUT DIFFERENCES. PRE-
VIOUS VERSIONS ARE NOT AVAILABLE ONLINE.
G9717 6" Grinder -1-
SSaaffeettyyIInnssttrruuccttiioonnssFFoorrPPoowweerrTToooollss
GGEENNEERRAALLSSAAFFEETTYYRRUULLEESS
55..KKEEEEPPCCHHIILLDDRREENNAANNDDVVIISSIITTOORRSSAAWWAAYY.
All children and visitors should be kept a
safe distance from work area.
66..MMAAKKEEWWOORRKKSSHHOOPPCCHHIILLDDPPRROOOOFFwith
padlocks, master switches, or by removing
starter keys.
77..DDOONN’’TTFFOORRCCEETTOOOOLL. It will do the job
better and safer at the rate for which it was
designed.
88..UUSSEERRIIGGHHTTTTOOOOLL..Don’t force tool or
attachment to do a job for which it was not
designed.
11..KKEEEEPPGGUUAARRDDSSIINNPPLLAACCEEand in working
order.
22..RREEMMOOVVEEAADDJJUUSSTTIINNGGKKEEYYSSAANNDD
WWRREENNCCHHEESS. Form habit of checking to
see that keys and adjusting wrenches are
removed from tool before turning on..
33..KKEEEEPPWWOORRKKAARREEAACCLLEEAANN. Cluttered
areas and benches invite accidents.
44..DDOONN’’TTUUSSEEIINNDDAANNGGEERROOUUSSEENNVVIIRROONN--
MMEENNTT. Don’t use power tools in damp or
wet locations, or where any flammable or
noxious fumes may exist. Keep work area
well lighted.
FFoorrYYoouurrOOwwnnSSaaffeettyyRReeaaddIInnssttrruuccttiioonnMMaannuuaall
BBeeffoorreeOOppeerraattiinnggTThhiissEEqquuiippmmeenntt
IInnddiiccaatteessaanniimmmmiinneennttllyyhhaazzaarrddoouussssiittuuaattiioonnwwhhiicchh,,iiffnnoottaavvooiiddeedd,,
WWIILLLLrreessuullttiinnddeeaatthhoorrsseerriioouussiinnjjuurryy..
IInnddiiccaatteessaappootteennttiiaallllyyhhaazzaarrddoouussssiittuuaattiioonnwwhhiicchh,,iiffnnoottaavvooiiddeedd,,
CCOOUULLDDrreessuullttiinnddeeaatthhoorrsseerriioouussiinnjjuurryy..
IInnddiiccaatteessaappootteennttiiaallllyyhhaazzaarrddoouussssiittuuaattiioonnwwhhiicchh,,iiffnnoottaavvooiiddeedd,,
MMAAYYrreessuullttiinnmmiinnoorroorrmmooddeerraatteeiinnjjuurryy..IIttmmaayyaallssoobbeeuusseeddttoo
aalleerrttaaggaaiinnssttuunnssaaffeepprraaccttiicceess..
TThhiissssyymmbboolliissuusseeddttooaalleerrtttthheeuusseerrttoouusseeffuulliinnffoorrmmaattiioonnaabboouutt
pprrooppeerrooppeerraattiioonnoofftthheeeeqquuiippmmeenntt..
TThheeppuurrppoosseeooffssaaffeettyyssyymmbboollssiissttooaattttrraaccttyyoouurraatttteennttiioonnttooppoossssiibblleehhaazzaarrddoouussccoonnddiittiioonnss..TThhiissmmaann--
uuaalluusseessaasseerriieessooffssyymmbboollssaannddssiiggnnaallwwoorrddsswwhhiicchhaarreeiinntteennddeeddttooccoonnvveeyytthheelleevveellooffiimmppoorrttaanncceeooff
tthheessaaffeettyymmeessssaaggeess..TThheepprrooggrreessssiioonnooffssyymmbboollssiissddeessccrriibbeeddbbeellooww..RReemmeemmbbeerrtthhaattssaaffeettyymmeessssaaggeess
bbyytthheemmsseellvveessddoonnootteelliimmiinnaatteeddaannggeerraannddaarreennoottaassuubbssttiittuutteeffoorrpprrooppeerraacccciiddeennttpprreevveennttiioonnmmeeaass--
uurreess..
NNOOTTIICCEE
G9717 6" Grinder
-2-
99..UUSSEEPPRROOPPEERREEXXTTEENNSSIIOONNCCOORRDD. Make
sure your extension cord is in good condi-
tion. Conductor size should be in accor-
dance with the chart below. The amperage
rating should be listed on the motor or tool
nameplate. An undersized cord will cause
a drop in line voltage resulting in loss of
power and overheating. Your extension
cord must also contain a ground wire and
plug pin. Always repair or replace exten-
sion cords if they become damaged.
Minimum Gauge for Extension Cords
1100..WWEEAARRPPRROOPPEERRAAPPPPAARREELL..Do not wear
loose clothing, gloves, neckties, rings,
bracelets, or other jewelry which may get
caught in moving parts. Non-slip footwear
is recommended. Wear protective hair
covering to contain long hair.
1111..AALLWWAAYYSSUUSSEESSAAFFEETTYYGGLLAASSSSEESS..Also
use face or dust mask if cutting operation
is dusty. Everyday eyeglasses only have
impact resistant lenses, they are NOT
safety glasses.
1122..SSEECCUURREEWWOORRKK..Use clamps or a vise to
hold work when practical. It’s safer than
using your hand and frees both hands to
operate tool.
LLEENNGGTTHH
AAMMPPRRAATTIINNGG2255fftt5500fftt110000fftt
0-6 18 16 16
7-10 18 16 14
11-12 16 16 14
13-16 14 12 12
17-20 12 12 10
21-30 10 10 No
SSaaffeettyyIInnssttrruuccttiioonnssFFoorrPPoowweerrTToooollss
1133..DDOONN’’TTOOVVEERRRREEAACCHH..Keep proper footing
and balance at all times.
1144..MMAAIINNTTAAIINNTTOOOOLLSSWWIITTHHCCAARREE..Keep
tools sharp and clean for best and safest
performance. Follow instructions for lubri-
cating and changing accessories.
1155..DDIISSCCOONNNNEECCTTTTOOOOLLSSbefore servicing
and changing accessories, such as blades,
bits, cutters, and the like.
1166..RREEDDUUCCEETTHHEERRIISSKKOOFFUUNNIINNTTEENNTTIIOONN--
AALLSSTTAARRTTIINNGG..Make sure switch is in off
position before plugging in.
1177..UUSSEERREECCOOMMMMEENNDDEEDDAACCCCEESSSSOORRIIEESS..
Consult the owner’s manual for recom-
mended accessories. The use of improper
accessories may cause risk of injury.
1188..CCHHEECCKKDDAAMMAAGGEEDDPPAARRTTSS..Before fur-
ther use of the tool, a guard or other part
that is damaged should be carefully
checked to determine that it will operate
properly and perform its intended function.
Check for alignment of moving parts, bind-
ing of moving parts, breakage of parts,
mounting, and any other conditions that
may affect its operation. A guard or other
part that is damaged should be properly
repaired or replaced.
1199..NNEEVVEERRLLEEAAVVEETTOOOOLLRRUUNNNNIINNGGUUNNAATT--
TTEENNDDEEDD..TTUURRNNPPOOWWEERROOFFFF..Don’t
leave tool until it comes to a complete stop.
G9717 6" Grinder -3-
AAddddiittiioonnaallSSaaffeettyyIInnssttrruuccttiioonnssFFoorrGGrriinnddeerrss
NNoolliissttooffssaaffeettyygguuiiddeelliinneessccaannbbeeccoommpplleettee..
EEvveerryysshhooppeennvviirroonnmmeennttiissddiiffffeerreenntt..AAllwwaayyss
ccoonnssiiddeerrssaaffeettyyffiirrsstt,,aassiittaapppplliieessttooyyoouurriinnddii--
vviidduuaallwwoorrkkiinnggccoonnddiittiioonnss..UUsseetthhiissaannddootthheerr
mmaacchhiinneerryywwiitthhccaauuttiioonnaannddrreessppeecctt..FFaaiilluurreettoo
ddoossooccoouullddrreessuullttiinnsseerriioouussppeerrssoonnaalliinnjjuurryy,,
ddaammaaggeettooeeqquuiippmmeennttoorrppoooorrwwoorrkkrreessuullttss..
OOppeerraattiinnggtthhiisseeqquuiippmmeenntthhaasstthheeppootteennttiiaallttoo
pprrooppeellddeebbrriissiinnttootthheeaaiirrwwhhiicchhccaannccaauusseeeeyyee
iinnjjuurryy..AAllwwaayysswweeaarrssaaffeettyyggllaasssseessoorrggoogggglleess
wwhheennooppeerraattiinnggeeqquuiippmmeenntt..EEvveerryyddaayyggllaasssseess
oorrrreeaaddiinnggggllaasssseessoonnllyyhhaavveeiimmppaaccttrreessiissttaanntt
lleennsseess,,tthheeyyaarreennoottssaaffeettyyggllaasssseess..BBeecceerrttaaiinn
tthheessaaffeettyyggllaasssseessyyoouuwweeaarrmmeeeetttthheeaapppprroo--
pprriiaatteessttaannddaarrddssoofftthheeAAmmeerriiccaannNNaattiioonnaall
SSttaannddaarrddssIInnssttiittuuttee((AANNSSII))..
11..AALLWWAAYYSSWWEEAARRa face shield and/or safe-
ty goggles.
22..SSEECCUURREETTHHIISSGGRRIINNDDEERRfirmly to a
benchtop or stand.
33..NNEEVVEERRUUSSEEAAGGRRIINNDDIINNGGWWHHEEEELLwhich
has evidence of cracking or chips. “Ring
Check” the wheel to test its integrity (See
Page 9 for checking procedure).
44..UUSSEEOONNLLYYPPRROOPPEERRLLYYSSIIZZEEDDWWHHEEEELLSS
which have the right bore size and overall
diameter.
55..DDRREESSSSTTHHEEGGRRIINNDDIINNGGWWHHEEEELLwhen its
surface becomes rutted or uneven.
Replace the wheel if the wear or damage
becomes excessive.
66..AALLLLOOWWTTHHEEWWHHEEEELLTTOOAATTTTAAIINNFFUULLLL
SSPPEEEEDDbefore introducing the workpiece.
77..AALLWWAAYYSSUUSSEETTHHEESSAAFFEETTYYSSHHIIEELLDDSS
AANNDDTTOOOOLLRREESSTTwhen grinding. The
shields prevent sparks from flying, and the
tool rest provides a firm rest on which to
position the workpiece.
88..NNEEVVEERRGGRRIINNDDSSMMAALLLLSSTTOOCCKK..Do not
attempt to grind or sharpen anything which
can’t be adequately supported by the tool
rest. Use clamping pliers or a similar holder
when grinding parts which can’t be easily
held by hand.
99..GGRRIINNDDIINNGGCCRREEAATTEESSSSPPAARRKKSS, make
sure your work area is free of combustible
materials.
1100..AAVVOOIIDDOOVVEERRHHEEAATTIINNGGTTHHEEWWOORRKK--
PPIIEECCEE..Excessive prolonged grinding on a
workpiece can heat it to the point of being
dangerously hot. Keep a water reservoir
handy when grinding to quench hot parts.
Overheating can also change the metallur-
gical properties of your part.
1111..NNEEVVEERRSSTTIICCKKAANNOOBBJJEECCTTAAGGAAIINNSSTTTTHHEE
WWHHEEEELLTTOOSSTTOOPPTTHHEEWWHHEEEELLRROOTTAA--
TTIIOONN..
G9717 6" Grinder
-4-
SSEECCTTIIOONN22::CCIIRRCCUUIITTRREEQQUUIIRREEMMEENNTTSS
111100VVOOppeerraattiioonn
The motor supplied with the G9717 must be oper-
ated at 110V. Use an outlet configuration as
shown in FFiigguurree11..Under normal use, the motor
draws approximately 2-3 amps @ 110V. We rec-
ommend a 15 amp circuit breaker for 110V oper-
ation. This should be satisfactory for normal use,
while providing enough protection against motor
damage caused by power surges.
FFiigguurree11..Typical 110V plug and outlet.
Should it be necessary to use an extension when
operating at 110V, make sure the cord is rated
Hard Service (grade S) or better. Refer to the
chart in Section 1: Safety Instructions to deter-
mine the minimum gauge for the extension cord.
The extension cord must also contain a ground
wire and plug pin. Always repair or replace exten-
sion cords when they become worn or damaged.
EExxtteennssiioonnCCoorrddss
TThhiisseeqquuiippmmeennttmmuussttbbeeggrroouunnddeedd..Please
ensure that this machine is continuously
grounded from the motor to the machine frame
and then to a known ground. Verify that any
existing electrical outlet and circuit you intend
to plug into is actually grounded. If it is not, it
will be necessary to run a separate 12 A.W.G.
copper grounding wire from the outlet to a
known ground. Under no circumstances should
the grounding pin from any three-pronged plug
be removed. SSeerriioouussppeerrssoonnaalliinnjjuurryymmaayy
ooccccuurr..
GGrroouunnddiinngg
In the event of an electrical short, grounding
reduces the risk of electric shock by providing a
path of least resistance to disperse electric cur-
rent. This tool is equipped with a power cord hav-
ing an equipment-grounding conductor. SSeeee
FFiigguurree11..The outlet must be properly installed
and grounded in accordance with all local codes
and ordinances.
WWeehhaavveeccoovveerreeddssoommeebbaassiicceelleeccttrriiccaall
rreeqquuiirreemmeennttssffoorrtthheessaaffeeooppeerraattiioonnooffyyoouurr
SSuurrffaacceeGGrriinnddeerr..TThheesseerreeqquuiirreemmeennttssaarreennoott
nneecceessssaarriillyyccoommpprreehheennssiivvee..YYoouummuussttbbeessuurree
tthhaattyyoouurrppaarrttiiccuullaarreelleeccttrriiccaallccoonnffiigguurraattiioonn
ccoommpplliieesswwiitthhllooccaallaannddssttaatteeccooddeess..EEnnssuurree
ccoommpplliiaanncceebbyycchheecckkiinnggwwiitthhyyoouurrllooccaallmmuunniicc--
iippaalliittyyoorraalliicceennsseeddeelleeccttrriicciiaann..
G9717 6" Grinder -5-
SSEECCTTIIOONN33::GGEENNEERRAALLIINNFFOORRMMAATTIIOONN
To operate this, or any power tool, safely and
efficiently, it is essential to become as familiar
with its characteristics as possible. The time
you invest before you begin to use your Model
G9717 will be time well spent. DO NOT oper-
ate this machine until you are completely famil-
iar with the contents of this manual. Make sure
you read and understand all of the safety pro-
cedures. If you do not understand something,
DDOONNOOTToperate the machine.
CCoommmmeennttaarryy
We are proud to offer the Grizzly Model G9717
6" Grinder. This Grinder is part of a growing
Grizzly family of fine metalworking machinery.
When used according to the guidelines set forth
in this manual, you can expect years of trouble-
free, enjoyable operation and proof of Grizzly’s
commitment to customer satisfaction.
The Model G9717 is intended for home and
hobby-type use. It features a 1⁄3HP, 110V motor,
two 6" grinding wheels, one 60 grit and one 30
grit. Eye shields and tool rests are included to
ensure safe operation of the wheels.
Replacement wheels with a 6" diameter and a 1⁄2"
bore are available through the Grizzly catalog.
We are also pleased to provide this manual with
the Model G9717. It was written to guide you
through assembly, review safety considerations,
and cover general operating procedures. It repre-
sents our effort to produce the best documenta-
tion possible. If you have any comments regard-
ing this manual, please write to us at the address
below:
Grizzly Industrial, Inc.
C/O Technical Documentation
P.O. Box 2069
Bellingham, WA 98227-2069
Most importantly, we stand behind our machines.
If you have any service questions or parts
requests, please call or write us at the location
listed below.
The specifications, drawings, and photographs
illustrated in this manual represent the Model
G9717 as supplied when the manual was pre-
pared. However, owing to Grizzly’s policy of con-
tinuous improvement, changes may be made at
any time with no obligation on the part of Grizzly.
Whenever possible, though, we send manual
updates to all owners of a particular tool or
machine. Should you receive one, we urge you to
insert the new information with the old and keep
it for reference.
Grizzly Industrial, Inc.
1203 Lycoming Mall Circle
Muncy, PA 17756
Phone:(570) 546-9663
Fax:(800) 438-5901
E-Mail: [email protected]
Web Site: http://www.grizzly.com
G9717 6" Grinder
-6-
SSEECCTTIIOONN44::AASSSSEEMMBBLLYY
TToooollRReesstt
The Tool Rest provides a surface which can be
used to support the workpiece during grinding.
Certain types of grinding may require jigs or
accessories to assure the proper angle of the
piece against the wheel.
The Tool Rest assembles to the inboard side of
the Wheel Guard. Use two (2) hex bolts and lock-
washers inserted through the rest support and
thread into the tapped holes. Repeat this installa-
tion for the opposite side wheel. The Tool Rest
can be adjusted in and out by loosening these
bolts. Always retighten before beginning grinding
operations.
EEyyeeSShhiieelldd
The Eye Shield should be positioned between the
grinding wheel and the operator’s face during
grinding. This lessens the possibility for sparks or
metal bits to go flying directly at the operator.
The Eye Shield has a clear plastic panel which is
attached to a support bracket. Thread the long
Phillips® head screw through the bracket, then
through the shield, and then through the other
side of the bracket. Use a nut and lockwasher,
but leave it loose enough so the angle of the Eye
Shield can be adjusted.
Attach the support bracket to the top end of the
wheel rim guard with a Phillips® head screw, flat
washer and lockwasher into the tapped hole.
Note that there is a slot in the support bracket
which allow adjusting the Eye Shield up and
down.
Repeat the Eye Shield installation for the oppo-
site side wheel.
FFiigguurree22..Tool rest installed.
FFiigguurree33..Eye shield in operating position.
G9717 6" Grinder -7-
MMoouunnttiinnggttooBBeenncchhNNootteess
The grinder base has two holes directly under the
wheel shaft. These holes can be used to mount
the grinder to a workbench, table top, or other
solid surface. Since grinding does develop a lot of
force, it is best to mount the grinder solidly before
using. If you wish for the grinder to remain
portable, it can be temporarily clamped to a table.
Just make certain no part of the clamping device
interferes with the wheels or the tool rests.
G9717 6" Grinder
-8-
OOppeerraattiioonnoofftthhiisseeqquuiippmmeenntthhaasstthheeppootteennttiiaall
ttoopprrooppeellddeebbrriissiinnttootthheeaaiirrwwhhiicchhccaannccaauussee
eeyyeeiinnjjuurryy..AAllwwaayysswweeaarrssaaffeettyyggllaasssseessoorrggoogg--
gglleesswwhheennooppeerraattiinnggeeqquuiippmmeenntt..EEvveerryyddaayy
ggllaasssseessoorrrreeaaddiinnggggllaasssseessoonnllyyhhaavveeiimmppaacctt
rreessiissttaannttlleennsseess,,tthheeyyaarreennoottssaaffeettyyggllaasssseess..
BBeecceerrttaaiinntthheessaaffeettyyggllaasssseessyyoouuwweeaarrmmeeeett
tthheeaapppprroopprriiaatteessttaannddaarrddssoofftthheeAAmmeerriiccaann
NNaattiioonnaallSSttaannddaarrddssIInnssttiittuuttee((AANNSSII))..
DDOONNOOTTmmaakkeeaaddjjuussttmmeennttsswwhhiilleetthheeggrriinnddeerriiss
rruunnnniinngg..EEnnssuurreetthhaatttthheesswwiittcchhiissooffff,,ppoowweerriiss
ddiissccoonnnneecctteeddaannddmmoovviinnggppaarrttsshhaavveessttooppppeedd
bbeeffoorreemmaakkiinnggaaddjjuussttmmeennttss..FFaaiilluurreettooccoommppllyy
ccoouullddrreessuullttiinnsseerriioouussiinnjjuurryyoorreelleeccttrriiccaallsshhoocckk
hhaazzaarrdd..
SSEECCTTIIOONN55::OOPPEERRAATTIIOONNSS
SSttaarrttiinnggaannddSSttooppppiinngg
Once assembly has been completed, the G9717
Grinder is ready for use in the shop.
The switch is located on the front of the grinder.
To turn the grinder “ON”, push the right hand side
of the rocker switch, to turn it “OFF”, push the left
hand side of the switch. Always make sure the
wheels come up to full speed before introducing
the workpiece to the wheel.
When mounting a new wheel, or when there is
any concern about wheel integrity, stand away
from the line of rotation of the wheel and then turn
the wheel “ON”. If there is a potential problem it
will generally occur when the wheel is first start-
ed.
Aluminum oxide and silicon carbide wheels are
marked in a somewhat uniform manner by all the
major manufacturers. Understanding these mark-
ings will help you understand the capabilities of
various wheels. Always refer to the manufactur-
er’s grinding recommendations when selecting a
wheel for your project.
The basic format for wheel numbering is:
PPrreeffiixxAAbbrraassiivveeGGrriittGGrraaddeeBBoonndd
TTyyppeeSSiizzeeTTyyppee
3366AA6600LLVV
The most common abrasive types used are A for
Aluminum Oxide and C for Silicon Carbide, and
occasionally SG for seeded gel. The prefix is the
manufacturer’s designation for a particular type.
The grit size is a number referring to the size of
the abrasive grain in the wheel. The lower the
number the coarser the wheel - 10 is a very
coarse wheel for roughing and 220 is usually the
upper range for fine finish work.
Grade is an indication of the hardness of the
wheel, with A being softest to Z the hardest.
Bond Type refers to the type of bonding material
used to hold the abrasive material. Most general
purpose wheels will have a V indicating Vitrified
clay is used, providing a high strength and good
porosity. The other most common is B for resin
where synthetic resins are used. These are used
to grind cemented carbide and ceramic materials
There may be other numbers inserted which
have meaning for a particular type of wheel.
Refer to the manufacturer’s technical data for a
complete explanation.
WWhheeeellSSeelleeccttiioonn
G9717 6" Grinder -9-
WWhheeeellMMoouunnttiinngg
Before mounting any wheel, check it for integrity
by performing a “ring check”. Balance the wheel
on one finger, then lightly tap the rim of the wheel
with a piece of wood such as the handle of a
hammer. The wheel should have a ringing or
harmonic type of sound. If it responds with a dull
thud it may indicate that the wheel has cracks. Do
not use a wheel which is suspected of having
cracks, or if there are visual chips, nicks or dents
in the wheel surface. These discontinuities can
lead to wheel failure where the wheel flies apart
at operating speed. Always be sure to use a
wheel which is rated for operating at speeds
equal to or greater than 3450 RPM.
The wheel guard assembly must be removed in
order to mount or dismount a grinding wheel.
11.Remove the three Phillips®head screws
and nuts which go through the outer guard.
22..Remove the outer guard and rim guard.
SSeeeeFFiigguurree44..
FFiigguurree44..Wheel guard components.
FFiigguurree55..Grinding wheel assembly.
NNEEVVEERRaasssseemmbblleeaaggrriinnddiinnggwwhheeeelloonntthhee
aarrbboorrwwiitthhoouuttppaappeerroorrffiibbeerrddiissccssbbeettwweeeenntthhee
wwhheeeellaannddtthheeffllaannggee..OOmmiittttiinnggtthheeddiissccssccaann
ppuuttuunndduueessttrreessssoonntthheewwhheeeellccaauussiinnggiittttoo
ccrraacckkaannddppoossssiibbllyyffllyyaappaarrtt..AALLWWAAYYSS““rriinngg
cchheecckk””aawwhheeeellbbeeffoorreeaasssseemmbbllyyttoommaakkeecceerr--
ttaaiinniittiissssoouunnddwwiitthhnnooccrraacckkssoorrffllaawwss..
33..Use a 3⁄4" or 19mm open end wrench on the
nut which holds the wheel on the arbor.
Hold the wheel from turning with the other
hand. Note that the wheel on the left hand
side of the machine is a left hand thread, so
loosening it will require turning it clockwise.
44.Remove the outer wheel flange and the
paper disc.
55..Pull the wheel free from the arbor. There
will also be a paper disc and a wheel flange
on the back side of the wheel. Always make
certain there is a paper or fiber disc
between the wheel flanges and the wheel
itself, this helps to spread the rotational
forces across the inner area of the wheel.
SSeeeeFFiigguurree55..
66..Mount the new wheel in the reverse order.
First a wheel flange, a paper disc, the
wheel, a paper disc, a wheel flange and
finally the nut itself. Tighten the nut snugly
but do not over tighten. Over tightening can
crack the wheel.
77..Run a new wheel for at least 1-2 minutes
while standing clear of the line of rotation.
If a wheel does have defects it will gener-
ally fail as soon as it gets up to full speed.