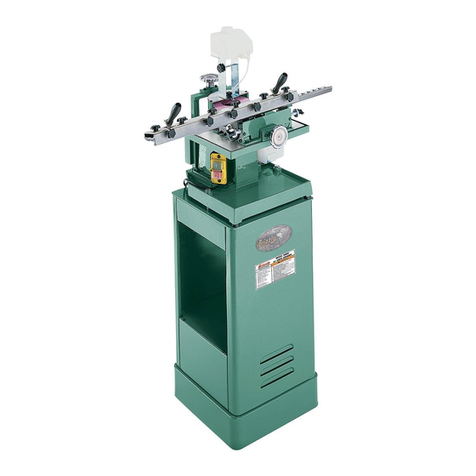
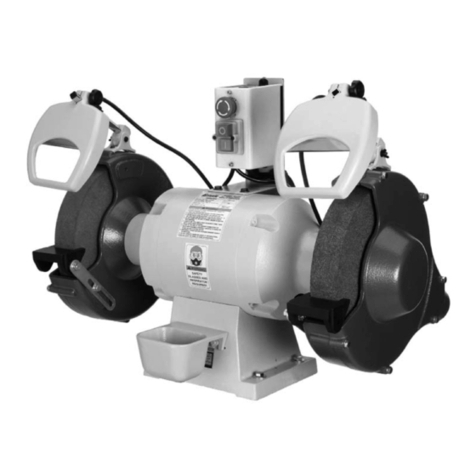
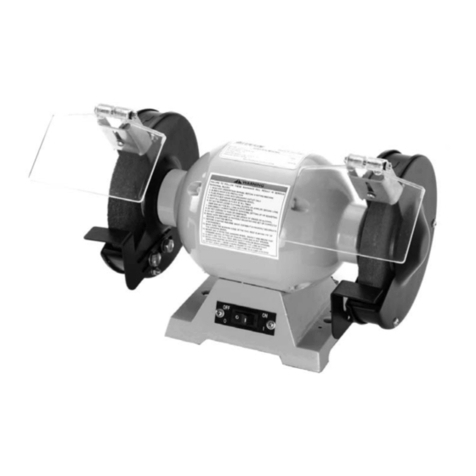
Grizzly T10097 User manual

WARNING: NO PORTION OF THIS MANUAL MAY BE REPRODUCED IN ANY SHAPE
OR FORM WITHOUT THE WRITTEN APPROVAL OF GRIZZLY INDUSTRIAL, INC.
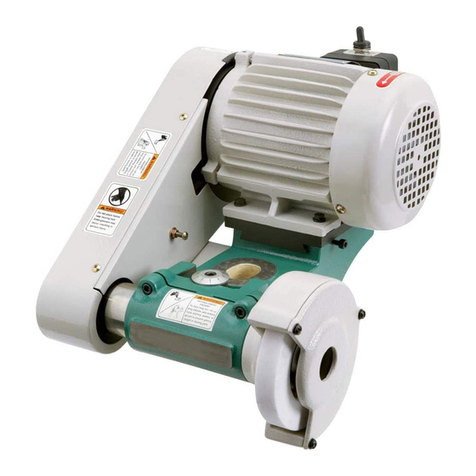
MODEL T10097
WET GRINDER

4HISMANUALPROVIDESCRITICALSAFETYINSTRUCTIONSONTHEPROPERSETUP
OPERATIONMAINTENANCEANDSERVICEOFTHISMACHINEEQUIPMENT
&AILURETOREADUNDERSTANDANDFOLLOWTHEINSTRUCTIONSGIVENINTHIS
MANUALMAYRESULTINSERIOUSPERSONALINJURYINCLUDINGAMPUTATION
ELECTROCUTIONORDEATH
4HEOWNEROFTHISMACHINEEQUIPMENTISSOLELYRESPONSIBLEFORITS
SAFEUSE4HISRESPONSIBILITYINCLUDESBUTISNOTLIMITEDTOPROPER
INSTALLATIONINASAFEENVIRONMENTPERSONNELTRAININGANDUSAGE
AUTHORIZATIONPROPERINSPECTIONANDMAINTENANCEMANUALAVAILABILITY
ANDCOMPREHENSIONAPPLICATIONOFSAFETYDEVICESBLADECUTTERINTEG
RITYANDTHEUSAGEOFPERSONALPROTECTIVEEQUIPMENT
4HEMANUFACTURERWILLNOTBEHELDLIABLEFORINJURYORPROPERTYDAMAGE
FROMNEGLIGENCEIMPROPERTRAININGMACHINEMODIFICATIONSORMISUSE
3OMEDUSTCREATEDBYPOWERSANDINGSAWINGGRINDINGDRILLINGAND
OTHERCONSTRUCTIONACTIVITIESCONTAINSCHEMICALSKNOWNTOTHE3TATE
OF#ALIFORNIATOCAUSECANCERBIRTHDEFECTSOROTHERREPRODUCTIVE
HARM3OMEEXAMPLESOFTHESECHEMICALSARE
s ,EADFROMLEADBASEDPAINTS
s #RYSTALLINESILICAFROMBRICKSCEMENTANDOTHERMASONRYPRODUCTS
s !RSENICANDCHROMIUMFROMCHEMICALLYTREATEDLUMBER
9OURRISKFROMTHESEEXPOSURESVARIESDEPENDINGONHOWOFTENYOU
DOTHISTYPEOFWORK4OREDUCEYOUREXPOSURETOTHESECHEMICALS
7ORKINAWELLVENTILATEDAREAANDWORKWITHAPPROVEDSAFETYEQUIP
MENTSUCHASTHOSEDUSTMASKSTHATARESPECIALLYDESIGNEDTOFILTER
OUTMICROSCOPICPARTICLES

SAFETY
For Your Own Safety Read Instruction Manual
Before Operating This Equipment
The purpose of safety symbols is to attract your attention to possible hazard-
ous conditions. This manual uses a series of symbols and signal words which
are intended to convey the level of importance of the safety messages. The
progression of symbols is described below. Remember that safety messages by
themselves do not eliminate danger and are not a substitute for proper accident
prevention measures.
Indicates a potentially hazardous situation which, if
not avoided, MAY result in minor or moderate injury.
It may also be used to alert against unsafe practices.
Indicates a potentially hazardous situation which, if
not avoided, COULD result in death or serious injury.
Indicates an imminently hazardous situation which, if
not avoided, WILL result in death or serious injury.
This symbol is used to alert the user to useful infor-
mation about proper operation of the equipment.
Safety Instructions for Machinery
1. READ THROUGH THE ENTIRE
MANUAL BEFORE STARTING
MACHINERY.
2. ALWAYS USE ANSI APPROVED
SAFETY GLASSES WHEN
OPERATING MACHINERY.
3. ALWAYS WEAR A NIOSH
APPROVED RESPIRATOR WHEN
OPERATING MACHINERY THAT
PRODUCES DUST.
NOTICE
4. ALWAYS USE HEARING
PROTECTIONWHENOPERATING
MACHINERY.
5. WEAR PROPER APPAREL.
6. NEVER OPERATE MACHINERY
WHEN TIRED, OR UNDER THE
INFLUENCE OF DRUGS OR
ALCOHOL.

7. ONLY ALLOW TRAINED AND
PROPERLY SUPERVISED PER-
SONNEL TO OPERATE MACHIN-
ERY.
8. KEEP CHILDREN AND VISITORS
AWAY.
9. MAKE WORKSHOP CHILD
PROOF.
10. NEVER LEAVE WHEN MACHINE
IS RUNNING. OFF
11. DO NOT USE IN DANGEROUS
ENVIRONMENTS.
12. KEEP WORK AREA CLEAN AND
WELL LIT.
13. USE A GROUNDED EXTENSION
CORD RATEDFORTHEMACHINE
AMPERAGE.
14.
ALWAYS DISCONNECT FROM
POWER SOURCE BEFORE
SERVICING MACHINERY
15. MAINTAIN MACHINERY WITH
CARE.
16. MAKE SURE GUARDS ARE IN
PLACE AND WORK CORRECTLY
BEFORE USING MACHINERY.
17. REMOVE ADJUSTING KEYS
AND WRENCHES.
ON
18. CHECK FOR DAMAGED PARTS
BEFORE USING MACHINERY.
19. USE RECOMMENDED
ACCESSORIES.
20. DO NOT FORCE MACHINERY.
21. SECUREWORKPIECE.
22. DO NOT OVERREACH.
23. MANY MACHINES WILL EJECT
THE WORKPIECE TOWARD THE
OPERATOR.
24. ALWAYS LOCK MOBILE BASES
(IF USED) BEFORE OPERATING
MACHINERY
25. BE AWARE THAT CERTAIN
WOODS MAY CAUSE AN ALLER-
GIC REACTION


Additional Safety Instructions for Grinders
6.LUNG PROTECTION
7. SIDE GRINDING
8. HAND/WHEEL CONTACT
9. UNIVERSAL SUPPORT POSITION
1.EYE PROTECTION
2.WHEEL SPEED RATING
3.WHEEL FLANGES
4.RING TEST.
5.STARTING GRINDER
ON

INTRODUCTION
Foreword Contact Info
Read the manual before operation.
Become familiar with this grinder, its
safety instructions, and its operation
before beginning any work. Serious
personal injury may result if safety or
operational information is not under-
stood or followed.

Overall Dimensions:
=Z^\]i######################################################################################################&'
L^Yi]#######################################################################################################&-
9Zei]#######################################################################################################&&
CZiLZ^\]i#########################################################################################'&aWh#
;ddieg^ci##################################################################################################&'
Main Specifications:
6gWdg9^VbZiZg#########################################################################################
<g^cY^c\L]ZZa<g^i############################################################################### ''%
<g^cY^c\L]ZZaH^oZ#######################################################################-m&
&¿'
<g^cY^c\L]ZZaBViZg^Va####################################################6ajb^cjbDm^YZ
Higdee^c\L]ZZaH^oZ####################################################################-m&(¿&+
Higdee^c\L]ZZaBViZg^Va#########################################################67H$AZVi]Zg
L]ZZaHeZZY################################################################################ &'%GEB
Motor:
IneZ###########################################################I:;88VeVX^idgHiVgi>cYjXi^dc
=dghZedlZg######################################################################################## &¿&%=E
E]VhZ$KdaiV\Z###########################################################################H^c\aZ$&&%K
6beh####################################################################################################&#'6
8nXaZ$GEB#########################################################################+%=o$&,'*GEB
Features:
################################################################################ Jc^kZghVaIddaHjeedgi
################################################################## EVYYaZHl^iX]l$9^hVWa^c\@Zn
########################################################################################### LViZgGZhZgkd^g
#################################### >cXajYZY''%<g^i6ajb^cjbDm^YZ<g^cY^c\L]ZZa
###############################################################>cXajYZYAZVi]ZgHigdee^c\L]ZZa
#############################################################################>cXajYZYHigdee^c\EVhiZ
###################################################################################>cXajYZY6c\aZ<j^YZ
MODEL T10097
WET GRINDER
Customer Service #: (570) 546-9663 • To Order Call: (800) 523-4777 • Fax #: (800) 438-5901
MACHINE DATA
SHEET
specs

CIRCUIT REQUIREMENTS
Figure 1.
<gdjcY^c\Egdc\^h
Adc\Zhid[i]ZI]gZZ
Egdc\h
8jggZci
8Vggn^c\Egdc\h <gdjcYZY
DjiaZi
Amperage Draw
Minimum Circuit Requirement
If
you are unsure about the wiring codes
in your area or you plan to connect your
machine to a shared circuit, consult a
qualified electrician.
Plug/Receptacle Type
110V Operation
This machine must have a ground
prong in the plug to help ensure
that it is grounded. DO NOT remove
ground prong from plug to fit into a
two-pronged outlet! If the plug will
not fit the outlet, have the proper
outlet installed by a qualified electri-
cian.
Electrocution or fire
could result if machine
is not grounded cor-
rectly or if electrical
configuration does not
comply with local and
state codes. Ensure
compliance by check-
ing with a qualified
electrician!
Extension Cords

Figure 2.
SECTION 3: SETUP
please immediately
call Customer Service at (570) 546-9663
for advice.
Otherwise, filing
a freight claim can be difficult.
Unpacking Inventory
Model T10097 Inventory (Figure 2)
A.
B.
C.
D.

Site Considerations
Bench Load
Machine Data Sheet Page
7
Placement Location
Figure 3
Figure 3.
Children and visitors
may be seriously injured
if unsupervised. Lock all
entrances to the shop
when you are away. DO
NOT allow unsupervised
children or visitors in
your shop at any time!
HIDE
GViZY(*%%GEB
BV`ZhjgZndjg\g^cYZg^hcdi
[VhiZgi]Vci]ZgViZYGEBd[i]^hl]ZZa
L6GC>C<
<g^cY^c\XVcWZYVc\Zgdjh
K^hjVaan^cheZXii]^hl]ZZa
[dgXgVX`h!c^X`h!X]^eh
IneZ"&
6ajb^cjb
Dm^YZ
+%<g^i
<gVYZA
K^ig^[^ZY7dcY
Figure 4.
Visual Inspection
Ring Test
To perform a Ring Test:
1.
2.
3. Figure 4
Wheel Inspection

Test Run
Troubleshooting
Page 20
To test run the machine:
1.
2.
3.
4.
5. ON
6.
7. OFF
8.
ON
OFF
4.
5.
grinding surface
is square.
Figure 5
Wheel Dressing
Page 19.
Figure 5.

OPERATIONS
Grinding Tips
Here are some tips to keep in mind
while grinding:
Operation Safety
If you have never used this type of
machine or equipment before, WE
STRONGLY RECOMMEND that you
read books, trade magazines, or get
formal training before beginning any
projects. Regardless of the content
in this section, Grizzly Industrial
will not be held liable for accidents
caused by lack of training.
Damage to your eyes and lungs could
result from using this machine with-
out proper protective gear. Always
wear safety glasses/faceshield and a
dustmask/respirator when operating
this machine.
Although the Model T10097 Wet
Grinder wheels are designed specifi-
cally for slow rotation, there is still the
possibility that blades and tools being
sharpened on either wheel could be
dislodged from your grasp. Be sure
that satisfactory space is allocated
between the grinder and areas where
others are working. Always wear safe-
ty glasses and keep the universal
support in the proper position when
grinding or sharpening.
Loose hair and cloth-
ing could get caught
in machinery and
cause serious per-
sonal injury. Keep
loose clothing and
long hair away from
moving machinery.
NOTICE

Positioning the
Universal Support
with against
To work against the rotation of the
grinding wheel:
1.
2.
Figure 6
3.
To work with the rotation of the grind-
ing wheel:
1.
2.
Figure
7
3.
Do not make adjustments while the
machine is running. Disconnect the
grinder from power before attempting
to make adjustments to the universal
support, water reservoir, changing
wheels or the angle guide.
Figure 6.
Figure 7.

Grinding Jig
To use the grinding jig:
1.
2.
Figure 8
3.
Figure 9
Angle Guide
Page 15
Figure 8.
4.
Figure 9
Figure 9.

Angle Guide
Figure 10.
To use the angle guide:
1.
Figure 10
2.
3.
Step 2
Figure 11
Figure 11.
4.
Figure 11.
Accessories Page 18

Here are some tips for using your wet
grinder water reservoir:
DO NOT allow the grinding wheel
to stay immersed in water for long
periods of time without running. The
water can cause the wheel to become
waterlogged and unbalanced and
may cause sections of the wheel to
break off when the grinder is started.
Always empty or remove the reser-
voir to the storage position when the
grinder will not be used.
Water Reservoir
Figure 12
Figure 12.
DO NOT attempt to use the grinding
wheel without filling the reservoir
with water. Overheating caused by
lack of lubrication could damage the
grinding wheel, as well as the tool
or blade you are grinding. Ensure
that the reservoir is filled with clean
water. Sediment-filled water can clog
the wheel and lessen the effective-
ness of the grinder.
NOTICE
To fill and position the reservoir:
1.
2.
3.
Figure 13.

Sharpening
To prepare the stropping wheel:
1.
2.
3.
4.
5. ON
6.
Never sharpen against the direction
of rotation. The edge of the tool may
dig into the leather wheel, damaging
the wheel and causing the tool to
eject from the machine. This could
result in personal injury

SECTION 5: ACCESSORIES
T10024—Accessory Kit #2
Figure 15.
T10023—Accessory Kit #1
Figure 14.
T10025—Sharpening Jig.
Figure 16.
H5891, H5892 Diamond Dressers
Industrial diamond for dressing grinding
wheels. 8¼" long round body with knurled
grip for maximum control. Includes protec-
tive rubber end cap.
Model H5891 ¼ Carat.
Model H5892 ¾ Carat.
Figure 17. Models H5891 & 5892.

SECTION 6: MAINTENANCE
!
Always DISCONNECT POWER before
servicing, adjusting, or doing main-
tenance to reduce the risk of acci-
dental injury or electrocution.
Grinding Wheels
Wheel Inspection Page
10
Water Reservoir
To replace the grinding or stropping
wheel:
1.
2.
3.
4.
5.
Wheel Replacement
Wheel Dressing
AccessoriesPage 18

SECTION 7: SERVICE
Symptom Possible Cause Solution
Troubleshooting
Motor and Electrical
Table of contents
Other Grizzly Grinder manuals

Grizzly
Grizzly G3155 User manual

Grizzly
Grizzly H6155 User manual

Grizzly
Grizzly G0686 User manual

Grizzly
Grizzly G9911 User manual

Grizzly
Grizzly H3368 User manual

Grizzly
Grizzly H4378 User manual

Grizzly
Grizzly G1062 User manual

Grizzly
Grizzly G0952 User manual

Grizzly
Grizzly G2790 User manual

Grizzly
Grizzly G0688 User manual

Grizzly
Grizzly T10010ANV User manual

Grizzly
Grizzly G1806 User manual

Grizzly
Grizzly G9960 User manual

Grizzly
Grizzly T23084 User manual

Grizzly
Grizzly G8183 User manual

Grizzly
Grizzly H8125 Quick start guide

Grizzly
Grizzly H8126 Quick start guide

Grizzly
Grizzly H8213 User manual

Grizzly
Grizzly G5343 User manual

Grizzly
Grizzly T32251 User manual