manuals.online logo
Brands
  1. Home
  2. •
  3. Brands
  4. •
  5. Grohe
  6. •
  7. Plumbing Product
  8. •
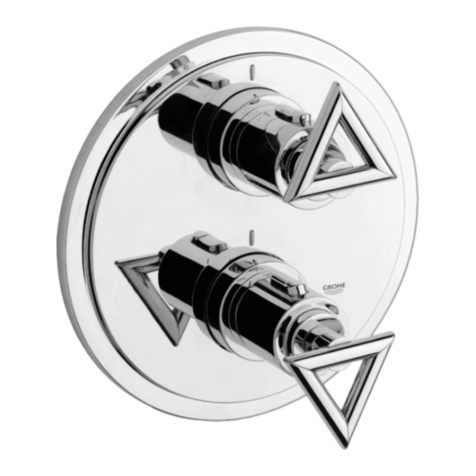
  9. Grohe GRANDERA 20 416 User manual

Grohe GRANDERA 20 416 User manual

D
.....1
NL
.....6
PL
.....11
P
.....16
BG
.....21
CN
.....26
GB
.....2
S
.....7
UAE
.....12
TR
.....17
EST
.....22
UA
.....27
F
.....3
DK
.....8
GR
.....13
SK
.....18
LV
.....23
RUS
.....28
E
.....4
N
.....9
CZ
.....14
SLO
.....19
LT
.....24
I
.....5
FIN
...10
H
.....15
HR
.....20
RO
.....25
DESIGN + ENGINEERING
GROHE GERMANY
www.grohe.com
20 416
GRANDERA
99.0052.031/ÄM 228586/06.13
I
S.v.p remettre cette instruction à l'utilisateur de la robinetterie!
Entregue estas instrucciones al usario final de la grifería!
Please pass these instructions on to the end user of the fitting!
1
II 2
03 924
45 882
45 023
03 924
45 023
45 883
10mm
29 031
20 416
43
1
3
46mm
6
3mm
7
2
4
5
4
English
Français
Español
Specifications
• Max. flow 5 L/min or 1.3 gpm/60 psi
Installation
Remove fitting templates.
Flush piping system prior and after installation of faucet
thoroughly!
Shut off cold and hot water supply.
I. Install side valves, see Figs. [1] to [7].
Crosscut extension sleeve with spindle extension so that the
installation dimension is -3/16" to max -1/4", see Fig. [4].
Caractéristiques techniques
• Débit maxi. 5 l/min ou 1,3 g/min/4,1 bar
Installation
Enlever les gabarits de montage.
Bien rincer les canalisations avant et après l’installation!
Couper l'alimentation en eau chaude et en eau froide.
I. Montage des robinets d'arrêt,voir fig. [1] à [7].
Couper à la bonne longueur la douille de protection avec la
prolongation de tige, pour obtenir une dimension de montage
comprise entre -4mm minimum et -6mm maximum,
voir fig. [4].
Datos técnicos
• Caudal máx. 5 L/min o 1.3 gpm/60 psi
Instalación
Quitar los patrones de montaje.
¡Purgar a fondo el sistema de tuberías antes y después
de la instalación!
Cerrar las llaves de paso del agua fría y del agua caliente.
I. Montaje de las válvulas laterales,véase figs. [1] a [7].
Cortar el casquillo de prolongación con la prolongación del
husillo de modo que resulte una cota de montaje de -3/16"
hasta como máx -1/4", véase la fig. [4].
65
B10mm
8
A
C
3mm
9
3mm
17mm
10
17mm
11
45 882
45 883
7
English
Français
Español
II. Install spout, see Figs. [8] and [9].
1.Screw in 1/2" NPT-adaptor (A), sold separately, to
concealed mixer housing, see Fig. [8].
2.Screw on connection nipple (B) using an 10mm allen
wrench.
3.Crosscut 1/2" NPT-adaptor in that way, that the installation
dimension is 1 1/16" to max 1 1/8", see Fig. [9].
4.Tighten the spout (C) with set screw, using an 3mm allen
wrench.
Open cold and hot water supply and check connections
for leakage!
Maintenance
Inspect and clean all parts, replace as necessary and grease
with special grease.
Shut off cold and hot water supply!
I. Headpart, see Figs. [10] and [11].
II. Mousseur (46 837),see Page 2.
Replacement parts, see Page 2 (* = special accessories).
Care
Instructions for care of this faucet will be found in the Limited
Warranty supplement.
II.Montage du bec,voir fig. [8] et [9].
1.Visser le 1/2" NPT-adaptateur (A), non fourni, au corps
encastré, voir fig. [8].
2.Visser la nipple de raccordement (B) à l'aide d'une clé
Allen de 10mm.
3.Couper à la bonne longueur la 1/2" NPT-adaptateur pour
obtenir une dimension de montage comprise entre 27mm
minimum et 29mm maximum, voir fig. [9].
4.Fixer le bec (C) avec la vis à l'aide d'une clé Allen
de 3mm.
Ouvrir l'arrivée d'eau froide et d'eau chaude et vérifier
l'étanchéité des raccordements.
Maintenance
Contrôler toutes les pièces, les nettoyer, les remplacer si
nécessaire et les graisser avec de la graisse spéciale pour
robinetterie.
Couper l'alimentation en eau chaude et en eau froide.
I. Tête, voir fig. [10] et [11].
II.Mousseur (46 837), voir page 2.
Pièces de rechange, voir page 2 (* = accessoires spéciaux).
Entretien
Vous trouverez les instructions d'entretien de ce mitigeur dans
le supplément Garantie Limitée.
II. Montaje del caño,véanse las figs. [8] y [9].
1.Enroscar el 1/2" NPT-adaptador (A), no contenido en el
volumen suministro, a la cuerpo encontrable, véase la
fig. [8].
2.Enroscar el casquillo roscado de conexión (B) con una llave
Allen de 10mm.
3.Cortar a medida el 1/2" NPT-adaptador de modo que resulte
una cota de montaje de min 1 1/16" hasta máx 1 1/8",
véase la fig. [9].
4.Fijar el caño (C) con el tornillo prisionero con una llave Allen
de 3mm.
Abrir las llaves de paso del agua fría y del agua caliente y
comprobar la estanqueidad de las conexiones.
Mantenimiento
Verificar todas las piezas, limpiarlas, cambiarlas en caso de
necesidad y engrasarlas con grasa especial para griferías.
Cerrar las llaves de paso del agua fría y del agua caliente.
I. Montura,véanse las figs. [10] y [11].
II. Mousseur (46 837), véase la página 2.
Piezas de recambio,véase la página 2
(* = accesorios especiales).
Cuidados
En el suplemento Garantía Limitada encontrará las
instrucciones relativas al cuidado de esta batería.
6
2014/03/21
www.grohe.com
D
&
+49 571 3989 333
impressum@grohe.de
A
&
+43 1 68060
info-at@grohe.com
AUS
Argent Sydney
&
+(02) 8394 5800
Argent Melbourne
&
+(03) 9682 1231
B
&
+32 16 230660
info.be@grohe.com
BG
&
+359 2 9719959
grohe-bulgaria@grohe.com
CAU
&
+99 412 497 09 74
[email protected]
CDN
&
+1 888 6447643
[email protected]
CH
&
+41 448777300
[email protected]
CN
&
+86 21 63758878
CY
&
+357 22 465200
[email protected]
CZ
&
+420 277 004 190
grohe-cz@grohe.com
DK
&
+45 44 656800
[email protected]
E
&
+34 93 3368850
[email protected]
EST
&
+372 6616354
[email protected]
F
&
+33 1 49972900
marketing-fr@grohe.com
FIN
&
+358 10 8201100
teknocalor@teknocalor.fi
GB
&
+44 871 200 3414
[email protected]
GR
&
+30 210 2712908
nsapountzis@ath.forthnet.gr
H
&
+36 1 2388045
[email protected]
HK
&
+852 2969 7067
[email protected]
I
&
+39 2 959401
[email protected]m
IND
&
+91 124 4933000
[email protected]
IS
&
+354 515 4000
[email protected]
J
&
+81 3 32989730
[email protected]o.jp
KZ
&
+7 727 311 07 39
[email protected]
LT
&
+372 6616354
[email protected]
LV
&
+372 6616354
grohe@grohe.ee
MAL
&
+1 800 80 6570
info-singapore@grohe.com
N
&
+47 22 072070
grohe@grohe.no
NL
&
+31 79 3680133
[email protected]
NZ
&
+09/373 4324
P
&
+351 234 529620
[email protected]
PL
&
+48 22 5432640
[email protected].pl
RI
&
+62 21 2358 4751
info-singapore@grohe.com
RO
&
+40 21 2125050
info-ro@grohe.com
ROK
&
+82 2 559 0790
info-singapore@grohe.com
RP
&
+63 2 8041617
RUS
&
+7 495 9819510
info@grohe.ru
S
&
+46 771 141314
[email protected]
SGP
&
+65 6 7385585
info-singapore@grohe.com
SK
&
+420 277 004 190
[email protected]
T
&
+66 2610 3685
info-singapore@grohe.com
TR
&
+90 216 441 23 70
GroheTurke[email protected]m
UA
&
+38 44 5375273
info-ua@grohe.com
USA
&
+1 800 4447643
us-customerservice@grohe.com
VN
&
+84 8 5413 6840
info-singapore@grohe.com
BiH
AL HR KS
ME MK SLO SRB
&
+385 1 2911470
[email protected]
Eastern Mediterranean,
Middle East - Africa
Area Sales Office:
&
+357 22 465200
[email protected]om
IR OM
UAE YEM
&
+971 4 3318070
grohedubai@grome.com
Far East Area Sales Office:
&
+65 6311 3600
[email protected]

Other Grohe Plumbing Product manuals

Grohe 29 025 User manual

Grohe

Grohe 29 025 User manual

Grohe RAPID SL Quick start guide

Grohe

Grohe RAPID SL Quick start guide

Grohe Ladylux Pro User manual

Grohe

Grohe Ladylux Pro User manual

Grohe EUROSMART COSMOPOLITAN E 36 324 User manual

Grohe

Grohe EUROSMART COSMOPOLITAN E 36 324 User manual

Grohe BRIDGEFORD 33 870 User manual

Grohe

Grohe BRIDGEFORD 33 870 User manual

Grohe Tectron 37749 User manual

Grohe

Grohe Tectron 37749 User manual

Grohe Blue HOME 31 498 User manual

Grohe

Grohe Blue HOME 31 498 User manual

Grohe 36 337 User manual

Grohe

Grohe 36 337 User manual

Grohe RED DUO 30 227 User manual

Grohe

Grohe RED DUO 30 227 User manual

Grohe F-DIGITAL DELUXE 26 371 User manual

Grohe

Grohe F-DIGITAL DELUXE 26 371 User manual

Grohe 320XX User manual

Grohe

Grohe 320XX User manual

Grohe Grotherm Micro 34 023 User manual

Grohe

Grohe Grotherm Micro 34 023 User manual

Grohe Ondus 36 065 User manual

Grohe

Grohe Ondus 36 065 User manual

Grohe Atrio 32652001 User manual

Grohe

Grohe Atrio 32652001 User manual

Grohe SENSIA IGS User manual

Grohe

Grohe SENSIA IGS User manual

Grohe Eurodisc SE 36 014 User manual

Grohe

Grohe Eurodisc SE 36 014 User manual

Grohe Bridgeford 31 055 User manual

Grohe

Grohe Bridgeford 31 055 User manual
Grohe Elberon 30 211 User manual

Grohe

Grohe Elberon 30 211 User manual

Grohe Essence 33 532 User manual

Grohe

Grohe Essence 33 532 User manual

Grohe 30 079 User manual

Grohe

Grohe 30 079 User manual

Grohe Euroeco Cosmopolitan E 36 269 User manual

Grohe

Grohe Euroeco Cosmopolitan E 36 269 User manual

Grohe MintaTouch 31 360 User manual

Grohe

Grohe MintaTouch 31 360 User manual

Grohe Seabury 24 020 User manual

Grohe

Grohe Seabury 24 020 User manual

Grohe Get 30 197 User manual

Grohe

Grohe Get 30 197 User manual

Popular Plumbing Product manuals by other brands

American Standard 2257 installation instructions

American Standard

American Standard 2257 installation instructions

Moen Solace S470 Series instruction manual

Moen

Moen Solace S470 Series instruction manual

Pfister Ladera LF-049-LR Quick installation guide

Pfister

Pfister Ladera LF-049-LR Quick installation guide

Tres Slim Exclusive Technical Characteristics

Tres

Tres Slim Exclusive Technical Characteristics

Gessi QUADRO manual

Gessi

Gessi QUADRO manual

Spectrum EFHS-PK-10-3/4 Installation & operation guide

Spectrum

Spectrum EFHS-PK-10-3/4 Installation & operation guide

THE SHOWER LAB VIEW 07 manual

THE SHOWER LAB

THE SHOWER LAB VIEW 07 manual

baliv WT-220 instructions

baliv

baliv WT-220 instructions

Geberit 10 Operation manual

Geberit

Geberit 10 Operation manual

Gessi ORIGINI 66036 manual

Gessi

Gessi ORIGINI 66036 manual

Elkay Lustertone LCR4322 Specifications

Elkay

Elkay Lustertone LCR4322 Specifications

sanindusa aqua 5669111 manual

sanindusa

sanindusa aqua 5669111 manual

Axor Metro E 06573XX0 parts list

Axor

Axor Metro E 06573XX0 parts list

Spectrum Brands Pfister Park Avenue LG49-FE0 Quick installation guide

Spectrum Brands

Spectrum Brands Pfister Park Avenue LG49-FE0 Quick installation guide

Moen EB1000 installation guide

Moen

Moen EB1000 installation guide

Kohler K-377 installation guide

Kohler

Kohler K-377 installation guide

Toto MONO TX605KMBR quick start guide

Toto

Toto MONO TX605KMBR quick start guide

Axor Citterio 39210 1 Series Installation/User Instructions/Warranty

Axor

Axor Citterio 39210 1 Series Installation/User Instructions/Warranty

manuals.online logo
manuals.online logoBrands
  • About & Mission
  • Contact us
  • Privacy Policy
  • Terms and Conditions

Copyright 2025 Manuals.Online. All Rights Reserved.