GSM Mistralaire SKJ-CR022 User manual

Model: SKJ-CR022
Smart Bladeless Fan
And Air Purier
Instruction Manual

2
Important Safeguards
When using electrical appliances, in
order to reduce the risk of re, electric
shock and/or injury, these basic
safety precautions should always be
followed:
For Your Safety
Read all instructions carefully, even if you are
familiar with the appliance.
• To protect against the risk of electric shock,
DO NOT IMMERSE power cord or plug in water
or any other liquid.
• Donotthrowthechargerintoreanddonot
expose it to extreme heat. The charger could
explode or burst.
• Do not use this product if it appears to be
damaged.
• This appliance is not intended for use by
persons (including children) with reduced
physical, sensory and mental capabilities,
or lack of experience and knowledge,
unless they have been given supervision or
instruction concerning use of the appliance
by a person responsible for their safety.
• Children should be supervised to ensure that
they do not play with the appliance.
• Always unplug the unit when not in use.
• Do not operate unit with a damaged power
cord or plug, or after a malfunction, has
been dropped or is damaged in any manner.
Return the unit to an authorised service
facility for examination.
• This unit is not intended for use in bathrooms,
laundry areas or similar moist indoor locations.
Never locate the unit where it may fall into a
bathtub or other water container.
• Do not run the power cord under carpeting
or cover the power cord with throw rugs,
runners or the like. Arrange the power cord
awayfromtrafcareasandwhereitwillnot
be tripped over.
• Do not place the power cord over any part
of the unit.
• Do not plug this unit into an extension lead,
double adapter or power board.
• To disconnect the unit set main switch to OFF
then remove the plug from the outlet.
• This unit has hot electrical parts inside. DO
NOT use it in areas where gasoline, paint or
ammableliquidsareusedorstored.
• Do not insert or allow foreign objects to enter
any ventilation or exhaust opening as this
maycauseanelectricshock,reorcould
damage the unit.
• Use the unit only as described in this booklet.
Any other use not recommended by the
manufacturermaycausere,electricshock
or injury to persons.
• Fully remove the power cord from the power
cord tidy before use. Always uncoil the power
cord before applying power.
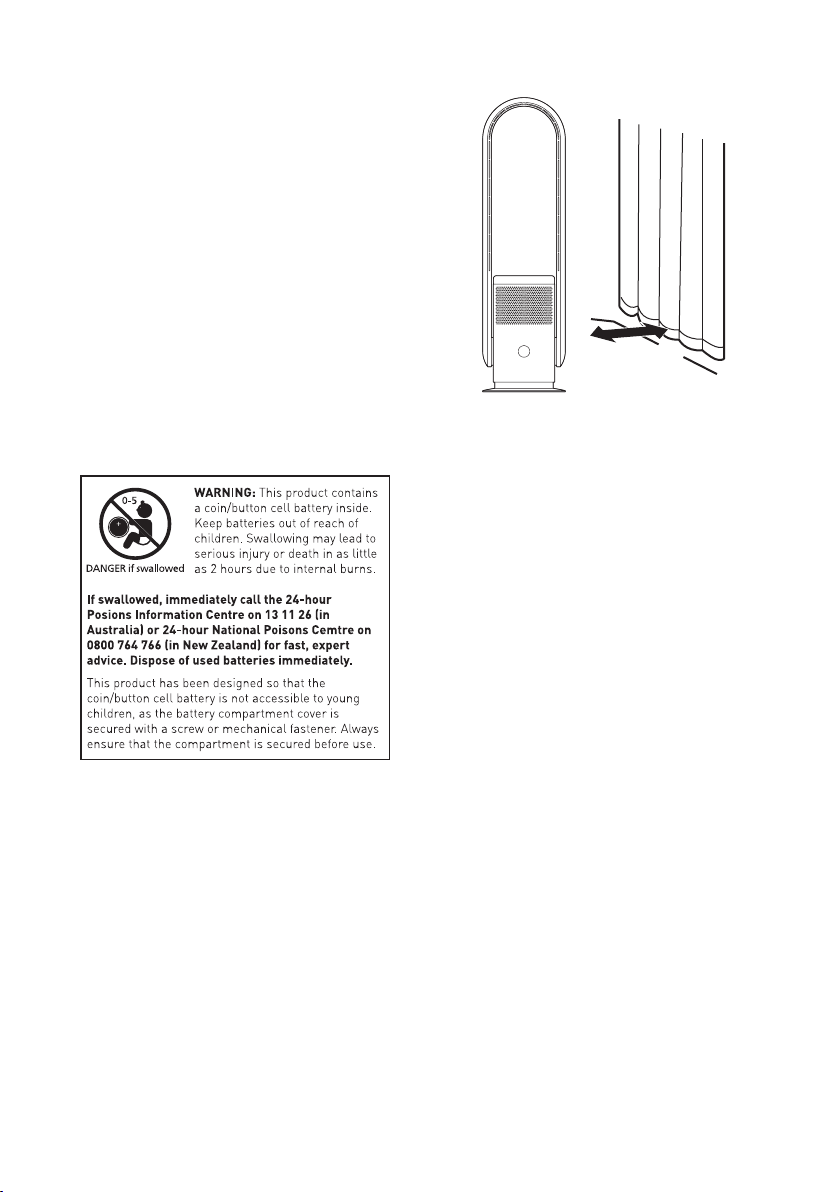
• This product must always be used AND
STORED in the upright position.
• Do not use this unit with a programmer, timer
or any other device that switches the unit on
automatically,sinceareriskexistsiftheunit
is covered or positioned incorrectly.
• Do not touch the power supply or power cord
with wet hands.
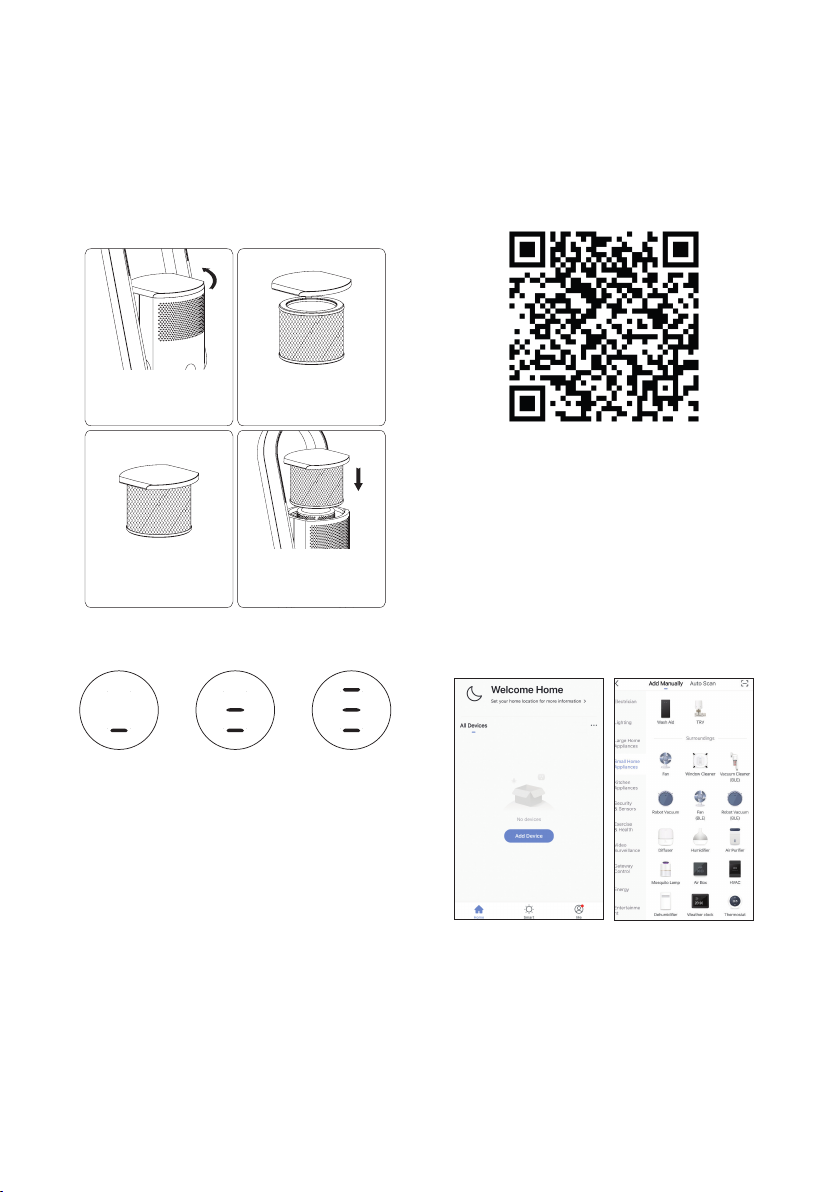
• Unplug appliance when cleaning, removing/
replacinglter,ormovingthedevice.
• Use indoor only.
• If it is necessary to move the unit after the
water has been added, roll gently to the
required position.
• Do not move the machine when it is in use.
• Do not block air circulation.
• Place the machine on a level surface.
• Unplugtheapplianceduringllingand
cleaning.
• Do not touch the Ultrasonic vibration plate.
• Clean regularly as per Maintenance
instructions to avoid malfunction.
• Always unplug from power supply before
maintenance.
• Keep away from directing sunshine heat
sources and air conditioners or fans.
• Always keep on stable plat surface do not
place on carpet, duvet or unstable area.

3
• CAUTION: DO NOT COVER the appliance in
any way in order to avoid overheating and
re.
• Do not run the cable under carpets, do not
cover it with carpets or similar covers. Route
thecableoutsidethetrafcareatavoidtrip
ping the cable.
• Turn off all controls before pulling the plug
and pull the plug out of the socket if you are
not going to use the device for a long time.
• Do not place any objects on the air inlet
or outlet. Make sure that the ventilation
openings are free of dust, lint, hair and other
obstaclesthatcouldimpairtheairow.
• The fan should be set up dry on a horizontal
platform and should not be near heat
sources, corrosive air and moisture. The fan
should be kept a distance of 150 mm around
to ensure good air circulation.
Warning
If the adaptor is damaged, the adaptor must be
replaced by the manufacturer, its service agent
orsimilarlyqualiedpersonsinordertoavoida
hazard.
This product has not been designed for any uses
otherthanthosespeciedinthisbooklet.
Save These Instructions

4
FeaturesofYourSmartBladelessFanandAirPurier
Product Specications
Rated Voltage: 220-240V~
Oscillation: 80° ± 5°
Power: 35W
Frequency: 50-60Hz
Timer: 1-8H
Scope of delivery contents : Fan assembly,
power supply cord, remote control, operating
instructions.
NOTE: As a result of continual
improvements, the design and
specications of the product within may
differ slightly to the unit illustrated on the
packaging.
Air outlet
Air duct Air duct
Top cover of air
purierlter
Top cover of air
purierlter
Air inlet Air inlet
Fan Enclosure
Power connection
Touch button
Display
Base

5
Your Smart Bladeless Fan
andAirPurier
Congratulations on the purchase of your new
SmartBladelessFanandAirPurier.
BeforerstusingyourSmartBladelessFanand
AirPurier,itismostimportantthatyoureadand
follow the instructions in this use and care booklet,
even if you feel you are quite familiar with this
type of appliance.
Your attention is drawn particularly to the section
dealing with IMPORTANT SAFEGUARDS. Find a
place and keep this booklet handy for future
reference.
Your designed to function quietly and safely
under normal circumstances.
Thisqualityfan/airpurierisfullyportable,with
sturdy base and a modern design.
Operation
1. Carefully remove the Fan from the plastic bag
and carton.Place the Fan on a level surface in
a stable upright position.
2. Connect the mains cord to the connector
jack of the Fan
3. Unwind the power cord and plug your Fan
into a socket outlet. Ensure that the voltage
onthespecicationsplateisthesameasin
your home.
4. Switch on and off
Connect the power supply, the LED display lights
up and the machine goes into standby mode.
Click the appliance Power Button “ ” to turn on
the Fan, the buzzer will beep once and the fan
will start. Press and hold the power button “ ” for
2 seconds, the buzzer will beep twice and the fan
willstoprunningafteryoureleaseyournger.
5. Set the air volume
When the fan is operating: Click the button “ ”
to adjust the air volume from 1 to 9.
6. Oscillation
When the fan is operating, press and hold the
screen touch button “ ” for 1 second. The buzzer
beep once and the fan starts to oscillate.
Press and hold the screen touch button “ ”
again for 1 second. The buzzer beep once and
the fan stops oscillating.
6. Air movement direction
Adjust the fan head position after fan has
stopped. Hold fan body with one hand and
set the wind outlet 15º before and after. push
fan head backwards or forwards maximum 15
Degrees to your desired direction.
Warning: Only adjust the tilt angle after the
fan has stopped operating. Do not tilt the
fan head more than it is intended to. Doing
so will damage the fan.
Remote Control
Power button:
Turn the fan
On and Off
Swing:
Start and
stop swing
Strongairow
mode:
Maximum
power strong
airow
Increaseairow
Decreaseairow
9 speed levels to
choose from
Sleep mode:
Soft and
smoothairow
Sleep timer:
1 to 8 hours of
timed shutdown
The device can be switched on and off by
pressing the “ON & OFF” button.
Pressthe“strongairowmode”buttonon
the remote control.
ThedisplaywillshowHandtheairow
strength will increase.
Pressagaintoexitstrongairowmode.
(You can also exit the current mode by
pressing the “ + - “ Exit button.)

6
Press the “Sleep mode” button on the
remote control.
ThedisplayshowsLandtheairowforceis
reduced.
Press again to exit the night sleep mode.
(You can also exit the current mode by
pressing the “+ - “Exit button.)
Press the “Oscillation” button on the remote
control to switch on he oscillating function.
This fan can swing 80 ° left and right.
Press this button again to stop oscillating
process.
Press the “+” button on the remote control to
increase the air volume.
Press the “-” button to decrease the air
volume.
There are 9-speed settings.
Press the timer button on the remote control
to set 1 to 8 hours. Press the timer button on
the remote control, the display shows: ”0“ to
cancel the timer.
After the timer function is set, other functions
can be used normally.
When the device is turned off, the timing
setting is also canceled.
Signal receiver
The remote control should
be pointed at the remote
control signal receiver on
the display to maximize
the remote control signal.
Possible phenomenon
1. This fan may respond to the remote control of
other devices.
2. If you use the remote control of this fan, other
devices may respond.
This is due to the overlapping frequencies of the
remote control.
There is no quality problem in the product itself.
To avoid misuse, keep the remote control away
from other electrical devices during operation
Battery Replacing (For Remote
Control)
1. The remote control requires one “CR2025”
type 3-volt lithium battery (included). If the
operation of the remote control becomes
unsatisfactory, replace with a new 3-volt
lithium battery.
2. Place the remote control with the control
buttons facing downward.
3. Loosen the cover screw. Press the locking arm
of the battery cover and pull out the tray.
(Pushtab“A”towardsthemiddlerst.Seethe
Fig.1).
4. Place one new 3V CR2025 battery into the
battery tray with the positive “+” side facing
up, observing the polarity markings. If the
battery is placed incorrectly, the remote
control will not work. CAUTION: There is
danger of malfunction if the battery is
replaced incorrectly. Replace only with the
same or equivalent type of battery.
5. Insert the battery holder into the battery
compartment and ensure it is secured.
tighten the cover screw.

7
WARNINGS:
1. Please remove the battery if the unit will
not be used for a long period of time.
Use only the specied size and type of
battery.
2. Keep coin-sized button batteries and
devices out of sight and out of reach of
children.
3. Examine devices and make sure the
battery compartment is secure.
4. Dispose of used button batteries
immediately. Flat batteries can still be
dangerous.
5. If you suspect a child has swallowed
a button battery, immediately go to a
hospital emergency room.
6. Tell others about the risk associated with
button batteries and how to keep their
children safe.
Installation
away from
curtains
• Pleaseusethefanonaatplatform.Donot
place the fan in an unstable place, such as
an inclined or soft surface, to avoid damage
or malfunctions caused by the fan tipping
over.
• Avoid blocking the air inlet when using. Stay
away from the curtains to avoid objects
blocking the air inlet and the fan not working.
• Do not place any objects within 30 cm of the
air outlet, otherwise the blower effect will be
impaired.

8
Filter replacement
This machine is equipped with an air cleaning
lter.
Beforeusingthefan,theltershouldbeinstalled
in the fan so that the air can be cleaned.
Installation and replacement method of air
cleaninglter:
1.Turntheltersystemtop
cover counterclockwise
to unlock and remove the
lter.
3.Thenewlterandtop
cover are attached and
assembled with a buckle.
2.Disconnecttheoldlter
from the top cover.
4. After assembling, put it
back in the main unit and
turn it clockwise to secure
it.
Auto reminder of Filter Replacing
• The fan has a memory function. After a total
of 720 hours of operation, the display (as
showninthegure)lightsupcycleindicator
light when turned on, the buzzer sounds
5 times and the status is displayed after 5
seconds.
• Afterreplacingthelterscreen,thepower
button on the remote control device can
clear the alarm for 5 seconds and the
operating time is reset again.
Operating through
Smart Life
Download and install Smart Life APP.
Use your smart phone to scan the QR code
below to download “Smart Life” App.
Or search “Smart Life” in either Apple Store or
Google Play to download and install the App.
Step 1: Run the “Smart Life” App and either
register a new account or login with your existing
account and password. You will need to add
your Smart Fan to the same WiFi Router as your
phone by following the below instructions.
Step 2: Open the App and click “Add Device”
or “+” to add device, select “Small Home
Appliance” in the list of devices and tap “Fan”
icon.

9
Step 3: Make sure the power is connected to
the fan before using. Plug the Fan into an AC
240V~50Hz mains outlet. Press and hold the
power button for 5 seconds,. Ensure your phone
is connected with your local 2.4GHz WIFI.
Step 4: In OFF mode, press and hold the button”
“for 5 seconds , the display will show”F” and
untilthe“F”ashesrapidly.Ifnot,tryagain.The
network connection is abnormal if the indicator
ashesslowly,pleasechecktherouterornetwork
conguration.
Step 5: Click“Conrmlightblinksrapidly”.Typein
yourWiFipasswordandclick“Conrm”tosearch
device.Oncethecongurationiscompleted,
the indicator light will stop blinking rapidly.
Note: If the Smart Fan is failed to establish
connection, make sure there is no
special symbol in your WiFi name (should
only contain letters and numbers) and
password, try again by repeating Step 4 &
Step 5 to set it up.
Step 6: Once connected, you can rename
your Smart Fan and select the Room (e.g. Living
Room) where your Smart Fan is located. This
helps you identify the device when you want to
cast to it.
Step 7: You can tap the “Power icon” to turn
on/off the fan. Sliding Press “The blue circle” to
adjust the fan speed, Press “Oscillat” to adjust
the Oscillation Press “Sleep” ,”Boost” or “Fresh” to
select your want Press “Time” , to set 1 to 8 hours.

10
Operating through
Amazon Alexa @ Echo
dot
The Smart Fan works seamlessly with Alexa to
give you hands-free voice control.
Step 1: Link Smart Life account to Alexa.
Run Alexa App and connect your Echo dot. Go
to Home menu. Select “Skills” or “Skills & Games”
in Home menu and search “Smart Life” on
search window. And then select “Smart Life” and
tap “Enable” to enable the Smart Life skill.
Step 2: Select your country code and enter your
“Smart Life” App Login and Password, then press
the “Link Now” button. Choose “Smart Life” and
tap “Link Now” again. And then press “Authorize”
button. Wait until “Alexa has been successful
linked with Smart Life” pops up.
Step 3: Back to the menu, press “Smart home”
button and choose “Devices”. And then press
”Discover” button.
Step 4: Your device is connected successfully if
youndthedeviceintheDeviceslist.Youcan
use your echo dot through Alexa to control your
Smart Lamp by voice now.
Control your intelligent product via
Amazon Alexa
When the accounts have been successfully
linked, you can use your smart products via
control the Amazon Alexa device by voice
command, e.g .:
Hi Alexa, turn on the “device name” // Hello
Alexa, turn on the “device name”
Hi Alexa, turn off the “device name” // Hello
Alexa, turn off the “device name”
Hi Alexa, set the “device name” to 9 speeds //
Hello Alexa, set the “device name” to 9 Speeds
Hi Alexa, increase / decrease the “device name”
speed // Hello Alexa, increase / decrease the
Speed of the “device name”
Note: “device name” or “device name”
is the name assigned by the user. , for
example, set the device as a “fan”.
Note: Echo needs to discover your smart
devices before it controls them. You can
say “Alexa, discover devices” to Alexa.
Alexa will discover devices in about 20
seconds. Now, you can control your smart
devices through Echo.

11
Operating through
Google Home
The Smart Fan works with the Google Assistant,
allowing you to control your device by using your
Google Home devices, your Android or iPhone,
or any other device with built-in Google Assistant
support. You’ll enjoy seamless, intuitive voice
control to this Smart Fan.
Step 1: Open Google Home App by tapping
the app icon on your device. Tap “Sign up” and
choose one Google account that you already
logged in on your mobile device. Find and tap
“Settings” from Home page. And then tap “More
Settings”.
Step 2: Tap “Assistant”. Tap “Home Control”.
Tap “+”. Find “Smart Life” in the list. In the input
window, select your Smart Life account’s region
type and input your account and password. The
link tab will be highlighted.
Step 3: Tap “Link Now”. After linked, select the
Room (ex Living Room) where your Smart Fan is
located. This helps you identify the device when
you want to cast to it.
Step 4: After then, your devices will be listed
in the Home Control page and now you can
control your Smart Fan through Fan Home. And
you can now activate Smart Lamp ON/OFF via
voice instructions to Google Home Device.
Control your smart product through Google
Home
Now you can use your Google Home device to
control your products using voice commands,
e.g. :
Hey Google, turn on the “device name” // Hey
Google, turn on the “device name”
Hey Google, turn off the “device name” // Hey
Google, turn off the “device name”
Hey Google, set the “device name” to 9 speeds
// Hey Google, set the “device name” to 9
Speeds
Hey Google, increase / decrease the “device
name” speed // Hey Google, increase /
decrease the speed of the “device name”
Note: “device name” or “device name” is the
name assigned by the user. for example, set the
device as a “fan”.
Note: “device name” or “device name”
is the name assigned by the user. for
example, set the device as a “fan”.
Maintenance and
Cleaning
Before maintenance work, pull the mains plug
out of the socket.
Surface
Gently wipe the fan surface with a soft, dry cloth
If the surface of the fan is dirty, dilute it with a
mild detergent and wipe the surface of the fan
with a soft cloth. Then wipe them off with a dry,
soft cloth.
Air inlet & air outlet
Use a soft brush or vacuum cleaner to clean
the dust at the air inlet and outlet. If there is too
much dust, this can affect the fan.
Remote control
Gently wipe the surface of the remote control
with a soft, dry cloth. If it will not be used for a
long time, please remove the button battery in
the remote control

12
Cat. No. SKJ-CR022
September 2020
Power plug
Please clean the power plug with a soft, dry
cloth
Safe keeping
1. After the fan has been cleaned, it can be
stored in a plastic bag.
2. Keep away from vibrations and electrical
devices with cooling / heating function.
3. Do not expose it to direct sunlight, hot and
humid places.
4. Keep out of the reach of kids.
Disposal
Do not dispose of packaging or the product
through your household waste! The product and
packaging are made from recyclable materials
(plastics, metals, paper).
If the product is no longer suitable for use dispose
of it in an environmentally friendly manner in
accordance with your local council.
Table of contents
Other GSM Air Cleaner manuals
Popular Air Cleaner manuals by other brands

Glaziar
Glaziar Predator PUR100WIFI Instructions for use

Giabo
Giabo PAC2301 user manual

Sharp
Sharp Plasmacluster FP-P40CX Operation manual

Maier
Maier MHI-6600 operating instructions

AtmosAir
AtmosAir Rainier Summit R1 User Guide & General Maintenance

IQAir
IQAir CleanZone 3020 series Installation guide & owner's manual

Lightair
Lightair CellFlow Pro CFPro600 manual

Professional Products
Professional Products UV-C Sterilux Air manual

Field Controls
Field Controls UV-AIRE UV-12FM Operation manual

Flanders
Flanders Alpha-HT PB1403 Specification sheet

Molekule
Molekule Air Mini+ quick start guide

AllerAir
AllerAir 8000 D Vocarb Specification sheet