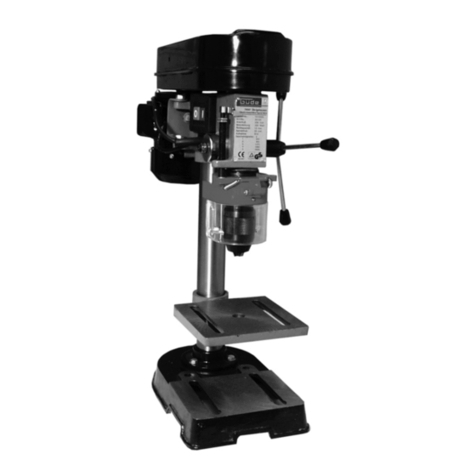
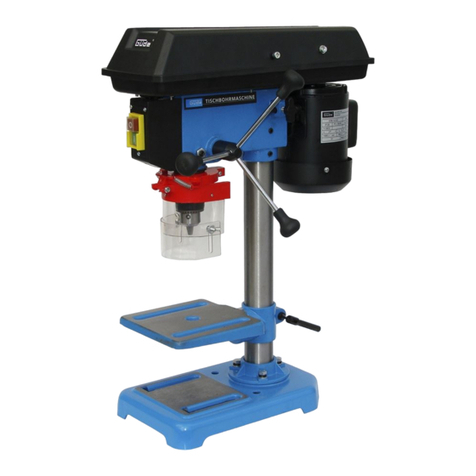
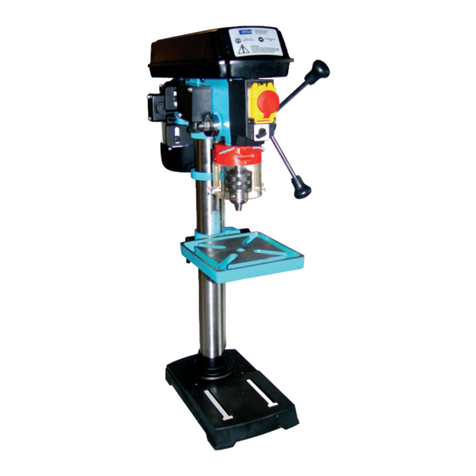
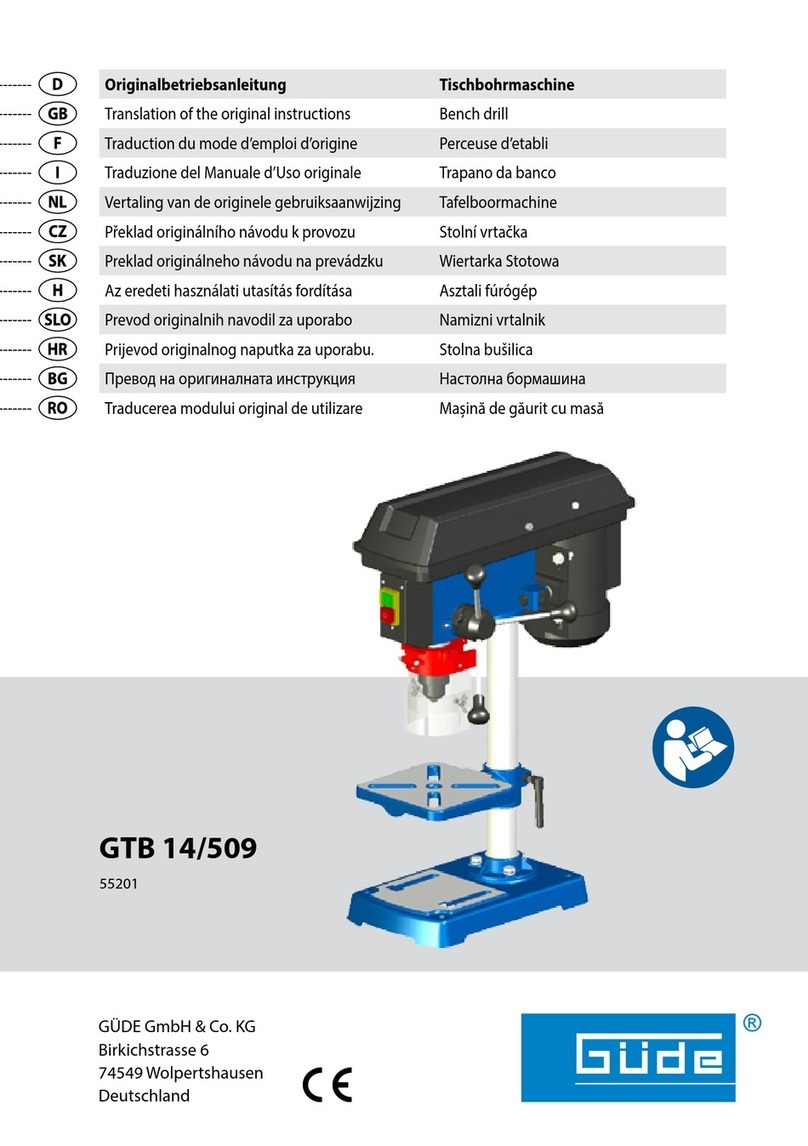
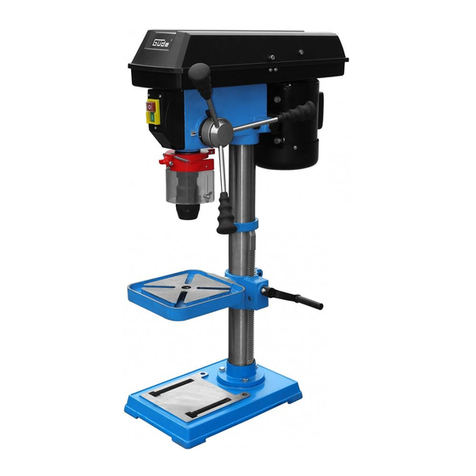
Gude GTB 13 User manual

List of Contents
ARTICLE Page
1. Technical Data.............................................................................................................................................................
2. General Safety Precautions.........................................................................................................................................
3. Other General Safety Precautions...............................................................................................................................
4. Drills-Specific Safety Precautions................................................................................................................................
5. Electrical Part Information............................................................................................................................................
6. Meet Your Drill.............................................................................................................................................................
7. Assembling..................................................................................................................................................................
8. Adjustment..................................................................................................................................................................
9. Operation....................................................................................................................................................................
10. Maintenance ...............................................................................................................................................................13
11.
Drilling Specifications Table
....................................................................................................................................14
12. Machine Exploded View Drawing................................................................................................................................15
13. List of Spare Parts for GTB 13...................................................................................................................................16
14. List of Spare Parts GTB 16. GTB 20. GSB 20. GSB 25 R+L. GSB 32 R+L..............................................................17
15. Pack Sheet GTB 13....................................................................................................................................................18
16. Pack Sheet GTB 16. GTB 20. GSB 20. GSB 25 R+L. GSB 32 R+L...........................................................................18
1. Technical Data
Model GTB 13 GTB 16/5 GTB 16/5 R+L GTB 20/12 GTB 20/12 R+L
Supply voltage:
230 V/50 Hz 230 V 400 V 230 V 230 V
Motor capacity:
180 W 600 W 600 W 800 W 800 W
Chuck:
13 mm 16 mm 16 mm 16 mm 16 mm
Quill stroke:
50 mm 60 mm 60 mm 80 mm 80 mm
Taper attachment:
MK 1/B16 MK 2 MK 2 MK 2 MK 2
Reach:
105 mm 126 mm 126 mm 178 mm 178 mm
Bench size:
164 x 164 mm 200 x 195 mm 200 x 195 mm 300 x 300 mm 300 x 300 mm
Base plate size:
295 x 185 mm 348 x 210 mm 348 x 210 mm 456 x 270 mm 456 x 270 mm
Total height:
580 mm 840 mm 840 mm 1065 mm 1065 mm
Quill speed:
500-2500 rpm. 5 dg 12 dg 12 dg 12 dg
460-2480 rpm 230-2470 rpm 180-2740 rpm 180-2740 rpm
Ordering No.: 55120 55190 55192 55193 55194
Model GSB 20/12 GSB 20/12 R+L GSB 25 R+L GSB 32 R+L
Supply voltage:
230 V 400 V 400 V 400 V
Motor capacity:
600 W 800 W 1100 W 1500 W
Chuck:
16 mm 16 mm 3-16 mm 3-16 mm
Taper attachment:
MK 2 MK 2 MK 3/B16 MK 4
Quill stroke:
80 mm 80 mm 120 mm 120 mm
Reach:
178 mm 178 mm 210 mm 255 mm
Bench size:
300 x 300 mm 300 x 300 mm 335 x 335 mm 423 x 475 mm
Base plate size:
456 x 270 mm 456 x 270 mm 520 x 305 mm 450 x 580 mm
Total height:
1610 mm 1610 mm 1670 mm 1720 mm
Quill speed:
12 dg 12 dg 16 dg 12 dg
180-2740 rpm 180-2740 rpm 160-3000 rpm 120-3480 rpm
Ordering No.: 55195 55197 55423 55435
2. Microswitch Safety Device
In the drill belt enclosure, a safety switch is fitted. The machine will not start when the enclosure cover
is opened or not properly closed.
Always check this microswitch functioning when you experience troubles at start-up. However, never
leave the machine on when handling this microswitch manually. That could result in serious injury.
!
17

List of Contents
ARTICLE Page
1. Technical Data.............................................................................................................................................................
2. General Safety Precautions.........................................................................................................................................
3. Other General Safety Precautions...............................................................................................................................
4. Drills-Specific Safety Precautions................................................................................................................................
5. Electrical Part Information............................................................................................................................................
6. Meet Your Drill.............................................................................................................................................................
7. Assembling..................................................................................................................................................................
8. Adjustment..................................................................................................................................................................
9. Operation....................................................................................................................................................................
10. Maintenance ...............................................................................................................................................................
11.
Drilling Specifications Table
....................................................................................................................................
12. Machine Exploded View Drawing................................................................................................................................
13. List of Spare Parts for GTB 13...................................................................................................................................
14. List of Spare Parts GTB 16. GTB 20. GSB 20. GSB 25 R+L. GSB 32 R+L..............................................................
15. Pack Sheet GTB 13....................................................................................................................................................
16. Pack Sheet GTB 16. GTB 20. GSB 20. GSB 25 R+L. GSB 32 R+L...........................................................................
1. Technical Data
Model GTB 13 GTB 16/5 GTB 16/5 R+L GTB 20/12 GTB 20/12 R+L
Supply voltage:
230 V/50 Hz 230 V 400 V 230 V 230 V
Motor capacity:
180 W 600 W 600 W 800 W 800 W
Chuck:
13 mm 16 mm 16 mm 16 mm 16 mm
Quill stroke:
50 mm 60 mm 60 mm 80 mm 80 mm
Taper attachment:
MK 1/B16 MK 2 MK 2 MK 2 MK 2
Reach:
105 mm 126 mm 126 mm 178 mm 178 mm
Bench size:
164 x 164 mm 200 x 195 mm 200 x 195 mm 300 x 300 mm 300 x 300 mm
Base plate size:
295 x 185 mm 348 x 210 mm 348 x 210 mm 456 x 270 mm 456 x 270 mm
Total height:
580 mm 840 mm 840 mm 1065 mm 1065 mm
Quill speed:
500-2500 rpm. 5 dg 12 dg 12 dg 12 dg
460-2480 rpm 230-2470 rpm 180-2740 rpm 180-2740 rpm
Ordering No.: 55120 55190 55192 55193 55194
Model GSB 20/12 GSB 20/12 R+L GSB 25 R+L GSB 32 R+L
Supply voltage:
230 V 400 V 400 V 400 V
Motor capacity:
600 W 800 W 1100 W 1500 W
Chuck:
16 mm 16 mm 3-16 mm 3-16 mm
Taper attachment:
MK 2 MK 2 MK 3/B16 MK 4
Quill stroke:
80 mm 80 mm 120 mm 120 mm
Reach:
178 mm 178 mm 210 mm 255 mm
Bench size:
300 x 300 mm 300 x 300 mm 335 x 335 mm 423 x 475 mm
Base plate size:
456 x 270 mm 456 x 270 mm 520 x 305 mm 450 x 580 mm
Total height:
1610 mm 1610 mm 1670 mm 1720 mm
Quill speed:
12 dg 12 dg 16 dg 12 dg
180-2740 rpm 180-2740 rpm 160-3000 rpm 120-3480 rpm
Ordering No.: 55195 55197 55423 55435
2. Microswitch Safety Device
In the drill belt enclosure, a safety switch is fitted. The machine will not start when the enclosure cover
is opened or not properly closed.
Always check this microswitch functioning when you experience troubles at start-up. However, never
leave the machine on when handling this microswitch manually. That could result in serious injury.
!

18

4. Drills-Specific Safety Precautions
WARNING: DO NOT OPERATE THE MACHINE BEFORE IT IS COMPLETELY ASSEMBLED AND
INSTALLED IN COMPLIANCE WITH INSTRUCTIONS.
1. NEVER SWITCH THE DRILL ON BEFORE YOU REMOVE ANY OBJECTS FROM THE BENCH (tools, wastes
etc.).
2. NEVER put your hands and finger close to the drill bit.
3. DO NOT ATTEMPT to drill material with the surface other than flat unless a suitable support is available.
4. NEVER switch the machine on while pressing the drill bit against the material.
5. Before switching the machine on, MAKE SURE that the bench-clamping lever is firmly tightened.
6. NEVER draw anything on the piece to be drilled, do not mount, do not clamp the material on the bench while the
machine is running.
7. MAKE SURE that the bit is firmly clamped in the chuck.
8. Before switching the machine on, MAKE SURE that the chuck key is removed.
9. ADJUST the bench or the down stop to avoid drilling in the bench.
10. ALWAYS stop the bit before removing chips from the bench.
11. USE A CLIP OR CLAMPING JAWS to secure the piece to be drilled on the bench.
12. DON´T wear gloves when operating the drill.
13. Before leaving the machine, PUT THE CURRENT SUPPLY OFF, remove the bit and clean the bench.
14. Set the drill to speed answering a specific job. .
15. If a part of the drill is missing, found damaged or id an electrical component does not work properly, switch the
current supply off and pull the cable out of the socket. Replace the missing, damaged or not working
components and only then resume the machine operation.
Follow the above safety regulations!!
19

5. Electrical Part Information
Grounding Instructions
IN CASE OF FAULT OR OUTAGE, grounding guarantees the current the least resistance passage and
reduces the risk of electrical shock. This machine has a power cable fitted with grounding conductor and
grounding plug.
The plug MUST be inserted in the interconnecting socket conforming to ANY local regulations and properly
installed and grounded in compliance with the same.
DO NOT ALTER THE PLUG SUPPLIED IN ANY WAY. If it does not fit in your socket, have a matching socket
installed by a qualified electrician.
UNQUALIFIED CONNECTION of the grounding conductor may entail a risk of electrical shock. The green-
insulated conductor (with/without yellow stripes) is the grounding conductor. If repair or replacement of the
power cable or the plug is required, DO NOT CONNECT the grounding conductor to the conductive input
terminal.
If you do not quite understand grounding instruction or if you are not sure that the machine is grounded as
appropriate, invite a qualified electrician or a servicing staff to CHECK the grounding conductors.
CAUTION: IF IN DOUBT ON YOUR SOCKET APPROPRIATENESS, MAKE SURE THAT IT IS GROUNDED
AS REQUIRED. IF YOU ARE NOT SURE, HAVE IT CHECKED BY A QUALIFIED ELECTRICIAN.
WARNING: THIS DRILLING MACHINE IS DESIGNED FOR WORKING INDOORS ONLY. NEVER EXPOSE
IT TO RAIN AND DO NOT USE IT IN ANY WET AREAS.
WARNING: THE MACHINE IS PERMITTED FOR OPERATION PROVIDED THAT IT IS CONNECTED TO A
VOLTAGE SOURCE USING A FAULT CURRENT PROTECTION SWITCH.
Make sure that the extension cable working condition is good. Provided that an extension cable be used,
make sure that the cross-section of it is sufficient for it to conduct the current needed for the product. An
undersized extension cable will cause a voltage drop resulting in the current loss and overheating. The table
below shows the correct sizes to be used subject to the cable length and the current value shown on the plate.
If in doubt, use the nearest bigger size.
The extension cable sizes show in the table will provide against a voltage drop above 5% at an estimated
load.
____________________________________________________________________________________
Current
(plate value) 3 6 10 12
-------------------------------------------------------------------------------------------------------------------------------------
Extension cable length Conductor cross-section mm2
-------------------------------------------------------------------------------------------------------------------------------------
7.5 m 0.75 0.75 1.0 1.25
-------------------------------------------------------------------------------------------------------------------------------------
15 m 0.75 0.75 1.0 1.5
-------------------------------------------------------------------------------------------------------------------------------------
22.5 m 0.75 0.75 1.0 1.5
-------------------------------------------------------------------------------------------------------------------------------------
30 m 0.75 0.75 1.25 1.5
-------------------------------------------------------------------------------------------------------------------------------------
45 m 0.75 1.25 1.5 2.5
20

6. Meet Your Drill
1 - Rotation speed indication 18 - Pitch adjustment scale
2 - Screw 18a – Setting screw
3 - Drill depth adjustment scale 18b - Nut
4 - Scale pointer 19 - Knockout wedge
5 - Set screw 20 - Bench arm
6 - Quill pulley 21 - Quill bushing
7 - Guide wheel 22 - Bench clamp tightening lever
8 - Motor pulley 23 - Column
9 - Down stop 24 - Bench crank
10 - Motor clamping lever 25 - Bench arm tightening lever
11 - Speed control knob 26 - Taper drift
12 - Quill return spring 27 - Mounting holes
13 - Quill (assembly) 28 - Rack
14 - Chuck 29 - Chuck
15 - Rack ring 30 - Base plate
16 - Bench 31 - Chuck tightening key
17 - Advancement hand lever 32 - Bench bracket
21

Fig. 1 Fig. 1
7. Assembling
Assembling and Cleaning
Carefully unpack the drill and all the parts and compare against the list below. Do not throw away the carton
and wrapping until the drill press is completely assembled.
Any worked surface is treated with protective coating to protect the machine against moisture. Remove the
coating using a soft cloth wetted with kerosene or WD-40 agent. Never use acetone. petrol or solvents for
CLEANING.
Parts Fig. 1
1 - Motor assembly 10 - Stems/advancement lever
2 - Column 11 - Column lock lever
3 - Service instruction (manual) 12 - Top knob
4 - Tapered drift 13 - 2 hex-wrenches & cotter
5 - Bench crank
6 - Screws/bolts
7 - Chuck and chuck key
8 - Bench
9 - Base plate
Warning:
If a part is missing or found damaged. do not connect the drill to the voltage source until the missing
or defective part is replaced and the assembly completed.
Assembly tooling:
- Monkey wrench
- Screwdriver*
- Hammer and a piece of wood
Fi
g
. 2
22

Column Base Plate Assembling (Fig. 3)
1. Align the column to the holes in the base plate.
2. Insert screw 10mm x 25mm in each hole of the column.
Mounting Bench on Column (Fig. 3)
1. Slacken the setting screw (4) to remove the ring (3).
2. Remove the rack from the column (5).
3. Check the worm gear (8)to see whether it is properly inserted in the bench fastening arm (7) and it
touched the gear wheels. The stem (9) should protrude ca 2.5 cm from the box
(Fig. 4).
4. Insert the rack (5) in the cross groove (6) of the bench-fastening arm (7)
(Fig. 4).
The bench fastening arm should be seated in the rack middle section.
5. Carefully slide the bench fastening arms and the rack (1) on the column (2)
(Fig. 5)
. Insert the rack lower
part in the slot of (3) the column base plate.
6. Hold the fastening arm and the rack against the column
(Fig. 6)
and slide the rack ring (4) on the column.
7. The rack (1) will just fit in the ring (4). Make sure that there is sufficient clearance between the rack and
the ring so that the bench may rotate around the column. .
8. Tighten the set screw (5). to fix the ring position.
9. Fit the handgrip (1) in place and tighten the setscrew (2). (
Fig. 7
)
10. Slide the column-locking lever (1) in the bench-fastening arm (2)
(Fig. 8)
11. Rotate the bench and adjust it so that it is above the base plate and it stays in alignment with it
Fig. 5 Fig. 6
Fig. 3 Fig. 4
23

Fixing Drill Head on Column
1. Carefully lift the drill head above the column. If the head is too heavy for you to handle. the work will take
two.
2. The column fits in the drill mounting hole. Make sure that the mounting hole is seated on the column. Align
the drill head with the bench and the base plate and tighten the two setscrews using a hex wrench.
(Fig.
9)
Advancement Hand Lever Assembling (Fig. 10)
1. Screw three bars in the advancement lever (1).
2. Tighten the round knobs (2) at the ends of the bars.
Pulleys Housing Assembling (Fig. 11)
1. Push a washer and a screw trough the pulley housing hole.
2. Screw on the knob and tighten it. .
Fig. 9 Fig. 10
Fig. 7 Fig. 8
24

Shaft and Chuck Assembling (Fig. 12)
1. Carefully clean the Morse taper and the chuck and keep them free of any traces of oil and dust. Now. fit
the Morse taper (1) in the chuck (2) with a jerk.
2. Put the chuck (3) on the taper drift short cone.
3. Close the chuck jaws completely. To prevent any damage to the chuck. put a small spanner in and knock
the taper and the chuck up with 2-3 slight hits.
WARNING: To avoid any damage to the chuck. do not use metal hammer for hammering the chuck on
the shaft.
Removal of Chuck (Fig. 13)
1. If the chuck is to be lowered completely. unloose the quill sleeve (1). Use the advancement hand lever to
do it. There big oval holes on both sides of the quill sleeve (2).
2. Rotate the chuck (3) until the quill hole (4) and the sleeve hole are in alignment
3. Insert the wedge (5) and knock it slightly with a hammer.
4. Both the shaft and chuck will fall down from the quill.
Drill Assembling (Fig. 14)
1. Mount your drill by means of two holes (1) in the base plate to a stand or a bench. using premium
assembling material. That should prevent any rollover. slip or shift of the machine in operation.
IMPORTANT NOTICE: When the stand or the bench begin to move while the drill is working. fix it
safely to the floor.
Fig. 11
Fig. 12
Fig. 13 Fig. 14
25

2
1
6
11
10
5
4
87
3
8. Adjustment
1. Motor 7. Red
2. Zero voltage switch 8. Brown
3. Secondary winding 9. Yellow green
4. Blue 10. Body
5. White 11. Motor housing
6. Main winding
Quill Speed Change (Fig. 16)
1. Disconnect the drill column from the voltage source.
2. Open the pulley housing
3. Release the slide rails knob (1).
4. Tilt the motor forward to release tension on both the belts.
5. Re-set the belts in the pulleys corresponding to the required quill speed (2).
6. Stretch the belts and tilt the motor to the machine rear side.
7. Tighten the slide rails knob (1).
8. Close the pulley housing.
9. Turn the machine on to check if the belts tension is correct.
Bench Adjustment (Fig.17)
1. The bench may be lifted or lowered to a required position by releasing the column lock (1) and turning
the crank (2). Before drilling is started. the column lock has to be re-tightened.
2. If you want to turn the bench around the column. release the column lock (1) and then re-tighten it
again.
3. If you want to turn the bench only. release the bench lock (3) and turn the bench to the required
position. Re-tighten the lock again.
4. If you want to se the bench at an angle of 00- 450(to the right/to the left). remove the pin (4) and the
nut (5). If the pin is stuck. turn the nut (5) clockwise until the pin slips out. Release the bench lock
screw (6). incline the table at the required angle and tighten the screw (6). If you want the bench put
back in the position of 0°. insert the pin again (4) and tighten the screw (6). Transversal setting scale
spacing is on the bench attachment device (7).
26

Fig. 16 Fig. 17
Drilling Depth (Fig. 18)
When drilling blind holes. take the drill quill down with the machine off and set the bit to the piece to be drilled.
Now. loose the down stop and zero (set to “0) the scale. Clamp the stop again and read the current down
depth on the scale.
Quill Return Spring (Fig. 19)
An automatic return mechanism is fitted on the quill. The main components are a spring and a grooved
chromium-plated housing. The spring is factory-set as appropriate and the setting should not be changed
Fig. 18 Fig. 19
IMPORTANT NOTICE: the nut should not be tightened too firmly. If the nut tightening is too firm. quill
movement is made more difficult.
27

9. Operation
Drilling Speeds
Factors influencing the drilling sped: type of material. drilled hole size. type of bit. required quality of cut.
Remember that the smaller the bit is the larger is the required speed. When drilling soft materials. higher
speed is required than that for the hard materials (see the table of drilling specifications).
Metal Drilling
Metal pieces need to be clamped safely. some of our vices are recommended. Never hold the piece just with
hands. The bit cutting edges may catch the piece and cause a serious injury to you. The bit will get broken
when a metal object strikes against the column. .
The piece to be drilled should be firmly clamped. Any tilting. twisting and shifting will result in a rough drilled
hole and the risk of breaking the bit will increase as well. If the metal object is flat. underlay it with a piece of
wood to prevent spinning. If the shape is irregular and its area cannot lie on the bench entirely. it should be
fixed.
Wood Drilling
It is possible to use the metal working bits for wood working as well. however. wood drilling bits should be
preferred. Do not use twist drills. those rotate so fast that they will lift the drilled piece from the bench and will
spin it around. To drill the material through. the bench has to be aligned for the bit to get in the centre hole.
When the bit starts cutting wood. the advance should add gradually to prevent the material from shattering.
Put a piece of waste wood under the worked material as a pad. It will help to reduce the shattering qualities
and protect the drill bit tip.
Advancement
Apply sufficient force on the advancement hand lever to press it down. interrupt the advancement now and
then to keep the chips short or to direct the sawdust from the hole being drilled. Too fast advancement could
result in the motor stopping. belt slipping. damaging the piece being drilled or breaking the bit. Too slow
advancement could heat the drilling bit and the piece being drilled could get burnt.
10. Maintenance
WARNING: SWITCH OVER TO “OFF” POSITION AND UNPLUG THE MACHINE BEFORE
MAINTENANCE OR LUBRICATION OF THE MACHINE FOR YOU TO BE SAFE.
Blow off or suck off any sawdust and chips gather on the motor. pulley housing. bench and the drilled piece
surface.
Wipe the gloss surface with an oiled cloth.
Apply a layer of pasty wax on the column and the bench to keep the surfaces clean with any spots of rust.
The ball bearings in the pinion and v-belt pulley assembly are lubricated for life and sealed permanently. Pull
the pinion down and lubricate with oil on a three-month basis.
If the bench clamping devices and locking knobs run heavily. lubricate them.
CAUTION: Any routine and scheduled maintenance of the drill should be done by an authorised
servicing technician.
28

11.
Drilling Specifications Table
29

12. Machine Exploded View Drawing
30

13. List of Spare Parts for GTB 13
Par
t
No.
Description Quantit
yNote Part
No. Description Quantit
yNote
1 Base plate 1 47 Switch 1
2 Screw/Bolt 4 (M10x40)
M10x25 48 Screw 1 M 5x10
3 Rack 1 49 Screw clamp 1
4 Column 1 50 Body 1
5 Bench lock 1 51 Screw/Bolt 1 M8x16
6 Hand grip 1 52 Point operating level 1
7 Headless set screw 1 M6x10 53 Sliding bar / shifting
device 1
8 Shaft 1 54 Sliding bar / shifting
device 1
9 Nut 1 M6 55 Motor base plate 1
10 Pin 1 56 Washer 2 12
11 Washer 1 Split washer 2 12
12 Screw/Bolt 1 M12x35 57 Nut 2 M 12
13 Bench screw 1 58 Motor 1
14 Bench bracket 1 59 Motor pulley 1
15 Bench 1 60 Plain key 1
16 Clamping screw 1 61 Headless set screw 1 M10x12
17 Gear wheel 1 62 v-belt 1 A-630
18 Worm 1 63 Centring shaft 1
19 Rack ring 1 64 Ball bearing 1 60202
20 Stop pin 1 65 Ball bearing 1 60202
21 Headless set screw 1 M6x10
22 Advancement hand lever 1 67 Centring pulley 1
23 Scale ring 1 68 Washer 4 6
24 Cylindrical pin 1 5x40 69 Screw 1 M6x8
25 Hand grip body 1 70 Screw 1 M5x10
26 Hand grip 3
27 Knob 3
28 Wrench 1 73 Pulley housing 1
29 Shifting device screw 1 74 v-belt 1 A-610
30 Headless set screw 2 M10x12 75 Pulley Nut 1
31 Cylindrical pin 2 6x25 76 Quill pulley 1
32 Shaft buckling rings 1 15 77 Shifting pulley 1
33 Point operating lever bar 1
34 Shifting device screw 2 79 Ball bearing 1 60205
35 Screw/Bolt 4 M8x25 80 Spacer 1
36 Washer 4 8 81 Ball bearing 1 60205
37 Nut 4 M8
38 Nut 1 M10 83 Round Nut 1 M17x1
39 Screws – special kit 1 84 Round nut coupling
washer 1
40 Nut 1 M12x1.5 85 Ball bearing 1 60203
41 Nut 1 M12x1.5 86 Rubber washer 1
42 Flexible cup 1 87 Quill lug 1
43 Twist spring 1 88 Ball bearing 1 80205
(80206)
44 Spring housing 1 89 Quill 1
45 Spring guide 1 90 Shaft 1
46 Screw 2 M4x12 91 Chuck 1
31

14. List of Spare Parts GTB 16. GTB 20. GSB 20. GSB 25 R+L. GSB 32
R+L
Par
t
No.
Description Quantit
yNote Part
No. Description Quantit
yNote
1 Base plate 1 47 Switch 1
2 Screw/bolt 4 M12x30 48 Screw 1 M 5x10
3 Rack 1 49 Screw clamp 1
4 Column 1 50 Body 1
5 Bench lock 1 51 Screw/bolt 1 M8x16
6 Hand grip 1 52 Point operating lever 1
7 Locking bolt 1 M6x10 53 Sliding bar/shifting device 1
8 Shaft 1 54 Sliding bar/shifting device 1
9 Nut 1 M6 55 Motor base plate 1
10 Pin 1 56 Washer 2 12
11 Washer 1 Split washer 2 12
12 Screw/bolt 1 M20x40 57 Nut 2 M 12
13 Bench screw 1 58 Motor 1
14 Bench clamping arm 1 59 Motor pulley 1
15 Bench 1
16 Clamping screw 1 61 Locking bolt 1 M10x12
17 Gear wheel 1 62 v-belt 1 A-630
18 Worm 1 63 Central shaft 1
19 Rack ring 1 64 Ball bearing 1 60202
20 Stopper pin 1 65 Ball bearing 1 60202
21 Locking bolt 1 M6x10
22 Advance hand lever 1 67 Central pulley 1
23 Scale ring 1 68 Washer 4 6
24 Cylindrical pin 1 5x40 69 Screw 1 M6x8
25 Hand grip body 1 70 Screw 1 M5x10
26 Hand grip 3 71 Washer 1 5
27 Knob 3 72 Knob 1
28 Wrench 1 73 Pulley housing 1
29 Shifting device screw 1 74 v-belt 1 A-610
30 Locking bolt 2 M10x12 75 Pulley nut 1
31 Cylindrical pin 2 6x25 76 Quill pulley 1
32 Shaft bucking ring l 1 15 77 Shifting pulley 1
33 Point operating lever
bar 1
34 Shifting device screw 2 79 Ball bearing 1 60207
35 Screw/bolt 4 M8x25 80 Spacer 1
36 Washer 4 8 81 Ball bearing 1 60207
37 Nut 4 M8
38 Nut 1 M10 83 Round nut 1 M30x1.5
39 Special kit of screws 1 84 Round nut coupling washer 1
40 Nut 1 M12x1.5 85 Ball bearing 1 60206
41 Nut 1 M12x1.5 86 Rubber washer 1
42 Flexible cup 1 87 Quill lug 1
43 Twist spring 1 88 Ball bearing 1 60207. 8706
44 Spring cover 1 89 Quill 1
45 Spring guide 1 90 Shaft 1
46 Screw 2 M4x12 91 Chuck 1
32

15. Pack Sheet GTB 13
No. Description Size Quantity
1 Head assembly 1
2 Bench assembly 1
3 Base plate 1
4 Column assembly 1
5 Chuck 13mm 1
6 Wedge-shaped slide valve 1
7 Internal hexagon wrench 3mm 1
8 Internal hexagon wrench 5mm 1
9 Screw/bolt M10x25 or M10x40 4
10 Operating instructions (manual) 1
16. Pack Sheet GTB 16. GTB 20. GSB 20. GSB 25 R+L. GSB 32 R+L
No. Description Size Quantity
1 Head assembly 1
2 Bench assembly 1
3 Base plate 1
4 Column assembly 1
5 Chuck 16mm 1
6 Wedge-shaped slide valve 1
7 Internal hexagon wrench 3mm 1
8 Internal hexagon wrench 5mm 1
9 Screw/bolt M10x25 orM10x40 4
10 Operating instructions (manual) 1
33
This manual suits for next models
8
Table of contents
Other Gude Drill manuals

Gude
Gude BS 18 User manual

Gude
Gude GTB 20/812 User manual

Gude
Gude GTB Series Wiring diagram

Gude
Gude 2600 PRO User manual

Gude
Gude SBM 710 E User manual

Gude
Gude GTB 16/500 VARIO User manual

Gude
Gude GSB 20 LASER/500W User manual

Gude
Gude GSB 25 User manual

Gude
Gude GTB 13/355 User manual

Gude
Gude GTB 16/5R User manual

Gude
Gude BX 710 Wiring diagram

Gude
Gude GE 1450.1 User manual

Gude
Gude GTB 16/605 User manual

Gude
Gude KH 32 E User manual

Gude
Gude GTB 14/509 User manual

Gude
Gude KH 26 E User manual

Gude
Gude GTB 13 PRO User manual

Gude
Gude BSBA 12-202-24 K User manual

Gude
Gude GSB 25/1100 VARIO User manual

Gude
Gude GE 1650 User manual