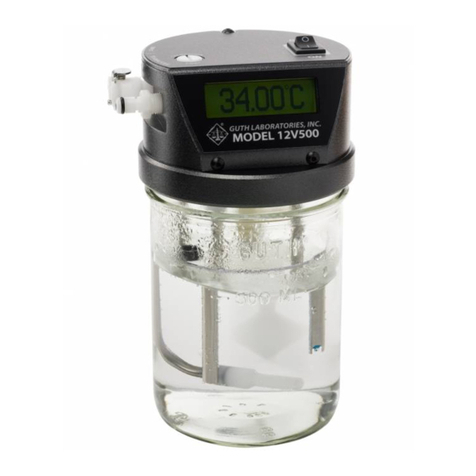
Guth Laboratories 2100 User manual

Guth Laboratories, Inc.
MODEL 2100 SIMULATOR
OPERATION MANUAL
590 North 67th Street
Harrisburg, PA 17111-4511
TELEPHONE: 717-564-5470 / 800-233-2338
FAX: 717-564-2555
WEB SITE AT: www.guthlabs.com PRICE $5.00

© 1999 Guth Laboratories, Inc./all rights reserved

RECORDS (SERIAL NUMBERS, CALIBRATION AND NOTES)
NIST TRACEABLE THERMOMETER – SERIAL NUMBER___________________
CERTIFIED BY________________________________DATE_____________
TEST TEMPERATURE_______qCNIST TRUE TEMPERATURE_______qC
MODEL 2100 – SERIAL NUMBER_________________________________
CALIBRATION CHECK DATE CHECKED BY
NOTE: Only a Guth Laboratories, Inc. certified technician shall perform Field
calibration.
INTRODUCTION
The Guth Model 2100 Alcohol Breath Simulator is a State-of-the-Art, electronically temperature
controlled, water-alcohol instrument for the purpose of providing a precise calibration standard.
Temperature of the water-alcohol solution placed in the simulator is maintained at 34oC + .05oC
or better.
The Guth Model 2100 Simulator is approved by the National Highway Traffic Safety
Administration (NHTSA), published on their Conforming Products List (CPL), and is listed with
Underwriters Laboratories, Inc. (UL), as meeting United States Safety Standards and Canadian
Safety Standards (CUL).
CERTIFIED* SIMULATOR SOLUTION STANDARD
PLEASE NOTE: It is imperative your Simulator Solution be of the highest quality in
order to acquire the scientific and legal standards of acceptance.
To establish a precise and accurate calibration standard when using a Guth simulator, GUTH
LABORATORIES, INC. recommends using Guth Certified Simulator Solution. Guth
Laboratories, Inc., a pioneer and leader in the science of alcohol breath testing, has provided
Certified Simulator Solution to state, municipal, and local law enforcement agencies for many
years.
************
Guth Premixed Certified Simulator Solution is the only solution available which is prepared by
aFDA /DEA Registered Laboratory.
************
Guth Certified Simulator Solutions are prepared in standard concentrations of .02%, .04%, .05%,
.08%, .10%, .15% and .20%. Other special concentrations are available. Please contact Guth
Laboratories, Inc. for availability and pricing:
Toll free: (800) 233-2338 Fax: (717) 564-2555
or visit our web site at: www.guthlabs.com
STORAGE: Store Simulator Solution in a cool location. Do not place solution in a freezer
–DO NOT REFRIGERATE SIMULATOR.
*Guth Certified Simulator Solutions are tested by recognized laboratories.
114

MODEL 2100 - BLOCK DIAGRAM
34.0
MULTIPLEXED
DISPLAY
DRIVER
TIMING
&
RESET
CPU DISPLAY SECTION
8051
MICRO
CONTROLLER
RS- 232
LEVEL
CONVERTER
CUSTOMER
INTERFACE
DATA OUT
DATA IN
MOTOR
HEATER
MOTOR
CONTROL
HEATER
CONTROL
BUFFERS
TRANSFORMER
POWER SUPPLY
+ 5vdc
TO ALL
CIRCUITS
I C BUS
2
A to D
CONVERTER
VOLTAGE
REFERENCE
4.096vdc
3 WIRE BUS
CALIBRATION
TEST
POINT
RFI
DETECT
HEATER
THERMOCOUPLE
HIGH TEMPERATURE SHUT-OFF
AMPLIFIER COMPARATOR
BEEPER LED
INSTRUMENT
AMPLIFIER
OUTPUT SECTION
INPUT
SECTION
PRECISION
THERMISTOR
EXCLUSIVE FEATURES OF THE MODEL 2100 SIMULATOR
xMICROPROCESSOR CONTROLLED: Mercury column is eliminated.
xTEMPERATURE SENSOR: The Model 2100
incorporates a high precision temperature sensor.
xMaintains a precise temperature of 34oC + .05oCor better.
xWill not heat if temperature sensor is defective (shorted or open).
xGUTH LABORATORY GLASS CONTAINER: Graduated 500ml + 5%.
xNON-MAGNETIC METAL TOP HOUSING ASSEMBLY: Provides uniform headspace
heating.
xPOWER SWITCH: Safety On/Off - Double pole, double throw (DPDT).
xELECTRICALLY ISOLATED: Internal power transformer and optically isolated control
components prevent AC leakage.
xFUSE: External fuse provides protection in the event of an electrical malfunction.
xHIGH INTENSITY LED DISPLAY: Provides maximum visibility of temperature and heater
activity.
xRELIABLE AGITATOR MOTOR.
xAGITATOR PADDLE: Designed by Guth Laboratories, Inc. Offers maximum circulation
and uniformity of solution.
xHEATER ELEMENT: Electronically protected from overheating when removed from
solution or when temperature sensor is defective.
xRFI PROTECTED: The heating element and motor will turn off when the simulator is
subjected to a RF field of 10 volts/meter or greater.
xINTERNAL DIAGNOSTICS: Simulator computer performs internal diagnostics.
xMALFUNCTION INDICATION: Simulator provides an audible and visual indication if a
malfunction occurs.
xPOWER : 120 volts AC 60 Hz.
x
xRS-232 COMMUNICATIONS: Provides the ability to monitor the temperature and status of
the simulator.
xO
OP
PT
TI
IO
ON
NA
AL
L:
:S
SE
ER
RI
IA
AL
LI
IZ
ZE
ED
DN
NI
IS
ST
TR
RE
EF
FE
ER
RE
EN
NC
CE
EM
ME
ER
RC
CU
UR
RY
Y-
-I
IN
N-
-G
GL
LA
AS
SS
S
T
TH
HE
ER
RM
MO
OM
ME
ET
TE
ER
RF
FO
OR
RC
CA
AL
LI
IB
BR
RA
AT
TI
IO
ON
NC
CH
HE
EC
CK
KS
S.
.
2
13 2

REMEDY: Turn off the simulator and turn on. If the simulator does not heat, the heating
element may be defective. Requires service*
*REQUIRES SERVICE - Simulator must be repaired by a Guth
certified technician or returned to Guth Laboratories, Inc.
(Seeinstructions on page 9.)
The temperature of the solution is belo
w
33.8oCafter it has initially obtaine
d
34.0oC.
1
MO D EL 2100
ON
OFF
RESET
GUTH LABORATORIES, INC.
.5 .5
G U TH MO DEL 2100 SIMULATOR
C
312

REMEDY: Turn the simulator off and allow solution to cool. Turn the simulator on. If the
condition continues to occur, simulator requires service*.
Remove the source of radio interference or change location of the simulator. Reset the simulator.
REMEDY:Turn “off” – wait 3-5 seconds, then turn “on”.
REMEDY: Reset the electronics. (Turn “off” for 3-5 seconds, then turn “on”.) If the simulator
does not heat, the heating element may be defective. Requires service*
The temperature of the solution is above
34.2qCor radio frequency interference
(RFI) has been detected.
Electronics need to be reset.
Excessive amount of time to obtai
n
operating temperature (longer than 15
minutes). The heating element may b
e
open or the solution was too cold.
MODEL 2100 REAR VI EW
!
CAU TI O N
REMOVE SOLUTION BEFORE
MOVING INSTRUMENT
REP LA CE FU SE W I TH BU SS TYP E G M W
1amp @ 125 vac Fast Acting
11 4

N
osolution in container or simulator powe
r
has been turned on with top housing no
t
attached to the container.
IF THE SIMULATOR DISPLAYS AN ERROR:
The Model 2100 provides internal diagnostics checking for several conditions which prevent the
simulator from maintaining the correct temperature. When a condition or malfunction occurs, the
simulator will deactivate the heater and the agitator motor. The simulator will alarm indicating a
malfunction and display the error code. This will continue until the malfunction is corrected or the
simulator is reset.
RESETTING THE SIMULATOR
Turning the power off and on will reset the simulator.
ERROR CODES
The following list of error codes indicate the cause and corrective action:
REMEDY: Turn the simulator off. Fill container with 500 ml of certified solution and
reassemble top housing and container.
REMEDY: Cannot be remedied in the field. Requires service*
REMEDY: Turn “off” – wait 3-5 seconds, then turn “on”.
10
The temperature sensor is open or the sensor is
shorted. The computer is receiving no signal to
allow it to control the temperature.
Electronics need to be reset.
INSTRUCTIONS FOR USE OF THE GUTH MODEL 2100 ALCOHOL BREATH
SIMULATOR:
1. Add tubing and connector to the simulator.
2. Remove the glass container from the simulator top housing.
3. Pour 500 ml of Certified Simulator Solution into the simulator container. The Guth
laboratory glass container has a 500 ml + 5% fill mark. The solution should never be
less than 500 ml prior to inserting the top housing.
4. Reassemble the simulator with the glass container. Be sure the container is properly
seated to the top housing DO NOT OVERTIGHTEN.
5. Turn the power ON. The simulator will alarm once and the display will completely
illuminate as shown in figure 1. This indicates the display is functioning properly.
Figure 1
6. The L.E.D. test display in figure 1 will remain for approximately one second and then
change to the COLD display as shown in figure 2.
Figure 2
7. Scanning of the decimal dots across the bottom of the display indicates the simulator is
heating.
8. When the solution reaches 33.6oC, the display will indicate the actual temperature. As
the simulator controls the temperature, the last decimal point of the display will pulse
indicating proper operation.
9. When 34.0ochas been obtained (as shown in Figure 3), the heater indicator will pulse
less frequently. It is normal for the simulator to display the temperatures of 34.0c and
33.9c. The simulator is controlling the temperature properly.
Figure 3
5
510

RETURNING A SIMULATOR:
If you have been unsuccessful in reuniting the mercury column, or repairing the
simulator in the field, please call our Product Service Department for assistance or a RMA (Return
Material Authorization) number.
GUTH LABORATORIES, INC.
590 NORTH 67th STREET
HARRISBURG, PA 17111-4511
(717) 564-5470
or
(800) 233-2338
NOTE: When returning the simulator, it is imperative the laboratory glass container is
attached. This is necessary to protect critical parts of the simulator. Remove the glass
container, empty contents, dry thoroughly, and replace container. Carefully wrap the
simulator in bubble wrap, newspaper, paper towels, etc. Package the simulator well placing
packing material UNDER, AROUND, and ABOVE the simulator. Insure your package for
$600.00 per simulator.
10. Allow approximately fifteen minutes for the simulator to stabilize.
11. After the simulator is stabilized, it is ready for use (See diagram):
C
When manually operating the simulator, take a deep breath and blow into the
mouthpiece for a 4 to 7 second duration.
The blowing technique should imitate a person providing a breath sample into the
breath test simulator. After the breath test sample is introduced into the breath analyzer, the breath
analyzer performs the analysis and provides a final result.
The following alternative means also fulfill the requirement of providing air through the
tubing attached to the simulator: a simulator bellows pump, a pump-powered air source, or an
atomizer. Several models of pumps are available through Guth Laboratories.
If a low reading is obtained, check all tubing for leaks. Be sure the glass container is
properly tightened to the metal top housing. Loosen and re-tighten the laboratory glass container.
DO NOT OVERTIGHTEN. Repeat the testing procedure.
IF THE SIMULATOR DOES NOT HEAT TO 34oCand you have purchased the OPTIONAL
calibration thermometer:
Check the temperature with the NIST Reference Thermometer (if not available see page 9
("RETURNING A SIMULATOR"). Remove the chrome cap from the fitting located on the
center of the simulator. Carefully insert the NIST thermometer into this port.
If the NIST thermometer does not indicate a temperature of 34oC + .15oC, inspect the
thermometer for mercury separation.
6
96

SEPARATION IN THE CONTRACTION CHAMBER
.5 .5
Separation of mercury in the contraction chamber is an entirely different problem. Many
thermometers contain scale ranges which begin well above ambient temperatures. These
thermometers are provided with a contraction chamber or enlargement which prevents the
mercury from entering the bulb at ambient temperatures. Unusual handling of the themometer
may cause a separation in the contraction chamber.
The procedure to rejoin this mercury is relatively simple. If the separated mercury is in the
form of a very slight amount, invert the thermometer and tap gently against the palm of the hand.
(It is recommended that protection be used in the palm of the hand - paper towel, cloth, etc.
against glass breakage.) This will cause a greater separation, adding volume and weight to the
separated portion. The thermometer should then be righted and gripped firmly in the hand with
bulb outward. Sharply swing the thermometer downward at one's side in a 270 to 180 degree arc.
The centrifugal force thus generated will join the separated mercury to the main portion. If the
original separation contained a large volume, only the latter step of swinging the thermometer
downward need be followed.
SEPARATION IN THE LOWER AND MIDDLE PORTION OF THE COLUMN
.5 .5
Separations of this type are less frequent and more difficult to repair. There are more variables,
and no one explanation will cover all types of thermometers.
The general procedure is to subject the bulb only to a temperature (in an ice bath or freezer)
sufficient to retract all the mercury into the bulb. A slow and careful return to ambient
temperature will return an intact column. Our experience has shown that additional problems may
be caused in these procedures, and we point out the following cautions:
Allow thermometer to return to ambient or room air slowly, or breakage may occur. This
breakage is caused by mercury thawing in the capillary more slowly than the mercury in the bulb
thereby creating an impasse to the expanding mercury. In order to avoid this breakage, extreme
care must be taken to allow the mercury in the bulb to liquify at the same rate as the mercury in the
capillary.
Position the thermometer vertically and allow it to return to ambient temperatures. Extreme
care must be taken to insure the thermometer is not jarred or at the slightest angle while the
nitrogen gas and the mercury return into the capillary. If this care is not taken, mercury will enter
the capillary prior to the gas. This will cause gas bubbles to develop in the bulb and, in turn, cause
considerable inaccuracy which may be undetectable when the thermometer is placed into use.
1) If there is no separation, return the unit to Guth Laboratories,
Inc. (See instructions page 9).
2) If there is a separation...Try another NIST thermometer (or)
follow the instructions for rejoining a mercury separation.
CAUTION:If amercury thermometer is accidentally broken, be very careful. Mercury is
poisonous.. DO NOT allow direct contact with skin or mouth! Use rubber gloves to clean any
spill.
INSTRUCTIONS FOR REJOINING MERCURY SEPARATIONS IN GLASS
THERMOMETERS
All Guth precision thermometers are sealed under extremely high nitrogen pressure while
drawing the mercury into the lower portion of the capillary. This process, when coupled with acid
washed tubing and triple distilled mercury, although costly, greatly reduces the frequency of
separations in the capillary portion of the thermometer.
Many instructions for rejoining separations begin with "the mercury may be retracted into the
bulb by immersing it in a suitable mixture of dry ice and alcohol..." This statement is NOT
specific enough. Determine the type of separation from the illustrations provided and proceed
according to these instructions.
SEPARATION AT THE UPPER PORTION OF MERCURY COLUMN
.5 .5
All well constructed thermometers contain an expansion chamber or bubble at the extreme top
of the capillary. This chamber serves a twofold purpose; one, to accommodate an overflow of
mercury when the thermometer is subjected to temperatures in excess of its scale range and two, as
ameans of rejoining this type of separation.
With the thermometer in a vertical position, slowly heat the bulb under WARM tap water until
the separated segments and a portion of the main (intact) column enter the top chamber. (Extreme
care must be taken to insure that the mercury does NOT fill more than HALF to THREE-
QUARTERS of the chamber volume; otherwise, breakage of the bulb will result). The nitrogen
pressure will force a rejoining of the mercury. While positioning the thermometer vertically,
examine the column as it cools and retracts to be sure it is intact.
78

SEPARATION IN THE CONTRACTION CHAMBER
.5 .5
Separation of mercury in the contraction chamber is an entirely different problem. Many
thermometers contain scale ranges which begin well above ambient temperatures. These
thermometers are provided with a contraction chamber or enlargement which prevents the
mercury from entering the bulb at ambient temperatures. Unusual handling of the themometer
may cause a separation in the contraction chamber.
The procedure to rejoin this mercury is relatively simple. If the separated mercury is in the
form of a very slight amount, invert the thermometer and tap gently against the palm of the hand.
(It is recommended that protection be used in the palm of the hand - paper towel, cloth, etc.
against glass breakage.) This will cause a greater separation, adding volume and weight to the
separated portion. The thermometer should then be righted and gripped firmly in the hand with
bulb outward. Sharply swing the thermometer downward at one's side in a 270 to 180 degree arc.
The centrifugal force thus generated will join the separated mercury to the main portion. If the
original separation contained a large volume, only the latter step of swinging the thermometer
downward need be followed.
SEPARATION IN THE LOWER AND MIDDLE PORTION OF THE COLUMN
.5 .5
Separations of this type are less frequent and more difficult to repair. There are more variables,
and no one explanation will cover all types of thermometers.
The general procedure is to subject the bulb only to a temperature (in an ice bath or freezer)
sufficient to retract all the mercury into the bulb. A slow and careful return to ambient
temperature will return an intact column. Our experience has shown that additional problems may
be caused in these procedures, and we point out the following cautions:
Allow thermometer to return to ambient or room air slowly, or breakage may occur. This
breakage is caused by mercury thawing in the capillary more slowly than the mercury in the bulb
thereby creating an impasse to the expanding mercury. In order to avoid this breakage, extreme
care must be taken to allow the mercury in the bulb to liquify at the same rate as the mercury in the
capillary.
Position the thermometer vertically and allow it to return to ambient temperatures. Extreme
care must be taken to insure the thermometer is not jarred or at the slightest angle while the
nitrogen gas and the mercury return into the capillary. If this care is not taken, mercury will enter
the capillary prior to the gas. This will cause gas bubbles to develop in the bulb and, in turn, cause
considerable inaccuracy which may be undetectable when the thermometer is placed into use.
1) If there is no separation, return the unit to Guth Laboratories,
Inc. (See instructions page 9).
2) If there is a separation...Try another NIST thermometer (or)
follow the instructions for rejoining a mercury separation.
CAUTION:If amercury thermometer is accidentally broken, be very careful. Mercury is
poisonous.. DO NOT allow direct contact with skin or mouth! Use rubber gloves to clean any
spill.
INSTRUCTIONS FOR REJOINING MERCURY SEPARATIONS IN GLASS
THERMOMETERS
All Guth precision thermometers are sealed under extremely high nitrogen pressure while
drawing the mercury into the lower portion of the capillary. This process, when coupled with acid
washed tubing and triple distilled mercury, although costly, greatly reduces the frequency of
separations in the capillary portion of the thermometer.
Many instructions for rejoining separations begin with "the mercury may be retracted into the
bulb by immersing it in a suitable mixture of dry ice and alcohol..." This statement is NOT
specific enough. Determine the type of separation from the illustrations provided and proceed
according to these instructions.
SEPARATION AT THE UPPER PORTION OF MERCURY COLUMN
.5 .5
All well constructed thermometers contain an expansion chamber or bubble at the extreme top
of the capillary. This chamber serves a twofold purpose; one, to accommodate an overflow of
mercury when the thermometer is subjected to temperatures in excess of its scale range and two, as
ameans of rejoining this type of separation.
With the thermometer in a vertical position, slowly heat the bulb under WARM tap water until
the separated segments and a portion of the main (intact) column enter the top chamber. (Extreme
care must be taken to insure that the mercury does NOT fill more than HALF to THREE-
QUARTERS of the chamber volume; otherwise, breakage of the bulb will result). The nitrogen
pressure will force a rejoining of the mercury. While positioning the thermometer vertically,
examine the column as it cools and retracts to be sure it is intact.
78

RETURNING A SIMULATOR:
If you have been unsuccessful in reuniting the mercury column, or repairing the
simulator in the field, please call our Product Service Department for assistance or a RMA (Return
Material Authorization) number.
GUTH LABORATORIES, INC.
590 NORTH 67th STREET
HARRISBURG, PA 17111-4511
(717) 564-5470
or
(800) 233-2338
NOTE: When returning the simulator, it is imperative the laboratory glass container is
attached. This is necessary to protect critical parts of the simulator. Remove the glass
container, empty contents, dry thoroughly, and replace container. Carefully wrap the
simulator in bubble wrap, newspaper, paper towels, etc. Package the simulator well placing
packing material UNDER, AROUND, and ABOVE the simulator. Insure your package for
$600.00 per simulator.
10. Allow approximately fifteen minutes for the simulator to stabilize.
11. After the simulator is stabilized, it is ready for use (See diagram):
C
When manually operating the simulator, take a deep breath and blow into the
mouthpiece for a 4 to 7 second duration.
The blowing technique should imitate a person providing a breath sample into the
breath test simulator. After the breath test sample is introduced into the breath analyzer, the breath
analyzer performs the analysis and provides a final result.
The following alternative means also fulfill the requirement of providing air through the
tubing attached to the simulator: a simulator bellows pump, a pump-powered air source, or an
atomizer. Several models of pumps are available through Guth Laboratories.
If a low reading is obtained, check all tubing for leaks. Be sure the glass container is
properly tightened to the metal top housing. Loosen and re-tighten the laboratory glass container.
DO NOT OVERTIGHTEN. Repeat the testing procedure.
IF THE SIMULATOR DOES NOT HEAT TO 34oCand you have purchased the OPTIONAL
calibration thermometer:
Check the temperature with the NIST Reference Thermometer (if not available see page 9
("RETURNING A SIMULATOR"). Remove the chrome cap from the fitting located on the
center of the simulator. Carefully insert the NIST thermometer into this port.
If the NIST thermometer does not indicate a temperature of 34oC + .15oC, inspect the
thermometer for mercury separation.
6
96

N
osolution in container or simulator powe
r
has been turned on with top housing no
t
attached to the container.
IF THE SIMULATOR DISPLAYS AN ERROR:
The Model 2100 provides internal diagnostics checking for several conditions which prevent the
simulator from maintaining the correct temperature. When a condition or malfunction occurs, the
simulator will deactivate the heater and the agitator motor. The simulator will alarm indicating a
malfunction and display the error code. This will continue until the malfunction is corrected or the
simulator is reset.
RESETTING THE SIMULATOR
Turning the power off and on will reset the simulator.
ERROR CODES
The following list of error codes indicate the cause and corrective action:
REMEDY: Turn the simulator off. Fill container with 500 ml of certified solution and
reassemble top housing and container.
REMEDY: Cannot be remedied in the field. Requires service*
REMEDY: Turn “off” – wait 3-5 seconds, then turn “on”.
10
The temperature sensor is open or the sensor is
shorted. The computer is receiving no signal to
allow it to control the temperature.
Electronics need to be reset.
INSTRUCTIONS FOR USE OF THE GUTH MODEL 2100 ALCOHOL BREATH
SIMULATOR:
1. Add tubing and connector to the simulator.
2. Remove the glass container from the simulator top housing.
3. Pour 500 ml of Certified Simulator Solution into the simulator container. The Guth
laboratory glass container has a 500 ml + 5% fill mark. The solution should never be
less than 500 ml prior to inserting the top housing.
4. Reassemble the simulator with the glass container. Be sure the container is properly
seated to the top housing DO NOT OVERTIGHTEN.
5. Turn the power ON. The simulator will alarm once and the display will completely
illuminate as shown in figure 1. This indicates the display is functioning properly.
Figure 1
6. The L.E.D. test display in figure 1 will remain for approximately one second and then
change to the COLD display as shown in figure 2.
Figure 2
7. Scanning of the decimal dots across the bottom of the display indicates the simulator is
heating.
8. When the solution reaches 33.6oC, the display will indicate the actual temperature. As
the simulator controls the temperature, the last decimal point of the display will pulse
indicating proper operation.
9. When 34.0ochas been obtained (as shown in Figure 3), the heater indicator will pulse
less frequently. It is normal for the simulator to display the temperatures of 34.0c and
33.9c. The simulator is controlling the temperature properly.
Figure 3
5
510

REMEDY: Turn the simulator off and allow solution to cool. Turn the simulator on. If the
condition continues to occur, simulator requires service*.
Remove the source of radio interference or change location of the simulator. Reset the simulator.
REMEDY:Turn “off” – wait 3-5 seconds, then turn “on”.
REMEDY: Reset the electronics. (Turn “off” for 3-5 seconds, then turn “on”.) If the simulator
does not heat, the heating element may be defective. Requires service*
The temperature of the solution is above
34.2qCor radio frequency interference
(RFI) has been detected.
Electronics need to be reset.
Excessive amount of time to obtai
n
operating temperature (longer than 15
minutes). The heating element may b
e
open or the solution was too cold.
MODEL 2100 REAR VI EW
!
CAU TI O N
REMOVE SOLUTION BEFORE
MOVING INSTRUMENT
REP LA CE FU SE W I TH BU SS TYP E G M W
1amp @ 125 vac Fast Acting
11 4

REMEDY: Turn off the simulator and turn on. If the simulator does not heat, the heating
element may be defective. Requires service*
*REQUIRES SERVICE - Simulator must be repaired by a Guth
certified technician or returned to Guth Laboratories, Inc.
(Seeinstructions on page 9.)
The temperature of the solution is belo
w
33.8oCafter it has initially obtaine
d
34.0oC.
1
MO D EL 2100
ON
OFF
RESET
GUTH LABORATORIES, INC.
.5 .5
G U TH MO DEL 2100 SIMULATOR
C
312

MODEL 2100 - BLOCK DIAGRAM
34.0
MULTIPLEXED
DISPLAY
DRIVER
TIMING
&
RESET
CPU DISPLAY SECTION
8051
MICRO
CONTROLLER
RS- 232
LEVEL
CONVERTER
CUSTOMER
INTERFACE
DATA OUT
DATA IN
MOTOR
HEATER
MOTOR
CONTROL
HEATER
CONTROL
BUFFERS
TRANSFORMER
POWER SUPPLY
+ 5vdc
TO ALL
CIRCUITS
I C BUS
2
A to D
CONVERTER
VOLTAGE
REFERENCE
4.096vdc
3 WIRE BUS
CALIBRATION
TEST
POINT
RFI
DETECT
HEATER
THERMOCOUPLE
HIGH TEMPERATURE SHUT-OFF
AMPLIFIER COMPARATOR
BEEPER LED
INSTRUMENT
AMPLIFIER
OUTPUT SECTION
INPUT
SECTION
PRECISION
THERMISTOR
EXCLUSIVE FEATURES OF THE MODEL 2100 SIMULATOR
xMICROPROCESSOR CONTROLLED: Mercury column is eliminated.
xTEMPERATURE SENSOR: The Model 2100
incorporates a high precision temperature sensor.
xMaintains a precise temperature of 34oC + .05oCor better.
xWill not heat if temperature sensor is defective (shorted or open).
xGUTH LABORATORY GLASS CONTAINER: Graduated 500ml + 5%.
xNON-MAGNETIC METAL TOP HOUSING ASSEMBLY: Provides uniform headspace
heating.
xPOWER SWITCH: Safety On/Off - Double pole, double throw (DPDT).
xELECTRICALLY ISOLATED: Internal power transformer and optically isolated control
components prevent AC leakage.
xFUSE: External fuse provides protection in the event of an electrical malfunction.
xHIGH INTENSITY LED DISPLAY: Provides maximum visibility of temperature and heater
activity.
xRELIABLE AGITATOR MOTOR.
xAGITATOR PADDLE: Designed by Guth Laboratories, Inc. Offers maximum circulation
and uniformity of solution.
xHEATER ELEMENT: Electronically protected from overheating when removed from
solution or when temperature sensor is defective.
xRFI PROTECTED: The heating element and motor will turn off when the simulator is
subjected to a RF field of 10 volts/meter or greater.
xINTERNAL DIAGNOSTICS: Simulator computer performs internal diagnostics.
xMALFUNCTION INDICATION: Simulator provides an audible and visual indication if a
malfunction occurs.
xPOWER : 120 volts AC 60 Hz.
x
xRS-232 COMMUNICATIONS: Provides the ability to monitor the temperature and status of
the simulator.
xO
OP
PT
TI
IO
ON
NA
AL
L:
:S
SE
ER
RI
IA
AL
LI
IZ
ZE
ED
DN
NI
IS
ST
TR
RE
EF
FE
ER
RE
EN
NC
CE
EM
ME
ER
RC
CU
UR
RY
Y-
-I
IN
N-
-G
GL
LA
AS
SS
S
T
TH
HE
ER
RM
MO
OM
ME
ET
TE
ER
RF
FO
OR
RC
CA
AL
LI
IB
BR
RA
AT
TI
IO
ON
NC
CH
HE
EC
CK
KS
S.
.
2
13 2

RECORDS (SERIAL NUMBERS, CALIBRATION AND NOTES)
NIST TRACEABLE THERMOMETER – SERIAL NUMBER___________________
CERTIFIED BY________________________________DATE_____________
TEST TEMPERATURE_______qCNIST TRUE TEMPERATURE_______qC
MODEL 2100 – SERIAL NUMBER_________________________________
CALIBRATION CHECK DATE CHECKED BY
NOTE: Only a Guth Laboratories, Inc. certified technician shall perform Field
calibration.
INTRODUCTION
The Guth Model 2100 Alcohol Breath Simulator is a State-of-the-Art, electronically temperature
controlled, water-alcohol instrument for the purpose of providing a precise calibration standard.
Temperature of the water-alcohol solution placed in the simulator is maintained at 34oC + .05oC
or better.
The Guth Model 2100 Simulator is approved by the National Highway Traffic Safety
Administration (NHTSA), published on their Conforming Products List (CPL), and is listed with
Underwriters Laboratories, Inc. (UL), as meeting United States Safety Standards and Canadian
Safety Standards (CUL).
CERTIFIED* SIMULATOR SOLUTION STANDARD
PLEASE NOTE: It is imperative your Simulator Solution be of the highest quality in
order to acquire the scientific and legal standards of acceptance.
To establish a precise and accurate calibration standard when using a Guth simulator, GUTH
LABORATORIES, INC. recommends using Guth Certified Simulator Solution. Guth
Laboratories, Inc., a pioneer and leader in the science of alcohol breath testing, has provided
Certified Simulator Solution to state, municipal, and local law enforcement agencies for many
years.
************
Guth Premixed Certified Simulator Solution is the only solution available which is prepared by
aFDA /DEA Registered Laboratory.
************
Guth Certified Simulator Solutions are prepared in standard concentrations of .02%, .04%, .05%,
.08%, .10%, .15% and .20%. Other special concentrations are available. Please contact Guth
Laboratories, Inc. for availability and pricing:
Toll free: (800) 233-2338 Fax: (717) 564-2555
or visit our web site at: www.guthlabs.com
STORAGE: Store Simulator Solution in a cool location. Do not place solution in a freezer
–DO NOT REFRIGERATE SIMULATOR.
*Guth Certified Simulator Solutions are tested by recognized laboratories.
114

UNDERWRITERS LABORATORIES, INC.
UL SYMBOLS AND WARNINGS
!
Power: 120 VAC 60Hz., 77 watts
Mains supply fluctuation not to exceed ±10% of the nominal voltage.
Do not position instrument so that it is difficult to disconnect the power
cord.
Disconnect power cord and empty solution before moving instrument.
Disconnect power cord before changing solution.
Disconnect power cord before replacing fuse.
Fuse Replacement: Buss type GMW 1 amp @ 125 vac Fast Acting
Indoor Use Only
Altitude up to 2000m (6562 ft.)
Temperature 5°C to 33°C (41°F to 91°F)
Maximum Relative Humidity 80% for Temperatures up to 31°C
(~88°F), decreasing linearly to 50% Relative Humidity.
Transient Over voltages according to Installation Category II.
Pollution Degree 2 in accordance with IEC 664.
When Instrument is operated at an elevated temperature, the outside of the
glass container may become hot.
15
15
Other Guth Laboratories Laboratory Equipment manuals
Popular Laboratory Equipment manuals by other brands

BIOMET
BIOMET Clotalyst manual

Endress+Hauser
Endress+Hauser Liquistation CSF48 operating instructions

Metrohm
Metrohm 916 Ti-Touch Manual - Short Instructions

Velp Scientifica
Velp Scientifica ARE instruction manual

GE
GE Filter Kit HR 10 instructions

Johnson & Johnson
Johnson & Johnson Sterrad 100NX user guide