Hach Ultra MET ONE HHPC-2 User manual

701230
MET ONE HHPC-2
Handheld Airborne Particle Counter
USER MANUAL
May 2008, Edition 3

701230
MET ONE HHPC-2
Handheld Airborne Particle Counter
USER MANUAL
May 2008, Edition 3
© Hach Ultra Analytics, Inc., 2008. All rights reserved. Printed in the U.S.A.


3
Table of Contents
Section 1 Specifications.................................................................................................................... 5
Section 2 General Information......................................................................................................... 7
2.1 Safety information........................................................................................................................ 7
2.1.1 Use of hazard information................................................................................................... 7
2.1.2 Precautionary labels ........................................................................................................... 7
2.1.3 Electrostatic Discharge (ESD) considerations .................................................................... 8
2.1.4 Battery safety information ................................................................................................... 8
2.2 General product information ........................................................................................................ 9
Section 3 Installation........................................................................................................................ 11
3.1 Unpack the instrument............................................................................................................... 11
3.2 Installation guidelines for MET ONE HHPC-2............................................................................ 12
3.3 Mechanical installation............................................................................................................... 12
3.3.1 Install the isokinetic probe................................................................................................. 12
3.3.2 Install the intake hose barb ...............................................................................................12
3.3.3 Install the zero count filter ................................................................................................. 13
3.3.4 Connect the AC/DC power supply .................................................................................... 14
Section 4 Operation.......................................................................................................................... 15
4.1 Install the MET ONE HHPC–2 utility software ........................................................................... 15
4.2 Start up ...................................................................................................................................... 15
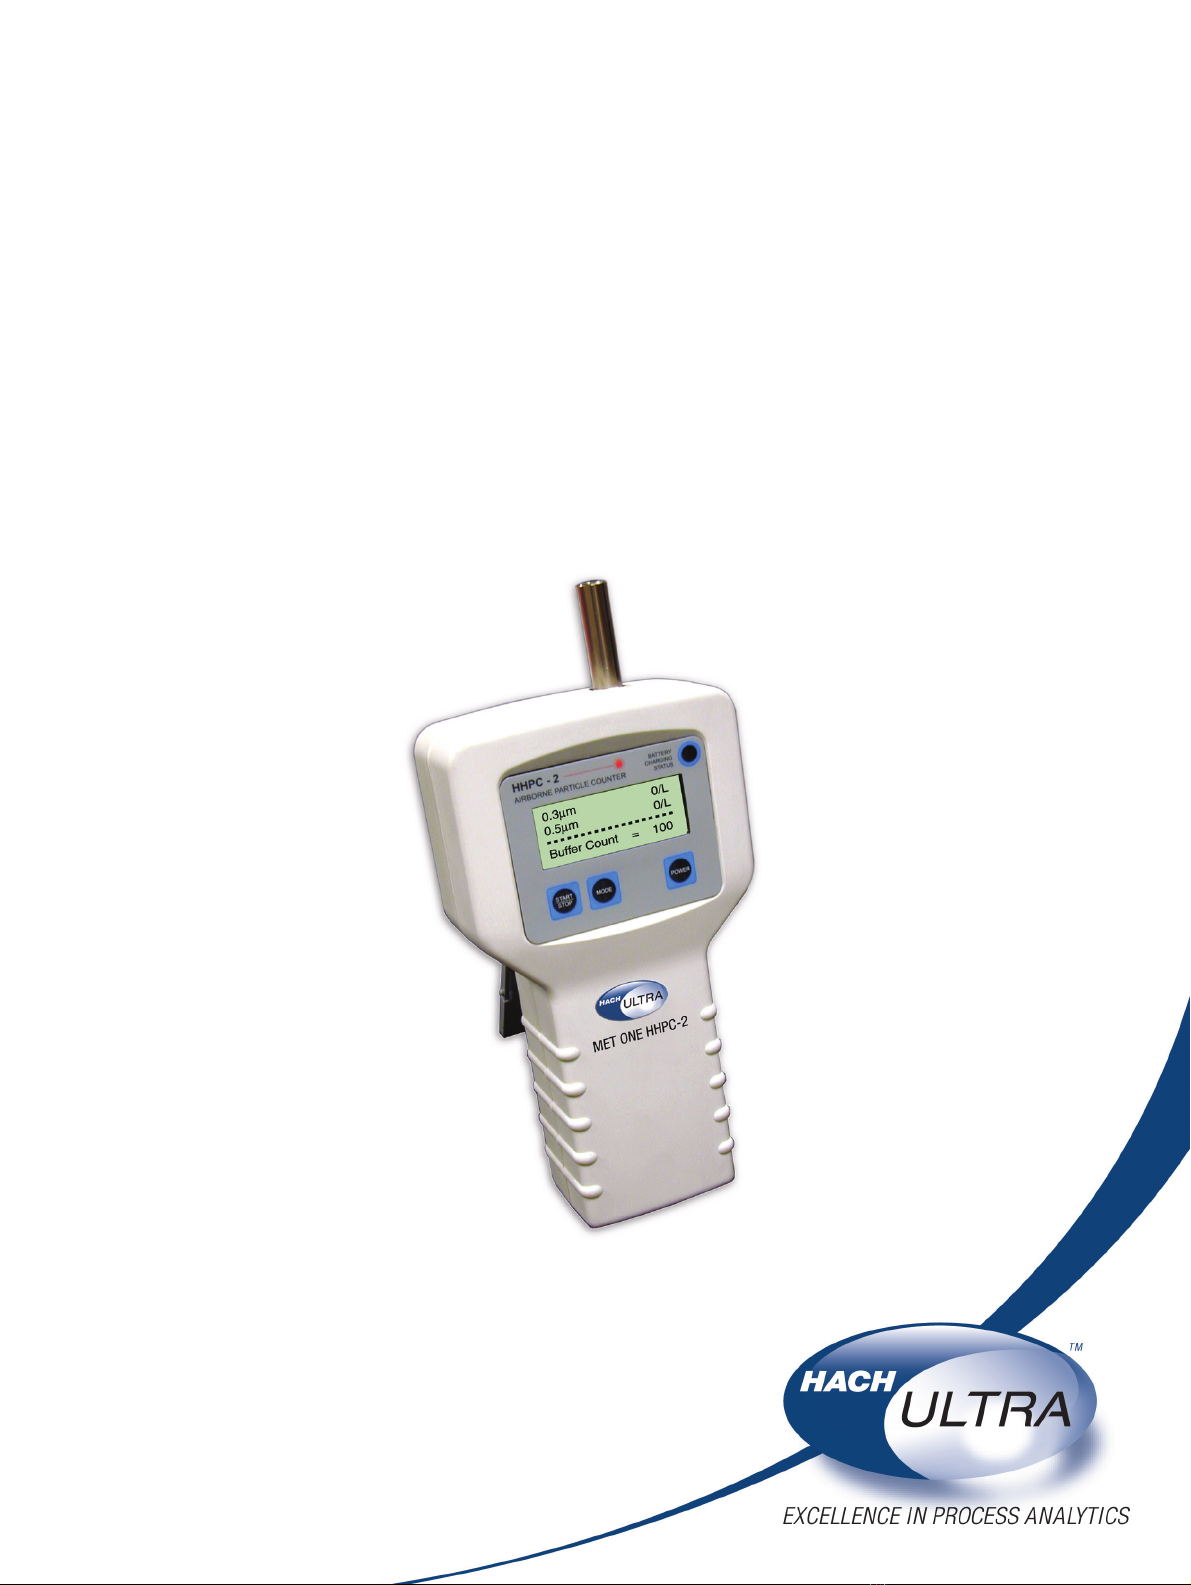
4.3 Display and keypad.................................................................................................................... 15
4.3.1 Keypad.............................................................................................................................. 16
4.3.2 Screens............................................................................................................................. 17
4.4 Configuration setup.................................................................................................................... 17
4.5 Select custom settings............................................................................................................... 17
4.5.1 Set the date and time........................................................................................................ 17
4.5.2 Select the count mode ......................................................................................................18
4.5.3 Set the sample units and volume...................................................................................... 19
4.5.3.1 Rate mode................................................................................................................19
4.5.3.2 Concentration or totalize mode ................................................................................ 19
4.5.4 Set the contrast................................................................................................................. 20
4.6 Counter operation ...................................................................................................................... 21
4.6.1 Verify the MET ONE HHPC–2 with a zero count filter ...................................................... 21
4.7 Collect samples.......................................................................................................................... 22
4.8 Transfer the sample data to the PC...........................................................................................22
4.9 Print samples ............................................................................................................................. 22
4.10 Storing samples ....................................................................................................................... 23
4.10.1 Determine the number of samples.................................................................................. 23
4.10.2 Display buffer records ..................................................................................................... 23
4.10.3 Clear the buffer ............................................................................................................... 24
Section 5 Maintenance .................................................................................................................... 25
5.1 Battery maintenance.................................................................................................................. 25
5.1.1 Charge a drained battery .................................................................................................. 25
5.2 Calibrate the MET ONE HHPC–2.............................................................................................. 25
Section 6 Troubleshooting ............................................................................................................. 27
6.1 Problems and recommendations ............................................................................................... 27
Section 7 Replacement Parts and Accessories......................................................................... 29
7.1 Accessories................................................................................................................................ 29
7.2 Optional accessories.................................................................................................................. 29
Section 8 Service Contact Information ........................................................................................ 31

4
Table of Contents
Section 9 Limited Warranty.............................................................................................................32
Section 10 Certification....................................................................................................................33
Appendix A Data Communications ...............................................................................................35
Index ......................................................................................................................................................37

5
Section 1 Specifications
Specifications are subject to change without notice.
General
Dimensions (W x L x H) 114.30 mm x 209.60 mm x 57.20 mm (4.5" x 8.25" x 2.25")
Weight 1.0 kg (2.2 lb)
Number of size channels 2
Standard 0.3, 0.5 µm
0.3, 1.0 µm
IAQ 0.5, 5.0 µm
Custom 0.3 to 20 µm available
Flow rate 0.1 cfm (2.83 L/min)
Light source Laser diode; index guided (26,000 MTBF at 25 °C)
Calibration PSL particles in air (NIST traceable)
Counting efficiency 50% at 0.3 µm; 100% for particles > 0.45 µm (per JIS B9921:1997)
Zero count 1 count/5 minute (per JIS B9921:1997)
Coincidence loss 5% at 2,000,000 particles per ft3
Relative humidity 20% to 90%, non-condensing
Temperature ± 3 °C, 10 °C to 40 °C (50 °F to 104 °F)
Data storage 100 sample records (rotating buffer)
Data recorded Counts, calibration error
Display LCD, 4 x 16 character display
Alarms Low battery, calibration error
Count modes Concentration, totalize, audio
Delay time 0 to 24 hours
Sample inlet Isokinetic probe
Interface RS232 through RJ45
Vacuum source Internal pump, flow controlled
Housing Injection molded plastic
Power AC Adapter, 12 VDC at 2.5 A, 90 to 250 VAC, 50 to 60 Hz
Rechargeable battery NiMH, 4.8 V at 4.5 Ah; replaceable
Recharge time 2 hours
Continuous Operating Time 8 hours
Standards CE, JIS B9921: 1997
Environment
Operating temperature 10 °C to 40 °C (50 °F to 104 °F)
Operating relative humidity 20% to 90%, non-condensing
Storage temperature –10 °C to 50 °C (14 °F to 122 °F)
Storage relative humidity Up to 90%, non-condensing
Compliance
Standards
JIS B 9921–1997—Light Scattering Automatic Particle Counter
Federal Standard 209E—Standard Practice for Defining Size Calibration,
Resolution and Counting Accuracy of an Air-Borne Particle Counter Using
Near-Monodispersed Spherical Particulate Material.

6
Specifications

7
Section 2 General Information
2.1 Safety information
Read this entire manual before unpacking, setting up or operating this equipment. Pay
attention to all danger and caution statements. Failure to do so could result in serious
injury to the operator or damage to the equipment.
To make sure that the protection provided by this equipment is not impaired, do not use
or install this equipment in any manner other than that specified in this manual.
2.1.1 Use of hazard information
DANGER
Indicates a potentially or imminently hazardous situation which, if not avoided, will
result in death or serious injury.
WARNING
Indicates a potentially or imminently hazardous situation which, if not avoided,
could result in death or serious injury.
CAUTION
Indicates a potentially hazardous situation that can result in minor or
moderate injury.
Important Note: Indicates a situation which, if not avoided, can cause damage to the
instrument. Information that requires special emphasis.
Note: Information that supplements points in the main text.
2.1.2 Precautionary labels
Read all labels and tags attached to the instrument. Personal injury or damage to the
instrument could occur if not observed. A symbol, if noted on the instrument, will be
included with a danger or caution statement in the manual.
This symbol, if noted on the instrument, references the instruction manual for operation and/or safety information.
Electrical equipment marked with this symbol cannot be disposed of in European public disposal systems after
12 August of 2005. In conformity with European local and national regulations (EU Directive 2002/96/EC),
European electrical equipment users must now return old or end-of life equipment to the Producer for disposal at no
charge to the user.
Note: To return for recycling, contact the equipment producer or supplier for instructions on how to return end-of-life
equipment, producer-supplied electrical accessories and all auxiliary items for proper disposal.
This symbol, when noted on a product enclosure or barrier, indicates that a risk of electrical shock and/or
electrocution exists.
This symbol, if noted on the product, indicates the need for protective eye wear.
This symbol, when noted on the product, identifies the location of a fuse or current limiting device.
This symbol indicates a laser device is used in the equipment.
This symbol, when noted on the product, indicated the presence of devices sensitive to Electro-static Discharge
(ESD) and indicated that care must be taken to prevent damage with the equipment.

8
General Information
2.1.3 Electrostatic Discharge (ESD) considerations
Important Note: To minimize hazards and ESD risks, maintenance procedures not
requiring power to the analyzer should be performed with power removed.
Delicate internal electronic components can be damaged by static electricity, resulting in
degraded instrument performance or eventual failure.
The manufacturer recommends taking the following steps to prevent ESD damage to
the instrument:
•Before touching any instrument electronic components (such as printed circuit cards
and the components on them) discharge static electricity. This can be accomplished
by touching an earth-grounded metal surface such as the chassis of an instrument,
or a metal conduit or pipe.
•To reduce static build-up, avoid excessive movement. Transport static-sensitive
components in anti-static containers or packaging.
•To discharge static electricity from the body and keep it discharged, wear a wrist
strap connected by a wire to earth ground.
Handle all static-sensitive components in a static-safe area. If possible, use anti-static
floor pads and work bench pads.
2.1.4 Battery safety information
WARNING
An explosion can occur if the internal battery is replaced incorrectly.
Figure 1 shows the label that is displayed on the battery for the safety of the user.
Figure 1 Battery safety label

9
General Information
2.2 General product information
The MET ONE Handheld Airborne Particle Counter–2 (HHPC–2) (refer to Figure 2) is a
portable instrument that measures, counts, stores and reports airborne particulates. The
standard MET ONE HHPC–2 holds 100 samples in the memory. The data records
include date, time, counts, sample labels, volume, alarm flags, temperature and relative
humidity. The user can download the data to a personal computer (PC) using the
included interface cable and software. The internal battery powers up the MET ONE
HHPC–2 when mobile or when connected to the AC power adapter.
Note: The AC power adapter provided with the unit is used for extended or stationary sampling.
The MET ONE HHPC–2 is used:
•To monitor the air quality in clean-rooms
•To monitor the air quality in manufacturing processes
•To monitor the air quality in pharmaceutical production
Figure 2 MET ONE HHPC–2
1Front view of the MET ONE HHPC–2 2Back view of the MET ONE HHPC–2
1Bottom view of the MET ONE HHPC–2

10

11
Section 3 Installation
DANGER
Only qualified personnel should conduct the tasks described in this section of
the manual.
3.1 Unpack the instrument
Remove the components from the shipping container and inspect for damage. Verify that
all the items listed in Figure 3 are included. If any items are missing or damaged, contact
the manufacturer or sales representative.
Retain the original packaging materials. Use the original packaging material to store or
ship the instrument to protect against damage during storage or transportation.
Figure 3 List of packaged items
1MET ONE HHPC–2 66¼”–OD high purity tubing (VP792002)
2Zero count filter 7MET ONE HHPC–2 Utility software (CS200025)
3Intake nozzle, 1/8” hose barb (MP000026–01) 8RS232 modular cable (VP894408)
4Black cap/Intake nozzle cover 9RJ45 to DB9 adaptor (SA000070–01)
5US power cord (CS200025) 10 AC/DC power supply (VP624005)

12
Installation
3.2 Installation guidelines for MET ONE HHPC-2
The MET ONE HHPC–2 is ready to use when shipped and has default configuration
settings. Refer to the following general guidelines during installation.
1. Lift the MET ONE HHPC–2 from the shipping container or the carrying case and
place it on a flat surface.
2. Remove the layer of protective plastic from the LCD screen.
3. Remove the isokinetic probe cover (black plastic cap) before the startup of the MET
ONE HHPC–2.
Note: The pump and other internal electrical components will be damaged if the cap is left on.
Note: The battery is charged before shipping, but may need to be charged before operation (refer to
section 6.1 on page 27 for more information).
3.3 Mechanical installation
The MET ONE HHPC–2 is shipped with two different intake devices:
•Isokinetic probe
•Intake hose barb
Important Note: Do not use a wrench to connect or disconnect the intake nozzle or
isokinetic probe. Only finger-tighten the connection.
3.3.1 Install the isokinetic probe
The isokinetic probe (refer to Figure 4 on page 13) is used to sample ambient air
samples. The isokinetic probe is pre-installed and ready for use as soon as the MET ONE
HHPC–2 is unpacked. To install the isokinetic probe:
1. Attach the isokinetic probe to the intake nozzle on the MET ONE HHPC–2 by turning
the isokinetic probe to the right.
2. Remove the black plastic cap attached to the isokinetic probe.
Note: Make sure that the cap is attached to the isokinetic probe when the probe is not in use.
The cap protects the MET ONE HHPC–2 from debris and contamination.
To sample areas that are difficult to reach, connect longer tubing to the isokinetic probe
with a hose barb end.
Note: Use a maximum of four feet of high purity or approved tubing only. Incorrect size or type of
tubing will affect the sample accuracy.
3.3.2 Install the intake hose barb
The intake hose barb (refer to Figure 4 on page 13) is connected to the MET ONE
HHPC–2 for zero counting and purging or to sample areas that are difficult to reach.
To install the intake hose barb:
1. Unscrew the isokinetic probe from the MET ONE HHPC–2.
2. Attach the hose barb.
3. Remove the protective cap from the intake hose barb.

13
Installation
3.3.3 Install the zero count filter
In a clean-room application, the zero count filter (refer to Figure 3 on page 11, item 2)
verifies if the MET ONE HHPC–2 is not counting electrical noise signals from internal
components and is not subject to external interference. In indoor air quality and other
applications, the zero count filter cleans out the sensor immediately after a high
concentration sampling.
To connect the zero count filter:
1. Remove the isokinetic probe from the MET ONE HHPC–2.
2. Attach the intake hose barb (MP000026–01).
3. Secure the high purity tubing (VP792002) to the hose barb.
4. Secure the opposite end of the tubing to the zero count filter (VP212808).
Note: Make sure that the arrow of airflow direction or the indicator on the zero count filter points
towards the tubing.
Figure 4 Isokinetic probe with tubing and zero count filter
1Hose barb fitting 3Tubing
2Isokinetic probe 4MET ONE HHPC–2

14
Installation
3.3.4 Connect the AC/DC power supply
Important Note: Do not use a power supply unit that does not supply the required voltage
and charging current (polarity) to operate the MET ONE HHPC–2.
To connect the external power supply:
1. Turn off power to the MET ONE HHPC–2 unit.
2. Plug one end of the power cord into the external power supply and the other end into
an electrical wall receptacle.
3. Plug the external power supply jack into the MET ONE HHPC–2 power port (refer to
Figure 5, item 1).
Figure 5 Location of power port
1I/O port 2Power port

15
Section 4 Operation
4.1 Install the MET ONE HHPC–2 utility software
To install the MET ONE HHPC–2 utility software:
1. Connect the MET ONE HHPC–2 to the communications port on the PC using the
RS232 modular cable (VP894408).
2. Connect the DB9 to the RJ45 converter (SA000070–01).
3. Insert the MET ONE HHPC–2 utility software (CSVDownloadUtility) diskette into the
drive.
4. Copy CSVDownloadUtility.exe and CSVDownloadUtility.ini from the diskette to a
working directory on the PC. If the communications port to be used is other than
Com1, open CSVDownloadUtility.ini and change Port=Com1 to Port=ComX (where X
represents the number of the port to use.)
5. To open the utility software, double-click the CSVDownloadUtility.exe file. The
CSVDownloadUtility window is displayed (refer to Figure 6 on page 15).
6. Follow the instructions in the Readme.txt file on the diskette to install the software.
4.2 Start up
Press and hold the POWER button on the right of the display of the MET ONE HHPC–2 to
turn on the unit. When the MET ONE HHPC–2 is powered on, the MET ONE Opening
screen is displayed briefly followed by the Main screen.
4.3 Display and keypad
The MET ONE HHPC–2 features a Liquid Crystal Display (LCD) with a keypad at the
bottom. Power on the unit and the MET ONE Opening screen displays briefly, followed by
the Main screen.
Note: If the MET ONE HHPC–2 does not power up, double-check the AC connection or the battery
power. To charge the battery, refer to section 5.1 on page 25.
Figure 6 MET ONE HHPC-2 Utility (CSVDownloadUtility) window

16
Operation
4.3.1 Keypad
Figure 7 shows the display of the Main screen of MET ONE HHPC–2. Table 1 on page
16 provides information about the keypad available at the bottom of the screen and the
various function keys.
Figure 7 MET ONE HHPC–2 Main screen display
1Display screen 3MODEkey
2POWERkey 4 START/STOP key
Table 1 Indicators and key features or functions
Key Name Description
START/STOP Starts and stops a sample
MODE Selects modes and saves data when the unit is counting
POWER Toggles the power on and off

17
Operation
4.3.2 Screens
Press the corresponding button from the keypad at the bottom of the LCD to invoke the
following screens:
•Main screen—The main screen displays:
•Channel sizes
•Particle counts (only displayed when counting or in Buffer mode)
•Status of the counting process (Run or Wait)
•Battery charge indicator (amount of charge remaining in the battery, refer to Table
4 on page 25)
•Select mode screen
•Select volume screen
•Buffer count and Buffer options screen
•Display buffer screen
•Contrast screen
•Date and Clock setup screen
4.4 Configuration setup
Once the MET ONE HHPC–2 is unpacked and connected to the appropriate intake
device, use the default settings to conduct a 1-minute count cycle. Download the data to
a PC and print the results.
To perform a 1-minute count cycle:
1. Remove the isokinetic probe cover (black plastic cap).
2. Press and hold the POWER key until the MET ONE HHPC–2 sounds two beeps and
turns on.
3. Press START/STOP on the Main screen to start counting. The count cycle begins and
the bottom line of display changes from “Wait” to “Run”. After one minute, the count
cycle ends and the display clears.
Note: The results are saved automatically in the print buffer.
Refer to section 4.8 on page 22 to transfer the data to a PC and print the results.
4.5 Select custom settings
To choose a setting, select an option that is displayed at the bottom of the Main screen
when the MODE key is pressed, then use the START/STOP and MODE keys to scroll
through the options or save selections.
4.5.1 Set the date and time
To set the date and time:
1. Press the MODE key six times on the Main screen. The bottom line displays the time
and date.
2. Press and hold the MODE key for one second until two beeps are heard. The Date
and Time screen is displayed with the date selected.
3. Use the MODE key to select the digit. The cursor moves to the next digit.

18
Operation
4. When the date, month, year or time is set, press the START/STOP key to change the
numbers for that field.
5. To select another unit of time, press the MODE key to select the next field. Press the
START/STOP key to change the numbers.
6. When the date and time are set, press and hold the MODE key for one second to
save the new setting and return to the Main screen.
4.5.2 Select the count mode
To select the count mode:
1. Press the MODE key once on the Main screen. Refer to Table 2 on page 18 for the
different modes available. The bottom line displays the current mode (refer to
Figure 8 on page 18).
2. Press the START/STOP or the MODE key.
3. When the required mode is displayed on the screen, press and hold the MODE key
for one second to save the new setting and return to the Main screen.
Figure 8 Select mode screen
Table 2 Count modes
Mode Description Sample unit
Concentration
The Concentration mode is useful for taking a quick snapshot of
airborne particulate samples, especially in areas where
particulate levels are unknown and may exceed the operating
levels of the counter. The MET ONE HHPC–2 estimates count
per cubic foot or liter depending on the volume selected. The unit
updates the results by calculating completed sample counts and
volume compared to the balance of volume remaining.
Volume size
Rate In the Rate mode, counting is continuous. The sliding average of
ten samples is displayed. Volume unit
Totali ze
In the Totalize mode, number of counts are displayed as they
accumulate, until the end of the sample. When the sample is
completed, the record is stored and the value is displayed on the
screen until the next sample is started.
Volume size

19
Operation
4.5.3 Set the sample units and volume
Sample volume may be measured in either liters or cubic feet. The volume size can
range from 0.01 cubic foot or 1 liter up to 1 cubic foot or 28.3 liters.
4.5.3.1 Rate mode
In the Rate mode, the unit of the sample volume is selected.
To select the unit of sample volume:
1. Make sure the unit is set to Rate mode as described in section 4.5.2 on page 18.
2. Press the MODE key twice on the Main screen. The bottom line displays the current
unit settings as shown in Figure 9.
3. Press and hold the MODE key for one second, until two beeps are heard. The Select
Units screen displays the selected units.
4. To select the units, press either the START/STOP key for cubic feet or the MODE key
for liters.
5. Press and hold the MODE key for one second to save the new setting and return to
the Main screen. The units selected appear on the right column of the Main screen.
4.5.3.2 Concentration or totalize mode
In the Totalize or Concentration modes, the volume size is selected.
To select the volume size in concentration or totalize mode:
1. Make sure the unit is set to Concentration or Totalize mode as described in
section 4.5.2 on page 18.
2. Press the MODE key twice on the Main screen. The bottom line displays the current
volume setting.
3. Press and hold the MODE key for one second, until two beeps are heard. The Select
Volume screen displays the selected volume as shown in Figure 10 on page 20.
4. To review the sample volume settings available, press either the START/STOP key or
the MODE key. Refer to Table 3 for sample volume choices.
Figure 9 Select Units screen
Table of contents
Other Hach Ultra Cash Counter manuals