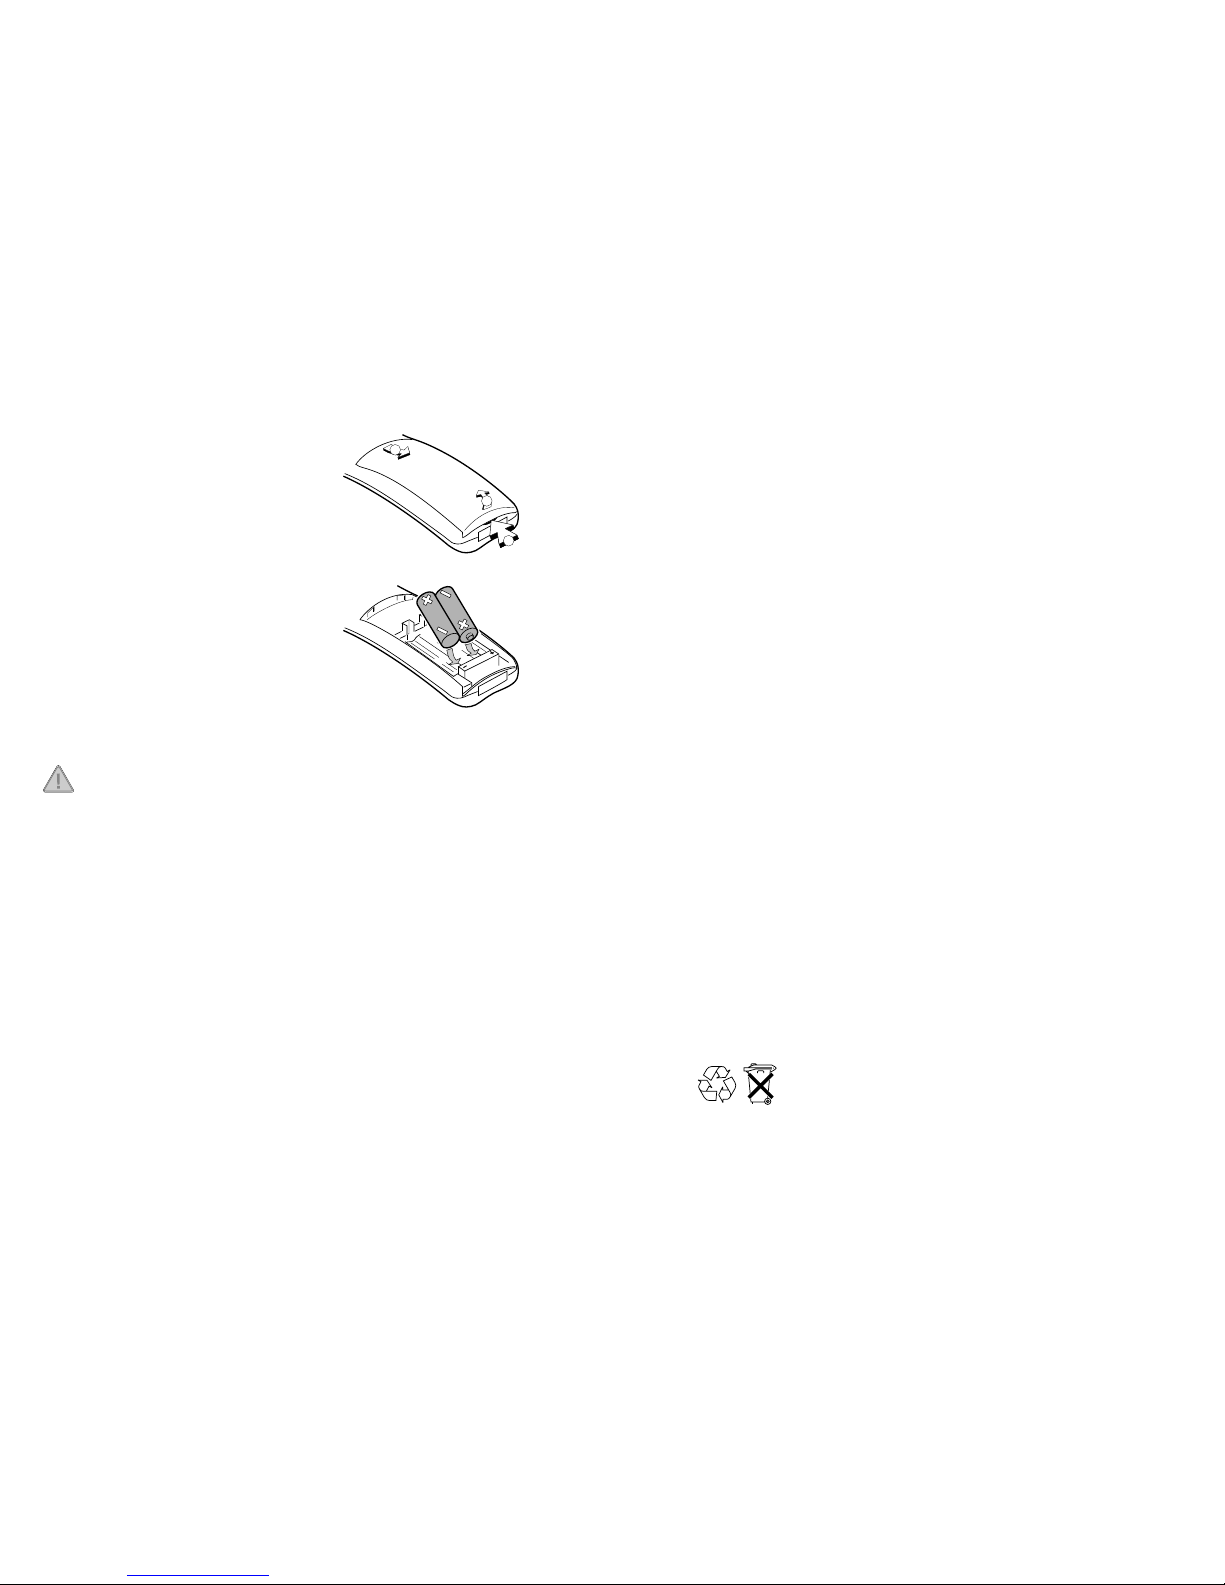
• LED flashes rapidly: base ready for book-ins
The booked handsets an be alled with the Paging key on the base.
The battery indi ator in the handset flashes a ording to the urrent har-
ging state during the harging pro edure on the base / harging station
(see 3.4.2).
3.4.4 The Various Memories
Your telephone provides you with various memories to make telephoning
more omfortable.
Redialing
The redialing memory ontains the last ten dialed phone numbers (also
those dialed from the phonebook). If all the memory slots are o upied, the
oldest entry is leared by a new entry. You an a ess the redialing memory
in the rest state by pressing one of the two arrow keys and in the onne -
tion state by pressing the Shift key followed by one of the arrow keys. You
then see the phone number dialed last. You an s roll in the redialing
memory with the arrow key.
The redialing memory onsists of 10 slots of 30 hara ters ea h.
Keyword data se urity: As a new entry the urrent display ontents are not
transferred to the redialing memory until the all is dis onne ted. In pra ti e
this means that, when, for example, you have entered your a ount number
and the ne essary PIN when using telephone banking, you an delete
these numbers or the entire display with cbefore dis onne ting (see
3.5); in this way you prevent them being transferred to the redialing memo-
ry.
Phonebook
You an save your telephone numbers manually or an transfer entries from
the redialing memory or the all list (see 5.15).
The phonebook is alled with the bkey. Then the first entry is display-
ed (01:). You an a ess another entry either by pressing the arrow keys
several times or by entering the memory slot with two digits (01 … 20).
The phonebook offers spa e for 20 entries of a maximum 30 hara ters.
1312
INT (s r) Dial an internal number (when operating
several handsets on one base)
ESC (s c) Leave the urrent programming level
CONF. (s 1) Set up a onferen e all (when operating
several handsets on one base)
CANCEL (s 2) Return to standby
LOCK (s 3) Swit h key lo k on / off
DIRECT (s 5) A tivate/dea tivate dire t all mode
with a programmed phone number
NOTICE (s 7) Call the notebook fun tion
PAUSE (s 8) Insert a dial pause (usually when operating on
tele ommuni ations systems / duration: 2 se onds)
BABY (s 9) A tivate / dea tivate the babyphone mode
MELODY (s *) Adjust the tone all melody of the handset
PROG. (s 0) Start programming
MUTE (s #) Swit h mi rophone off / on (mute)
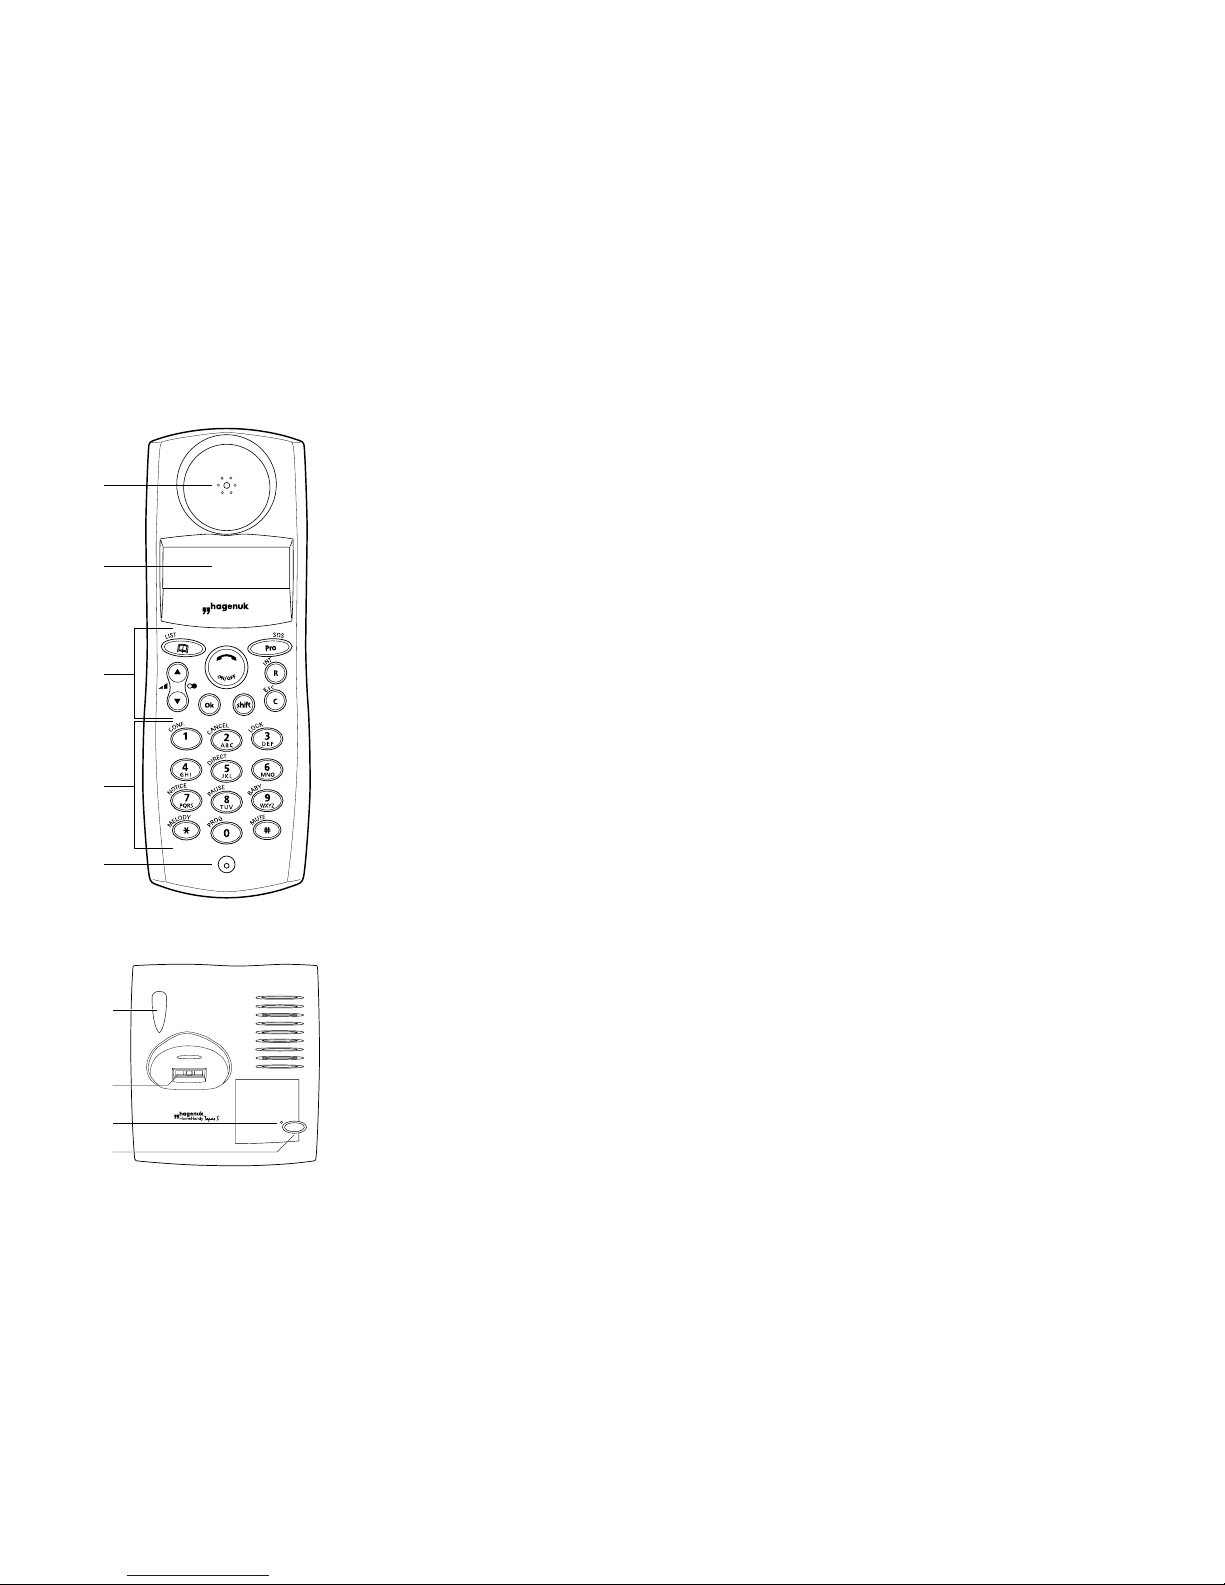
3.4.2 Display
top line: display states with 8 pi tograms
bottom line: display urrent base (on standby),
display phone numbers or programming
3.4.3 Base
A LED signals the following operating states on the base:
• LED lights steadily: standby
• LED flashes slowly: in oming all, spee h onne tion
ƒMi rophone off
©Dual tone multifrequen y
(DTMF) dialing set
ªCall state, flashes during
onne tion setup
⁄º∆ Battery fully harged
⁄º∆Battery ready to operate
⁄Battery almost empty
⁄(flashes rapidly) battery
empty, additional warning
signal
å2nd fun tion level a tivated;
flashes when programming
ontinues
∫Entries in the all list, flashes
for new entries
çPhonebook, flashes when pro-
gramming
∂Dire t all or babyphone a ti-
ve, flashes when programming