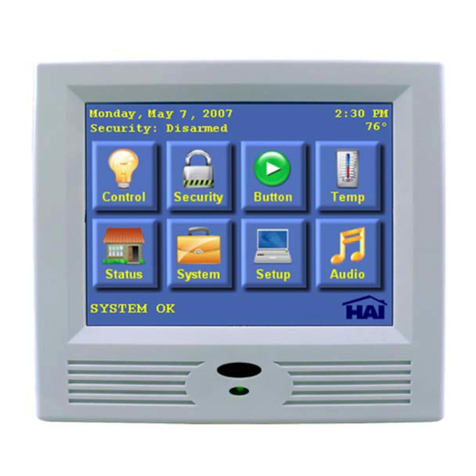
HAI 38A00-2 UPB User manual

3
7
5
1
8
6
4
2
HAI UPB™ 8-Button House Controller
Installation and Operating Instructions
For the following Model:
38A00-2 HAI UPB™ 8-Button House Controller
READ THESE INSTRUCTIONS BEFORE INSTALLING DEVICE
This HAI UPB™ 8-Button House Controller is intended for installation in accordance with the National Electrical Code and local
regulations. It is recommended that a qualified electrician perform this installation. Retain these instructions for reference.
This product is for indoor use only. Connect only copper or copper clad wire to this device.
Important Notes Prior To Installation
Be sure that all power to the load has been disconnected by turning off the circuit breaker. Installing an HAI UPB™ 8-Button House
Controller with power on may expose you to dangerous voltage and may damage the device.
HAI UPB™ 8-Button House Controller Overview
The HAI UPB™ 8-Button House Controller (Figure 1) is used to turn on or off lighting in up to 8 rooms in a house where HAI
UPB™ Wall Switches and HAI UPB™ 6-Button Room Controllers have been installed. It can also be used for various other lighting
control applications, such as controlling 8 individual loads or lighting scenes (on/off). It uses the UPB™ two-way powerline
communication technology to communicate with an HAI controller, UPB™ Wall Switches, and other UPB™ devices on the network.
The HAI UPB™ 8-Button House Controller has eight pushbuttons labeled 1, 2, 3, 4, 5, 6, 7, and 8 (although these buttons may be
custom engraved). Each pushbutton is slightly backlit so that the buttons can be seen in a dark room. Depending on configuration of
the HAI UPB™ 8-Button House Controller, one or more of the eight pushbuttons will be distinctly illuminated, indicating that one or
more lights are on in the respective room(s). If a pushbutton is not illuminated, that means all lights in the respective room are
currently off.
Changing Switch Color
The color of the HAI UPB™ 8-Button House
Controller may be changed to complement the
interior décor. The HAI UPB™ 8-Button
House Controller is supplied with a white
bezel. Additional colors are available; contact
your HAI distributor for more information.
When changing the bezel, make sure that the
HAI UPB™ 8-Button House Controller is
disconnected from all power, and proceed as
follows:
1. The bezel attaches to the HAI UPB™
8-Button House Controller with two small
Philips head screws: one on the upper-
right corner and one on the lower-left
corner (Figure 2).
2. Using a small-bladed Philips screwdriver, unscrew each of the two screws. Remove the
bezel from the back housing.
3. Install the new bezel by aligning the mounting holes on the bezel with the installation pins
on the back housing. Secure bezel to back housing with the two Phillips screws that were
removed in Step 1.
Figure 2 – Changing Switch Color
Figure 1 - HAI UPB™
8-Button House Controller
38I00-2, Rev B

INSTALLATION INSTRUCTIONS
1. Be sure that all power at the wall box has been disconnected by turning off the circuit breaker.
2. If applicable, remove the faceplate from the existing device, remove the existing device from the wall box, and disconnect the
wires from the existing device. Identify the “Line” (black) and "Neutral" (white) wires.
3. Remove ¾” of insulation from each of the wires on the HAI UPB™ 8-Button House Controller. Install the HAI UPB™ 8-Button
House Controller by connecting wires per wiring configuration shown in Figure 3.
4. After all connections have been made, be certain that all wire connectors are firmly attached and there is no exposed copper.
5. Gently place the wires and HAI UPB™ 8-Button House Controller into the wall box with the “1” pushbutton at the top of device.
Using the supplied screws, attach the HAI UPB™ 8-Button House Controller to the wall box.
6. Before installing the faceplate, restore power to the circuit for testing.
7. After testing the HAI UPB™ 8-Button House Controller for proper local operation, install a Decora-style faceplate over the HAI
UPB™ 8-Button House Controller.
8
7
5
6
3
4
2
1
MAIN
CIRCUIT
BREAKER
PANEL
120VAC
60Hz
BLACK WHITE
NEUTRAL
LINE
38A00-2
8-BUTTON
HOUSE
CONTROLLER
Figure 3 – Wiring Diagram
CONFIGURING THE HAI UPB™ 8-BUTTON HOUSE CONTROLLER
The HAI UPB™ 8-Button House Controller is designed to control up to 8 rooms of lighting using HAI Lighting Control (HLC) but
also has several configuration options that can be enabled or modified using the UPB™ UPStart configuration software.
Option Factory Default HAI Lighting Control (HLC)
Pushbuttons 1-8 Supper Toggle / Link 013 – Link 020,
respectively
Each pushbutton on the HAI UPB™ 8-Button House Controller will
toggle the lighting loads in the respective room on and off.
Pushbuttons 1-8
LED Indicators
Each LED Indicator is assigned to its
pushbutton’s Link ID
Each LED Indicator is independent
(multiple LED indicators may be on at
one time).
When the room is turned on using the pushbutton, the LED indicator
under the respective pushbutton is illuminated. When the room is
turned off using the pushbutton, the LED indicator under the
respective pushbutton is turned off. Anytime a lighting load in a
room is turned on, the LED indicator under the respective pushbutton
(room) is illuminated. When all loads in a room are turned off, the
LED indicator under the respective pushbutton (room) is turned off.
UPB Transmission
Attempts
2
No change
UPB ID NID = 255
UID = 096
HAI controller configures Network ID (NID), Unit ID (UID),
Network Password, Network Name, Room Name, Device Name, etc.
LED Brightness High No change.
LED Backlighting Enabled No change.

HAI UPB™ 8-BUTTON HOUSE CONTROLLER OPERATION
The HAI UPB™ 8-Button House Controller has many configurable items that can be set using the UPB™ UPStart configuration
software. The following describes the operation of the HAI UPB™ 8-Button House Controller in its factory default configuration.
Using Pushbuttons to Control Individual Lighting Loads
In its factory default configuration, all 8 pushbuttons are configured to toggle between two different actions each time a pushbutton is
pressed. Likewise the LED indicator behind the pushbutton will toggle when the pushbutton is pressed.
Linking Pushbuttons to HAI UPB™ Wall Switch Dimmer(s)
To configure these actions, the pushbuttons on the HAI UPB™ 8-Button House Controller must be linked to HAI UPB™ Wall Switch
Dimmer(s) as follows:
Step Operation
1 Use the local Decora-style rocker switch on the HAI UPB™ Wall Switch Dimmer(s) to set the desired level(s).
2 Tap the Decora-style rocker switch on the HAI UPB™ Wall Switch Dimmer(s) five (5) times quickly.
3 The HAI UPB™ Wall Switch Dimmer will flash its lighting load one time and blink its LED blue, to indicate that it is
ready to be linked.
4 Press the pushbutton on the HAI UPB™ 8-Button House Controller five (5) times quickly.
5 Each HAI UPB™ Wall Switch will flash its lighting load one time to indicate that it is successfully linked to the
pushbutton and that the new light level has been set.
Unlinking Pushbuttons from HAI UPB™ Wall Switch Dimmer(s)
If you accidentally link the wrong pushbutton to the wrong HAI UPB™ Wall Switch Dimmer, you can unlink them as follows:
Step Operation
1 Tap the Decora-style rocker switch on the desired HAI UPB™ Wall Switch Dimmer(s) five (5) times quickly.
2 The HAI UPB™ Wall Switch Dimmer will flash its lighting load one time and blink its LED blue, to indicate that it is
ready to be unlinked.
3 Press the pushbutton on the HAI UPB™ 8-Button House Controller ten (10) times quickly.
4 Each HAI UPB™ Wall Switch will flash its lighting load one time to indicate that it is successfully unlinked.
Toggling Lighting Loads
After the pushbuttons have been linked, when a pushbutton is pressed while its LED indicator is off, the lighting loads are set to the
preset lighting levels and the LED indicator is turned on. When the pushbutton is pressed again (while its LED indicator is on), the
lighting loads are turn off and the LED indicator is turned off.
Event When LED Indicator is Off When LED Indicator is On
Single-Tap The HAI UPB™ Wall Switch Dimmer(s) that are linked to
this pushbutton will go to their preset lighting levels.
The LED indicator under the pushbutton is turned on.
The HAI UPB™ Wall Switch Dimmer(s) that are
linked to this pushbutton will fade to 0% (off).
The LED indicator under the pushbutton is turned off.
Double-Tap The HAI UPB™ Wall Switch Dimmer(s) that are linked to
this pushbutton will snap to 100% (on).
The LED indicator under the pushbutton is turned on.
The HAI UPB™ Wall Switch Dimmer(s) that are
linked to this pushbutton will snap to 0% (off).
The LED indicator under the pushbutton is turned off.
Brightening and Dimming Lighting Loads
When a pushbutton is pressed and held while its LED indicator is off, the lights are brightened, until the pushbutton is released. When
the pushbutton is pressed, the lights are dimmed, until the pushbutton is released.
Event When LED Indicator is Off When LED Indicator is On
Hold The HAI UPB™ Wall Switch Dimmer(s) that are linked to
this pushbutton will brighten.
The LED indicator under the pushbutton is turned on.
The HAI UPB™ Wall Switch Dimmer(s) that are
linked to this pushbutton will dim.
The LED indicator under the pushbutton is turned off.
Release The HAI UPB™ Wall Switch Dimmer(s) that are linked to
this pushbutton will stop brightening.
The HAI UPB™ Wall Switch Dimmer(s) that are
linked to this pushbutton will stop dimming.

SETUP MODE
To configure the HAI UPB™ 8-Button House Controller using an HAI controller or a PC running the UPB™ UPStart configuration
software, it must be put into Setup Mode as follows:
Step Operation
1 Press and hold the “1” and “8” pushbuttons simultaneously for at least 3 seconds.
2 All of the LED indicators will blink to indicate that the HAI UPB™ 8-Button House Controller is in Setup Mode.
Reset to Factory Default Settings
To reset the HAI UPB™ 8-Button House Controller to factory default settings:
Step Operation
1 Press and hold the “1” and “8” pushbuttons simultaneously for at least 3 seconds.
2 All of the LED indicators will blink to indicate that the HAI UPB™ 8-Button House Controller is in Setup Mode.
3 Press and hold the “2” and “7” pushbuttons simultaneously for at least 3 seconds.
4 The LED indicators will stop blinking and the “1” and “8” pushbuttons will illuminate to indicate that it has been reset.
SPECIFICATIONS
Model Number 38A00-2
Number of Backlit Pushbuttons 8
Connections 18 GA
LED Indicators Yes
Dimensions 4.1 x 1.7 x 1.5
Weight 0.25 lb.
Mounting Standard J Box
Input Power 120 ± 12 VAC
Input Frequency 60 ± 3 Hz
Operating Temperature -40 °F to 104 °F
Note: It is normal for this switch to make a slight buzzing sound during operation.
LIMITED WARRANTY
HAI warrants this product against defects in material and workmanship, under normal use and service, for a period of two (2) years from the date of
purchase. During the warranty period, HAI will repair or replace, at its sole option, if this product fails due to defect. This warranty does not cover the
cost of removal or reinstallation of any product. This warranty does not cover failure caused by normal wear, damage to the product while in
your possession (other than damage caused by defect or malfunction), or by its improper installation, including failure to follow the written
installation and operation instructions, alterations, misuse, or abuse. The remedies provided for in this warranty are the sole and exclusive
remedies thereof. In no event shall HAI be liable for incidental expenses or consequential loss or damages. For the complete HAI Warranty for USA
policy, see the HAI web site at www.homeauto.com.
Any implied warranties, including warranties of merchantability and fitness for particular use or purpose are limited to a period of two (2)
years from purchase date. This warranty gives you specific legal rights, and you may have other legal rights, which vary from state to state. Some
limitations may not apply to you.
For warranty and repair service within the continental United States, send defective unit carefully packaged, postage prepaid, along with description of
trouble, name, return address, and phone number to: HAI, Repair Department, 4330 Michoud Blvd, New Orleans, LA, 70129. HAI will pay return
shipping charges via normal ground service.
Outside of the continental United States: Contact an Authorized Distributor for repair/replacement instructions.
Table of contents
Other HAI Controllers manuals
Popular Controllers manuals by other brands

Mitsubishi Electric
Mitsubishi Electric MELSEC Q Series user manual

Omega Engineering
Omega Engineering DRF-POT user guide

Fisher
Fisher 4194B Series instruction manual

Fly Wing
Fly Wing H1 user manual

NAVITAS
NAVITAS 440A Installation & service manual

Eaton
Eaton Ampgard 720A Instructions for installation, operation and maintenance

Raven
Raven AGCO RoGator Hawkeye C Series installation manual

Auber Instruments
Auber Instruments DSPR400 instruction manual

Unidrive
Unidrive ZoneLogix 301216 Installation and troubleshooting guide

DSEGenset
DSEGenset DSE8660 Operator's manual

Alpine
Alpine CRA-1655RF owner's manual

SEW-Eurodrive
SEW-Eurodrive MOVIPRO PHC2 Series operating instructions