logo
Brands
  1. Home
  2. •
  3. Brands
  4. •
  5. Haier
  6. •
  7. Washer
  8. •
  9. Haier HWM50-10B User manual

Haier HWM50-10B User manual

Other Haier Washer manuals

Haier XPB50-AS User manual

Haier

Haier XPB50-AS User manual

Haier JW-K51A User manual

Haier

Haier JW-K51A User manual

Haier HNR500TX Owner's manual

Haier

Haier HNR500TX Owner's manual

Haier HLT364XXQ - Genesis Washer User manual

Haier

Haier HLT364XXQ - Genesis Washer User manual

Haier SIG100-97 User manual

Haier

Haier SIG100-97 User manual

Haier HWM70VA User manual

Haier

Haier HWM70VA User manual

Haier HW70-1001 User manual

Haier

Haier HW70-1001 User manual

Haier JW-K50B\JW-K50C User manual

Haier

Haier JW-K50B\JW-K50C User manual

Haier HWM-G42A User manual

Haier

Haier HWM-G42A User manual

Haier HLT23E1 User manual

Haier

Haier HLT23E1 User manual

Haier HA1000T Instruction Manual

Haier

Haier HA1000T Instruction Manual

Haier B629TX Setup guide

Haier

Haier B629TX Setup guide

Haier HWM80-0528 User manual

Haier

Haier HWM80-0528 User manual

Haier HW80-B14266A-EC User manual

Haier

Haier HW80-B14266A-EC User manual

Haier HMS1060TVE User manual

Haier

Haier HMS1060TVE User manual

Haier XPB58-111S User manual

Haier

Haier XPB58-111S User manual

Haier XQG50-QF800 User manual

Haier

Haier XQG50-QF800 User manual

Haier HWM85-728 User manual

Haier

Haier HWM85-728 User manual

Haier XQG50-S1016 User manual

Haier

Haier XQG50-S1016 User manual

Haier HW80-B14979 User manual

Haier

Haier HW80-B14979 User manual

Haier HW-B1060 User manual

Haier

Haier HW-B1060 User manual

Haier HWM160-B1678S User manual

Haier

Haier HWM160-B1678S User manual

Haier HLP21N User manual

Haier

Haier HLP21N User manual

Haier HW70-1479S-F User manual

Haier

Haier HW70-1479S-F User manual

Popular Washer manuals by other brands

Samsung WF8508NMW8 null

Samsung

Samsung WF8508NMW8 null

Samsung WF-B105AV null

Samsung

Samsung WF-B105AV null

Akai AWM1050WF null

Akai

Akai AWM1050WF null

Tricity Bendix AW 1000 W Operating & installation instructions

Tricity Bendix

Tricity Bendix AW 1000 W Operating & installation instructions

Panasonic NA-F60L5WRB operating instructions

Panasonic

Panasonic NA-F60L5WRB operating instructions

GE WSLP1500 Dimensions and installation information

GE

GE WSLP1500 Dimensions and installation information

Electrolux EWF1284EDW Service manual

Electrolux

Electrolux EWF1284EDW Service manual

LG TV2516DV3B owner's manual

LG

LG TV2516DV3B owner's manual

LG TH2517DSAV owner's manual

LG

LG TH2517DSAV owner's manual

VESTEL CMH-XL 7510 TE user manual

VESTEL

VESTEL CMH-XL 7510 TE user manual

AEG 74335 User information

AEG

AEG 74335 User information

Johnson JWF721A user manual

Johnson

Johnson JWF721A user manual

Beko WTE7604XLW0 owner's manual

Beko

Beko WTE7604XLW0 owner's manual

Danby DTT100A1WDB Owner's use and care guide

Danby

Danby DTT100A1WDB Owner's use and care guide

Amica WA 14 Ex operating instructions

Amica

Amica WA 14 Ex operating instructions

Daewoo DWD-F1222 instruction manual

Daewoo

Daewoo DWD-F1222 instruction manual

Bosch WAS28461AU instruction manual

Bosch

Bosch WAS28461AU instruction manual

Miele PW 6080 Vario manual

Miele

Miele PW 6080 Vario manual

https://manuals.online logo
https://manuals.online logoBrands
  • About & Mission
  • Contact us
  • Privacy Policy
  • Terms and Conditions

Copyright 2026 Manuals.Online. All Rights Reserved.

Full Automatic Washing Machine
ser's m nualUa
This manual is for
Please read this manual
carefully before using.
Retain it for future reference.
HWM50-10B
se 's nalUr ma u
0030805169G
Names of the parts...............................................................................................1
Safety precautions .............................................................................................2
Installation and adjustment ...................................................................................4
Install the water inlet hose....................................................................................6
Preparation before washing .................................................................................8
Put in the laundries ..............................................................................................9
Usage of the detergent ........................................................................................9
Use the operation buttons ..................................................................................10
Close the top lid .................................................................................................13
Finish washing ....................................................................................................13
Disposal after washing .......................................................................................14
Trouble shooting·Answer to question.............................................................15
Packing list· Specification...................................................................................16
Contents
Meaning and description of the symbols
Names of the parts
Warning sign
Forbidden sign
Contents marked with that symbol are related to the safety
of the product and the personal safety of the users. Please
operate in strict conformity to the contents, otherwise it may
cause damage of the machine or injure the personal safety
of the user.
Contents marked with that symbol are actions forbidden to
perform. Performing of those actions may result in damage
of the machine or injure the personal safety of the user.
Adjustable foot
Fixed foot (3)
Back cover
Cabinet
Drain hose
Control panel
film
Control panel
Filter cover
Power cord
Pulsator
Inner tub
Detergent box
Lint filter(two)
Top lid B
Handle
Water valve
Top lid A
Hanging hole
for the drain
hose
Water absorption
cushion
Adjustable foot
stick
Notice label
1
Safety pr ecautions
Do not damage the power cord, bend ,extend, twist, bind or alter it by force. Do not press or
nip it with weight. If the power cord or the power plug is bad, or the power plug becomes
flexible, to avoid risk it is required to have it replaced by
the technicians of our special shop or the after-sale
service department. Keep the pin of the power plug
clean, if the power plug is polluted with dust, please
wipe with dry cloth carefully.
The power cord plug should be convenient
to be pluged in or pluged out with hand
while the washing machine runs normally.
Be sure to pull the plug out and close the
water tap when the machine is idle, when
moving the machine, or when cleaning
the machine. Do not use wet hand to insert
or pull out the power plug.
In case the washing machine is installed
on ground with carpet, do not block the
ventilation hole with carpet.
Do not let the machine share one receptacle with other
electric appliances. If the power plug is damaged, or
the plugging into the receptacle is loose,
do not use the plug any more.
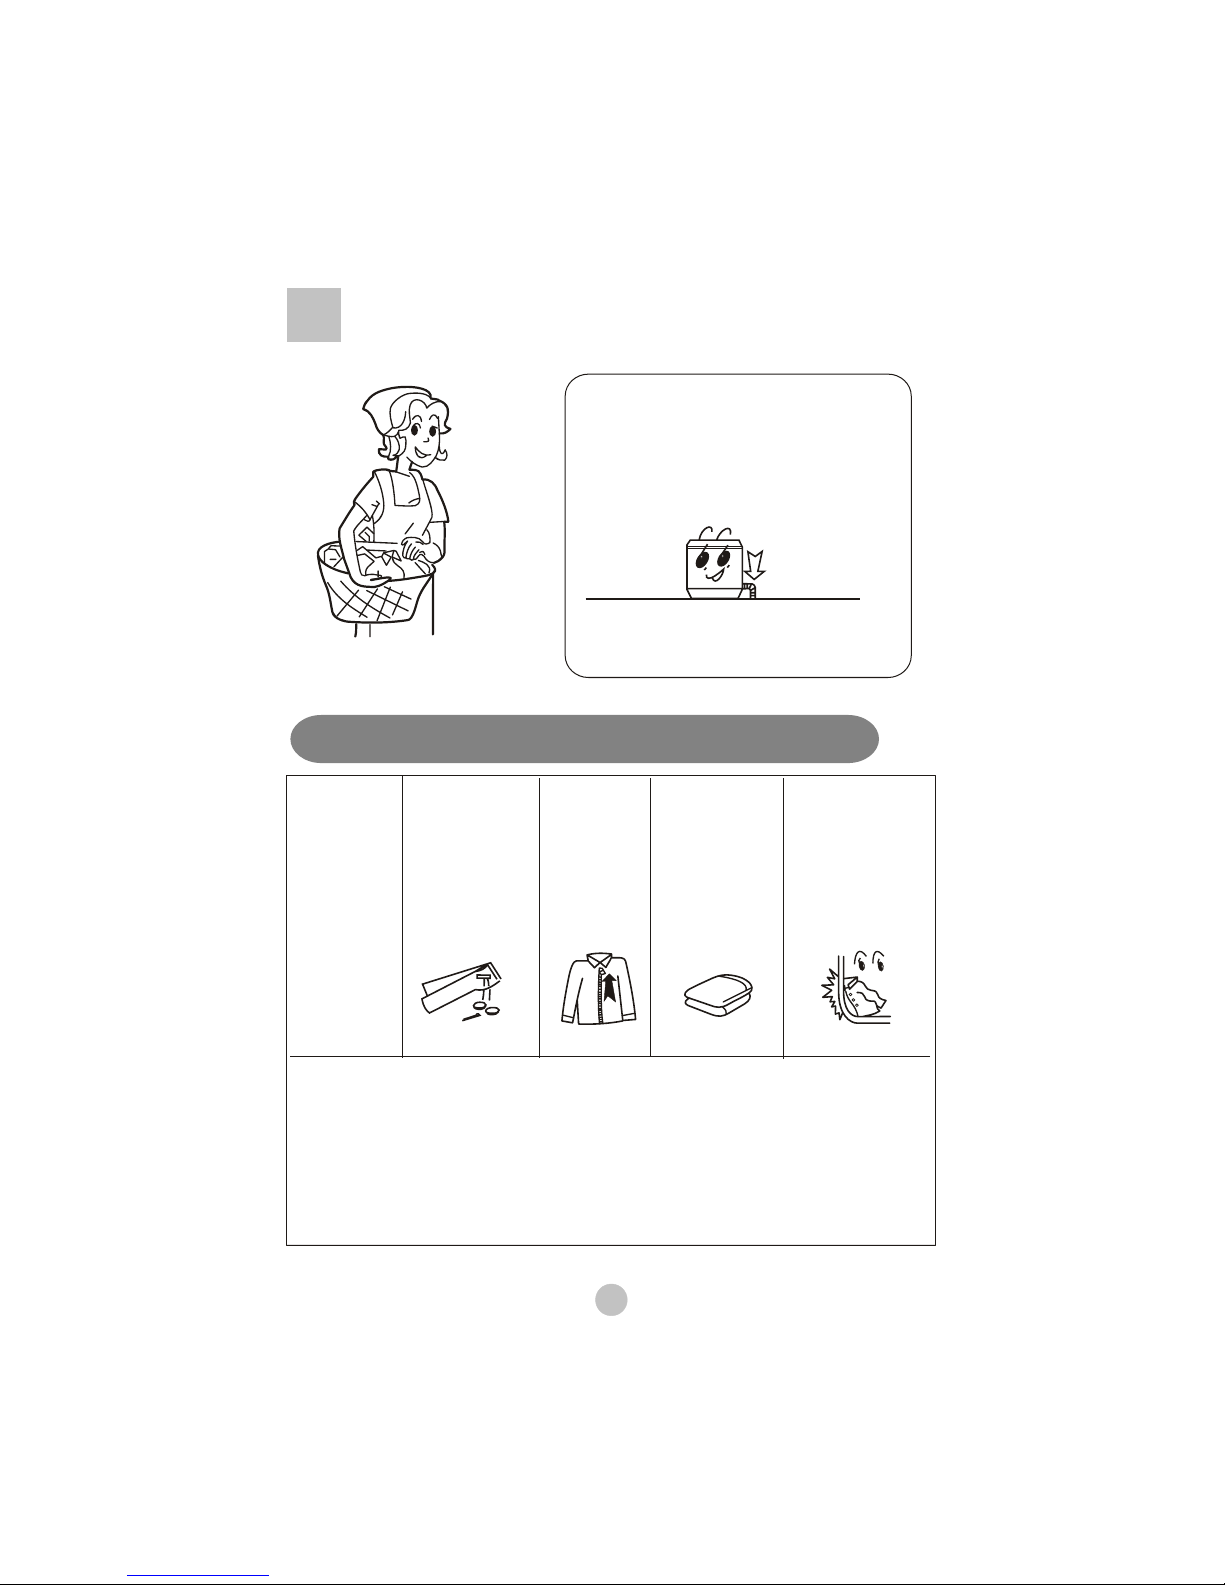
Do not wash water-proof laundries like
the raincoat, bike covers etc. to avoid
abnormal vibrations in spinning.
Do not use water hotter above 50 C .
Do not put the machine at damp place like
the bathroom. Never wash it with water.
Not put wet laundries on the control panel.
50 C
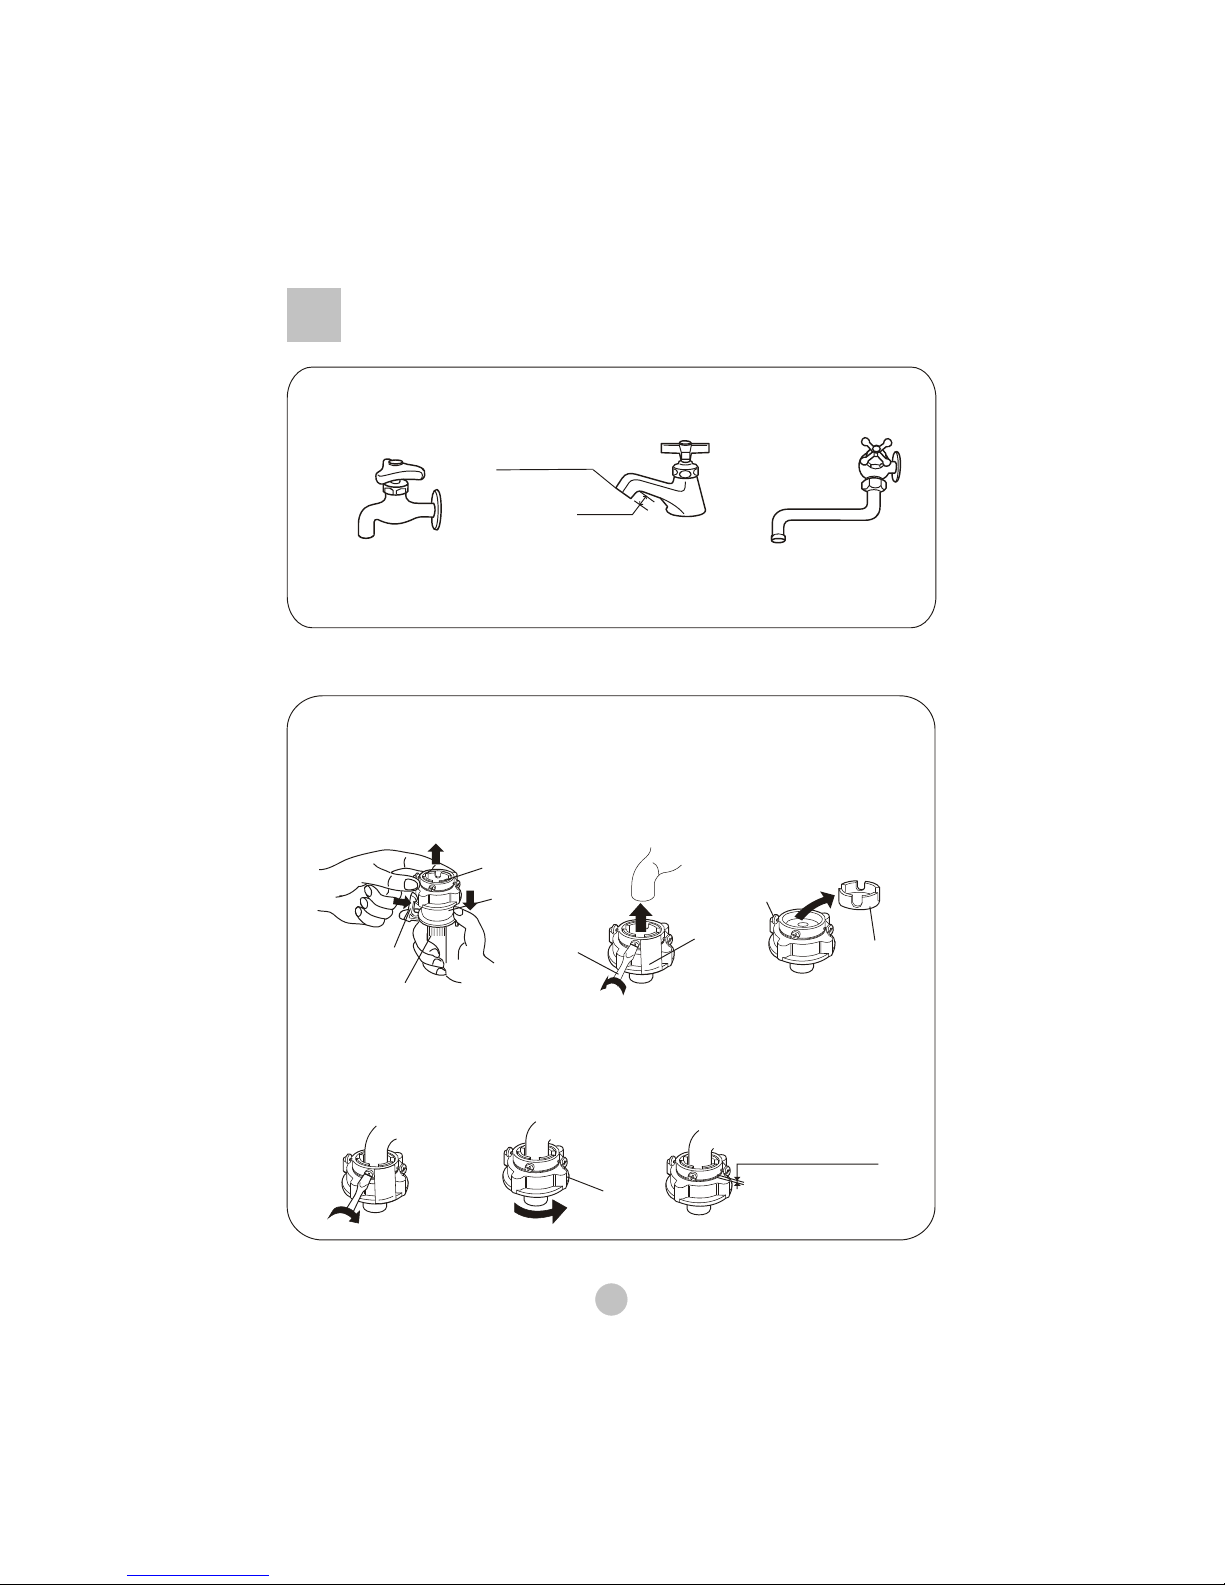
Please plug the plug on special receptacle
with rated voltage. Be sure to use single-
phase three pins receptacle. Ensure the
earthing prong of the power receptacle is
earthed reliably. Use leakage protector if
possible.
soft items
The ventilation holes
at the bottom
2
Safety pr ecautions
Do not decompose, repair or alter the
machine by yourself.
Do not put any hot or heavy items (such
as the kettle with hot water ) on the
washing machine.
Do not wash laundries with volatile
materials (such as thinner, petrol etc.)
The handicapped or children without
care shall not use the machine.
Keep the machine away from direct
sunlight and heat source like the heater.
Do not stretch hands into the working
machine. It is dangerous even if the
rotation is slow. Take special care of
the children. Do not let the children
climb the washing machine.
Petrol
Thi n r
ne
Dismantle Install
To prevent the lint inside the tub from blocking
the cascade outlet during washing, please
keep the lint filter in good condition, and
install it to proper position. If the lint filter
is lost or damaged, please contact the local
after-sales service department of our company.
To protect your laundries and wash-
ing machine, please take out all of the
coins, buttons, sand, hairpin and
other foreign materials before washing.
Please check if the water faucet is open,
and if the connection of the water inlet
pipe is proper.
It is suggested to use foamless washing
powder.
Install
Dismantle
3
Installation and adjustment
The largest allowed slope of the
shank base of the machine is 2°.
The slanting or rough ground will
result in unstable running or
stoppage of the machine. Please
adjust it with following methods:
Adjust the adjustable foot:
Install the bottom plate
After you open the package, please lean
the washing machine gently down on soft
items ( like the towel cloth, blanket, etc. ).
Install the bottom plate to the bottom of the
machine with the seven screws by a cross
screwdriver, then lift the machine up gently.
See to the figure:
Adjust the installation position
Please install and adjust the machine according to the requirement of the manual. It is
very important to your security and correct operating the machine.
Push the lint filter downward to
location for lint filter.
1.To twist the adjustable foot, please
first lift up the side of the foot slightly,
loosen the adjustable nut, and twist
the foot.
2.Fasten the nut after adjustment.
Loosen Fasten
High Low
adjustable nut
adjustable foot
<2
Back
Front
Install the lint filter
Soft items
Bottom plate
Screw
4
How to change the direction of the drain hose
1.Dismantle the back cover of the washing
machine.
3.Dismantle the protecting cover of the
drain outlet at the other side (method
the same as the bushing). Install the
bushing as per indicated in Figure 4.
4.Extend the drain hose from the other
side. Fix the drain hose onto the base
frame with the drain hose frame. (As
indicated in Figure 5)
5.Install the protecting cover of the drain
outlet at the other side as per indicated
in Figure 6.
Drain outlet
protecting cover
Drain hose bushing Drain hose bushing
Figure 1
Figure 4
Figure 5
Figure 6
Drain hose
bushing
Take off
Drain hose
bushing claw
Cabinet
Figure 2
Figure 3
Inner
Press
Press
Outer
2.Put down the drain hose. Take off the
drain hose frame. As indicated in Figure
1, put the drain hose into the cabinet.
Then stretch one hand into the cabinet
to nip the claw of the drain hose bush-
ing to remove the claw from original
position. Take off the drain hose bush-
ing with the other hand. (As indicated in
Figure 2 and 3).
Drain hose frame
Outer
drain
hose
1.The height of the drain hose shall be
less than 10cm, or the drainage will not
be smooth, and cost such long time that
the machine may stop at mid way.
2.Do not trample or press the drain hose.
3.If the drain hose is too long, cut it at mid
point. To make smooth drainage, cut the
front end of the hose slantingly.
4.If extra drain hose is needed, please
make separate purchase. The inner
diameter of the extra hose shall not
less than 30mm, and the length shall
not exceed 1.5m.
5.If the extra hose is too long, cut it
either at A or at B point.
<10cm
BA
Usage of the drain hose
The drain hose shall drain smoothly
> 30mm
<1.5m
5
Water tap,suitable Water tap,not suitable
It is required that the front end shall be longer than 10mm.
The outlet end surface of the tap shall be flat and smooth. If not please file it to
avoid leakage.
2.Loosen the screw till the water tap can be accessed. Put the jointer of the water
inlet hose on the tap. See to Figure 2. (If the tap diameter is too large and the jointer
can not be set on the water tap, please loosen the four screws and take out the
bushing in the jointer. See to the figure3.)
1.Press the lower end of the lock lever and push down the slider. Take off the water
inlet hose jointer from the water inlet hose component. See to Figure 1.
Remarks: Before twisting the fastening nut, the thread is 4mm above the
upper surface of the nut. After twisting the fastening nut, the thread is 2mm
above the upper surface of the nut. See to Figure 6.
4.Take off the nameplate. Twist the fastening nut as per the indication of the figure.
See to Figure 5.
3.Fasten the four screws evenly. See to Figure 4.
>10mm
Outlet end surface
Nut
About 4mm before twisting
About below 2mm after twisting
Screw
Screwdriver Mark label bushing
Figure 2
Figure 5
Figure 1
Figure 4
Figure 3
Figure 6
Slider
Water inlet pipe jointer
Water inlet pipe
Locking lever
Install the water inlet hose
Confirm the water tap
Connection between the water inlet hose jointer and
the water tap
6
1.Do not take off the water absorption
cushion. Please check if the cushion
is dropped or damaged before each
usage. If it happens please contact
our after-sale department immediately.
2.Put the nut of the water inlet hose on
the valve jointer.
3.Fasten the nut. Swaying it gently to
confirm if it's suitable.
1.Close the water tap.
2.Press the locking lever. Push down the slider. Then
pull off the water inlet hose. If the machine is used
more than once every week, the jointer of the water
inlet hose can be kept on the tap to prevent
damaging the fixing screw.
1.Push down the slider. Insert the
water inlet hose into the jointer.
2.Hang the lock lever to the jointer.
Release the slider till a click
sound is heard.
Locking lever
Slider
Water absorption cushion
Nut of the wa ter inlet hose
Jointer of the water inlet valve
Slider
Jointer of the water
inlet hose
Locking lever
Connection between the water inlet hose and the
washing machine
Connection between the jointer of the water inlet
hose and the water inlet hose
Check the connection between the jointer of the
water inlet hose and the water tap
Take down the water inlet hose
1.Swaying the hose gently to confirm if it is fastened stable.
2.After installation, open the tap to check if it leaks.
3.Do not bend the hose with overstrain.
4.Before each usage please check if
the connection between the jointer
of the water inlet hose and the water
tap, and the installation of the
water inlet hose are firm, so as to
prevent dropping from improper
Installation position.
7
Preparation before washing
Confirm if
there's special
requirement for
the laundries.
Clear the pocket.
Tak e out the
coins , sand,
hairpins etc.
Fasten the
buttons and
zippers.
When the pulsator
is running , the
buttons of the
laundries may
cause noise. For
the sake of
discretion, please
put the laundries
with buttons into
other laundries.
Preparation before washing
1.Connect the water inlet hose and open the
water tap .
2.Confirm that the washing machine is earthed
reliably . Then insert the power plug into the
receptacle. Do not connect the earth ter-
minal to the gas pipe and tap water pipe.
3.Put down the drain hose.
The quantity of
the laundries
shall not exceed
the rated value.
The big laundries
like the jeans
shall be put in
loosely.
Pay attention to followings before washing the laundries
a. Please check if the laundries are applicable for washing.
b. Separate those not colorfast from other laundries.
c. For laundries not water absorbing, please put them into water with hands.
d. For laundries with much soil, please remove the soil first. Yo u can add detergent on the
part with serious soil directly. It is much easier to remove the soil by that mean.
e. For laundries likely to get lint ball or with long fiber, please first turn the inside out before
putting them into the water.
f. Do not put the laundries polluted with chemicals directly into the washing machine.
For those small laundries ,laundries likely to be twisted or worn, and woolen laundries,
please put them into mesh bag before washing.
4.Slanting or uneven ground may result in
unstable working or abnormal noise. Please
make the machine stand horizontally.
8