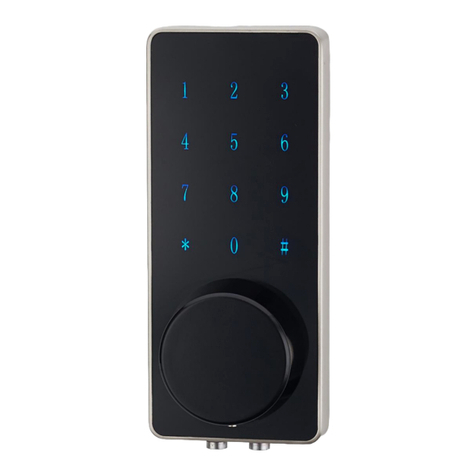
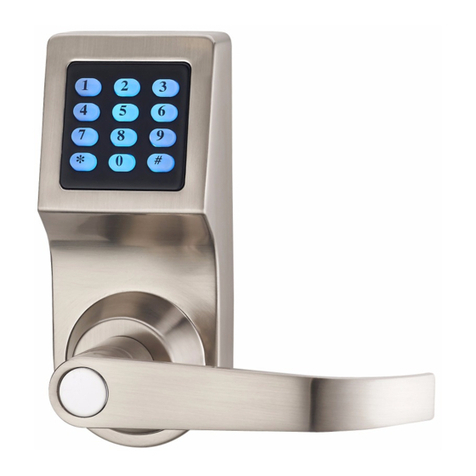
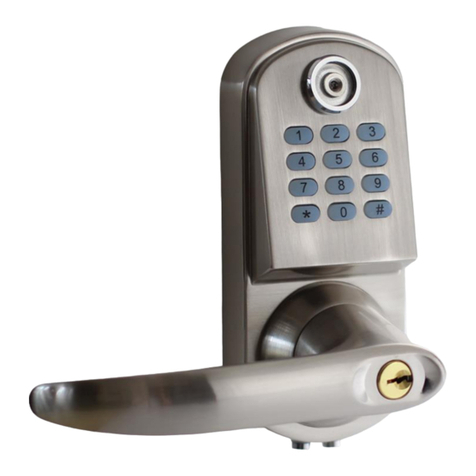
Haifuan HFAM10B-L-NB User manual

HAIFUAN
HFAM10B-L-NB Bluetooth
User Manual

Technical Parameters
Product Type
HFAM10B-L-NB
Dimensions
8.27”*2.76”*4.53”(210*70*115MM)
Communication Methods
Bluetooth 5.0 BLE
Supporting systems
Android 4.3/ISO7.0 above
Working Temperature
-20~60 Celsius (-4~140 Fahrenheit)
Material
Zinc Alloy
Weight
5.5LBS (2.5KG)
Operating Voltage
4* 1.5V“AA”Alkaline Batteries
Low Battery Voltage
4.8V
Static Current
≤60µA
Dynamic Current
≤200mA
Ways to open
Password, Mechanical key, M1 Card
User Capacity
200 cards, 150 code users, unlimited users on app
Backset
2 3/8”and 2 3/4”adjustable (60mm or70mm)
Door Thickness
1.2”-2.75”(30mm—70mm)
Part 1: Product Structure Map
1:back panel 2:inner back plate 3:front panel 4:latch 5:spindle 6:strike plate 7: plastic
strike plate case 8:fixing screws of back plate 9:screws 10:batteries 11:fixing screw
12:key hole cover

Part 2: Installation Instructions
2.1 Drilling holes
1、Drill holes according to the
drilling template
2、Drill holes on the door frame to
install strike plate
2.2 Install latch and strike plate
1、Fix latch on the door broadside
with two screws
2、Fix the plastic case and strike plate
on the door frame with two
screws
2.3 Install square shaft to front panel
1、Put the spindle into square
hole(on the back of front panel),
install 3 screw tubes
2、Fix the square shaft with the pin
in fitting screw bag(make sure it
won’t move)

2.4 Install front panel
1、Place water proof rubber under front
panel, Install front panel, pull the
connect data line through the hole
2.5 Install back inner plate
1、Place water proof rubber under back
inner plate, Fix 3 screws
2、Connect data line of the front and
back panel, get the extra line into door
hole or fix it around the spindle(do not
impact the movement of spindle)
3、Install batteries
4、Make adjustment if necessary, fasten
the screws
2.6 Install back panel and test after installation
1、Fix 2 screws
2、Installation finished
3、Test back handle to open the lock.
4、Input initial master code “123456”“#”
on front panel to open it. (if this code
doesn’t work, press the reset
button(under the back panel) for 6
seconds , then input 000 # to reset it,
try 123456 # again)
5、Remove the key hole cover and test
keys

System Operation
3.1 Outline
Admin code: default admin code: 123456
User Capacity: 200 cards(13.56Mhz mifare card), 150 code users(4-9 digits), unlimited app users
The lock can be operated on keypad or by app via bluetooth, if gateway is installed(the gateway is not included in
the lock package, require additional purchase), it can be operated remotely(check 4.3 for details )
3.2 System Initialization
Default admin code is “123456”. We must change the default admin code to add users if you want to operate on
keypad, or you can operate on app via Bluetooth(check 4.2 for details)
Initialization:
Input “123456 #”to open the lock if the lock is in factory mode, it is very important to
make sure the lock is in factory mode when you first receive it.
4Operation On App
4.1 Download App
Search “TTLOCK”on app store to download the software or scan the QR code bellow to download it
Press RST button for 6
seconds(reset button is hidden
under the battery case )
Input 000 # to confirm, recover to factory state,
admin code back to “123456”

4.2 Login in TTLOCK(Turn Bluetooth On)
4.2.1 Register app
This app support more than 200 countries. Can be registered by
phone number or email.
4.2.2 Connect lock with app(Turn Bluetooth on)
Step:1 click on the left up corner button to show the page on step 2
Step:2 click on add locks Step:3 click on door locks
Step:4 click on next
Step:5 touch the keypad to wake up the lock. If the “+”doesn’t appear,
input *83#→master code# (check 5.7 for details), then check this
screen again
Step:6 give the lock a name Step:7 Upload dates
Step:8 Added successful
Step:4
Step:1
Step:2
Step:3
Step:5
Step:6
Step:7
Step:8
Step:1

4.2.3 Unlock by app
Tap on the lock just added, tap the lock button to unlock (make sure the Bluetooth is turned on)
4.2.4 Send ekey
We can send timed, permanent, one-time, or cyclic ekey to others,
The recipient should also registered this app, when the ekey is sent,
The recipient will be able to login in the app to unlock the device.
4.2.4
4.2.5
4.2.6
4.2.7
4.2.8
4.2.9
4.2.10

4.2.5 Generate Passcode
We can generate varies types of codes, such as
permanent, timed, one-time ,Erase, customized,
Or cyclic codes, and we can also send the code
to others by wechat, SMS,Email, Messager,or
Whatsapp
4.2.6 Manage Ekeys,
All ekey information is shown on this page,
we can clear ekey, reset it, and send ekey to
others on this page
4.2.7 Manage Passcodes
All code information is shown on this page,
We can reset it, generate passcodes, or upload
Passcodes on this page(such as we program a
Code on keypad, then upload it to app, check5.2 for details
The upload function is only effective when the
Lock already connect with the app, and codes
generated on keypad is later than the connection)

4.2.8Manage IC Cards
All card information is shown on this page,
We can clear card, add card, or upload
Card information on this page(such as we program a
Card on keypad, then upload it to app, check 5.3 for details
The upload function is only effective when the
Lock already connect with the app, and codes
generated on keypad is later than the connection)
4.2.9 Records
All the unlock information are recorded on this page
4.2.10 setting
Most system setting can be seen
here, we can change admin
passcode on
this page

4.3 Install Gateway for remote control (An extra gateway is required for this step, after installation, the lock can
be operated in a long distance where Wifi or 4G is available, and it will be able to work with alexa, check 4.4)
Follow these photos to add a gateway for the lock
Step 1: login TTLOCK app, click the left up corner button to show the page, click setting
Step2: click on gateway
Step3: click on the “+”Button
Step4: connect to wifi, make sure gateway is nearby, input the wifi code, and give the gateway a name
Step5: Long press the button on gateway until the green light flash quickly, click on next
Step6:Gateway added successful
Step7: Enable remote unlock function
Step8: Turn off bluetooth, click on the small remote unlock button(the button on the right of the normal unlock
button) to check if it works.
Step1
Step2
Step3
Step4
Step5
Step6
Step7
Step7

4.4 Work with alexa( Must install gate first and enable remote control)
Check the following photos to know about the process
Step1: login alexa app and click on the left up corner to show the page on step 2
Step2: click on Skills & Games
Step3: search for “ScienerSmart”
Step4: enable it
Step5: input your TTLOCK account
Step6: successfully linked
Step7: go to “smart home”page on alexa app”, click on add device
Step8: Amazon echo will find a new device(HFAD6300B in this case)
Step9: click the right up corner to show the page on step 10
Step10: edit a new name for the lock such as “office lock”, click on unlock by voice
Step11: input a voice code for alexa such as 1234, input it again (keep the lock close to echo)
Step12: speak to alexa such as “alexa, unlock office lock”, alexa will answer “what’s your voice code for office
lock”, “answer the voice code we just set(1234)”, door lock will open
Step8
Step8

Step1
Step2
Step3
Step4
Step5
Step6
Step7
Step8
Step9
Step10
Step11

5. Operation On Keypad
5.1 change admin code user via keypad
Input *12#→original master code(123456) #→new master code(4-9 digits) #→new master
code again#
5.2 add users codes via keypad
Input *85#→new master code#→user code(4-9 digits)#→user code(4-9 digits)#
5.3 add card user via keypad
Input *85#→new master code#→swipe a card on keypad→swipe the card again
5.4 delete all code users via keypad
Input *71#→new master code#
5.5 delete all card users via keypad
5.6 change user code
Input *10#→original code#→new code(4-9 digits)#→new code again#
*12#
Original master
code(123456) +#
New Master code(4-9
digits) +#
New Master Code
again+#
*85#
New master code +#
user code(4-9 digits)
+#
User Code again+#
*85#
New master code +#
Swipe a card on
keypad
Swipe the card again
*71#
New master code +#
*69#
New master code +#
*10#
Original code +#
New code(4-9
digits)+#
New code again+#

5.7 add app user
Input *83#→new master code#→login in app to add this device(check 4.2.1)
(Note: all the codes and cards added before connection with app will be deleted except for
admin code, you can add new codes or cards on app now. Or you can still add users via keypad,
they are able to uploaded to app now)
6Others
This lock has anti-peeking function, with which users can input innocent number before or after the
password, e.g. XXX+password+XXX. (no more than 16 digits.)
The keypad will be locked for 5 minutes if you continuously input wrong codes for 5 times.
Low voltage alarm function:There will alarm to remind to change the batteries upon
unlock the door when the voltage is below 4.8V.
The Bluetooth must be turn on when upload the data operated by keypad to app
Bluetooth effective distance: about 2 meters
Gate way effective distance: about 16 meters diameter
If you keep stay on the app page, you can touch any key on keypad to unlock it
You can also add users by press the “add user button”hidden under the back panel, near
reset button, press it , input a code to add users
7 Video Instruction
Video content
link
1
Installation and programming of HFAM10B
https://youtu.be/5_HAO0arUXM
Problem shooting (Customer Service Email: xiongsihong@hotmail.com)
If you failed to program this lock or you have any other question, please contact customer service email,
we will reply within 24 hours normally.
*83#
New master code +#
Login app to add
this device


FCC Warning
This device complies with part 15 of the FCC rules. Operation is subject to the
following two conditions: (1) this device may not cause harmful interference,
and (2) this device must accept any interference received, including interference
that may cause undesired operation.
Changes or modifications not expressly approved by the party responsible for
compliance could void the user's authority to operate the equipment.
NOTE: This equipment has been tested and found to comply with the limits for
a Class B digital device, pursuant to part 15 of the FCC Rules. These limits are
designed to provide reasonable protection against harmful interference in a
residential installation. This equipment generates uses and can radiate radio
frequency energy and, if not installed and used in accordance with the
instructions, may cause harmful interference to radio communications.
However, there is no guarantee that interference will not occur in a particular
installation. If this equipment does cause harmful interference to radio or
television reception, which can be determined by turning the equipment off and
on, the user is encouraged to try to correct the interference by one or more of
the following measures:
· Reorient or relocate the receiving antenna.
· Increase the separation between the equipment and receiver.
· Connect the equipment into an outlet on a circuit different from that to
which the receiver is connected.
· Consult the dealer or an experienced radio/TV technician for help.
Radiation Exposure Statement
This equipment complies with FCC radiation exposure limits set forth for an
uncontrolled environment. This equipment should be installed and operated
with minimum distance 20cm between the radiator and your body.
Table of contents
Other Haifuan Lock manuals
Popular Lock manuals by other brands

Assa Abloy
Assa Abloy Corbin Russwin CL3500 Series installation instructions

Sargent
Sargent ASSA ABLOY PR100 installation instructions

Paxton
Paxton APN-1173 Installation and commissioning guide

COMPX
COMPX Stock Locks C3186 Dimensional drawing

COMPX
COMPX National D8952 instruction sheet

Delaney
Delaney SK500 Series User manual & installation guide

SECO-LARM
SECO-LARM Enforcer E-941SA-300 installation manual

Promet
Promet PS310/E31 user manual

Sargent and Greenleaf
Sargent and Greenleaf 6120 installation instructions

Reer
Reer 51020 user manual

Yli Electronic
Yli Electronic YM-180M quick start guide

Assa Abloy
Assa Abloy Corbin Russwin FE6700 Series installation instructions