Haklift LTTSCC05 User manual

Rev. 20210819
Haklift Oy
Asessorinkatu 3-7
20780 Kaarina, Finland
Tel. +358 2 511 5511
www.haklift.com
Lifting Solutions Group
Axel Johnson International
ORIGINAL INSTRUCTIONS
KÄÄNNÖS ALKUPERÄISESTÄ KÄYTTÖOHJEESTA
ÖVERSÄTTNING AV ORIGINAL BRUKSANVISNING
TŁUMACZENIE INSTRUKCJI ORYGINALNEJ
PŘEKLAD PŮVODNÍHO NÁVODU K POUŽITÍ
PREKLAD ORIGINÁLNEHO NÁVODU
AZ EREDETI ÚTMUTATÓ FORDÍTÁSA
SCREW CLAMP
RUUVITARRAIN
SKRUVKLÄMMA
ŚRUBOWY UCHWYT ZACISKOWY
ŠROUBOVÁ ZVEDACÍ SVĚRKA
SKRUTKOVÁ SVORKA
CSAVARORSÓS LEMEZFOGÓ
LTTSCC05, LTTSCC075, LTTSCC15, LTTSCC3, LTTSCC6

Haklift Oy
Asessorinkatu 3-7
20780 Kaarina, Finland
Tel. +358 2 511 5511
www.haklift.com
Lifting Solutions Group
Axel Johnson International
Read these instructions carefully! Keep the document within easy access of operators. It is important
that operators understand these warnings and instructions before using the product.
SAFETY & WARNINGS
Select a proper size clamp for the job/lifting application. Determine the weight of the plate or steel
structure to be lifted.
Do not exceed the limited working load shown in the WLL diagram. Plate thickness must be within the
grip range of the clamp. In some cases, with hardened plates, light plates (less than 1/5 of capacity
marked on the clamp) and thin plates (less than 1/4 of the maximum clamping range), the clamping
force of the clamp will be reduced. In these cases, confirm that the clamp has a positive grip before
lifting.
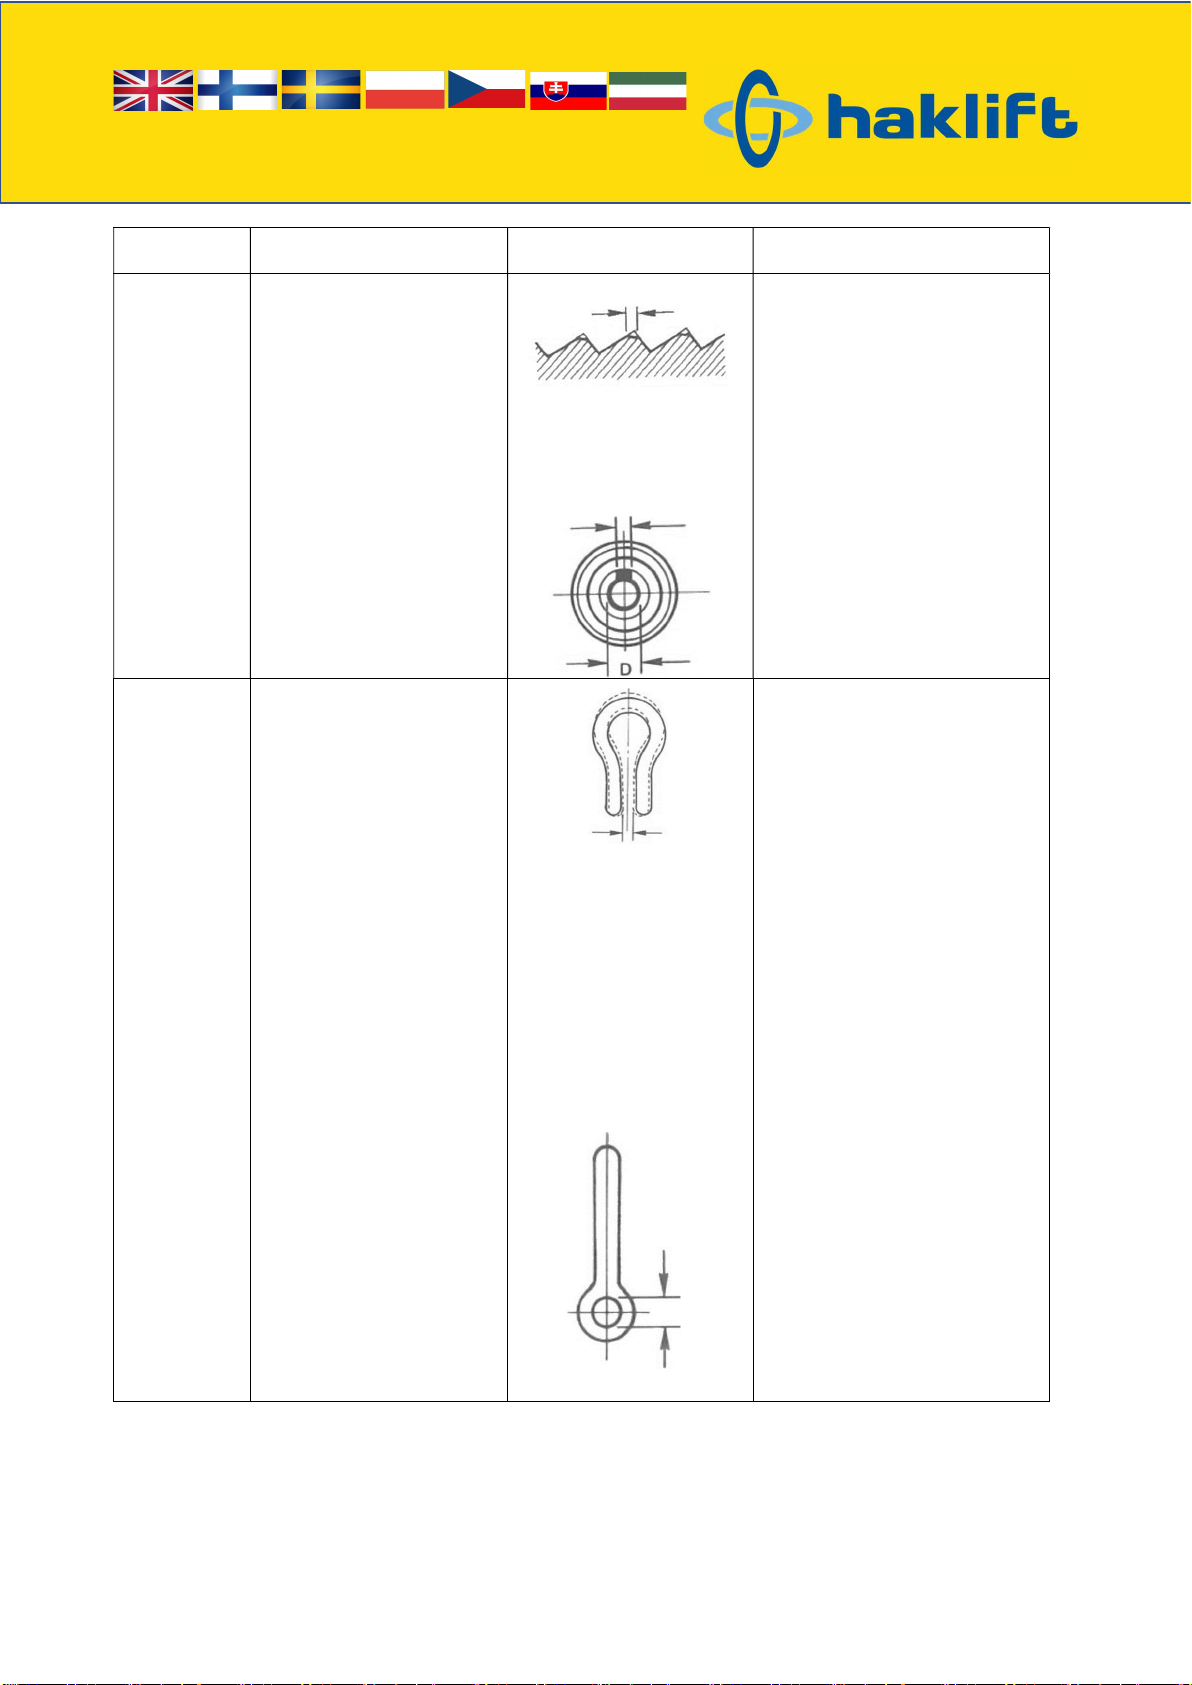
Inspect the clamp before each use; if cam or pad teeth are worn, or if the clamp is damaged, DO NOT
USE it.
All the markings on the clamp must be legible.
All personnel must stand clear of the load while it is being lifted or moved.
Lift the load slowly and steadily. Do not bounce or jerk the load.
Use the clamp with correct manners and read the following instructions for lifting and clamping
manners.
Never use the clamp on material other than steel.
When operating with clamps, always maintain a firm footing and only operate from a location that will
be always safe.
Before lifting the load, confirm that the clamps are in good condition and functioning properly.
Always protect the surface of the cam and pad from weld spatters or other damaging contaminants.
The surface of the load must always be clean and free of scale, grease, paint, dirt and coating or other
foreign matters that can reduce friction.
Note that the service life of clamps is reduced considerably when stainless steel sheets or high-tensile
steel are clamped. Do not use clamps for hard steel (30 HRC or higher).
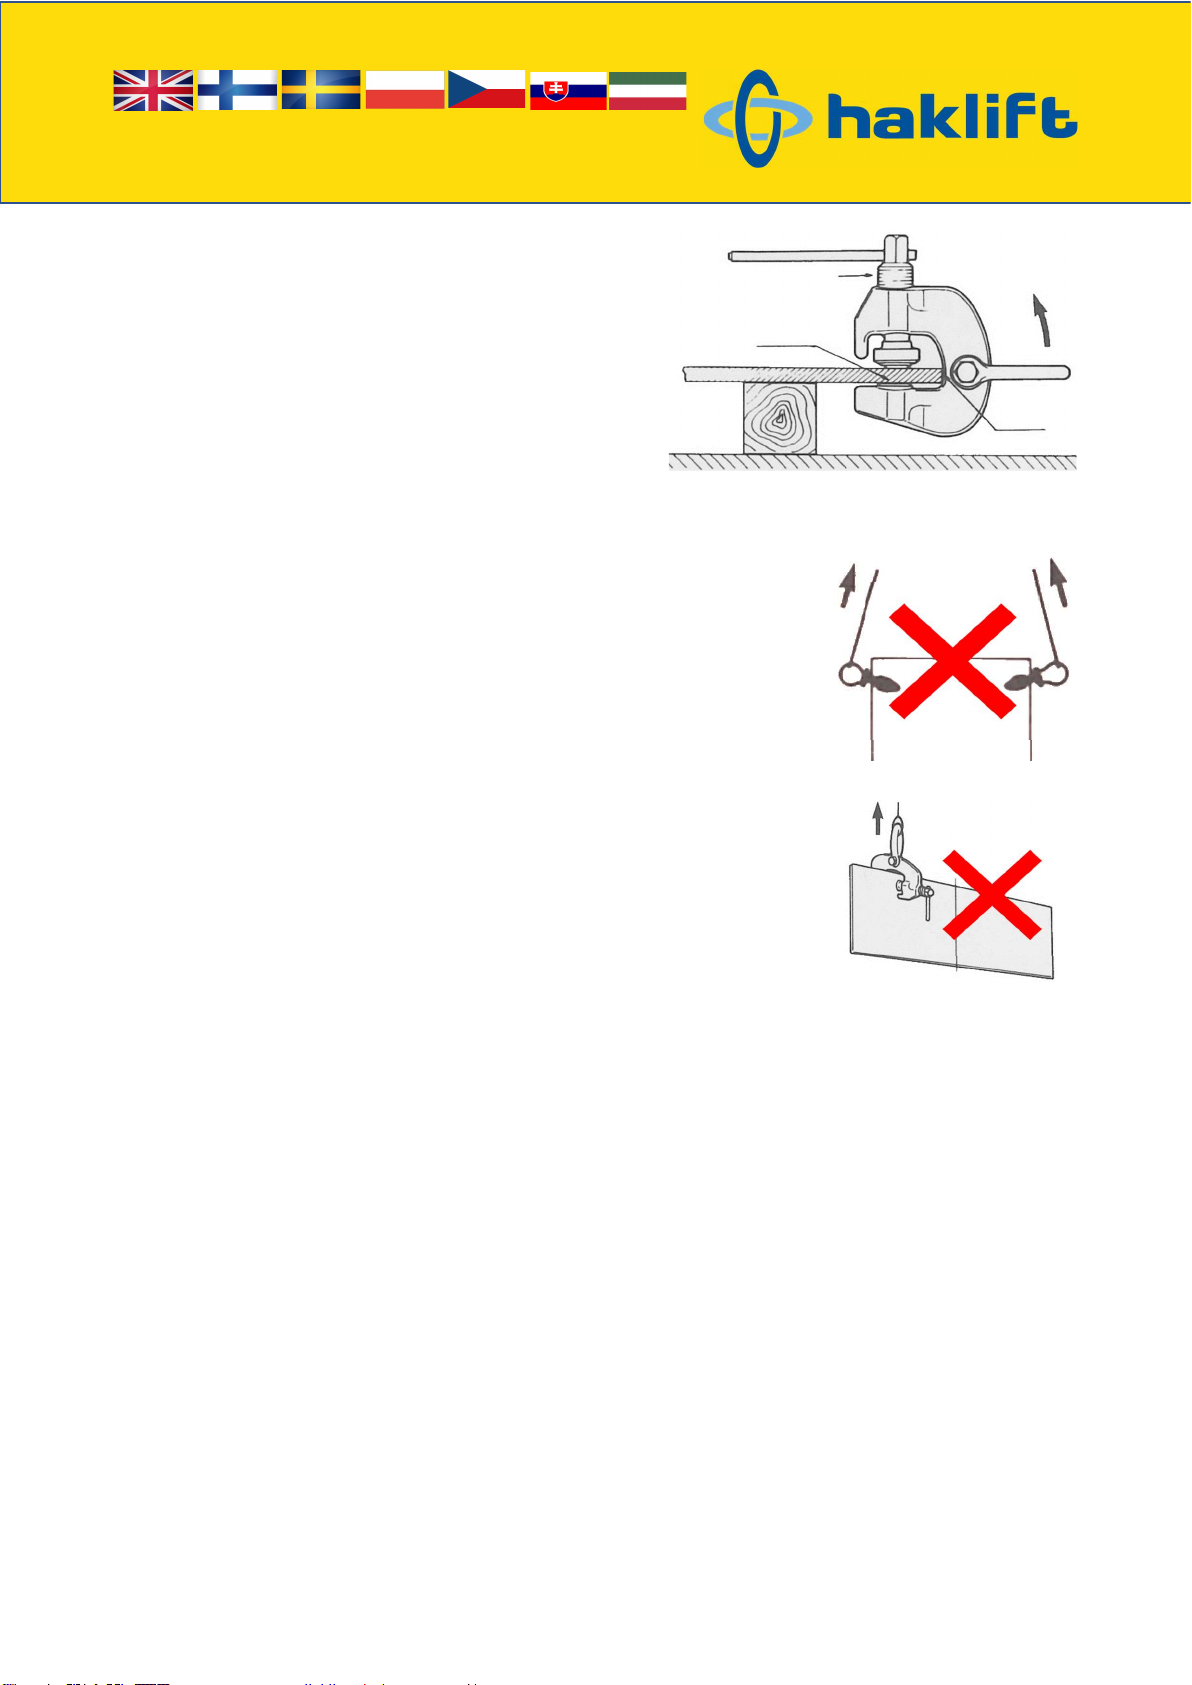
Never vertically lift material that tapers towards the edge.
Never lift more than one steel plate at a time.
Always use slings correctly. Pay special attention to the correlation between the lifting angle and the
rated load.
Never operate clamps unless the load is properly centered.
After the load has been lifted a few centimeters, confirm that the load is well balanced.
Never allow the operator’s attention to be diverted when operating with clamps and never leave the
suspended load unattended.
Do not use the clamp as a suspension element.
Do not modify the product.
The clamp is only suitable for use in normal atmospheric conditions, not in acid environment or at
high/extreme temperatures.
Only use genuine parts when repairing clamps.
Make sure that the lifting accessories that are to be attached to the clamp are legitimate and of the
adequate capacity.

Haklift Oy
Asessorinkatu 3-7
20780 Kaarina, Finland
Tel. +358 2 511 5511
www.haklift.com
Lifting Solutions Group
Axel Johnson International
WORKING LOAD LIMIT (WLL) & REDUCTION
Product code WLL (t) 0°- 45°
LTTSCC05 0,5
LTTSCC075 0,75
LTTSCC15 1,5
LTTSCC3 3,0
LTTSCC6 6,0
CORRECT MANNERS OF USING VERTICAL LIFTING CLAMPS
Insert the steel plate all the way into the clamp jaw.
When the center of gravity is hard to locate;
Lift at three points as shown beside. Calculate
as two-point lift as third leg might remain
unloaded.

Haklift Oy
Asessorinkatu 3-7
20780 Kaarina, Finland
Tel. +358 2 511 5511
www.haklift.com
Lifting Solutions Group
Axel Johnson International
When gripping an object placed horizontally, set the
clamp by directing the screw upward (and the pad
down). If set reversely, the state of the screw cannot
be visually observed, and it would be very dangerous.
Reduce the WLL according to “Working load limit &
Reduction” section.
WRONG MANNERS (DANGEROUS – DO NOT DO THIS)
Two-point lifting by using only one rope (unbalance).
Side gripping / side loading.
Lifting offset center of gravity.
One-point lifting of a long object.
Insufficient gripping – The plate is not reaching the bottom of
the jaw or the screw is not tightened.
Lifting more than one plate simultaneously.
Overloading.
Pulling out a plate from a stack.
Other cautions: Do not lift an object exceeding the clamping range.
Do not weld electrically the plate being lifted by the clamp.
Side gripping
Lifting offset
center of
gravity

Haklift Oy
Asessorinkatu 3-7
20780 Kaarina, Finland
Tel. +358 2 511 5511
www.haklift.com
Lifting Solutions Group
Axel Johnson International
OPERATION METHOD
1. Lower the clamp onto the plate (object to be lifted). Be sure that
the end of the plate touches the bottom of the body. When lifting
from horizontal, place the pad side of the jaw under the plate and
reduce the WLL.
2. Turn the screw clockwise until the minor center-ring on the cam
touches the plate.
3. Tighten the screw further with the furnished handle;
over 5 Nm: LTTSCC05
over 35 Nm: LTTSCC075 – LTTSCC6
Increase initial tightening force when lifting thicker or heavier
objects. Always ensure an adequate grip.
Note! To prevent unintentional loosening of the screw, remove the handle
from the screw after the clamp has been tightened. However, 0,5 t model
is equipped with a fixed handle, so special attention should be paid to
ensure that it will not contact anything which could lead to accidental
loosening of the screw.
When starting to lift:
Minor center-ring touches upon the plate and the cam is vertical against the axis center of the screw.
When loaded:
Cam swivels in proportion to the load applied and teeth edges of the cam bite into the plate firmly to
grip strongly.
4. When detaching the plate, lower the plate on the ground slowly. After that, loosen the screw.
WARNING:
Do not loosen the screw until the plate is at rest and on a flat surface.
Excessive loosening operation makes the cam detach from the screw.
Cam
Cam
Screw
Center-ring
Object
Pad
This manual suits for next models
4
Table of contents
Languages: