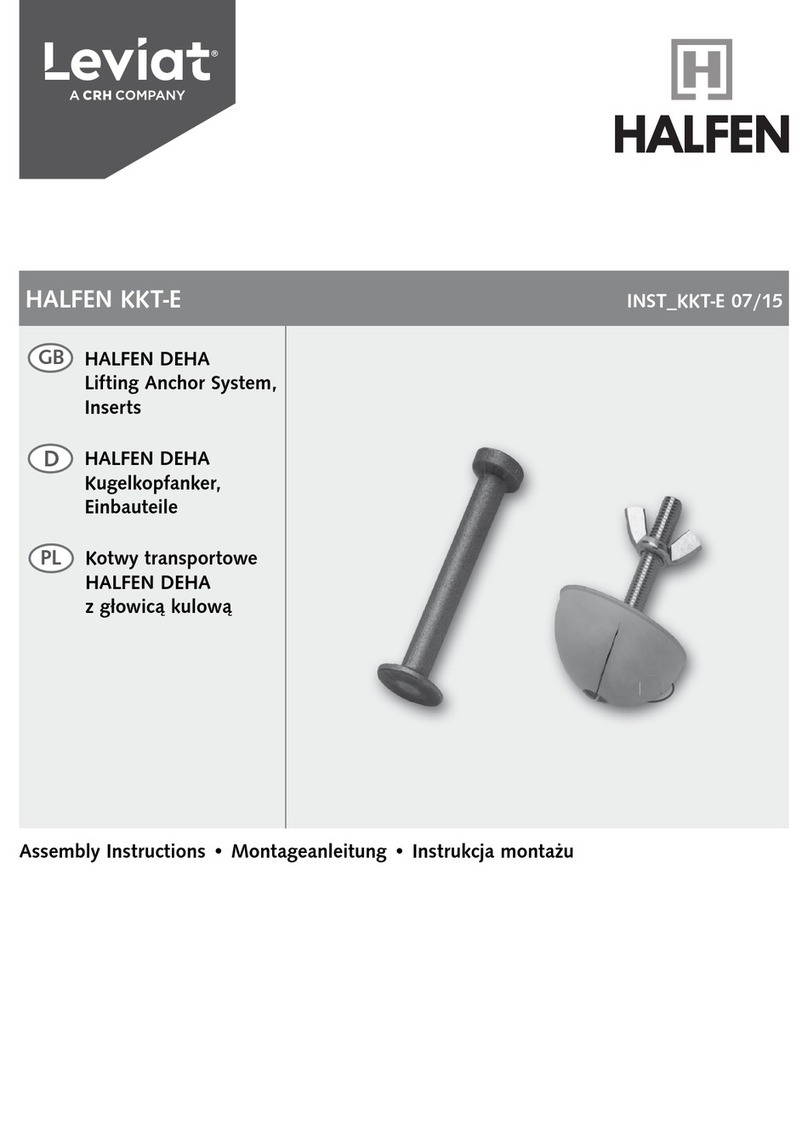
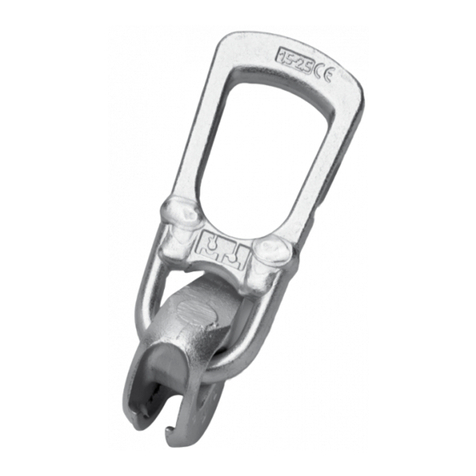
Halfen HLX Series User manual

HALFEN HLX Lift-Box
HALFEN HLX INST_HLX 10/19
Assembly Instructions •Montageanleitung•Notice d‘utilisation •Istruzioni di montaggio•
Instrukcja montażu •Instruções de Montagem
HALFEN HLX Lift-Box
HALFEN HLX Lift-Box
Lift-Box HALFEN HLX
Lift-Box HALFEN HLX
Lift-Box HALFEN HLX
D
PT
PL
I
F
GB
A
LFEN HLX Li
f
t-Bo
x
N
H
LX
INST
_
HLX
10/
19
A
LFEN HL
X
Li
f
t-Bo
x
A
LFEN HL
X
Lift-Bo
x
ft
-B
o
x
H
AL
FE
N
HL
X
f
t-Bo
x
HALFEN HL
X
f
t-B
ox
HALFEN HL
X

Scope of application
Installation
Type variants
The HALFEN HLX Lift-Box is installed in the underside
of concrete slabs (e.g. in lift shafts). It serves as an anchor-
age point for temporary suspension of objects used during
installation or maintenance.
Requirements for installation and allowable load capacities
can be found in the tables included with these installation
instructions.
Attention: The HALFEN HLX Lift-Box is not
intended for use as a personal fall protection
unit according to EN 795.
The HALFEN HLX Lift-Box must only be installed by trained
and qualified personnel.
Elevator lifting device acc. to ETA-17/0488
HALFEN
LB
6
5
HALFEN
HLXLift-Box
1.500Loop
A-551- 05/17
HALFEN
LB
2.0
The use of incomplete anchors is not allowed. Missing components may
only be replaced by the manufacturer. The use of non-system compo-
nents can result in reduced safety of the unit; may also result
in anchor failure causing suspended construction elements to fall. This will en-
danger people in the vicinity and may result in serious injury or death.
The anchor system must be checked for integrity before each application.
Any change, adapting or welding to the anchor is not allowed. This may cause
the attached load to fall, resulting in injury or death. The HALFEN HLX Lift-Box
may only be used in an unmodified and its original state.
Attention: The load bearing loops must not come into contact with
chemicals or other aggressive substances.
1The correct position of the anchorage point is determined by (notches)
markings in the lid.
2The HALFEN HLX Lift-Box can be attached with the included nails or
firmly glued (e.g. to steel formwork). The minimum spacings (see table 3)
must be observed. For reinforcement installation, please refer to the
section “Element requirements“.
3The concrete must be poured and compacted carefully around the
HALFEN HLX Lift-Box. Avoid direct contact between the vibrator and the
HALFEN HLX Lift-Box components. Remove the formwork carefully to
avoid any damage.
4Remove the lid and nails.
2
4
The HALFEN HLX Lift-Box is installed in the underside of concrete slabs
(e.g. in lift shafts).
The condition of the HALFEN HLX Lift-Box components and the concrete slab
must be visually inspected before each use. The system must be evaluated by a
qualified person if there is doubt about its integrity.
1
3
The HLX Lift-Box is available in 2 types with 3 load steps:
The HLX Loop with wire loop or the HLX Link with chain
link.
Both systems are robustly built for suspending hooks, and
are folded back into the box after utilization. The installation
sequence for both variants is the same.
HALFEN
LB
HLX Lift-Box Loop
(with wire loop)
HLX Lift-Box Link
(with chain link)
2© 2019 HALFEN · INST_HLX 10/19 · www.halfen.com
HALFEN HLX Assembly Instructions
DeutschPortuguês EnglishFrançaisItalianoPolski

Manufacturer’s Identification
The HALFEN HLX Lift-Box is marked on the lid cover and
on the inside of the box. In addition, there is a label on the
inside and one on the outside of the box that show the nec-
essary installation procedure and the permissible weight.
The types have different colour codes.
Table 1: Dimensions
Product
name Article no. Permissible
weight [kg]
L
[mm]
B
[mm]
H1
[mm]
H2
[mm]
H3
[mm]
d
[mm]
Weight
[kg]
Box
colour
Opening of
wire loop or
chain link
h x b
[mm]
1500 Loop 0742.220-00101 1500 259 102 133.0 28 68 10 0.75 grey 100x60
2000 Loop 0742.220-00102 2000 259 102 139.5 28 68 10 0.80 blue 100x60
2000 Link 0742.220-00103 2000 259 102 139.0 28 68 11 0.82 blue 65x50
4000 Link 0742.220-00104 4000 259 102 209.5 28 68 13 1.29 red 65x50
Marking –Inside the box
Manufacturer, date stamp
Label inside of the box
Illustration of the installation proce-
dure steps 5-6; Information: Permis-
sible weight, CE marking, QR code,
manufacturer
Label on the cover of the box:
Illustration of the installation proce-
dure steps 1-4; Information:
Permissible weight, CE marking,
QR code, manufacturer
Marking –lid
Manufacturer; Product desig-
nation
Dimensions
T-FIXX® or bolt anchor
Plastic-box
Cover plate (lid)
Load-bearing wire loop/chain link
Included nails
Loop locking plate
(Inside)
L
H1
H2
H3
B
b
h
61
d
HALFEN
LB
6
5
HALFEN
HLX Lift-Box
1.500 Loop
A- 551- 05/17
HALFEN
LB
2.0
1
12
3
48
HALFEN
HLX Lift-Box
3
© 2019 HALFEN · INST_HLX 10/19 · www.halfen.com
HALFEN HLX Assembly Instructions
DeutschPortuguês EnglishFrançaisItalianoPolski

Element requirements/ Minimum reinforcement / Load capacities
To absorb bursting forces we
recommend installing double
layer standard reinforcement
≥ 188mm²/m in the area of the
HALFEN HLX Lift-Box.
Lift shaft wall
Slab edges
C1
C2
S
S
Slab view from
below
HLX Lift-Box spacings/load capacities
Type hnom
[mm]
min h
[mm]
min C1;C2
[mm]
min S
[mm]
FR,d
[kN]
1500 Loop 133,0 150 250 500 14.8
2000 Loop 139,5 150 250 500 19.7
2000 Link 139,0 150 250 500 19.7
4000 Link 209,5 220 350 700 39.3
To ensure full load capacity of the
HALFEN HLX Lift-Box the minimum
distances to the slab edges and to
adjacent anchorage points must not
be lower than the given values.
Ensure the loads are sufficiently an-
chored in the on-site cast concrete
when using the HLX in semi-precast
slabs. Observe the approval specifica-
tions for the respective semi-precast
slabs.
hnom
h
Application Base material Dimensioning
•Installation in ceiling slab of
elevator shafts, for transfer of
the elevator-car load into the
concrete slab during elevator
installation.
•static and quasi-static loads
•for elements in dry interior
conditions
•fire protection class A1
•reinforced and non-rein-
forced, normal weight
concrete without fibres
acc. to EN 206
•concrete strength class
C25/30 to C50/60 acc.
to EN 206
•cracked and non-cracked
concrete
•proof of local load transfer of the Lift-Box into
the concrete has been provided by the ETA
•verification of the structure considering the characteristic
load-bearing capacity must be carried out (see ETA-
17/0488 Annex C1)
•anchor installation carried out by appropriately qualified
personnel and under the supervision of the technical site
manager
•verifiable calculations and design drawings must be
prepared taking into account the loads to be anchored
4© 2019 HALFEN · INST_HLX 10/19 · www.halfen.com
HALFEN HLX Assembly Instructions
DeutschPortuguês EnglishFrançaisItalianoPolski

Application of types 1500 Loop and 2000 Loop
Application of types 2000 Link and 4000 Link
Safety notes
5Remove the locking plate.
6Carefully pull the load bearing
loop out of the box.
5The chain link drops down out of the box and locks
automatically
6
5
HALFEN
HLX Lift-Box
1.500 Loop
A- 551- 05/17
HALF
LB
2.
5
5
HALFEN
LB
2.0
6
The chain link is folded back into the box after use.
Push the securing clamp up , fold the chain link up
and fix with the locking plate or with adhesive tape.
Attention: The HALFEN HLX Lift-Box is not
intended for use as a personal fall protection
unit according to EN 795.
Attention: Using anchor points with insuffi-
cient or missing identification marking is not
allowed.
Use only rounded lifting equipment (e.g. load
hooks) with a minimum 10mm radius.
≤10° ≤10° ≤10° ≤10° Minimum radius
of the load hook r = 10mm
The load bearing loop is designed for centric tension.
Assumed tension loads with an angle larger than 10° are
to be avoided.
Only use the system if you have been sufficiently instructed
in its correct use.
Before each application check the condition of the HALFEN
HLX Lift-Box components and the concrete slab. Broken
strands in the cable, cracks in the concrete slab and signs of
corrosion are all indications of problems with the integrity of
the system.
The system must be evaluated by a qualified person if there
is doubt about its integrity and its fitness for use.
5
© 2019 HALFEN · INST_HLX 10/19 · www.halfen.com
HALFEN HLX Assembly Instructions
DeutschPortuguês EnglishFrançaisItalianoPolski

Inspections
According to the inspection criteria regular inspections are
required; after exceptional incidents additional inspections
are required. All inspections have to be documented in an
inspection record.
Regular inspections / inspection before application
The contractor or operator must ensure that the HALFEN
HLX Lift-Box system is inspected at regular intervals.
Before each use, it must be ensured that the last inspection
and confirmation of usability were not carried out more
than 12 months ago.
Frequent use or environmental effects may require shorter
periods between inspections. The inspections must only be
executed by qualified persons and have to be recorded in
the inspection record.
Additional inspections
After unusual incidents which may influence the load
capacity of the HALFEN HLX Lift-Box or after maintenance
work, the contractor or operator has to ensure that an
additional inspection is done by a suitably qualified
person and documented in the inspection record.
Inspection criteria
• Good, undamaged condition of the HALFEN HLX Lift-
Box components — signs of corrosion, broken strands
in the cable and visible deformations are not allowed.
• Perfect condition of the concrete slab — visible cracks,
spalling in the concrete and signs of corrosion are not
allowed.
• Proper condition of the marking – the anchorage point is
not to be used if the marking is not legible or missing.
• Cable loops must be checked for the following defects:
– kinking
– breakage in a loop
– loosening of the exterior wires in the length of
the cable
– compressive deformation
– crushing in the load area of the load loop with
more than 4 wire breaks
– in strand-cables and more than 10 breaks in
wire-laid cables
– signs of corrosion
– damage or exaggerated wear in the cable or cable
ferrule
– large number of broken wires
– Slippage between the cable loop and the ferrule
Do not use HLX Lift Box if the following number of broken
wires are visible:
Wire breaks
Cable type
Visible wire breaks over a cable length of
3d 6d 10d
strand
cable 46 16
Inspection record
Year of production: Date of first use:
Date of purchase: Identification no.
Inspection
Date Reason for inspection
(maintenance work or
regular periodical check)
Detected deficiencies and
required maintenance work
Name / signature
of inspector
Date of next
inspection due:
6© 2019 HALFEN · INST_HLX 10/19 · www.halfen.com
HALFEN HLX Assembly Instructions
DeutschPortuguês EnglishFrançaisItalianoPolski

Anwendungsgebiet
Einbau
Ausführungsvarianten
Die HALFEN HLX Lift-Box wird flächig an der Unterseite
von Stahlbetondecken (z.B. von Aufzugsschächten) einge-
baut. Sie dient als Lastanschlagspunkt zum temporären Auf-
hängen von Gegenständen bei Montage- und Wartungsar-
beiten.
Die Randbedingungen für den Einbau sowie die zulässigen
Achtung: Die HALFEN HLX Lift-Box ist nicht
vorgesehen als Anschlageinrichtung zum
Schutz gegen Absturz von Personen gemäß
DIN EN 795.
Tragfähigkeiten sind in den Tabellen dieser Einbau- und Ver-
wendungsanleitung angegeben.
Die HALFEN HLX Lift-Box darf nur von sachkundigem Fach-
personal eingebaut und verwendet werden.
Anschlagpunkt für Lastaufnahmemittel
nach ETA-17/0488
HALFEN
LB
6
5
HALFEN
HLXLift-Box
1.500Loop
A-551- 05/17
HALFEN
LB
2.0
Der Einsatz unvollständiger Anker ist nicht zulässig. Fehlende Kompo-
nenten dürfen ausschließlich durch den Hersteller ersetzt werden. Der
Einsatz systemfremder Teile kann zu reduzierten Sicherheiten, bis hin
zum Versagen des Ankers und Absturz der Last führen. Hierbei besteht Gefahr
für Leib und Leben der an der Montage beteiligten Personen. Das Ankersystem
ist vor dem Einsatz auf Vollständigkeit zu prüfen.
Jegliche Veränderungen, Ergänzungen sowie Schweißarbeiten sind unzulässig.
Dies kann zum Absturz der Last und damit zur Verletzung oder zum Tod von
Personen führen. Verwenden Sie die HALFEN HLX Lift-Box nur in unverän-
dertem Originalzustand.
Achtung: Lastschlaufe nicht mit Chemikalien oder anderen
aggressiven Stoffen in Verbindung bringen!
1Die richtige Lage des Lastanschlagpunkts wird über die am Deckel ange-
brachten Markierungen (Kerben) eingemessen.
2Die Fixierung erfolgt mit den 4 mitgelieferten Nägeln oder durch lagesi-
cheres Kleben (z.B. an Stahlschalung). Für die Positionierung der HALFEN
HLX Lift-Box sind die Mindestabstände zu beachten (s.Tabelle 3). Zum Ein-
bau der Bewehrung ist der Abschnitt Bauteilanforderungen zu beachten.
3Der Beton ist im Bereich der HALFEN HLX Lift-Box vorsichtig einzu-
bringen und zu verdichten. Beim Verdichten ist der direkte Kontakt zwi-
schen der Rüttelflasche und den Komponenten der HALFEN HLX Lift-Box
zu vermeiden.
Die Schalung vorsichtig entfernen um Beschädigungen zu vermeiden.
4Deckel abnehmen und Nägel entfernen.
2
4
Der Einbau der HALFEN HLX Lift-Box erfolgt an der Unterseite von Stahlbetonde-
cken (z.B. von Aufzugsschächten).
Vor jeder Verwendung ist der Zustand der HALFEN HLX Lift-Box-Komponenten
sowie der Stahlbetondecke visuell zu prüfen. Wenn Zweifel am ordnungsge-
mäßen Zustand des Systems bestehen, ist die Frage der Nutzbarkeit von einer
befähigten Person zu bewerten.
1
3
HALFEN bietet die HLX Lift-Box in 2 Ausführungsvarianten
mit 3 unterschiedlichen Laststufen an. HLX Loop mit starker
flexibler Seilschlaufe oder HLX Link mit Kettenglied.
Beide Systeme bieten gute Stabilität zum Einhängen des Ha-
kens und lassen sich nach Gebrauch in die Box zurückklap-
pen. Der Einbauablauf beider Varianten ist gleich.
HALFEN
LB
HLX Lift-Box Loop
(mit Seilschlaufe)
HLX Lift-Box Link
(mit Kettenglied)
7
© 2019 HALFEN · INST_HLX 10/19 · www.halfen.com
DeutschPortuguês EnglishFrançaisItalianoPolski
HALFEN HLX Montageanleitung

Kennzeichnung
Die HALFEN HLX Lift-Box ist auf der Außenseite des De-
ckels sowie auf der Innenseite der Box gekennzeichnet.
Zusätzlich befindet sich jeweils ein Etikett auf der Innen-
und Außenseite der Box mit Hinweisen auf die erforderli-
chen Montageschritte und das zulässige Gewicht.
Die Typen sind unterschiedlich gefärbt, siehe Tabelle.
Tabelle 1: Abmessungen
Typenbe-
zeichnung Artikel Nr.
zulässiges
Gewicht
[kg]
L
[mm]
B
[mm]
H1
[mm]
H2
[mm]
H3
[mm]
d
[mm]
Ge-
wicht
[kg]
Farb-
kenn-
zeich-
nung der
Box
Öffnung
Lastschlaufe
oder
Kettenglied
h x b
[mm]
1500 Loop 0742.220-00101 1500 259 102 133,0 28 68 10 0,75 grau 100x60
2000 Loop 0742.220-00102 2000 259 102 139,5 28 68 10 0,80 blau 100x60
2000 Link 0742.220-00103 2000 259 102 139,0 28 68 11 0,82 blau 65x50
4000 Link 0742.220-00104 4000 259 102 209,5 28 68 13 1,29 rot 65x50
Kennzeichnung –Innenseite Box
Hersteller; Datumsstempel
Etikett –Innenseite Box
Darstellung der Montageschritte 5- 6;
Angaben: Zulässiges Gewicht, CE-Kennzei-
chen, QR-Code, Hersteller
Etikett –Außenseite Box
Darstellung der Montageschritte
1-4; Angaben: Zulässiges Gewicht,
CE-Kennzeichen, QR-Code, Hersteller
Kennzeichnung –Deckel
Hersteller; Produktbezeichnung;
Abmessungen
T-FIXX® oder Bolzenanker
Kunststoff-Box
Abdeckung (Deckel)
Lastschlaufe/Kettenglied
Mitgelieferte Nägel
Sicherungsplatte
(innenliegend)
L
H1
H2
H3
B
61
d
HALFEN
LB
6
5
HALFEN
HLX Lift-Box
1.500 Loop
A- 551- 05/17
HALFEN
LB
2.0
1
12
3
48
HALFEN
HLX Lift-Box
b
h
8© 2019 HALFEN · INST_HLX 10/19 · www.halfen.com
DeutschPortuguês EnglishFrançaisItalianoPolski
HALFEN HLX Montageanleitung

Bauteilanforderungen / Mindestbewehrung / Tragfähigkeiten
Zur Aufnahme der Spaltzugkräfte
wird empfohlen, in der Decke, im
Bereich der HALFEN HLX Lift-Box
eine zweilagige Grundbewehrung
≥ 188mm²/m anzuordnen.
Aufzugsschachtwand
Freier
Deckenrand
C1
C2
S
S
Deckenuntersicht
HLX Lift-Box Abstände/Tragfähigkeiten
Typ hnom
[mm]
min h
[mm]
min C1;C2
[mm]
min S
[mm]
FR,d
[kN]
1500 Loop 133,0 150 250 500 14,8
2000 Loop 139,5 150 250 500 19,7
2000 Link 139,0 150 250 500 19,7
4000 Link 209,5 220 350 700 39,3
Um die volle Tragfähigkeit der
HALFEN HLX Lift-Box zu gewährlei-
sten, dürfen die angegebenen Min-
destabstände zum freien Deckenrand
und zu benachbarten Anschlagpunk-
ten nicht unterschritten werden.
Bei Fertigplatten mit Ortbetonergän-
zung sind die Lasten im Ortbeton aus-
reichend zu verankern. Es gelten die
Zulassungen der entsprechenden Fer-
tigplatten.
hnom
h
Verwendung Verankerungsgrund Bemessung
•Einbau in die Decke eines Auf-
zugsschachtes, um während
der Aufzugsmontage die Last
von der Aufzugskabine in die
Betondecke zu übertragen.
•Statische und quasi-statische
Beanspruchung.
•Für Bauteile unter den Bedin-
gungen trockener Innenräume
•Brandverhalten: Klasse A1
•Bewehrter und unbe-
wehrter Normalbeton
ohne Fasern entspre-
chend EN 206.
•Festigkeitsklasse
C25/30 bis C50/60
entsprechend EN 206.
•Gerissener und ungeris-
sener Beton.
•Der Nachweis der lokalen Lasteinleitung der Lift-Box in
den Beton ist durch die ETA erbracht.
•Der Nachweis des Bauwerks unter Berücksichtigung der
charakteristischen Tragfähigkeit (siehe ETA-17/0488 An-
hang C1) ist zu führen.
•Die Bemessung der Verankerung erfolgt unter der Verant-
wortung eines auf dem Gebiet der Verankerungen und
des Betonbaus erfahrenen Ingenieurs.
•Unter Berücksichtigung der zu verankernden Lasten sind
prüfbare Berechnungen und Konstruktionszeichnungen
anzufertigen.
9
© 2019 HALFEN · INST_HLX 10/19 · www.halfen.com
DeutschPortuguês EnglishFrançaisItalianoPolski
HALFEN HLX Montageanleitung

Verwendung Typen 1500 Loop und 2000 Loop
Verwendung Typen 2000 Link und 4000 Link
Sicherheitshinweise
5Sicherungsplatte entfernen.
6Schlaufe vorsichtig aus der Box
ziehen.
5Kettenglied fällt aus der Box und arretiert sich von selbst
6
5
HALFEN
HLX Lift-Box
1.500 Loop
A- 551- 05/17
HALF
LB
2.
5
5
HALFEN
LB
2.0
6
Nach Gebrauch lässt sich das Kettenglied zurückklappen.
Hierzu Krone zurückschieben , Ketteglied einklappen
und mit Sicherheitsbügel oder Klebeband fixieren.
Achtung: Die HALFEN HLX Lift-Box ist nicht
vorgesehen als Anschlageinrichtung zum
Schutz gegen Absturz von Personen gemäß
DIN EN 795.
Achtung: Die Benutzung von Anschlagpunkten
mit unzureichender oder fehlender Kennzeich-
nung ist nicht zulässig.
Es dürfen ausschließlich Anschlagmittel
(z.B. Lasthaken) mit mindestens 10mm
Ausrundungsradius verwendet werden.
≤10° ≤10° ≤10° ≤10° Mindestradius
des Lasthakens r = 10mm
Die Lastschlaufe bzw. Lastöse ist für Belastungen durch zen-
trischen Zug ausgelegt. Planmäßige Schrägzugbeanspru-
chungen größer als 10° sind zu vermeiden.
Benutzen Sie das System nur, wenn Sie in den sicheren Um-
gang eingewiesen sind.
Vor jeder Verwendung ist der Zustand der Komponenten
sowie der Betondecke zu prüfen. Drahtbrüche, Risse in der
Betondecke und Hinweise auf Korrosion sind Anzeichen für
einen nicht einwandfreien Zustand.
Wenn Zweifel am ordnungsgemäßen Zustand des Systems
bestehen, ist die Frage der Nutzbarkeit von einer befähigten
Person zu bewerten.
10 © 2019 HALFEN · INST_HLX 10/19 · www.halfen.com
DeutschPortuguês EnglishFrançaisItalianoPolski
HALFEN HLX Montageanleitung

Prüfung
Prüfbuch
Herstellungsjahr: Datum des ersten Einsatzes:
Kaufdatum: Ident.- Nr.
Prüfung
Datum Prüfgrund
(Instandsetzung oder
regelmäßige Prüfung)
Festgestellte Mängel und
durchgeführte Instandsetzungsarbeiten
Name / Unter-
schrift des sachkun-
digen Prüfers
Nächste
regelmäßige Prü-
fung fällig am:
Entsprechend der Prüfkriterien sind regelmäßige und nach
besonderen Vorkommnissen außerordentliche Prüfungen
vorzunehmen und im Prüfbuch zu dokumentieren.
Regelmäßige Prüfungen/ Prüfung vor der Verwendung
Der Unternehmer oder der Betreiber hat dafür zu sorgen,
dass das HALFEN HLX Lift-Box System in regelmäßigen Ab-
ständen überprüft wird.
Vor jeder Benutzung ist sicherzustellen, dass die letze Über-
prüfung und die Bestätigung der Verwendbarkeit nicht län-
ger als 12 Monate zurückliegen.
Bei häufiger Benutzung oder durch Umwelteinflüsse be-
dingt, können die Prüfungen auch in kürzeren Abständen
erforderlich sein. Die Prüfung darf ausschließlich von sach-
kundigen Personen durchgeführt werden und ist im Prüf-
buch zu dokumentieren.
Außerordentliche Prüfung
Nach besonderen Vorkommnissen, welche die Tragfähigkeit
der HALFEN HLX Lift-Box beeinflussen können, sowie nach
Instandsetzungsarbeiten, hat der Unternehmer oder der Be-
treiber dafür Sorge zu tragen, dass eine außerordentliche
Prüfung durch einen Sachkundigen durchgeführt und im
Prüfbuch dokumentiert wird.
Prüfkriterien
• Guter, unbeschädigter Betriebszustand der HALFEN HLX
Lift-Box-Komponenten – Kennzeichen von Korrosion,
Drahtbrüche und sichtbare Verformungen sind unzulässig
• Einwandfreier Zustand der Betondecke – Erkennbare
Risse, Abplatzungen und Hinweise auf Korrosion sind
nicht zulässig
• Ordnungsgemäße Kennzeichnung – bei nicht lesbarer
oder fehlender Kennzeichnung darf der Anschlagspunkt
nicht mehr benutzt werden.
• Seilschlaufen sind auf folgende Mängel zu untersuchen:
– Knicke und Klinken (Klanken)
– Bruch einer Litze
– Lockerung der äußersten freien Lage in freier
Länge
– Quetschungen in freier Länge
– Quetschungen im Auflagebereich der Öse mit
mehr als 4 Drahtbrüchen bei Litzenseilen bzw.
mehr als 10 Drahtbrüchen bei Kabelschlagseilen
– Korrosionsnarben
– Beschädigung oder starker Verschleiß der Seil- oder
Seilendverbindung
– Drahtbrüche in großer Zahl
– Schlupf zwischen Seilschlaufe und Pressklemme
Folgende Drahtbrüche machen die HLX Box unbrauchbar:
Drahtbrüche
Seilart
Anzahl sichbarer Drahtbrüche
auf einer Länge von
3d 6d 10d
Litzenseil 4 6 16
11
© 2019 HALFEN · INST_HLX 10/19 · www.halfen.com
DeutschPortuguês EnglishFrançaisItalianoPolski
HALFEN HLX Montageanleitung

Domaine d‘application
Einbau
Variantes d’exécution
Le Lift-Box HALFEN HLX est monté à plat sur la surface
inférieure des plafonds en béton (par ex. dans les cages
d’ascenseur). Il fait office de point d’ancrage pour la
suspension temporaire d’objets lors du montage et des
travaux de maintenance.
Les conditions spécifiques pour le montage et les capacités
portantes admissibles sont spécifiées dans les tableaux des
Attention: Le Lift-Box HALFEN HLX n‘est pas
destiné à être utilisé comme dispositif d‘ancrage
pour la prévention des chutes des personnes
conformément à EN 795.
présentes instructions de montage.
Le Lift-Box HALFEN HLX ne doit être monté et utilisé que
par du personnels spécialisés et compétents.
Point d‘ancrage pour les dispositifs de préhension de
charge selon la ETA-17/0488
HALFEN
LB
6
5
HALFEN
HLXLift-Box
1.500Loop
A-551- 05/17
HALFEN
LB
2.0
L’utilisation d’ancres incomplètes n’est pas autorisée.
Les composants manquants doivent uniquement être remplacés par le
fabricant. L’utilisation de pièces non originales peut réduire la sécurité
et aller jusqu’à la défaillance de l’ancre et la chute de l’élément de construc-
tion. Les personnes participant au montage s’exposent alors à un risque d’ac-
cident potentiellement mortel. Il convient de s’assurer que le système d’an-
crage est complet avant de l’utiliser.
Aucune modification, aucun ajout ni travail de soudage n’est autorisé en raison
des risques de chute de la charge et d’accident corporel pouvant entraîner la
mort. N’utiliser le Lift-Box HALFEN HLX que dans son état original non modifié.
Attention: Ne pas mettre en contact la boucle de charge avec des
produits chimiques ou d‘autres matières agressives.
1La position exacte du point d’ancrage de charge est mesurée sur les
marques (encoches) disposées sur le couvercle.
2La fixation est assurée à l’aide des 4 clous ou par collage fiable (par exemple
sur un coffrage en acier). Le positionnement du Lift-Box HALFEN HLX im-
plique de respecter les distances minimales (voir tableau 3).
Le montage de l’armature implique de tenir compte de la section Spécifi-
cations de l’élément de construction.
3Le béton doit être appliqué et scellé avec précaution dans la zone du
Lift-Box HALFEN HLX. Lors du scellement, il convient d’éviter tout contact
direct entre l’aiguille et les composants du Lift-Box HALFEN HLX.
Retirer le coffrage avec précaution afin d’éviter tout dommage.
4Retirer le couvercle et retirer les clous.
2
4
Le montage du Lift-Box HALFEN HLX est réalisé au-dessus des plafonds en béton
armé (par ex. dans les cages d‘ascenseur).
Contrôler visuellement l‘état des composants du Lift-Box HALFEN HLX ainsi que
du plafond en béton armé. En cas de doute sur l‘état correct du système, une
personne compétente doit examiner ce dernier afin de déterminer s‘il peut être
utilisé.
1
3
HALFEN propose la HLX Lift-Box en deux variantes d’exécution
assorties de trois niveaux de charge différents.
HLX Loop une boucle de clavetage plus résistante et plus
flexible ou HLX Link avec maillon de chaîne. Les deux systèmes
offrent une excellente stabilité lors de l’accrochage du crochet
et peuvent être rabattus dans la box après utilisation.
La procédure de montage est identique pour les deux variantes.
HALFEN
LB
HLX Lift-Box Loop
(avec boucle de clavetage)
HLX Lift-Box Link
(avec maillon de chaîne)
12 © 2019 HALFEN · INST_HLX 10/19 · www.halfen.com
DeutschPortuguês EnglishFrançaisItalianoPolski
HALFEN HLX Notice d‘utilisation

Identification du fabricant
La HALFEN HLX Lift-Box porte une identification aussi
bien sur la face extérieure du couvercle que sur la face in-
térieure de la box. Une étiquette comportant des données
concernant les phases obligatoires du montage et le poids
admissible se trouve sur la face intérieure et sur la face ex-
térieure de la box. Chaque type est assorti d‘une couleur
différente, voir le tableau.
Tableau 1: dimensions
Désignati-
on de type Article no
Poids ad-
missible
[kg]
L
[mm]
B
[mm]
H1
[mm]
H2
[mm]
H3
[mm]
d
[mm]
Poids
[kg]
Identification
de la couleur
de la box
Embrasure
h x b
[mm]
1500 Loop 0742.220-00101 1500 259 102 133,0 28 68 10 0,75 gris 100x60
2000 Loop 0742.220-00102 2000 259 102 139,5 28 68 10 0,80 bleu 100x60
2000 Link 0742.220-00103 2000 259 102 139,0 28 68 11 0,82 bleu 65x50
4000 Link 0742.220-00104 4000 259 102 209,5 28 68 13 1,29 rouge 65x50
Designation – face interieur du boitier
Fabricant; tampon de date
Etiquette à l’intérieur du boîtier:
Illustration de la procédure de mise en
place, étapes 5 à 6; information: charge
admissible, marquage CE, QR code, fabri-
cant
Etiquette sur le couvercle du boîtier:
Illustration de la procédure de mise
en place, étapes 1 à 4; information:
charge admissible, marquage CE, QR
code, fabricant
Designation – couvercle
Fabricant; designation du produit
Dimensions
T-FIXX® ou cheville
à frappe
Boîtier en plastique
Fermeture (couvercle)
Boucle d‘ accrochage
Clous fournis
Plaque de maintien
(côté intérieur)
L
H1
H2
H3
B
61
d
HALFEN
LB
6
5
HALFEN
HLX Lift-Box
1.500 Loop
A- 551- 05/17
HALFEN
LB
2.0
1
12
3
48
HALFEN
HLX Lift-Box
L’illustration présente le
type HLX 1500 Loop
b
h
13
© 2019 HALFEN · INST_HLX 10/19 · www.halfen.com
DeutschPortuguês EnglishFrançaisItalianoPolski
HALFEN HLX Notice d‘utilisation

Exigences relatives aux pièces / armature minimale / capacité de charge
Il est recommandé d‘intégrer dans
la dalle beton, au niveau du Lift-
Box HALFEN HLX, une armature
de base sur deux couches
≥ 188mm2/m.
Paroi de la cage d‘ascenseur
Bord libre
du plafond
C1
C2
S
S
Face inférieure
du plafond
Ecartements et distances au bord/capacités de charge des HLX Lift-Box
Typ hnom
[mm]
min h
[mm]
min C1;C2
[mm]
min S
[mm]
FR,d
[kN]
1500 Loop 133,0 150 250 500 14,8
2000 Loop 139,5 150 250 500 19,7
2000 Link 139,0 150 250 500 19,7
4000 Link 209,5 220 350 700 39,3
Afin d’assurer la pleine capacité de
charge du Lift-Box HALFEN HLX, les
distances spécifiées au bord libre du
plafond et aux points de butée voisins
sont des distances minimum.
hnom
h
Utilisation Support d’ancrage Dimensionnement
•Montage dans la dalle d’un puits
d’ascenseur afin que la charge de
la cabine de l’ascenseur soit
reprise par la dalle en béton pen-
dant l’installation de l’ascenseur.
•Sollicitation statique et quasi-sta-
tique.
•Pour des pièces soumises aux
conditions qui prévalent dans des
espaces intérieurs secs.
•Comportement au feu: classe A1
•Béton normal armé et non
armé sans fibres conformé-
ment à EN 206.
•Classe de résistance
C25/30 à C50/60 confor-
mément à EN 206..
•Béton fissuré et non fissuré.
•L’ATE présente le calcul de la reprise locale de la
charge de la Lift-Box dans le béton.
•Il convient de calculer l’ouvrage en tenant compte
de la capacité de charge caractéristique
(voir ATE-17/0488 annexe C1).
•Le dimensionnement de l’ancrage incombe à un
ingénieur compétent dans le domaine des ancrages
et de la construction en béton.
•Des calculs pouvant être étayés et des plans de
construction doivent être établis en tenant compte
des charges à ancrer.
Assurez-vous que les charges soient
suffisamment ancrées dans le béton
coulé en place, lors de l’utilisation des
HLX avec des prédalles béton. Il
convient de respecter les spécifica-
tions de l’agrément respectives aux
prédalles béton.
14 © 2019 HALFEN · INST_HLX 10/19 · www.halfen.com
DeutschPortuguês EnglishFrançaisItalianoPolski
HALFEN HLX Notice d‘utilisation

Utilisation des types 1500 Loop et 2000 Loop
Utilisation des types 2000 Link et 4000 Link
Consignes de sécurité
5Retirer la plaque de maintien.
6Sortir avec précaution la boucle
du boîtier.
5Le maillon de chaîne sort de la box
et s’arrête de lui-même
6
5
HALFEN
HLX Lift-Box
1.500 Loop
A- 551- 05/17
HALF
LB
2.
5
5
HALFEN
LB
2.0
6
Le maillon de chaîne peut être rabattu après usage. Pour
cela, il faut décaler la couronne vers l’arrière , rabattre
le maillon de chaîne et le fixer à l’aide d’un étrier de sé-
curité ou d’un ruban adhésif.
Attention: Le Lift-Box HALFEN HLX n‘est pas
destiné à être utilisé comme dispositif
d‘ancrage pour la prévention des chutes des
personnes conformément à EN 795.
Attention: Les points d‘ancrage ne doivent pas
être utilisés si le marquage est insuffisant ou
absent.
Utiliser uniquement des dispositifs d‘élingage
(tels que crochet de charge) dont le rayon de
la courbe de raccordement est au moins égal
à 10mm
≤10° ≤10° ≤10° ≤10° Rayon minimum
du crochet de charge = 10mm
La boucle de charge est destinée à supporter des charges
de traction axiales. Éviter les efforts de traction obliques
supérieurs à 10°
Contrôler l’état des composants ainsi que du plafond en
béton avant toute utilisation. Les ruptures de fils, les fis-
sures dans le plafond en béton et les signes de corrosion
indiquent la présence de défaillances.
En cas de doute sur l’état correct du système, une personne
compétente doit examiner ce dernier afin de déterminer s’il
peut être utilisé.
15
© 2019 HALFEN · INST_HLX 10/19 · www.halfen.com
DeutschPortuguês EnglishFrançaisItalianoPolski
HALFEN HLX Notice d‘utilisation

Contrôle
Conformément aux critères de contrôle, il convient de do-
cumenter les contrôles réguliers et les contrôles extraordi-
naires réalisés après des événements particuliers et de les
documenter dans le livret de contrôle.
Contrôles réguliers / Contrôles avant utilisation
L'entreprise ou l'exploitant veillera au contrôle régulier du
système du Lift-Box HALFEN HLX.
S'assurer avant chaque utilisation que le dernier contrôle et
la dernière confirmation d'utilisation sont datés de moins
de 12 mois.
En cas d'utilisation plus fréquente ou en fonction des fac-
teurs environnementaux, il peut être nécessaire de réaliser
des contrôles plus fréquents. Le contrôle doit exclusivement
être effectué par une personne formée et documenté dans
le livret de contrôle.
Contrôle extraordinaire
Après certains événements susceptibles d'affecter la capacité
portante du Lift-Box HALFEN HLX, ainsi qu'après des
travaux d'entretien, l'entreprise ou l'exploitant doit veiller à
la réalisation d'un contrôle extraordinaire par une personne
compétente et à sa consignation dans le livret de contrôle.
Critères de contrôle
• Bon état de fonctionnement et absence de dommages
des composants du Lift-Box HALFEN HLX – aucun signe
de corrosion, rupture de fil et déformation visible n'est
autorisé.
• État impeccable du plafond en béton - aucune présence
de fissure, éclatement ni aucun signe de corrosion
autorisé.
• Marquage correct - ne plus utiliser le point d'ancrage si le
marquage est absent ou illisible.
• Les boucles de câble doivent être examinées pour les dé-
fauts suivants:
– Coudes et plis
– Rupture d'un toron
– Desserrage du câble
– Écrasements du câble
– Écrasements dans la zone d'appui de l'œillet avec
plus de 4 ruptures de fil pour les câbles toronnés
ou plus de 10 ruptures de fils pour les haussières
– Piqûres dues à la corrosion
– Dommages ou forte usure des jonctions ou
extrémités de câble
– Grand nombre de ruptures de fil
– Glissement entre la boucle de câble et serre-câble
N’utilisez pas le boîtier HLX, si le nombre suivant de câbles
endommagés est visible:
Ruptures de fil
Type de
câble
Nombre de ruptures de fils visibles sur
une longueur de
3d 6d 10d
Câble toronné 4 6 16
Livret de contrôle
Année de fabrication Date de la première utilisation:
Date d'achat: Num. d'ident.
Contrôle
Date Motif du contrôle
(entretien ou contrôle
régulier)
Défauts constatés et travaux
d'entretien réalisés
Nom / signature
du contrôleur com-
pétent
Date prévue pour
le prochain
contrôle régulier
16 © 2019 HALFEN · INST_HLX 10/19 · www.halfen.com
DeutschPortuguês EnglishFrançaisItalianoPolski
HALFEN HLX Notice d‘utilisation

Campo di applicazione
Montaggio
Tipologie
Lift-Box HALFEN HLX viene installato nella parte inferiore
della soletta in cemento armato (ad esempio nel vano
ascensori). Serve come punto di ancoraggio del carico per
tenere in sospensione in via temporanea oggetti durante i
lavori di montaggio e manutenzione.
Le condizioni generali per il posizionamento, così come i
Attenzione: Lift-Box HALFEN HLX non è inteso
come dispositivo di ancoraggio per proteggere
dalla caduta le persone conformemente alla
norma EN 795.
carichi consentiti sono riportate nelle tabelle delle presenti
istruzioni per l’uso.
Lift-Box HALFEN HLX può essere installato e utilizzato solo
da personale tecnico qualificato.
Dispositivo di ancoraggio per ascensori secondo
ETA-17/0488
HALFEN
LB
6
5
HALFEN
HLXLift-Box
1.500Loop
A-551- 05/17
HALFEN
LB
2.0
Non è consentito l’uso di ancoraggi incompleti. I componenti mancanti
devono essere sostituiti esclusivamente dal produttore. L’uso di parti
non originali può compromettere la sicurezza dell’ancoraggio con con-
seguente cedimento del componente.
In questo modo è in pericolo la vita e la salute del personale addetto all’instal-
lazione. Prima di effettuare la posa verificare, che il sistema di ancoraggio sia
integro.
Eventuali modifiche, integrazioni e lavori di saldatura non sono consentiti. Ciò
può provocare la caduta del carico con conseguenti lesioni, che a volte posso-
no risultare letali. Utilizzare solo Lift-Box HALFEN HLX originale e inalterato.
Attenzione: Non portare a contatto l‘asola a cappio con sostanze
chimiche o altro materiale aggressivo.
1La corretta posizione del punto di ancoraggio del carico viene rilevata
attraverso le marcature (tacche) applicate sul coperchio.
2Il fissaggio viene effettuato con 4 chiodi in dotazione o tramite apposito
incollaggio (ad esempio al cassero d’acciaio). Per il posizionamento della
Lift-Box HALFEN HLX devono essere rispettate le distanze minime (vedi
tabella 3). Per la posa dell’armatura, osservare il paragrafo sui requisiti dei
componenti.
3Il calcestruzzo deve essere applicato e compattato con cura nella zona
della Lift-Box HALFEN HLX. Durante la fase di compattazione evitare il
contatto diretto tra la vibropunta e i componenti della Lift-Box HALFEN
HLX.
Rimuovere con cautela il cassero per evitare danni.
4Rimuovere coperchio e chiodi.
2
4
L’installazione della Lift-Box HALFEN HLX viene eseguita nella parte inferiore
della soletta in cemento armato (ad esempio nel vano ascensori).
Prima di ogni utilizzo eseguire un controllo visivo per accertare lo stato dei
componenti della Lift-Box HALFEN HLX, così come la soletta in cemento armato.
Se ci sono dubbi sul corretto stato del sistema, una persona competente dovrà
valutarne la possibilità di utilizzo.
1
3
Lift-Box HALFEN HLX è disponibile in 2 varianti con 3 diversi
livelli di carico. HLX Loop con asola a cappio oppure HLX
Link con gancio ad anello. Entrambi i sistemi offrono una
buona stabilità per sospendere il gancio e possono essere ri-
piegati nella scatola dopo l‘uso.
Il processo di installazione di entrambe le varianti è il
medesimo.
HALFEN
LB
HLX Lift-Box Loop
(con asola a cappio)
HLX Lift-Box Link
(con gancio ad anello)
17
© 2019 HALFEN · INST_HLX 10/19 · www.halfen.com
DeutschPortuguês EnglishFrançaisItalianoPolski
HALFEN HLX
Istruzioni di montaggio

Identificazione del produttore
Lift-Box HALFEN HLX è contrassegnato sul coperchio, così
come sul lato interno della scatola.
Inoltre ci sono un‘etichetta all‘interno e una all‘esterno
della scatola che mostrano la procedura d‘installazione
necessaria ed il carico ammissibile.
Alle differenti portate corrisponde un colore diverso.
Tabella 1: dimensioni
Nome
prodotto Aticolo nr.
Carico
ammissibile
[kg]
L
[mm]
B
[mm]
H1
[mm]
H2
[mm]
H3
[mm]
d
[mm]
Peso
[kg]
Colore
scatola
Buco
h x b
[mm]
1500 Loop 0742.220-00101 1500 259 102 133,0 28 68 10 0,75 grigio 100x60
2000 Loop 0742.220-00102 2000 259 102 139,5 28 68 10 0,80 blu 100x60
2000 Link 0742.220-00103 2000 259 102 139,0 28 68 11 0,82 blu 65x50
4000 Link 0742.220-00104 4000 259 102 209,5 28 68 13 1,29 rosso 65x50
Marcatura all‘interno della scatola
Produttore; data del timbro
Etichetta all’interno della scatola
Illustrazione della procedura di instal-
lazione, passaggi 5-6; Informazioni:
peso ammissibile, marchio CE, QR
code, produttore
Etichetta sul coperchio della scatola
Illustrazione della procedura di in-
stallazione, passaggi 1 -4; Informa-
zioni: peso ammissibile, marchio CE,
QR code, produttore
Marcatura – coperchio
Produttore; denominazione del
prodotto
Dimensioni
T-FIXX® o bolt anchor
box in plastica
copertura (coperchio)
Punto di fissaggio asola a cappio/
gancio ad anello
chiodi in dotazione
piastra di fermo
(a scomparsa)
L
H1
H2
H3
B
61
d
HALFEN
LB
6
5
HALFEN
HLX Lift-Box
1.500 Loop
A- 551- 05/17
HALFEN
LB
2.0
1
12
3
48
HALFEN
HLX Lift-Box
L‘immagine
mostra il tipo
HLX 1500 Loop
b
h
18 © 2019 HALFEN · INST_HLX 10/19 · www.halfen.com
DeutschPortuguês EnglishFrançaisItalianoPolski
HALFEN HLX
Istruzioni di montaggio

Requisiti del supporto / Armatura minima / Capacità di carico
Per riprendere le forze di spinta
derivanti dalla trazione centrica si
raccomanda di inserire
un’armatura di base a due livelli ≥
188 mm2/m nella soletta in prossi-
mità della Lift-Box HALFEN HLX.
parete del vano
ascensore
bordo libero
della soletta
C1
C2
S
S
vista inferiore
della soletta
Lift-Box HLX interassi / capacità di carico
Tipologia hnom
[mm]
min h
[mm]
min C1;C2
[mm]
min S
[mm]
FR,d
[kN]
1500 Loop 133,0 150 250 500 14,8
2000 Loop 139,5 150 250 500 19,7
2000 Link 139,0 150 250 500 19,7
4000 Link 209,5 220 350 700 39,3
Per garantire la capacità massima di
portata della Lift-Box HALFEN HLX,
devono essere osservate le distanze
minime specificate dal bordo libero
della soletta e dai punti di ancorag-
gio adiacenti.
Quando si utilizzano i sistemi HLX in
strutture semiprefabbricate è neces-
sario assicurarsi che i carichi applicati
siano sufficientemente supportati. Si
prega di rispettare le specifiche con-
tenute nell’approvazione.
hnom
h
Applicazioni Materiale del supporto Dimensionamento
•Installazione nella soletta del
vano ascensore, per trasferire
il carico dell‘ascensore al calce-
struzzo durante il montaggio
dello stesso
•carichi statici e quasi-statici
•per elementi in condizioni in-
terne asciutte
•protezione al fuoco classe A1
•calcestruzzo armato e
non armato, non alleg-
gerito senza fibre se-
condo EN 206
•classe di resistenza del
calcestruzzo da C25/30
a C50/60 secondo
EN 206
•calcestruzzo fessurato e
non fessurato
•la verifica del trasferimento locale del carico dal Lift-Box
al calcestruzzo è garantita dalla ETA
•la verifica della struttura, considerando la capacità di
carico caratteristica, deve essere eseguita
(guardare ETA-17/0488 All. C1)
•l‘installazione dell‘ancoraggio deve essere fatta da perso-
nale qualificato sotto la supervisione del direttore lavori
•le verifiche di calcolo e i disegni devono essere eseguiti
considerando il carico che deve essere fissato
19
© 2019 HALFEN · INST_HLX 10/19 · www.halfen.com
DeutschPortuguês EnglishFrançaisItalianoPolski
HALFEN HLX
Istruzioni di montaggio

Installazione delle tipologie 1500 Loop e 2000 Loop
Installazione delle tipologie 2000 Link e 4000 Link
Note per la sicurezza
5Rimuovere la piastra di fermo.
6Estrarre con cautela l’asola a
cappio della box.
5Il gancio ad anello fuoriesce dalla scatola e si
blocca in modo automatico
6
5
HALFEN
HLX Lift-Box
1.500 Loop
A- 551- 05/17
HALF
LB
2.
5
5
HALFEN
LB
2.0
6
Dopo l‘uso il gancio ad anello viene inserito all‘interno
della scatola.
Premere la leva di sicurezza verso l‘alto , ruotare il gan-
cio verso l‘alto e chiudere con il coperchio o con del
nastro adesivo.
Attenzione: Lift-Box HALFEN HLX non è inte-
so come dispositivo di ancoraggio per proteg-
gere dalla caduta le persone conformemen-
te alla norma EN 795.
Attenzione: L‘uso di punti di ancoraggio con
marcatura insufficiente o mancante non è
consentito.
Si possono utilizzare esclusivamente mezzi di
ancoraggio (ad esempio ganci di sollevamento)
con almeno 10mm di raggio di curvatura.
≤10° ≤10° ≤10° ≤10° Raggio minimo del
gancio di sollevamento
r = 10mm
L’asola di sollevamento è progettata per sostenere carichi
tramite trazione centrica. Evitare sollecitazioni a trazione
obliqua superiore a 10°.
Utilizzare il sistema solo se siete stati istruiti al corretto
utilizzo.
Verificare lo stato dei componenti e del soffitto di calce-
struzzo prima di ogni utilizzo. Rotture di fili, crepe nel sof-
fitto in calcestruzzo e prove di corrosione sono segni di uno
stato imperfetto.
Se ci sono dubbi sul corretto stato del sistema, una persona
competente dovrà valutarne la possibilità di utilizzo.
20 © 2019 HALFEN · INST_HLX 10/19 · www.halfen.com
DeutschPortuguês EnglishFrançaisItalianoPolski
HALFEN HLX
Istruzioni di montaggio
This manual suits for next models
4
Table of contents
Languages:
Other Halfen Lifting System manuals
Popular Lifting System manuals by other brands

Screen International
Screen International SI-30 Installation and maintenance manual

REID LIFTING
REID LIFTING PORTA-GANTRY 5000 Assembly & operation

Joab
Joab EcoDrive VL10U Operation and maintenance manual

Thiele
Thiele TWN 0861 Mounting instructions

MoJack
MoJack ZR 350 manual

Proslat
Proslat HEAVY DUTY HOIST installation guide

Nussbaum
Nussbaum ATT HYMAX S 3000 Operating manual, Inspection book

ARTHUR HOLM
ARTHUR HOLM AHDTL user guide

Floe
Floe VSD 5000 Assembly instructions

Simpro
Simpro Multi-Tip MT1200 user manual

Nussbaum
Nussbaum 4.50 SL Operating Instruction and Documentation

Grundfos
Grundfos Multilift MSS Installation and operating instructions