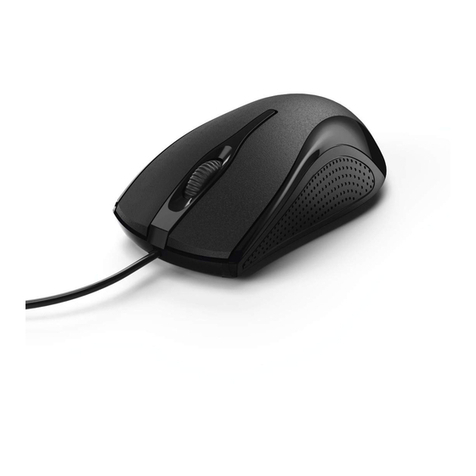
Hama Easy Line S1010 User manual

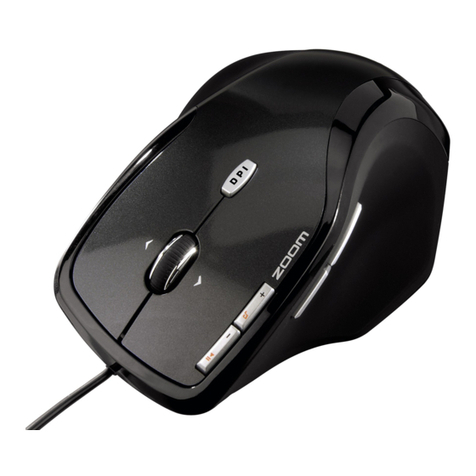
S1010 Laser Mouse
00021026
00021026-12.06
EasyLine by
Hama GmbH & Co KG
Postfach 80
86651 Monheim/Germany
Tel. +49 (0)9091/502-0
Fax +49 (0)9091/502-274
www.hama.com
00021026bda 04.01.2007 12:04 Uhr Seite 2

5
b) Klicken Sie anschließend im Fenster „Mauseigenschaften“ auf die Leiste
„Laser Mouse“. Sie können nun der dritten, vierten und fünften Maustaste
verschieden Funktionen zuordnen:
Scroll wheel
Der 3. Rad-Taste eine Funktion zuordnen*
Roll the scroll wheel one notch
Einstellung der Scrollgeschwindigkeit
Net Wheel
Der 4. Rad-Taste eine Funktion zuordnen*
Office Wheel
Der 5. Rad-Taste eine Funktion zuordnen*
Enable System Tray Icon
Das Maus –Symbol in der Taskleiste anzeigen
oder verstecken
Compatible with Microsoft
Sollte die Scoll-Funktion in manchen Anwendungen
nicht funktionieren, aktivieren Sie diese Option.
Tip: Durch klicken auf die Leiste „Zeigeroptionen“ können Sie Einstellungen
des Mauszeigers vornehmen (z.B. die Zeigergeschwindigkeit verändern).
*Verfügbare Funktionen der M1020/1022/1024 Laser Mouse:
Anschließen der Maus
a) Verbinden Sie den USB-Stecker der Maus mit der USB-Buchse
am PC oder einem USB-Hub. Je nach Windows-Version kann
es sein, dass Sie nach der Windows® Installations-CD gefragt
werden. Legen Sie dazu ihre Windows-CD in das CD-ROM
Laufwerk und folgen Sie den Vorgaben auf dem Bildschirm.
b) Die Maus ist nun mit Standardfunktionen (linke und rechte Maustaste,
Scrollfunktion) sofort einsatzbereit.
c) Es besteht die Möglichkeit die Auflösung der Maus zwischen 1000dpi und
2000dpi zu wechseln. Zum Umschalten halten Sie für 5 Sekunden die linke
und rechte Maustaste gedrückt. Danach können Sie mit der neuen
Auflösung arbeiten. Standardmäßig sind 2000dpi voreingestellt.
d) Um der 3. (Rad-) Taste sowie den Zusatztasten eine bestimmte Funktion
zuordnen, ist es notwendig die beigelegte Software zu installieren.
(Siehe dazu nächster Absatz )
Software Installation
a) Deinstallieren Sie zunächst eventuell bereits vorhandene Maussoftware.
b) Die Software unterstützt Windows 98/ME/2000/XP und Vista.
c) Benutzen Sie Windows Vista als Betriebssystem können Sie
den aktuellen Treiber auf unserer Homepage www.hama.com downloaden.
d) Legen Sie die beigelegte CD in Ihr CD-ROM oder DVD-ROM Laufwerk.
Warten Sie einen Moment, und das Installationsmenü wird automatisch
gestartet. (Sollte dies nicht geschehen, doppelklicken Sie das Symbol
„Autorun“ im Dateiverzeichnis der CD).
e) Klicken Sie auf „Driver Install“; das Installationsprogramm führt Sie durch
die einzelnen Schritte der Installation.
f) Starten Sie zum Abschluss der Installation Ihren PC neu.
Bedienung der Maussoftware
a) Um die Rad- und Tasteneinstellungen Ihren persönlichen Bedürfnissen
anzupassen, klicken Sie zunächst auf das Maus-Symbol in der Taskleiste,
danach auf „Mouse Configuration“.
llLaser Maus
4
1.) Default Function Vorgegebene Grundeinstellung:
Scroll-Rad Taste: Scroll-Rad
Net-Wheel Taste: Net Wheel
Office-Wheel Taste: Office Wheel
2.) Start Menu Öffnet das Windows Start-Menü
3.) Close Window Schließt das ausgewählte Fenster
4.) Contrex help Öffnet das Hilfe-Fenster
5.) Restore window Stellt die ausgewählte Fenstergröße wieder her
6.) Maximizing window Maximiert das ausgewählte Fenster
7.) Minimizing window Minimiert das ausgewählte Fenster
00021026bda 04.01.2007 12:04 Uhr Seite 4

6 7
Die Net-Wheel und Office-Wheel Funktionen
Sie können die Net-Wheel oder Office-Wheel Funktionen
der dritten, vierten, oder fünften Maustaste zuordnen. Wenn
Sie dann die ensprechende Taste für die Net-Wheel betätigen,
erscheint das Net-Wheel auf Ihrem Desktop.
Sie können anschließend verschiedene Internet-Anwendungen
steuern, indem Sie auf das entsprechende Symbol klicken.
Wurde die Office-Wheel Funktion einer Taste zugewiesen,
können Sie über diese Funktion einfach und komfortabel die
Office-Anwendungen (Word, Powerpoint, Excel usw.) starten.
8.) Next window Öffnet das nächste Fenster (entspricht der Tastenkombination
Alt+Shift+Tab)
9.) Previous window Öffnet das vorherige Fenster (entspricht der Tastenkombination
Alt+Tab)
10.) Screen Safer Startet den Bildschirmschoner
11.) Page Up Bewegt den Mauszeiger auf die vorherige Seite
12.) Page down Bewegt den Mauszeiger auf die nächste Seite
13.) Home Bewegt den Mauszeiger zum Zeilenanfang
14.) End Bewegt den Mauszeiger zum Zeilenende
15.) Calculator Startet den Windows-Rechner
16.) F1 Function Simuliert die Tastenfunktion "F1"
17.) F2 Function Simuliert die Tastenfunktion "F2"
18.) F3 Function Simuliert die Tastenfunktion "F3"
19.) F4 Function Simuliert die Tastenfunktion "F4"
20.) F5 Function Simuliert die Tastenfunktion "F5"
21.) F6 Function Simuliert die Tastenfunktion "F6"
22.) F7 Function Simuliert die Tastenfunktion "F7"
23.) F8 Function Simuliert die Tastenfunktion "F8"
24.) F9 Function Simuliert die Tastenfunktion "F9"
25.) F10 Function Simuliert die Tastenfunktion "F10"
26.) F11 Function Simuliert die Tastenfunktion "F11"
27.) F12 Function Simuliert die Tastenfunktion "F12"
28.) Screen Snapshot Kopiert ein Abbild des Desktops in die Zwischenablage
29.) Window Snapshot Kopiert ein Abbild des aktiven Fensters in die Zwischenablage
30.) Control-C Simuliert die Tastenfunktion "Strg-C"
31.) Control-V Simuliert die Tastenfunktion "Strg-V"
32.) Control-A Simuliert die Tastenfunktion "Strg-A"
33.) Control-H Simuliert die Tastenfunktion "Strg-H"
34.) Control-G Simuliert die Tastenfunktion "Strg-G"
35.) Control-F Simuliert die Tastenfunktion "Strg-F"
36.) Control-X Simuliert die Tastenfunktion "Strg-X"
37.) Control-Z Simuliert die Tastenfunktion "Strg-Z"
38.) Control-W Simuliert die Tastenfunktion "Strg-W"
39.) Control-N Simuliert die Tastenfunktion "Strg-N"
40.) Control-O Simuliert die Tastenfunktion "Strg-O"
41.) Control-S Simuliert die Tastenfunktion "Strg-S"
42.) Control-P Simuliert die Tastenfunktion "Strg-P"
43.) Control-R Simuliert die Tastenfunktion "Strg-R"
44.) Run... Führt die Funktion "Ausführen" aus
45.) MS-Outlook Startet Office-Outlook
46.) MS-Word Startet Office-Word
47.) MS-Excel Startet Office-Excel
48.) MS-PowerPoint Startet Office PowerPoint
49.) MS-Finder Startet Office-Finder
50.) Outlook Express Startet Outlook-Express
51.) Internet Explorer Startet Internet Explorer
52.) File Manager Startet den Ordner "Eigene Dateien"
53.) NotePad Startet den Editor
54.) CD Player Startet den CD-Player
55.) MS-Paint Startet das Programm "Paint"
56.) Adress Book Startet das Adressbuch
57.) Office-Wheel Siehe nachfolgende Beschreibung
58.) Net-Wheel Siehe nachfolgende Beschreibung
59.) Double-Clicks Simuliert das Doppelklicken der linke Maustaste
00021026bda 04.01.2007 12:04 Uhr Seite 6

b) Next, in the “Mouse properties” window click on the
“Laser mouse” bar. You can now assign various functions to the third,
fourth and fifth mouse buttons.
Scroll wheel
To assign a function to the 3rd scroll wheel button*
Roll the scroll wheel one notch
Setting the scroll speed
Web wheel
To assign a function to the 4th scroll wheel button*
Office wheel
To assign a function to the 5th scroll wheel button*
Enable system tray icon
Show the mouse icon in the task bar or hide it
Compatible with Microsoft
If the scroll function does not work in certain
applications, then activate this option.
Tip: By clicking on the “Cursor options” bar you can make changes to the
mouse cursor (e.g. change the cursor speed).
*Functions available for the M1020/1022/1024 Laser Mouse:
Connecting the mouse
a) Insert the USB plug of the mouse into the USB socket
on the PC or a USB hub. Depending on the Windows version,
you may be prompted to insert the Windows CD.
Place your Windows CD in the CD-ROM or DVD-ROM drive
and follow the instructions on your screen.
b) The mouse is now immediately usable with the standard functions
(left and right mouse button, scroll function).
c) The mouse resolution can be switched between 1000 dpi and 2000 dpi.To
switch, hold the left and right mouse buttons down for 5 seconds.You can
then work with the new resolution.The default setting is 2000 dpi.
d) In order to assign specific functions to the 3rd button (scroll wheel) as well
as to the additional buttons, it is necessary to install the enclosed software.
(see next paragraph)
Installing the software
a) Uninstall any mouse software already installed.
b) The software supports Windows 98/ME/2000/XP and Vista.
c) If you use the operating system Windows Vista please download
the dedicated driver from our website www.hama.com
d) Place the enclosed CD in your CD-ROM or DVD-ROM drive.
Wait a moment; the installation menu is then automatically
started. (If this does not occur then double-click on the “Autorun”
icon in the data directory of the CD).
e) Click on “Install driver”. The installation program then leads you through the
individual installation steps.
f) Restart your PC to complete installation.
Using the mouse software
a) In order to adapt the scroll wheel and button settings to suit your personal
needs, first click on the mouse icon in the task bar,
then on “Mouse configuration”.
LLLaser Mouse
89
1.) Default function Preset default setting:
Scroll wheel button: Scroll wheel
Web wheel button: Web wheel
Office-Wheel Taste: Office Wheel
2.) Start menu Opens the Windows Start menu
3.) Close window Closes the selected window
4.) Context help Opens the Help window
5.) Restore window Restores the selected window to its original size
6.) Maximising window Maximises the selected window
7.) Minimising window Minimises the selected window
00021026bda 04.01.2007 12:04 Uhr Seite 8

The Web Wheel and Office Wheel functions
Assign to the third, fourth or fifth mouse buttons. If you then
activate the corresponding button for the Web Wheel,
then the Web Wheel appears on your desktop.
Afterwards, you can control various Internet applications
by clicking on the corresponding icon.
If the Office Wheel has been assigned to a button, then
you can simply and easily start MS Office applications
(Word, PowerPoint, Excel, etc.) via this function.
8.) Next window Opens the next window
(corresponds to the key combination Alt+Shift+Tab)
9.) Previous window Opens the previous window
(corresponds to the key combination Alt+Tab)
10.) Screen saver Starts the screen saver
11.) Page up Moves the cursor to the previous page
12.) Page down Moves the cursor to the next page
13.) Home Moves the cursor to the beginning of a line
14.) End Moves the cursor to the end of a line
15.) Calculator Starts the Windows computer
16.) F1 Function Simulates the “F1” key function
17.) F2 Function Simulates the “F2” key function
18.) F3 Function Simulates the “F3” key function
19.) F4 Function Simulates the “F4” key function
20.) F5 Function Simulates the “F5” key function
21.) F6 Function Simulates the “F6” key function
22.) F7 Function Simulates the “F7” key function
23.) F8 Function Simulates the “F8” key function
24.) F9 Function Simulates the “F9” key function
25.) F10 Function Simulates the “F10” key function
26.) F11 Function Simulates the “F11” key function
27.) F12 Function Simulates the “F12” key function
28.) Screen snapshot Copies an image of the desktop into the buffer
29.) Window snapshot Copies an image of the active window into the buffer
30.) Control-C Simulates the “Ctrl-C” key function
31.) Control-V Simulates the “Ctrl-V” key function
32.) Control-A Simulates the “Ctrl-A” key function
33.) Control-H Simulates the “Ctrl-H” key function
34.) Control-G Simulates the “Ctrl-G” key function
35.) Control-F Simulates the “Ctrl-F” key function
36.) Control-X Simulates the “Ctrl-X” key function
37.) Control-Z Simulates the “Ctrl-Z” key function
38.) Control-W Simulates the “Ctrl-W” key function
39.) Control-N Simulates the “Ctrl-N” key function
40.) Control-O Simulates the “Ctrl-O” key function
41.) Control-S Simulates the “Ctrl-S” key function
42.) Control-P Simulates the “Ctrl-P” key function
43.) Control-R Simulates the “Ctrl-R” key function
44.) Run Executes the “Run” function
45.) MS Outlook Starts MS Office Outlook
46.) MS Word Starts MS Office Word
47.) MS Excel Starts MS Office Excel
48.) MS PowerPoint Starts MS Office PowerPoint
49.) MS Finder Starts MS Office Finder
50.) MS Outlook Express Starts MS Office Outlook Express
10 11
51.) Internet Explorer Starts the Internet Explorer
52.) File Manager Opens the “My Files” folder
53.) NotePad Starts the NotePad file editor
54.) CD Player Starts the CD Player
55.) MS Paint Starts MS Paint
56.) Address Book Starts the Address Book
57.) Office Wheel See the following description
58.) Web Wheel See the following description
59 Double-click Simulates the double click function of the left mouse button
00021026bda 04.01.2007 12:04 Uhr Seite 10
Table of contents
Languages:
Other Hama Mouse manuals