manuals.online logo
Brands
  1. Home
  2. •
  3. Brands
  4. •
  5. Hama
  6. •
  7. Switch
  8. •
  9. Hama EASY User manual

Hama EASY User manual

H ama GmbH & Co KG
Postfach 80
86651 Monheim/Germany
Tel. +49 (0)9091/502-0
Fax +49 (0)9091/502-274
[email protected]
www.hama.com
2R021042-06.07
2R021042bda.indd Abs1:2
2R021042bda.indd Abs1:2 08.10.2007 13:53:35 Uhr
08.10.2007 13:53:35 Uhr
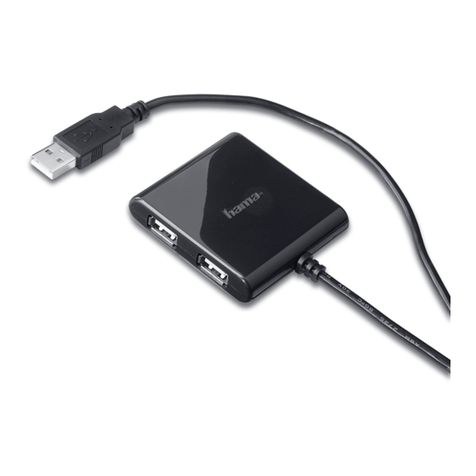
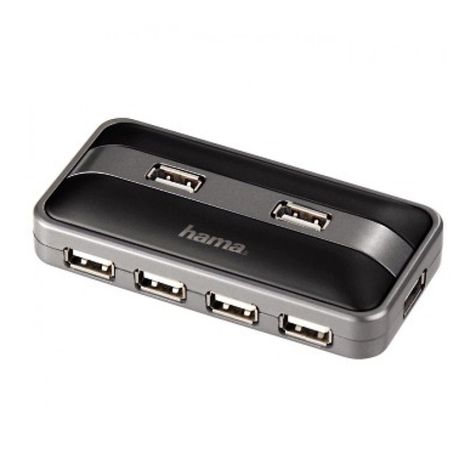
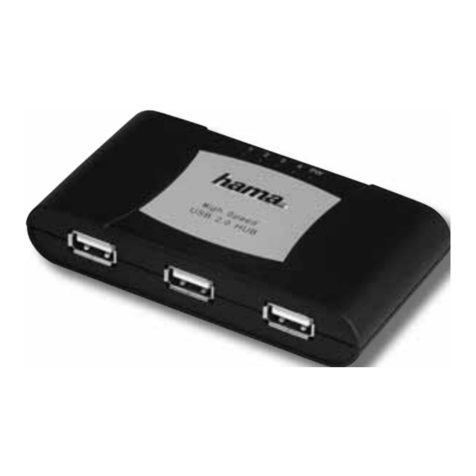
USB 2.0 Hub 1:4
2R021042
2R021042bda.indd Abs1:3
2R021042bda.indd Abs1:3 08.10.2007 13:53:37 Uhr
08.10.2007 13:53:37 Uhr
2
dBedienungsanleitung
Packungsinhalt:
1x USB-2.0-Hub
1x Bedienungsanleitung
Systemvoraussetzung:
• Betriebssystem Windows 2000 ab SP 3,
XP ab SP 1, Vista
• freier USB-Anschluss, vorzugsweise USB 2.0
Sicherheitshinweise:
Sie haben ein hochwertiges elektronisches Zubehör für
Ihren Computer erworben, es ist universell einsetzbar,
allerdings ist folgendes zu beachten:
• Schützen Sie das Gerät vor Druck- und
Stoßeinwirkung.
• Setzen Sie das Gerät keiner Feuchtigkeit aus, da
die Präzisionskontakte Schaden nehmen können.
• Schließen Sie das Gerät nicht an, wenn das Gerät,
die Anschlussleitung oder der Netzadapter
beschädigt sind.
• Lassen Sie Reparaturen grundsätzlich nur von
einer Fachwerkstatt bzw. im Service-Center
durchführen.
• Verwenden Sie ausschließlich den mitgelieferten
original Netzadapter, oder original Ersatzteile.
• Verwenden Sie ausschließlich das mitgelieferte
USB Anschlusskabel ohne Verlängerung, da sonst
die Datensicherheit beeinträchtigt werden kann.
• Vergewissern Sie sich, dass alle angeschlossenen
Geräte, das CE Zeichen tragen.
• Meiden Sie Wärmequellen und direkte
Sonneneinstrahlung.
• Achtung! Halten Sie Kinder fern von Elektro- und
elektronischen Geräten.
• Achtung! Halten Sie Kinder von Verpackungs-
material fern. Es besteht Erstickungsgefahr!
Inbetriebnahme:
1.Schalten Sie Ihren PC ein und warten Sie bis dieser
hochgefahren ist. Verbinden Sie durch das mitgelieferte
USB-Kabel, den USB-Hub mit Ihrem PC/ Notebook.
2.Bitte beachten Sie, dass bei der Installation des USB
Hub`s kein Endgerät angeschlossen sein darf.
Hinweis:
Beim Anschließen und Trennen des USB-
Hubs und der USB-Geräte können unterschiedliche
Meldungen auf Ihrem Bildschirm erscheinen. Bei
Fragen lesen Sie bitte im Handbuch Ihres Computers
oder Betriebssystems nach, oder wenden sich an
einen Fachmann.
3.Sie können nun Ihre USB-Peripheriegeräte (z. B.
Drucker, Scanner, etc.) an den USB-Hub anschließen.
Bitte beachten Sie bei der Installation der Geräte,
dass jedes Gerät einzeln installiert werden muss,
d.h. warten Sie bitte ab, bis die Treiber des jeweiligen
Gerätes vollständig installiert wurden, bevor Sie ein
weiteres Gerät installieren.
4.Weiterhin ist es empfehlenswert, die am Hub
angeschlossenen Endgeräte mit eigenem Strom zu
versorgen, soweit dies möglich ist.
Hinweis:
Zum Anschließen des USB-Hub muss kein
Treiber installiert werden. (Sind im Betriebssystem
Windows 2000 ab SP3 , XP ab SP1, Vista enthalten)
Bei den angeschlossenen USB-Geräten kann ein
Treiber jedoch nötig sein. Diesen erhalten Sie beim
Kauf, oder beim Hersteller des jeweiligen Gerätes.
Informationstechnische Einrichtung Class A
Warnung! Dies ist eine Einrichtung der Klasse A. Diese
Einrichtung kann im Wohnbereich Funkstörungen ver-
ursachen. In diesem Fall kann vom Betreiber verlangt
werden, angemessene Maßnahmen durchzuführen.
2R021042bda.indd Abs2:2
2R021042bda.indd Abs2:2 08.10.2007 13:53:37 Uhr
08.10.2007 13:53:37 Uhr
3
g
Package contents:
1x USB 2.0 hub
1x operating instructions
System requirements:
• Operating system Windows 2000 from SP 3,
XP from SP 1, Vista
• Free USB connection, preferably USB 2.0
Safety instructions:
You have acquired a high-quality, electronic accessory
for your computer which is universally useable. Please
observe the following points:
• Protect the device against pressure and impact.
• Do not expose the device to moisture. The precision
contacts can be damaged.
• To not connect the device if the device, the
connection lead or the mains adapter are damaged.
• The device or other components must only be
repaired in a specialist shop or in a service centre.
• Only use the enclosed original mains adapter or
original spare parts.
• Only use the enclosed USB connection cable without
extension. Otherwise, the data security can be
affected.
• Make sure that all connected devices are CE-marked.
• Avoid heat sources and direct sunlight exposure.
•
Attention!
Keep electrical equipment and electronic
devices out of reach of children.
•
Attention!
Keep packaging materials out of reach of
children! Danger of suffocation!
Putting into operation:
1.Switch on your PC and wait until it has started up.
Connect the USB hub with your PC/notebook by
means of the enclosed USB cable.
2.Please make sure that no terminal device is
connected when you install the USB hub.
Note:
When connecting and disconnecting the USB
hub and the USB devices, different messages can
appear on your screen. Contact a specialist or consult
the manual of your computer or operating system if
you have any questions.
3.Now you can connect your USB peripheral devices
(e.g. printer, scanner etc.) to the USB hub. When
installing the devices you have to install every devices
separately, i.e. please wait until the drivers of the
respective device have been completely installed
before installing another device.
4.
It is also recommendable – as far as this is possible –
to supply the terminal devices which are connected to
the hub with power of their own.
Note:
When connecting the USB hub, you do not have
to install drivers (are included in the operating system
Windows 2000 from SP3, XP from SP1, Vista). A driver
may be necessary for the connected USB devices.
This one can be obtained from the manufacturer of
the respective device or when purchasing such a
device.
Class A information technology equipment
Warning! This device is categorized as class A
equipment. This equipment can cause radio
interference in living spaces. If this is the case, you
can request the operator to undertake appropriate
measures to prevent such interference.
User manual
2R021042bda.indd Abs2:3
2R021042bda.indd Abs2:3 08.10.2007 13:53:37 Uhr
08.10.2007 13:53:37 Uhr
4
2R021042bda.indd Abs2:4
2R021042bda.indd Abs2:4 08.10.2007 13:53:38 Uhr
08.10.2007 13:53:38 Uhr
5
2R021042bda.indd Abs2:5
2R021042bda.indd Abs2:5 08.10.2007 13:53:41 Uhr
08.10.2007 13:53:41 Uhr

Other manuals for EASY

1

Other Hama Switch manuals

Hama uRage Vendetta 210 User manual

Hama

Hama uRage Vendetta 210 User manual

Hama USB Hub User manual

Hama

Hama USB Hub User manual

Hama 00044166 User manual

Hama

Hama 00044166 User manual

Hama 78483 User manual

Hama

Hama 78483 User manual

Hama USB 2.0 / Fire Wire Combo User manual

Hama

Hama USB 2.0 / Fire Wire Combo User manual

Hama 135750 User manual

Hama

Hama 135750 User manual

Hama 2R198803 User manual

Hama

Hama 2R198803 User manual

Hama Matrix 420 User manual

Hama

Hama Matrix 420 User manual

Hama AV-800S User manual

Hama

Hama AV-800S User manual

Hama AV-1000 User manual

Hama

Hama AV-1000 User manual

Hama 11467 User manual

Hama

Hama 11467 User manual

Hama USB 2.0 / Fire Wire Combo User manual

Hama

Hama USB 2.0 / Fire Wire Combo User manual

Hama 179567 User manual

Hama

Hama 179567 User manual

Hama USB 2.0 / Fire Wire Combo User manual

Hama

Hama USB 2.0 / Fire Wire Combo User manual

Hama 121760 User manual

Hama

Hama 121760 User manual

Hama Standby off switch User manual

Hama

Hama Standby off switch User manual

Hama 78495 User manual

Hama

Hama 78495 User manual

Hama USB 2.0 / Fire Wire Combo User manual

Hama

Hama USB 2.0 / Fire Wire Combo User manual

Hama 00176551 User manual

Hama

Hama 00176551 User manual

Hama 00079091 User manual

Hama

Hama 00079091 User manual

Hama 102193 User manual

Hama

Hama 102193 User manual

Hama Matrix 420 User manual

Hama

Hama Matrix 420 User manual

Hama 00121770 User manual

Hama

Hama 00121770 User manual

Hama AV-1200 AIR User manual

Hama

Hama AV-1200 AIR User manual

Popular Switch manuals by other brands

TRENDnet TE100-S16Eg Specifications

TRENDnet

TRENDnet TE100-S16Eg Specifications

Murphy DF Series Installating and operation manual

Murphy

Murphy DF Series Installating and operation manual

3Com Switch 4070 Getting started guide

3Com

3Com Switch 4070 Getting started guide

Leunig ePowerSwitch 8XM R2 user guide

Leunig

Leunig ePowerSwitch 8XM R2 user guide

Tenda TEG1016D user manual

Tenda

Tenda TEG1016D user manual

Pakedge SX-24P quick start guide

Pakedge

Pakedge SX-24P quick start guide

RuggedCom RuggedSwitch RS1600 installation guide

RuggedCom

RuggedCom RuggedSwitch RS1600 installation guide

ATEN RCM Series user manual

ATEN

ATEN RCM Series user manual

Dell Networking Z9500 Configuration guide

Dell

Dell Networking Z9500 Configuration guide

EUCHNER CTP-I.-AS Unicode Series operating instructions

EUCHNER

EUCHNER CTP-I.-AS Unicode Series operating instructions

Fujitsu XG700 - Switch Hardware guide

Fujitsu

Fujitsu XG700 - Switch Hardware guide

Potter VSR-F quick start guide

Potter

Potter VSR-F quick start guide

Armacost Lighting AL-28068 quick start guide

Armacost Lighting

Armacost Lighting AL-28068 quick start guide

Mastervolt MasterBus Power Interrupter user manual

Mastervolt

Mastervolt MasterBus Power Interrupter user manual

ATEN VS481C user manual

ATEN

ATEN VS481C user manual

Miranda NV5256 user guide

Miranda

Miranda NV5256 user guide

Pepperl+Fuchs PROFINET IO Power Hub manual

Pepperl+Fuchs

Pepperl+Fuchs PROFINET IO Power Hub manual

Intelligent network solutions DNX-A-2R-K quick start guide

Intelligent network solutions

Intelligent network solutions DNX-A-2R-K quick start guide

manuals.online logo
manuals.online logoBrands
  • About & Mission
  • Contact us
  • Privacy Policy
  • Terms and Conditions

Copyright 2025 Manuals.Online. All Rights Reserved.