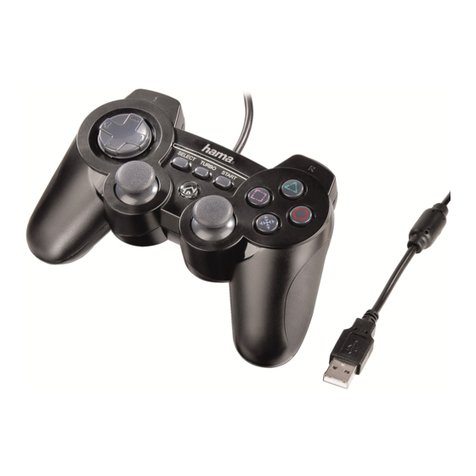
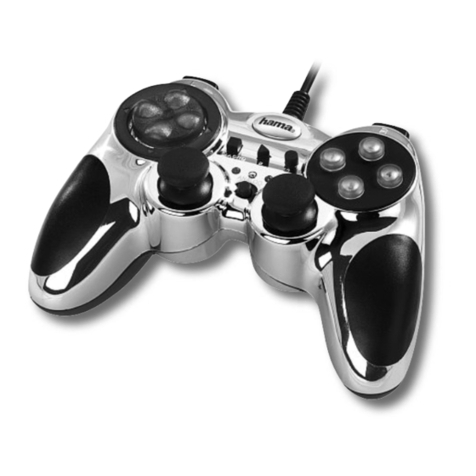
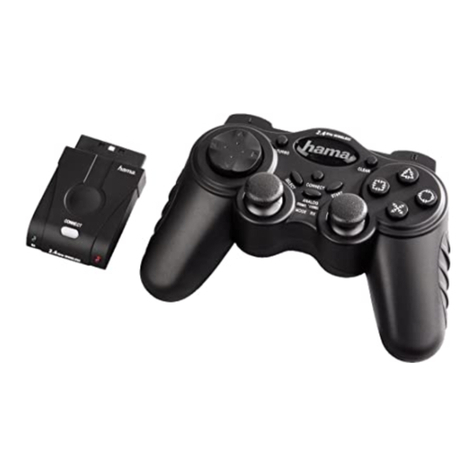
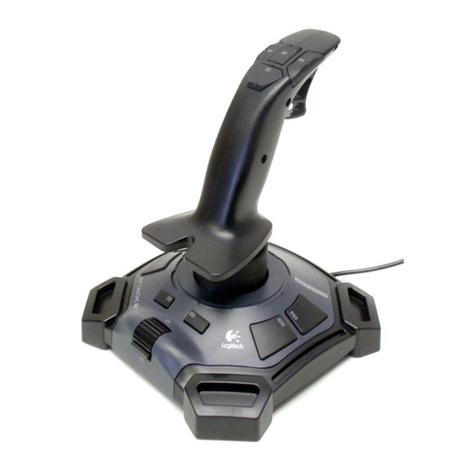
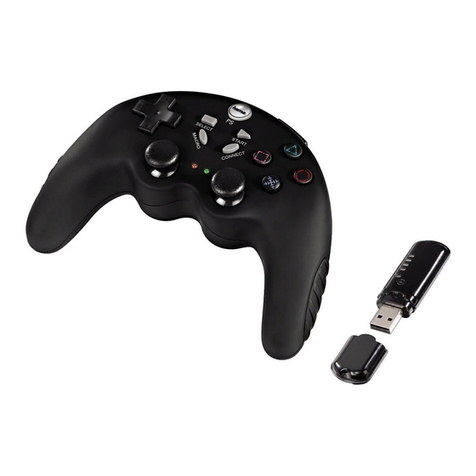
Hama uRage Vendetta 210 User manual

00
186074
GAMEPAD
VENDETTA 210
SRB
DK
N
Operating Instructions
Bedienungsanleitung
Mode d‘emploi
Instrucciones de uso
Gebruiksaanwijzing
Istruzioni per l‘uso
Instrukcja obsługi
Használati útmutató
Manual de utilizare
Návod kpoužití
Návod na použitie
Manual de instruções
Bruksanvisning
Руководство по эксплуатации
Работна инструкция
Οδηγίες χρήσης
Kullanma kılavuzu
Käyttöohje
Betjeningsvejledning
Bruksanvisning
Uputstvo za upotrebu
E
F
D
GB
NL
PL
RO
CZ
SK
P
S
RUS
BG
GR
TR
FIN
I
H

XInput
DInput
DOWNLOADS
Further information areavailable on:
WeitereInformationen nden Sie hier:
download.urage.com/186074


3
GOperating Instructions
IT'S ALLABOUT U!
Whether it be sports simulations or beat-em-ups, experience your game even more
intensively: with our Vendetta series, you really areinthe centreofthe action right
from the get-go. Equipped with motors and vibration functions, they offer you
situation-dependent reactions you can feel to your game play.Assign your additional
keys as you wish with individual functions or entirecombos. An ergonomic design and
ideal grip make our products especially comfortable. They allow you to enjoy complete
and precise control at any speed.
1. Explanation of warning symbols and notes
Warning
This symbol is used to indicate safety instructions or to draw your attention to
specichazards and risks.
Note
This symbol is used to indicate additional information or important notes.
2. Package contents
•Vendetta 210 game pad
•These operating instructions
3. Safety instructions
•The product is intended for private, non-commercial use only.
•Do not use the product in the immediate vicinity of heaters, other heat sources or in
direct sunlight.
•As with all electrical products, this device should be kept out of the reach of
children.
•Do not drop the product and do not expose it to any major shocks.
•Do not operate the product outside the power limits specied in the technical data.
•Do not use the product in areas in which electronic products arenot permitted.
•Be considerate. High volumes can disturb or interferewith your surroundings.
•Do not open the device or continue to operate it if it becomes damaged.
•Keep the packaging material out of the reach of children due to the risk of
suffocation.
•Dispose of packaging material immediately in accordance with the locally applicable
regulations.
•Do not modify the product in any way.Doing so voids the warranty.

4
4. Start-up and operation
4.1 Connecting the controller
•Connect the USB plug on the controller to your PC and press the Home button on
the controller
Note -Automatic disconnection
Be awarethat you will need to carry out this procedureeach time you log into the
PC.
4.2 Additional keys
•The following action keys can be assigned to the additional keys:
1/2/3/4/L/R/L2/R2/D-PAD
•Individual functions or key combinations can be programmed.
•Your settings remain active after an interruption to the connection.
•Programming mode is aborted after 30 seconds
•Programming mode is ended after 25 keys
4.3 Programming the additional keys
•Hold the relevant Mkey and "Start" pressed until all four LEDs start to ash
•Now enter the individual key or key combination
•To nish, press the relevant Mkey again
•To delete the Mkeys, hold "Start" and an Mkey pressed.
•Now press the Mkey for which you wish to delete the setting.

5
5. Turbo function
•The following action keys can be assigned aTurbo function:
1/2/3/4/L/R/L2/R2/D-PAD
•To assign the relevant key,hold the action key pressed and then the Turbo key
•To remove the Turbo function, repeat the procedure.
•Your settings arereset after an interruption to the connection.
6. Auto function
•The following action keys can be assigned aTurbo function:
1/2/3/4/L/R/L2/R2/D-PAD
•To assign the relevant key,hold the action key pressed and then the Turbo key twice.
•To remove the Auto function, repeat the procedure.
•Your settings arereset after an interruption to the connection.
7. Care and maintenance
•Only clean this product with aslightly damp, lint-free cloth and do not use
aggressive cleaning agents.
8. Warranty disclaimer
Hama GmbH &CoKGassumes no liability and provides no warranty for damage
resulting from improper installation/mounting, improper use of the product or from
failuretoobserve the operating instructions and/or safety notes.
9. Technical data
Input 5V 200 mA
System requirement Windows 10 /8.1 /8/7

6
10. Recycling information
Note on environmental protection:
Following the implementation of European Directive 2012/19/EU and
2006/66/EU into national law,the following applies:
Electrical and electronic devices as well as batteries must not be disposed
of with household waste. Consumers areobliged by law to return electrical
and electronic devices as well as batteries to the designated public collection
points or to the point of sale at the end of their service lives. Detailed information on
this topic is dened in the national laws of the respective country.This presence of
the above symbol on the product, operating instructions or package indicates that the
product is subject to these regulations. By recycling, reusing the materials or other
forms of utilising old devices/batteries, you aremaking an important contribution to
protecting our environment.

7
DBedienungsanleitung
IT'S ALLABOUT U!
Ob Sportsimulationen oder Beat ‘em Ups -erlebe dein Spiel jetzt noch intensiver: Mit
unserer Vendetta Serie bist du ab sofort wirklich mittendrin. Ausgestattet mit Motoren
und Vibrationsfunktionen bieten sie dir je nach Situation spürbareReaktionen auf dein
Gameplay.Belege die Zusatztasten frei nach deinen Wünschen mit Einzelfunktionen
oder ganzen Combos. Ergonomisches Design und bester Grip machen unsereProdukte
besonders komfortabel. Sie ermöglichen dir präzise Steuerung und volle Kontrolle bei
jeder Geschwindigkeit.
1. Erklärung von Warnsymbolen und Hinweisen
Warnung
Wirdverwendet, um Sicherheitshinweise zu kennzeichnen oder um Aufmerksamkeit
auf besondereGefahren und Risiken zu lenken.
Hinweis
Wirdverwendet, um zusätzlich Informationen oder wichtige Hinweise zu
kennzeichnen.
2. Packungsinhalt
•Gamepad Vendetta 210
•Diese Bedienungsanleitung
3. Sicherheitshinweise
•Das Produkt ist für den privaten, nicht-gewerblichen Haushaltsgebrauch vorgesehen.
•Betreiben Sie das Produkt nicht in unmittelbarer Nähe der Heizung, anderer
Hitzequellen oder in direkter Sonneneinstrahlung.
•Dieses Produkt gehört, wie alle elektrischen Produkte, nicht in Kinderhände!
•Lassen Sie das Produkt nicht fallen und setzen Sie es keinen heftigen
Erschütterungen aus.
•Betreiben Sie das Produkt nicht außerhalb seiner in den technischen Daten
angegebenen Leistungsgrenzen.
•Benutzen Sie das Produkt nicht in Bereichen, in denen elektronische Produkte nicht
erlaubt sind.
•Nehmen Sie Rücksicht. Hohe Lautstärken können ihreUmgebung stören oder
beeinträchtigen.
•Öffnen Sie das Produkt nicht und betreiben Sie es bei Beschädigungen nicht weiter.
•Halten Sie Kinder unbedingt von dem Verpackungsmaterial fern, es besteht
Erstickungsgefahr.
•Entsorgen Sie das Verpackungsmaterial sofort gemäß den örtlich gültigen
Entsorgungsvorschriften.
•Nehmen Sie keine Veränderungen am Produkt vor.Dadurch verlieren Sie jegliche
Gewährleistungsansprüche.
8
4. Inbetriebnahme und Betrieb
4.1 Verbinden des Controllers
•Schließen Sie den USB-Stecker des Controllers an Ihrem PC an und drücken Sie die
Home-Taste am Controller
Hinweis –Automatische Trennung
Beachten Sie, dass Sie diesen Vorgang bei jeder Neuanmeldung am PC durchführen
müssen.
4.2 Zusatztasten
•Es können folgende Aktionstasten auf die Zusatztasten gelegt werden:
1/2/3/4/L/R/L2/R2/D-PAD
•Es können Einzelfunktionen oder Tastenkombinationen programmiert werden
•IhreEinstellungen bleiben nach einer Verbindungsunterbrechung weiterhin aktiv.
•Der Programmier-Modus wirdnach 30 Sekunden abgebrochen
•Der Programmier-Modus wirdnach 25 Tasten beendet
4.3 Programmieren der Zusatztasten
•Halten Sie die jeweilige M-Taste und „Start“ gedrückt bis alle vier LEDs zu blinken
beginnen
•Geben Sie nun die Einzeltaste oder Tastenkombination ein
•Drücken Sie zum Abschluss die jeweilige M-Taste erneut
•Zum Löschen der M-Tasten halten Sie "Start" und eine M-Taste gedrückt.
•Drücken Sie nun die M-Taste, welcher Sie die Einstellung entfernen wollen.

9
5. Turbo-Funktion
•Es können folgende Aktionstasten mit der Turbo-Funktion belegt werden:
1/2/3/4/L/R/L2/R2/D-PAD
•Um die jeweilige Taste belegen zu können, halten Sie die Aktionstaste und Turbo-
Taste gleichzeitig gedrückt.
•Zum entfernen der Turbo-Funktion, wiederholen Sie den Vorgang.
•IhreEinstellungen werden nach einer Verbindungsunterbrechung zurückgesetzt.
6. Auto-Funktion
•Es können folgende Aktionstasten mit der Auto-Funktion belegt werden:
1/2/3/4/L/R/L2/R2/D-PAD
•Um die jeweilige Taste belegen zu können, halten sie die Aktionstaste gedrückt und
drücken die Turbo-Taste zwei mal.
•Zum entfernen der Auto-Funktion, wiederholen Sie den Vorgang.
•IhreEinstellungen werden nach einer Verbindungsunterbrechung zurückgesetzt.
7. Wartung und Pflege
•Reinigen Sie dieses Produkt nur mit einem fusselfreien, leicht feuchten Tuch und
verwenden Sie keine aggressiven Reiniger.
8. Haftungsausschluss
Die Hama GmbH &CoKGübernimmt keinerlei Haftung oder Gewährleistung für
Schäden, die aus unsachgemäßer Installation, Montage und unsachgemäßem
Gebrauch des Produktes oder einer Nichtbeachtung der Bedienungsanleitung und/oder
der Sicherheitshinweise resultieren.
9. Technische Daten
Input 5V 200 mA
Systemvoraussetzung Windows 10 /8.1 /8/7

10
10. Entsorgungshinweise
Hinweis zum Umweltschutz:
Ab dem Zeitpunkt der Umsetzung der europäischen Richtlinien 2012/19/EU
und 2006/66/EG in nationales Recht gilt folgendes:
Elektrische und elektronische Geräte sowie Batterien dürfen nicht mit dem
Hausmüll entsorgt werden. Der Verbraucher ist gesetzlich verpichtet,
elektrische und elektronische Geräte sowie Batterien am Ende ihrer
Lebensdauer an den dafür eingerichteten, öffentlichen Sammelstellen oder an die
Verkaufsstelle zurückzugeben. Einzelheiten dazu regelt das jeweilige Landesrecht.
Das Symbol auf dem Produkt, der Gebrauchsanleitung oder der Verpackung weist auf
diese Bestimmungen hin. Mit der Wiederverwertung, der stoichen Verwertung oder
anderen Formen der Verwertung von Altgeräten/Batterien leisten Sie einen wichtigen
Beitrag zum Schutz unserer Umwelt.

11
FMode d‘emploi
IT’S ALLABOUT U!
Fais une expérience encoreplus intense du jeu, que ce soit avec des simulations de
sport ou avec le beat ‘em up :Avecnotresérie Vendetta, tu es au centredel'action.
Avec l’équipement de moteurs et de fonctions de vibration, tu perçois en fonction
des situations des réactions sensibles dans ton gameplay.Tupeux librement attribuer
aux touches supplémentaires des fonctions individuelles ou des combos. Le design
ergonomique et la tenue optimisée rendent notreproduit particulièrement confortable.
Ils te permettent un pilotage précis et un contrôle intégral pour toutes les vitesses.
1. Explication des symboles d’avertissement et des remarques
Avertissement
Ce symbole est utilisé pour indiquer des consignes de sécurité ou pour attirer votre
attention sur des dangers et risques particuliers.
Remarque
Ce symbole est utilisé pour indiquer des informations supplémentaires ou des
remarques importantes.
2. Contenu de l’emballage
•Gamepad Vendetta 210
•Le présent mode d’emploi
3. Consignes de sécurité
•Ce produit est destiné àune utilisation domestique non commerciale.
•N’utilisez pas le produit àproximité immédiate d’un chauffage, d’autres sources de
chaleur ou àlalumièredirecte du soleil.
•Cet appareil, comme tout appareil électrique, doit êtregardé hors de portée des
enfants !
•Protégez le produit des secousses violentes et évitez tout choc ou toute chute.
•N’utilisez pas le produit en dehors des limites de puissance indiquées dans les
caractéristiques techniques.
•N’utilisez pas le produit dans des zones où les produits électroniques ne sont pas
autorisés.
•Faites attention. Un volume excessif est susceptible de déranger les personnes de
votreenvironnement ou de leur porter atteinte.
•Ne tentez pas d’ouvrir le produit en cas de détérioration et cessez de l’utiliser.
•Tenez les emballages d’appareils hors de portée des enfants, risque d’étouffement.
•Recyclez les matériaux d’emballage conformément aux prescriptions locales en
vigueur.
•N’apportez aucune modication au produit. Des modications vous feraient perdre
vos droits de garantie.

12
4. Mise en service et fonctionnement
4.1 Raccordement de la manette
•Raccordez la prise USB de la manette àvotrePCetappuyez sur la touche home sur
la manette
Remarque –déconnexion automatique
Veuillez tenir compte du fait que vous devez respecter cette procédureàchaque
nouvelle connexion sur le PC.
4.2 Touches supplémentaires
•Les touches d’action suivantes peuvent êtreattribuées aux touches supplémentaires:
1/2/3/4/L/R/L2/R2/D-PAD
•Il est possible de programmer des fonctions individuelles ou des raccourcis
•Vosréglages restent actifs après une interruption de la connexion.
•Le mode de programmation est annulé après 30 secondes
•Le mode de programmation s'arrête après 25 touches
4.3 Programmation des touches supplémentaires
•Maintenez enfoncée la touche Metdedémarrage jusqu’au clignotement des quatre
voyants LED
•Saisissez àprésent la touche individuelle ou le raccourci
•Pour nir,appuyez de nouveau sur la touche Mcorrespondante
•Pour supprimer la touche M, maintenez enfoncée la touche de démarrage et la
touche M.
•Appuyez maintenant sur la touche Mdelaquelle vous souhaitez retirer des réglages.

13
5. Fonction turbo
•Les touches d’action suivantes peuvent inclurelafonction turbo :
1/2/3/4/L/R/L2/R2/D-PAD
•And’attribuer la fonction àlatouche correspondante, maintenez enfoncée la
touche d’action puis appuyez sur la touche turbo
•Pour retirer la fonction turbo, répétez la procédure.
•Vosréglages sont réinitialisés après une interruption de la connexion.
6. Fonction auto
•Les touches d’action suivantes peuvent inclurelafonction turbo :
1/2/3/4/L/R/L2/R2/D-PAD
•And’attribuer la fonction àlatouche correspondante, maintenez enfoncée la
touche d’action et appuyez deux fois sur la touche turbo.
•Pour retirer la fonction auto, répétez la procédure.
•Vosréglages sont réinitialisés après une interruption de la connexion.
7. Soins et entretien
•Nettoyez le produit uniquement àl’aided’un chiffon non pelucheux légèrement
humide ;évitez tout détergent agressif.
8. Exclusion de garantie
La société Hama GmbH &CoKGdécline toute responsabilité en cas de dommages
provoqués par une installation, un montage ou une utilisation non conformes du
produit ou encoreprovoqués par le non-respect des consignes du mode d’emploi et/ou
des consignes de sécurité.
9. Caractéristiques techniques
Entrée 5V 200 mA
Conguration système requise Windows 10 /8.1 /8/7

14
10. Consignes de recyclage
Remarques concernant la protection de l’environnement :
Àcompter de la date de la transposition des directives européennes
2012/19/UE et 2006/66/CE dans le droit national, les règles suivantes
doivent êtreappliquées :
Les appareils électriques et électroniques ainsi que les piles ne doivent pas
êtreéliminés avec les déchets ménagers. Le consommateur doit retourner le
produit/les batteries usagé(e) aux points de collecte prévus àcet effet. Il peut aussi les
remettreàunrevendeur.Les détails àcesujet sont régis par la législation de chaque
pays. Le pictogramme "picto" présent sur le produit, son manuel d’utilisation ou son
emballage indique que le produit est soumis àcette réglementation. En permettant
le recyclage des matériaux et des piles ou toute autreforme de valorisation d’anciens
appareils, le consommateur apporte une contribution importante àlaprotection de
notreenvironnement.

15
EInstrucciones de uso
IT'S ALLABOUT U!
Ya se trate de deportes odebeat 'em ups, ahorapodrá experimentar el juego con
mayor intensidad: Con nuestraserie Vendetta estará verdaderamente en el centro
de la escena. Equipados con motores yfunciones de vibración, reacciona de forma
sorprendente en cada situación. Permite asignar funciones individuales ocombos
completos alos botones adicionales según se preera. El diseño ergonómico yel
mejor agarregarantizan la comodidad de nuestros productos. Proporcionan un control
preciso ytotal en cualquier velocidad.
1. Explicación de los símbolos de aviso ydelas indicaciones
Nota
Se utiliza paraindicar información adicional oindicaciones importantes.
Nota
Se utiliza paraindicar información adicional oindicaciones importantes.
2. Contenido del paquete
•Gamepad Vendetta 210
•Este manual de instrucciones
3. Indicaciones de seguridad
•Este producto está previsto parausarlo en el ámbito privado ynocomercial del
hogar.
•No utilice el producto junto asistemas de calefacción, otras fuentes de calor ni
expuesto alaluz solar directa.
•Este producto, como todos los productos eléctricos, no debe estar en manos de los
niños.
•No deje caer el producto ni lo someta asacudidas fuertes.
•No utilice el producto fueradelos límites de potencia indicados en los datos
técnicos.
•No utilice el producto en áreas donde no se permitan aparatos electrónicos.
•Precaución. Losvolúmenes altos pueden molestar oafectar asuentorno.
•No abraelproducto ni siga utilizándolo en caso de presentar daños.
•Mantenga el material de embalaje fueradel alcance de los niños, ya que existe
peligrodeasxia.
•Deseche el material de embalaje de conformidad con las normativas locales vigentes
en materia de eliminación de desechos.
•No realice cambios en el producto. Esto conllevaría la pérdida de todos los derechos
de la garantía.

16
4. Puesta en marcha yfuncionamiento
4.1 Conexión del mando
•Conecte la toma USB del mando al PC ypulsa el botón Home del mando
Nota -Desconexión automática
Tenga en cuenta que debe realizar este procedimiento cada vez que se conecte al
PC.
4.2 Botones adicionales
•Lossiguientes botones de acción pueden asignarse alos botones adicionales:
1/2/3/4/L/R/L2/R2/D-PAD
•Se pueden programar funciones individuales ocombinaciones de botones
•Losajustes permanecen activos después de una interrupción de la conexión.
•El modo de programación se cancela tras 30 segundos
•El modo de programación naliza después de 25 pulsaciones
4.3 Programación de los botones adicionales
•Mantenga pulsado el botón Mrespectivo y"Start" hasta que los cuatroLEDs
empiecen aparpadear
•Ahoraintroduzca el botón ocombinación de botones
•Pulse de nuevo el botón Mcorrespondiente para nalizar
•Para eliminar los botones M, mantenga pulsado "Star" yuna tecla M.
•Ahorapulse el botón Mcuyo ajuste desea eliminar.

17
5. Función turbo
•Lossiguientes botones de acción pueden ser asignados alafunción turbo:
1/2/3/4/L/R/L2/R2/D-PAD
•Para asignar el botón correspondiente, mantenga pulsado el botón de acción y
luego el botón de turbo
•Para eliminar la función turbo, repita el procedimiento.
•Su conguración se restablecerá tras una interrupción de la conexión.
6. Función auto
•Lossiguientes botones de acción pueden ser asignados alafunción turbo:
1/2/3/4/L/R/L2/R2/D-PAD
•Para asignar el botón correspondiente, mantenga pulsado el botón de acción ypulse
dos veces el botón turbo.
•Para eliminar la función auto, repita el procedimiento.
•Su conguración se restablecerá tras una interrupción de la conexión.
7. Mantenimiento ycuidado
•Limpie este producto solo con un paño ligeramente humedecido que no deje pelusas
ynoutilice detergentes agresivos.
8. Exclusión de responsabilidad
La empresa Hama GmbH &CoKGnoseresponsabiliza ni concede garantía alguna
por los daños que se deriven de una instalación, montaje omanejo incorrectos del
producto opor la inobservancia de las instrucciones de uso odelas indicaciones de
seguridad.
9. Datos técnicos
Entrada 5V 200 mA
Requisitos del sistema Windows 10 /8.1 /8/7

18
10. Instrucciones para desecho yreciclaje
Nota sobre la protección medioambiental:
Desde la implementación de la Directiva europea 2012/19/UE y2006/66/CE
en el sistema legislativo estatal, se aplica lo siguiente:
Losaparatos eléctricos yelectrónicos, así como las baterías ylos
acumuladores, no se deben eliminar junto con la basuradoméstica.
El usuario está legalmente obligado allevar los aparatos eléctricos y
electrónicos, así como las baterías ylos acumuladores alos puntos de recogida
públicos oadevolverlos al punto de venta donde los adquirió al nal de su vida
útil. Las particularidades al respecto están estipuladas en las distintas legislaciones
nacionales. El símbolo ubicado sobreelproducto, en las instrucciones de uso oenel
embalaje hace referencia alas disposiciones legales mencionadas. Gracias al reciclaje,
la recuperación de materiales uotras formas de recuperación de residuos de aparatos
eléctricos yelectrónicos ypilas yacumuladores usados, usted contribuye de manera
importante alaprotección de nuestromedio ambiente.

19
NGebruiksaanwijzing
IT'S ALLABOUT U!
Of het nu gaat om sportsimulaties of beat 'em ups -beleef je spel nu nog intenser: met
onze Vendetta-serie zit je er nu echt middenin. Met motoren en vibratiefuncties bieden
ze je afhankelkvan de situatie merkbarereacties op je gameplay.Wsnaar wens
individuele functies of complete combo's toe aan de extraknoppen. Het ergonomisch
ontwerp en de beste grip maken onze producten bzonder comfortabel. Ze bieden je
nauwkeurige besturing en volledige controle belke snelheid.
1. Verklaring van waarschuwingssymbolen en instructies
Waarschuwing
Wordtgebruikt om veiligheidsinstructies te markeren of om op bzonderegevaren
en risico’s te attenderen.
Aanwijzing
Wordtgebruikt om extrainformatie of belangrke aanwzingen te markeren.
2. Inhoud van de verpakking
•Gamepad Vendetta 210
•Deze gebruiksaanwzing
3. Veiligheidsinstructies
•Het product is bedoeld voor huishoudelk, niet-commercieel gebruik.
•Gebruik het product niet in de onmiddellke nabheid van de verwarming, andere
warmtebronnen of in direct zonlicht.
•Dit product dient, zoals alle elektrische producten, buiten het bereik van kinderen te
worden gehouden!
•Laat het product niet vallen en stel het niet bloot aan zwareschokken of stoten.
•Gebruik het product niet buiten de in de technische gegevens vermelde
vermogensgrenzen.
•Gebruik het product niet op plaatsen waar elektronische producten niet zn
toegestaan.
•Houd rekening met anderen. Grote geluidsvolumes kunnen uw omgeving storen of
benadelen.
•Open het product niet en gebruik het niet meer bbeschadigingen.
•Het verpakkingsmateriaal mag absoluut niet in handen van kinderen komen in
verband met verstikkingsgevaar.
•Voer het verpakkingsmateriaal direct en overeenkomstig de lokaal geldende
afvoervoorschriften af.
•Verander niets aan het product. Daardoor vervalt elke aanspraak op garantie.
Other manuals for uRage Vendetta 210
1
This manual suits for next models
1
Table of contents
Languages:
Other Hama Video Game Controllers manuals

Hama
Hama Black Force Wireless User manual

Hama
Hama Quixotic User manual

Hama
Hama Paradox User manual

Hama
Hama Amazing User manual

Hama
Hama Cromo User manual

Hama
Hama Easy Line Firejet Pro User manual

Hama
Hama Twin Pack User manual

Hama
Hama SCORPAD User manual

Hama
Hama Air Grip User manual

Hama
Hama X-Style User manual