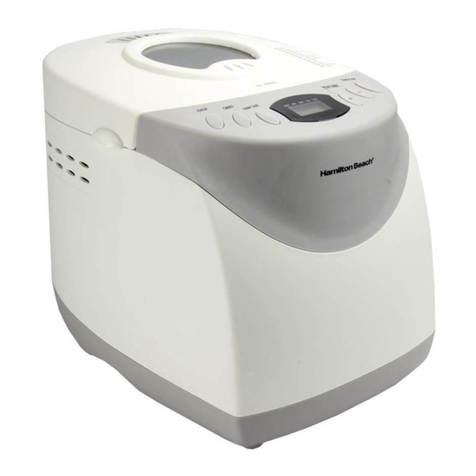
Hamilton Beach 29880 - Bread Maker Instruction Manual

Breadmaker
840106600
Important Safeguards ...................... 2
Parts and Features .......................... 3
How to Use Your Breadmaker ........ 5
Tips for Perfect Bread...................... 6
Timetable for Program .................... 7
How to Clean .................................... 7
Frequently Asked Questions ............8
Recipes.............................................. 9
Customer Service .......................... 18
In USA: 1-800-851-8900
In Canada: 1-800-267-2826
840106600 ENv02.qxd 12/16/02 5:16 PM Page 1

2
IMPORTANT SAFEGUARDS
SAVE THESE INSTRUCTIONS!
1. Read all instructions before using.
2. Do not touch hot surfaces. Use handles
or knobs. Always use potholders or oven
mitts to handle hot bread pan or hot
bread.
3. Do not put hand inside oven chamber
after bread pan is removed. Heating unit
will still be hot.
4. To protect against electric shock, do not
place cord, plug or appliance in water or
other liquid.
5. Close supervision is necessary when any
appliance is used by or near children.
6. Unplug from outlet when not in use and
before cleaning. Allow to cool before
putting on or taking off parts and before
cleaning appliance.
7. Avoid contacting moving parts.
8. Do not operate any appliance with a
damaged cord or plug or if the appliance
malfunctions or has been damaged in
any manner. Return appliance for exami-
nation, repair or adjustment.
9. The use of accessory attachments not
recommended by the manufacturer
may result in fire, electrical shock or
personal injury.
10. Do not use outdoors.
11. Do not let cord hand over edge of
table, counter, surface areas, or touch
hot surfaces.
12. Do not place appliance on or near a
hot gas or electrical burner, or in a
heated oven.
13. Do not use appliance for other then
intended use.
14. To disconnect, turn any control to OFF,
then remove plug from wall outlet.
Never pull on the cord.
15. Extreme caution must be used when
moving appliance during operation.
This product is intended for household
use only.
This appliance is equipped with a polarized
plug. This type of plug has one blade wider
than the other. The plug will fit into an
electrical outlet only one way. This is a
safety feature intended to help reduce the
risk of electrical shock. If you are unable to
insert the plug into the outlet, try reversing
the plug. If the plug should still fail to fit,
contact a qualified electrician to replace the
obsolete outlet. Do not attempt to defeat
the safety purpose of the polarized plug by
modifying the plug in any way.
The length of the cord used on this appli-
ance was selected to reduce the hazards of
becoming tangled in or tripping over a
longer cord. If a longer cord is necessary an
approved extension cord may be used. The
electrical rating of the extension cord must
be equal to or greater than the rating of the
breadmaker. Care must be taken to arrange
the extension cord so that it will not drape
over the countertop or tabletop where it
can be pulled on by children or accidentally
tripped over.
To avoid an electrical circuit overload, do
not use another high wattage appliance on
the same circuit with your breadmaker.
Consumer Safety Information
When using electric appliances, basic safety precautions should always be followed includ-
ing the following:
840106600 ENv02.qxd 12/16/02 5:16 PM Page 2

3
Parts and Features
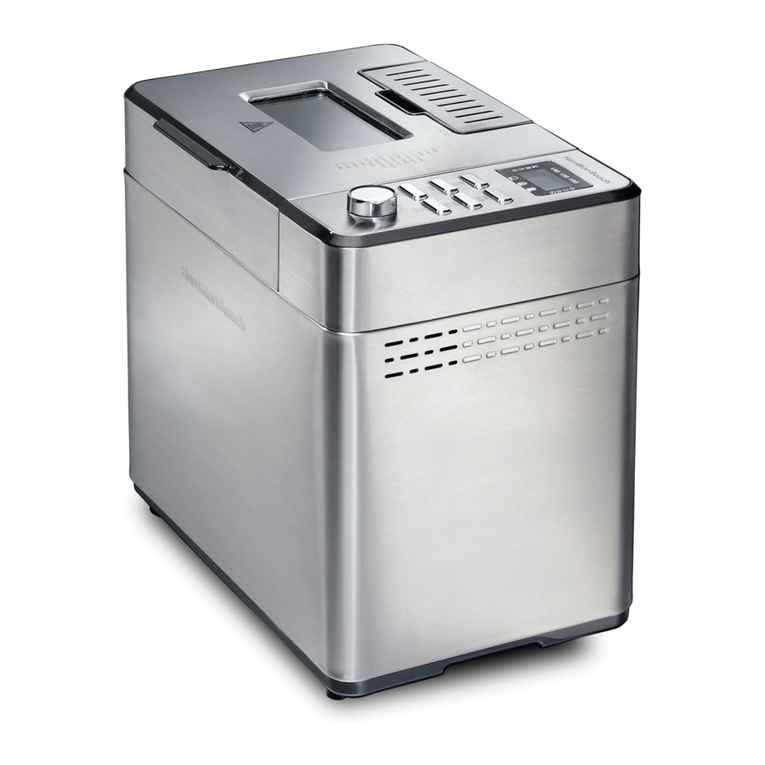
1. Cover
2. Viewing Window
3. Bread Pan
4. Oven Chamber
5. Control Panel
6. Kneading Paddle
Quick Start Guide
1. Wash and dry bread pan and
kneading paddle.
2. Place kneading paddle on shaft, with
arrow pointing up, pushing down as
far as it will go.
3. Carefully measure the ingredients
into the pan in the following order:
• Water or other liquid
• Sugar
• Salt
• Butter, margarine, or shortening
• Flour
• Yeast
4. Place bread pan in the breadmaker,
matching the alignment arrows ∇on
the pan and the side of the oven
chamber. Push bread pan down
firmly.
NOTE: Bread pan must click into
place for proper kneading and
mixing.
5. Close the cover and press
PROGRAM select button until
desired program number appears on
the digital display. The CRUST color
will automatically indicate “medium.”
Press CRUST color to change to
dark or light crust.
NOTE: Not available in Programs
3, 7, and 8.
6. Press START/CANCEL. The digital
display will show the time before the
bread will be ready. To program a
Delayed Start, refer to page 4 for
more information.
7. When done the bread machine will
beep. Press the START/CANCEL
button for 3 seconds. This will turn
off the bread machine. Using an
oven mitt pull bread pan straight up.
Still using oven mitts shake loaf from
pan and let cool for 10 minutes.
840106600 ENv02.qxd 12/16/02 5:16 PM Page 3

4
Control Panel
PROGRAM SELECT – These programs
allow you to make almost any type of
bread in your breadmaker. The amount
of mixing, kneading, rising, and baking
times and temperatures have been
pre-programmed for best results.
1. White Bread or basic setting with an
“Add Ingredient” signal.
2. Whole Wheat Bread for recipes
containing whole wheat flour.
3. Whole Wheat Rapid for whole
wheat bread baked in a shorter time
frame than normal.
4. French Bread – This bread is typi-
cally low in fat and sugar and has a
crispy crust with a chewy interior.
5. Sweet Bread – This program is pro-
grammed for dough with a higher
fat or sugar content. Has “Add
Ingredient” signal.
6. Quick Bread/Cake – This program
allows you to make baked goods
that do not use yeast for rising.
7. Dough – This program does the hard
work for you. The ingredients are
mixed, kneaded, then allowed to rise.
When the program is finished, the
dough will be ready to shape for the
second rising before you bake in
your oven.
8. Rapid – This setting is for a basic
White Bread that will be ready in
59 minutes. The crust color is
automatically set to Medium in
this program.
NOTE: The “Add Ingredient” signal is in
the White and Sweet Bread programs.
This signal sounds about 30 minutes
into the mixing/kneading program. This
is when to add ingredients such as
raisins, fruit, or nuts as directed in cer-
tain recipes. Adding these ingredients
at this stage prevents them from being
totally crushed.
CRUST – Allows you to select your
choice of crust color: light, medium, or
dark.
NOTE: Crust color is not programmable
in cycles 3, 7, and 8.
START/CANCEL – Press for 1 second
to Start. Press for 3 seconds to Cancel
or end a program.
SET TIMER – The programmable timer
allows you to set up the breadmaker, fill
with ingredients and set the timer so
the breadmaker starts at a later time.
This will give you just-baked bread
whenever you want.
To program a delayed start, determine
how many hours are between the time
you are ready to start the machine and
when you want the bread to be done.
That is the amount of time that should
be entered in the timer. Once you have
figured the amount, press the up (▲)
keypad. The first time displayed will be
the total bread program time. Maximum
allowed delay is 12 hours over the
program time. Hold button down 2 plus
seconds to adjust in fast mode.
Continue to press the up (▲) keypad
and it will increase in 10 minute inter-
vals. Once you have entered the
amount of time, press start.
NOTE: When using the programmable
timer, NEVER use perishable
ingredients, such as milk or eggs.
840106600 ENv02.qxd 12/16/02 5:16 PM Page 4

5
How to Use Your Breadmaker
1. Make sure breadmaker is unplugged
and placed on a stable, level surface.
Remove the bread pan and kneading
paddle and wash before first use.
2. Place the bread pan on the counter
and place the kneading paddle onto
the shaft in the bottom of the bread
pan. The arrow on the paddle should
point up. Push the kneading paddle
all the way down. About 1⁄8-inch of
the shaft will show above the knead-
ing paddle.
3. Measuring carefully, add the ingredi-
ents to the bread pan in the order
listed in the recipe. Liquid ingredi-
ents first, then dry ingredients, and
adding the yeast last.
4. Lift the bread pan by the handle and
place in the oven chamber. Place the
bread pan arrow at the front, aligning
with the oven chamber arrow. Push
the bread pan all the way down to
lock into the bottom gear in the oven
chamber. Bread pan must click in
place for proper mixing and knead-
ing. Close the cover.
5. Plug in breadmaker. A beep will sound
and the display window will blink SEL.
Press PROG until the desired bread
program number is shown in the dis-
play window.
6. Now select the Crust Color by
pressing CRUST. (Only available in
cycles 1, 2, 4, 5, and 6.) A small
arrow will move along the bottom of
the display window indicating which
crust color has been selected.
7. If not using the programmable timer
feature, press START/CANCEL to
start the breadmaker. The total time
before the bread is ready will be
shown in the display window. If using
the programmable timer, set the
timer then press START/CANCEL.
If START/CANCEL is not pushed
within 60 seconds, the display will go
back to “SEL.” See page 4 to pro-
gram a delayed start.
NOTE: During the White and Sweet
Cycles, a beep will sound about
30 minutes after the breadmaker
starts mixing. This is the Add
Ingredient signal to add raisins, dried
fruit or nuts if the recipe instructs.
8. The breadmaker will beep when the
bread is done. END will be shown
in the display window. For best
results, the bread should be
removed from the bread pan imme-
diately. If not however, the
breadmaker will start a Keep Warm
cycle for about 1 hour.
9. Press START/CANCEL and hold
for three seconds to turn off the
breadmaker. Unplug the unit. SEL
will blink in the display window until
the unit is unplugged. Raise the
cover and using an oven mitt, lift
the bread pan straight up to
remove from the oven chamber.
10. Using oven mitts on both hands,
turn the bread pan upside down
and shake the loaf until it falls out of
bread pan. Locate kneading pad-
dle. It may remain on the shaft in
the bottom of the bread pan or it
may have baked into the bottom of
the loaf of bread. Let bread cool on
rack for 10 minutes before slicing.
NOTES:
• Do not use any metal utensils in
the bread pan. This could dam-
age the non-stick coating.
• After making a loaf of bread,
the breadmaker must cool down
before making another loaf. Leave
the cover open to assist the cool-
ing process. After 30 minutes, if
you are still unable to turn the unit
on, unplug it. After waiting a few
seconds, plug it in again. This will
reset the unit.
• The cover of the breadmaker
is designed to be taken off and
reattached easily. This will help
when cleaning. However, never
immerse the cover; simply wipe
clean with a damp cloth.
• The unit is not operating correctly
if the control panel displays “EL”
or “ES” codes. Call Customer
Service if these codes appear.
840106600 ENv02.qxd 12/16/02 5:16 PM Page 5

6
Tips for Perfect Bread
Two things can ensure a perfect loaf of bread: precise measuring and quality
ingredients. Paying close attention to these areas will go a long way toward
successful breadmaking.
Measuring
Exact measuring is very important
when using a breadmaker. For the
most precise measurements you
should use two different types of mea-
suring cups. Liquid measuring cups are
usually clear glass or plastic with a
spout for ease of pouring. Measure the
liquid ingredient into the cup but do not
raise the cup to your eye level to check.
Set the cup on the counter and lower
yourself to check the liquid level.
Dry measuring cups are usually sold in
a nested set that are level across the
top of the cup. To measure flour, first
stir the flour to aerate it. Then spoon
flour into the measuring cup and using
the straight edge of a knife, scrape off
the excess. Do not shake the flour to
level.
Loaf Sizes
One pound, 11⁄2-pound, and 2-pound
breadmakers do not actually refer to
the weight or size of the loaf. These
actually refer to the capacity of the
bread pan in the breadmaker. This
breadmaker pan has a 2-pound loaf
capacity and can also make a 1-pound
or 11⁄2-pound loaf.
Prepared Mixes
Most prepared mixes purchased from a
grocery store work best on Program 1.
Ingredients
Bread flour is recommended in most
yeast-bread recipes. See Measuring tips
to ensure proper flour measurement.
Flour varies by region. For example,
American flour is milled from hard spring
wheat. Canadian flour is milled from hard
winter wheat. The percentage of natural
gluten varies, therefore, the bread varies.
Gluten, a protein, is the component that
gives bread its structure. While bread
flour has a higher gluten content than
all-purpose flour, all-purpose flour will
also work well. Gluten should be added
to all-purpose flour. Gluten is available at
specialty stores, health food stores, and
some grocery stores. Follow package
directions for the amount of gluten
needed per cup of flour. Gluten may
be added to bread flour to eliminate a
concave top on the bread loaf.
Yeast formulated specifically for bread-
makers has a finer grain and is
sometimes called instant yeast. Regular
active dry yeast can also be used in the
breadmaker. Make sure the yeast is
fresh. Check the expiration date printed
on every package or proof the yeast. To
proof, mix 1 cup hot tap water, 1 table-
spoon of yeast, and 1 teaspoon of sugar.
Let sit for 5 minutes. If the mixture bub-
bles or “grows” the yeast is active and
fresh.
Egg yolk should be broken in recipes
that use eggs.
The Weather
Extremely dry or extremely damp and
humid weather can affect your bread
because flour absorbs moisture. During
the first 5 to 10 minutes of the bread-
maker mixing and kneading, look at
the dough in the machine. The dough
should look like a smooth ball. It should
not be dry or crumbly. It should not be
sticky. Make any adjustment to dough
by adding water or flour, 1 tablespoon
at a time, while the dough is still in the
first stages of mixing.
840106600 ENv02.qxd 12/16/02 5:16 PM Page 6

7
Timetable for Programs
This chart shows the various stages and times used in the different programmed
cycles.
Rest
Knead
Rise
Punchdown
Rest
Shape
Rise
Bake
Light
Medium
Dark
1
White
–
33 min.
23 min.
–
–
20 sec.
64 min.
40 min.
55 min.
65 min.
2
Whole
Wheat
30 min.
24 min.
76 min.
10 sec.
30 min.
3 sec.
55 min.
40 min.
50 min.
60 min.
3
Whole
Wheat
Rapid
5 min.
33 min.
28 min.
120 sec.
15 min.
120 sec.
50 min.
–
65 min.
–
4
French
–
28 min.
34 min.
20 sec.
29 min.
20 sec.
54 min.
60 min.
70 min.
80 min.
5
Sweet
–
37 min.
40 min.
20 sec.
29 min.
20 sec.
49 min.
45 min.
55 min.
65 min.
6
Quick
Bread/
Cake
–
20 min.
0 min.
–
–
–
–
85 min.
95 min.
105 min.
7
Dough
–
30 min.
60 min.
–
–
–
–
–
–
–
STAGES PROGRAMMED SETTINGS
An easy way to determine the total time of any program is to check the digital
display. With the bread pan removed from the breadmaker, press PROGRAM
SELECT until the desired program number is displayed. Select CRUST color then
press START/CANCEL. The total program time will be displayed. Press
START/CANCEL for 3 seconds to turn the breadmaker off.
Cycles 2 and 3 begin with a rest period. The breadmaker will not immediately mix
after pressing START. See the Chart for rest period times for each program. The
breadmaker stabilizes the temperature for the program.
How To Clean
1. Unplug breadmaker and allow to
cool.
2. Remove the bread pan from the
oven chamber and remove the
bread. Locate the kneading paddle
in the bread or remaining on the
shaft in the bread pan.
NOTE: If the kneading paddle is diffi-
cult to remove from the shaft, fill the
bread pan with hot, soapy water and
let soak for 15 to 30 minutes. Pour
the water out. Grasp the kneading
paddle and twist back and forth. It
should release, then pull off.
3. DO NOT immerse the bread pan in
water or place in a dishwasher. Fill
the bread pan with hot, soapy water.
Wash bread pan and kneading pad-
dle with a soft cloth. Rinse and dry.
NOTE: Do not use abrasive cleaners
or steel wool to clean the bread pan.
These could damage the non-stick
coating.
4. Wipe the outside of the breadmaker
with a damp cloth. Do not immerse
in water or other liquid.
8
Rapid
–
14 min.
20 min.
–
–
–
–
–
25 min.
–
840106600 ENv02.qxd 12/16/02 5:16 PM Page 7

8
Frequently Asked Questions
How should I store my bread?
Bread keeps well at room temperature,
sealed in an airtight plastic bag. Cool
bread completely before placing in
plastic bags. Bread stored in the refrig-
erator quickly becomes stale.
Conversely, bread freezes very well.
Let bread cool completely then place in
an airtight plastic bag and freeze for up
to 6 months. It’s a good idea to slice
bread prior to freezing if you are only
using a few slices at a time. Let bread
defrost at room temperature in the
plastic bag.
Why is my bread raw on top?
Most likely, the bread rose too high and
touched the top of the machine, which
kept the heat from circulating and bak-
ing the top of the loaf. This is caused
by too much yeast. Use about 1⁄4less
yeast next time.
Why is my bread raw in the center?
This means that the bread didn’t rise
sufficiently because either there wasn’t
enough yeast or there wasn’t enough
rising time. Try programming the
machine for Manual or Dough then,
when the machine is done, reset it
back to START. This gives the dough
two kneading cycles before baking.
Why didn’t my loaf rise?
The yeast was either dead because of
an overdose of salt or sugar, or there
wasn’t enough yeast for the amount of
flour. Or you forgot to add yeast.
Why did my bread rise up and over
the pan?
Too much yeast was added to the
dough.
Why is my bread all holey?
This is caused by too much yeast or
liquid.
Why is my dough too dry?
Add liquid, a teaspoon at a time,
until dough forms a ball while being
kneaded.
Why is my dough wet and sticky?
Add extra flour, a teaspoon at a time,
until dough forms a ball while being
kneaded.
840106600 ENv02.qxd 12/16/02 5:16 PM Page 8

9
White Bread (Program 1)
White
11⁄2-Pound Loaf
1 cup water
11⁄8teaspoon salt
1 tablespoon sugar
3 tablespoons vegetable shortening
31⁄2cups American bread flour OR
21⁄4cups Canadian bread flour*
11⁄2teaspoons bread machine yeast
White Wheat
11⁄2-Pound Loaf
1 cup water
11⁄2teaspoons salt
3 tablespoons sugar
2 tablespoons vegetable shortening
2 tablespoons nonfat dry milk
2 cups American bread flour OR
11⁄4cups Canadian bread flour*
1 cup whole wheat flour
2 teaspoons bread machine yeast
Onion
11⁄2-Pound Loaf
1 cup water
11⁄8teaspoons salt
1 tablespoons sugar
3 tablespoons vegetable shortening
2 tablespoons dried minced onion
31⁄2cups American bread flour OR
21⁄4cups Canadian bread flour*
2 teaspoons bread machine yeast
Onion Poppy Seed
11⁄2-Pound Loaf
1 cup water
11⁄8teaspoons salt
1 tablespoon sugar
3 tablespoons vegetable shortening
31⁄2cups American bread flour OR
21⁄4cups Canadian bread flour*
11⁄2teaspoons onion flakes
2 teaspoons poppy seeds
2 teaspoons bread machine yeast
2-Pound Loaf
11⁄3cups water
11⁄2teaspoons salt
2 tablespoons sugar
1⁄4cup vegetable shortening
41⁄2cups American bread flour OR
3 cups Canadian bread flour*
2 teaspoons bread machine yeast
2-Pound Loaf
11⁄4cups water
11⁄2teaspoons salt
3 tablespoons sugar
2 tablespoons vegetable shortening
3 tablespoons nonfat dry milk
21⁄2cups American bread flour OR
11⁄2cups Canadian bread flour*
11⁄2cup whole wheat flour
11⁄2teaspoons bread machine yeast
2-Pound Loaf
11⁄3cup water
11⁄2teaspoons salt
2 tablespoons sugar
1⁄4cup vegetable shortening
3 tablespoons dried minced onion
41⁄2cups American bread flour OR
3 cups Canadian bread flour*
11⁄2teaspoons bread machine yeast
* When using Canadian flour, use the reduced flour amount listed for
Canadian bread flour. Do not use the American flour amount.
2-Pound Loaf
11⁄3cup water
11⁄2teaspoons salt
2 tablespoons sugar
1⁄4cup vegetable shortening
41⁄2cups American bread flour OR
3 cups Canadian bread flour*
2 teaspoons onion flakes
1 tablespoon poppy seeds
11⁄2teaspoons bread machine yeast
840106600 ENv02.qxd 12/16/02 5:16 PM Page 9

10
Oatmeal-Buttermilk
11⁄2-Pound Loaf
1 cup buttermilk
1 teaspoon salt
2 tablespoons sugar
3 tablespoons vegetable shortening
3⁄4cup regular oats (old-fashioned oats)
21⁄2cups American bread flour OR
13⁄4cups Canadian bread flour*
2 teaspoons bread machine yeast
Maple Wheat
11⁄2-Pound Loaf
1 cup buttermilk
1 teaspoon salt
2 tablespoons nonfat dry milk
2 tablespoons maple syrup
2 tablespoons vegetable shortening
1 cup whole wheat flour
2 cups American bread flour OR
11⁄4cups Canadian bread flour*
11⁄2teaspoons bread machine yeast
Italian Parmesan Bread
11⁄2-Pound Loaf
1 cup + 2 tablespoons water
11⁄8teaspoons salt
1 tablespoon sugar
3 tablespoons vegetable shortening
31⁄2cups American bread flour OR
21⁄4cups Canadian bread flour*
1 teaspoon dried, crushed basil
1 teaspoon dried, crushed oregano
3 tablespoons grated Parmesan cheese
11⁄2teaspoons bread machine yeast
Light Rye
11⁄2-Pound Loaf
1 cup water
11⁄2teaspoons salt
2 tablespoons sugar
1 tablespoon vegetable shortening
2 teaspoons caraway seed
2 cups American bread flour OR
11⁄2cups Canadian bread flour*
1 cup rye flour
11⁄2teaspoons bread machine yeast
2-Pound Loaf
11⁄3cups water
11⁄2teaspoons salt
2 tablespoons sugar
1⁄4cup vegetable shortening
41⁄2cups American bread flour OR
3 cups Canadian bread flour*
11⁄2teaspoons dried, crushed basil
11⁄2teaspoons dried, crushed oregano
1⁄4cup grated Parmesan cheese
11⁄2teaspoons bread machine yeast
2-Pound Loaf
11⁄3cups buttermilk
1 teaspoon salt
2 tablespoons nonfat dry milk
3 tablespoons maple syrup
2 tablespoons vegetable shortening
11⁄2cups whole wheat flour
21⁄2cups American bread flour OR
11⁄2cups Canadian bread flour*
11⁄2teaspoons bread machine yeast
2-Pound Loaf
11⁄2cups water
11⁄2teaspoons salt
2 tablespoons sugar
1 tablespoon vegetable shortening
2 teaspoons caraway seed
3 cups American bread flour OR
2 cups Canadian bread flour*
11⁄2cups rye flour
2 teaspoons bread machine yeast
* When using Canadian flour, use the reduced flour amount listed
for Canadian bread flour. Do not use the American flour amount.
2-Pound Loaf
11⁄4cups buttermilk
11⁄4teaspoons salt
2 tablespoons sugar
1⁄4cup vegetable shortening
1 cup regular oats (old-fashioned oats)
23⁄4cups American bread flour OR
2 cups Canadian bread flour*
21⁄2teaspoons bread machine yeast
840106600 ENv02.qxd 12/16/02 5:16 PM Page 10

11
Whole Wheat Bread (Program 2)
Whole Wheat
11⁄2-Pound Loaf
1 cup water
1 teaspoon salt
11⁄2tablespoons sugar
4 teaspoons vegetable shortening
4 teaspoons nonfat dry milk
31⁄2cups American whole wheat flour
OR
21⁄4cups Canadian whole wheat flour*
1 teaspoons bread machine yeast
High Fiber Bran
11⁄2-Pound Loaf
11⁄4cups water
11⁄2teaspoons salt
2 tablespoons honey
2 tablespoons vegetable shortening
1 cup whole bran cereal
11⁄2cups whole wheat flour
11⁄2cups American bread flour OR
3⁄4cup Canadian bread flour*
21⁄2teaspoons bread machine yeast
2-Pound Loaf
11⁄3cups water
1 teaspoon salt
3 tablespoons sugar
2 tablespoons vegetable shortening
2 tablespoons nonfat dry milk
41⁄2cups American whole wheat flour
OR
31⁄2cups Canadian whole wheat flour*
1 teaspoons bread machine yeast
Honey Granola
11⁄2-Pound Loaf
1 cup + 2 tablespoons water
11⁄8teaspoons salt
1 tablespoon sugar
3 tablespoons vegetable shortening
11⁄2cups American bread flour OR
1 cup Candian bread flour*
1 cup whole wheat flour
1 cup granola
11⁄4teaspoons bread machine yeast
2-Pound Loaf
11⁄2cups water
11⁄2teaspoons salt
1⁄4cup honey
2 tablespoons vegetable shortening
21⁄2cups American bread flour OR
2 cups Canadian bread flour*
1 cup whole wheat flour
1 cup granola
11⁄2teaspoons bread machine yeast
2-Pound Loaf
11⁄3cups water
11⁄2teaspoons salt
3 tablespoons honey
2 tablespoons vegetable shortening
1 cup whole bran cereal
13⁄4cups American whole wheat flour OR
11⁄2cups Canadian whole wheat flour
13⁄4cups American bread flour OR
11⁄2cups Canadian bread flour*
21⁄2teaspoons bread machine yeast
* When using Canadian flour, use the reduced flour amount listed
for Canadian bread flour. Do not use the American flour amount.
840106600 ENv02.qxd 12/16/02 5:16 PM Page 11

12
French Bread (Program 4)
French
11⁄2-Pound Loaf
1 cup water
1 teaspoon salt
1 teaspoon sugar
31⁄2cups American bread flour OR
21⁄4cups Canadian bread flour*
11⁄2teaspoons bread machine yeast
French Onion
11⁄2-Pound Loaf
1 cup water
1-ounce envelope dry onion soup mix
31⁄2cups American bread flour OR
21⁄4cups Canadian bread flour*
2 teaspoons bread machine yeast
2-Pound Loaf
11⁄4cups + 1 tablespoon water
1 teaspoon salt
11⁄2teaspoons sugar
41⁄2cups American bread flour OR
3 cups Canadian bread flour*
11⁄2teaspoons bread machine yeast
2-Pound Loaf
11⁄2cups water
1-ounce envelope dry onion soup mix
41⁄2cups American bread flour OR
3 cups Canadian bread flour*
11⁄2teaspoons bread machine yeast
Rapid Whole Wheat (Program 3)
Honey Oatmeal
11⁄2-Pound Loaf
11⁄4cups water
1 teaspoon salt
1 tablespoon honey
1 tablespoon vegetable shortening
2 tablespoons nonfat dry milk
11⁄4cups American bread flour OR
3⁄4cup Canadian bread flour*
11⁄4cups whole wheat flour
1⁄4cup regular oatmeal
(old-fashioned oats)
11⁄2teaspoons bread machine yeast
Whole Wheat
11⁄2-Pound Loaf
1 cups water
11⁄2teaspoons salt
1 tablespoon sugar
2 tablespoons vegetable shortening
2 tablespoons nonfat dry milk
31⁄2cups American whole wheat flour
OR
21⁄4cups Canadian whole wheat flour*
1 teaspoons bread machine yeast
* When using Canadian flour, use the reduced flour amount listed
for Canadian bread flour. Do not use the American flour amount.
2-Pound Loaf
11⁄3cups water
11⁄4teaspoons salt
1 tablespoon honey
1 tablespoon vegetable shortening
2 tablespoons nonfat dry milk
21⁄2cups American bread flour OR
11⁄2cups Canadian bread flour
11⁄2cups whole wheat flour
1⁄3cup regular oatmeal
(old-fashioned oats)
2 teaspoons bread machine yeast
2-Pound Loaf
11⁄3cups warm water
11⁄2teaspoons salt
3 tablespoons sugar
2 tablespoons vegetable shortening
3 tablespoons nonfat dry milk
41⁄2cups American whole wheat flour
OR
3 cups Canadian whole wheat flour
1 teaspoons bread machine yeast
840106600 ENv02.qxd 12/16/02 5:16 PM Page 12

13
Sweet Bread (Program 5)
Chocolate
11⁄2-Pound Loaf
1 cup milk
1 egg, slightly beaten
1 teaspoon salt
1⁄2cup sugar
1⁄4cup unsweetened baking cocoa
1⁄4cup butter, room temperature
3 cups American bread flour OR
2 cups Canadian bread flour*
6-ounces (1 cup) semi-sweet
chocolate chips
2 teaspoons bread machine yeast
Set crust color to Light. Serve as a breakfast bread with cream cheese.
Cinnamon
11⁄2-Pound Loaf
1 cup water
11⁄2teaspoons salt
1⁄4cup sugar
2 tablespoons nonfat dry milk
2 tablespoons vegetable shortening
31⁄2cups American bread flour OR
21⁄4cups Canadian bread flour*
11⁄2teaspoons cinnamon
2 teaspoons bread machine yeast
Cinnamon-Raisin
11⁄2-Pound Loaf
1 cup water
11⁄2teaspoons salt
1⁄4cup sugar
2 tablespoons nonfat dry milk
2 tablespoons vegetable shortening
23⁄4cups American bread flour OR
2 cups Canadian bread flour*
11⁄2teaspoons cinnamon
2 teaspoons bread machine yeast
3⁄4cup raisins†
†Add raisins at Add Ingredient signal, about 30 minutes after the Program begins.
2-Pound Loaf
11⁄4cups milk
1 egg, slightly beaten
11⁄4teaspoons salt
1⁄2cup sugar
1⁄4cup unsweetened baking cocoa
1⁄4cup butter, room temperature
31⁄2cups American bread flour OR
21⁄2cups Canadian bread flour*
6-ounces (1 cup) semi-sweet
chocolate chips
21⁄4teaspoons bread machine yeast
2-Pound Loaf
11⁄2cups water
2 teaspoons salt
1⁄4cup sugar
2 tablespoons nonfat dry milk
3 tablespoons vegetable shortening
4 cups American bread flour OR
3 cups Canadian bread flour*
2 teaspoons cinnamon
11⁄2teaspoons bread machine yeast
2-Pound Loaf
11⁄4cups water
11⁄2teaspoons salt
1⁄4cup sugar
2 tablespoons nonfat dry milk
3 tablespoons vegetable shortening
31⁄4cups American bread flour OR
3 cups Canadian bread flour*
2 teaspoons cinnamon
21⁄4teaspoons bread machine yeast
1 cup raisins†
* When using Canadian flour, use the reduced flour amount listed
for Canadian bread flour. Do not use the American flour amount.
840106600 ENv02.qxd 12/16/02 5:16 PM Page 13

14
Quick Bread/Cake (Program 6)
Moist Devils Food Cake
12-ounce can evaporated milk
1⁄2cup vegetable oil
3 eggs, slightly beaten
18-ounce package Devil’s Food cake mix
Set crust color to Light.
Yellow Pound Cake
11⁄3cups water
1⁄3cup vegetable oil
3 large eggs, slightly beaten
3.9-ounce vanilla instant pudding mix
18-ounce package yellow cake mix
Banana-Nut Quick Bread
1 cup water
1⁄4cup vegetable oil
2 eggs, slightly beaten
14-ounce package banana quick bread mix
1⁄2cup finely chopped nuts
Cornbread
2 eggs, slightly beaten
1 cup milk
1⁄2teaspoon bread machine yeast
2 8.5-ounce package corn muffin mix
Set crust color to Light.
840106600 ENv02.qxd 12/16/02 5:16 PM Page 14

15
Dough Only (Program 7)
Dinner Rolls
1 cup milk
1⁄4cup butter, room temperature
1 egg, slightly beaten
1⁄4cup sugar
1 teaspoon salt
4 cups all-purpose flour
2 teaspoons bread machine yeast
At the end of the dough program, remove the dough from the bread machine.
Press and hold START/CANCEL for several seconds to end the program. Place
on floured counter. Grease a 9x13-inch baking pan. Cut dough in half, then divide
each half into 8 pieces. Place in greased pan. Let rise until almost double in size,
about 45 minutes. Bake at 375ºF for 15 to 20 minutes or until done. Makes 16
rolls.
Pizza Crust
1 cup water
1 teaspoon salt
1 tablespoon vegetable oil
3 cups bread flour
2 teaspoons bread machine yeast
At the end of the dough program, remove the dough from the bread machine.
Press and hold START/CANCEL for several seconds to end the program. Place
dough on floured counter and let the dough rest for 10 minutes. Shape into a 15-
to 16-inch round pizza pan. Add favorite pizza ingredients. Bake at 475ºF for 20 to
25 minutes or until done. Makes one 16-inch pizza.
Focaccia
Dough:
1 cup water
1 teaspoon salt
1 teaspoon sugar
31⁄4cups bread flour
2 teaspoons bread machine yeast
At the end of the dough program, remove the dough from the bread machine.
Press and hold START/CANCEL for several seconds to end the program. Place
dough on floured counter and let the dough rest for 10 minutes. Sprinkle cornmeal
on a jelly roll pan or cookie sheet. Roll dough into a large rectangle. Place rectan-
gle onto pan. Using your fingers, make dents in the dough about 1 to 2 inches
apart. Drizzle oil over top of dough. Let rise 30 to 45 minutes. Sprinkle dough with
basil and cheese. Bake at 400ºF for 20 to 25 minutes. Makes 1 focaccia.
Toppings:
1 to 2 tablespoons cornmeal
2 tablespoons olive oil
3 tablespoons fresh basil,
coarsely chopped
1⁄4cup grated Parmesan cheese
840106600 ENv02.qxd 12/16/02 5:16 PM Page 15

16
Cinnamon Raisin Buns
Dough:
1 cup milk
2 eggs, slightly beaten
1 teaspoon salt
1⁄2cup sugar
1⁄4cup butter, room temperature
4 cups all-purpose flour
21⁄2teaspoons bread machine yeast
Filling:
1⁄3cup butter, softened
1 cup brown sugar
1 tablespoon cinnamon
3⁄4cup raisins
At the end of the program, remove the dough from the bread machine. Press and
hold START/CANCEL for several seconds to end the program. Place on floured
counter and let rest for 10 minutes. Roll dough to a large rectangle. Spread with
softened butter. Mix the brown sugar and cinnamon, then sprinkle over the butter.
Scatter the raisins over the butter and sugar. Roll up dough from the longest side.
Cut into rolls about 1⁄2-inch thick. Place in a greased 10x14-inch baking pan.*
Cover and let rise until almost doubled, about 1 hour. Bake at 375ºF for 20 to 25
minutes, or until done. Let cool slightly, then ice.
Icing: Combine the cream cheese, butter, confectioners sugar, vanilla, and salt.
Makes about 16 large cinnamon rolls.
*Can also use a 9x13-inch baking pan plus a 9x5-inch loaf pan.
Icing:
3-ounces cream cheese,
room temperature
3 tablespoons butter,
room temperature
1 cup confectioners sugar
1 teaspoon vanilla extract
Pinch salt
840106600 ENv02.qxd 12/16/02 5:16 PM Page 16

17
Rapid White Bread (Program 8)
White
11⁄2-Pound Loaf
1 cup warm water
1 teaspoon salt
3 tablespoons sugar
2 tablespoons vegetable shortening
2 tablespoons nonfat dry milk
31⁄4cups American bread flour OR
21⁄4cups Canadian bread flour*
3 teaspoons bread machine yeast
Cheddar
11⁄2-Pound Loaf
1 cup warm water
1 teaspoon salt
3 tablespoons sugar
2 tablespoons vegetable shortening
2 tablespoons nonfat dry milk
1⁄3cup grated cheddar
31⁄4cups American bread flour OR
21⁄4cups Canadian bread flour*
3 teaspoons bread machine yeast
Pepper-Dill
11⁄2-Pound Loaf
1 cup warm water
1 teaspoon salt
1⁄2teaspoon black pepper
1⁄2teaspoon dried dillweed
3 tablespoons sugar
2 tablespoons vegetable shortening
2 tablespoons nonfat dry milk
3 cups American bread flour OR
21⁄4cups Canadian bread flour*
3 teaspoons bread machine yeast
2-Pound Loaf
11⁄4cups warm water
11⁄4teaspoons salt
1⁄4cup sugar
3 tablespoons vegetable shortening
3 tablespoons nonfat dry milk
4 cups American bread flour OR
3 cups Canadian bread flour*
31⁄2teaspoons bread machine yeast
2-Pound Loaf
11⁄4cups warm water
11⁄4teaspoons salt
1⁄4cup sugar
3 tablespoons vegetable shortening
3 tablespoons nonfat dry milk
1⁄2cup grated cheddar
4 cups American bread flour OR
3 cups Canadian bread flour*
31⁄2teaspoons bread machine yeast
2-Pound Loaf
11⁄4cups warm water
11⁄4teaspoons salt
1⁄2teaspoon black pepper
1⁄2teaspoon dried dillweed
1⁄4cup sugar
3 tablespoons vegetable shortening
3 tablespoons nonfat dry milk
4 cups American bread flour OR
3 cups Canadian bread flour*
31⁄2teaspoons bread machine yeast
* When using Canadian flour, use the reduced flour amount listed
for Canadian bread flour. Do not use the American flour amount.
840106600 ENv02.qxd 12/16/02 5:16 PM Page 17

18
If you have a claim under this warranty, please call our Customer Service Number.
For faster service please have model, series, and type numbers ready for operator
to assist you. These numbers can be found on the bottom of your breadmaker.
MODEL: _______________ TYPE: ________________ SERIES: _________________
Customer Service
LIMITED WARRANTY
This product is warranted to be free from defects in material and workmanship for a period
of two (2) years for Hamilton Beach Portfolio products or one (1) year for Hamilton Beach
products from the date of original purchase, except as noted below. During this period, we
will repair or replace this product, at our option, at no cost. THE FOREGOING WARRANTY
IS IN LIEU OF ANY OTHER WARRANTY, WHETHER EXPRESS OR IMPLIED, WRITTEN
OR ORAL INCLUDING ANY WARRANTY OF MERCHANTABILITY OR FITNESS FOR A
PARTICULAR PURPOSE. ANY LIABILITY IS EXPRESSLY LIMITED TO AN AMOUNT
EQUAL TO THE PURCHASE PRICE PAID, AND ALL CLAIMS FOR SPECIAL, INCIDENTAL
AND CONSEQUENTIAL DAMAGES ARE HEREBY EXCLUDED. There is no warranty with
respect to the following, which may be supplied with this product: glass parts, glass
containers, cutter/strainer, blades, and/or agitators. This warranty extends only to the
original consumer purchaser and does not cover a defect resulting from abuse, misuse,
neglect, use for commercial purposes, or any use not in conformity with the printed
directions. This warranty gives you specific legal rights, and you may also have other legal
rights which vary from state to state, or province to province. Some states or provinces do
not allow limitations on implied warranties or special, incidental or consequential damages,
so the foregoing limitations may not apply to you.
If you have a claim under this warranty, DO NOT RETURN THE APPLIANCE TO THE
STORE! Please call our CUSTOMER SERVICE NUMBER. (For faster service please have
model, series, and type numbers ready for operator to assist you.)
CUSTOMER SERVICE NUMBERS
In the U.S. 1-800-851-8900
In Canada 1-800-267-2826
Web site address: www.hamiltonbeach.com
KEEP THESE NUMBERS FOR FUTURE REFERENCE!
Web site address: www.hamiltonbeach.com
HAMILTON BEACH PROCTOR-SILEX,INC.PROCTOR-SILEX CANADA,INC.
263 Yadkin Road
Southern Pines, North Carolina 28387
Picton, Ontario K0K 2T0
12/02
840106600
840106600 ENv02.qxd 12/16/02 5:16 PM Page 18

Robot boulanger
840106600
Précautions importantes.................. 2
Pièces et caractéristiques .............. 3
Utilisation du robot boulanger ........ 5
Conseils pour un pain parfait .......... 6
Horaire des programmes ................ 7
Nettoyage .......................................... 7
Questions les plus fréquentes ........ 8
Recettes ............................................ 9
Service à la clientèle ...................... 18
Aux É.-U. : 1-800-851-8900
Au Canada : 1-800-267-2826
840106600 FRv02.qxd 12/16/02 5:06 PM Page 1

2
PRÉCAUTIONS IMPORTANTES
CONSERVEZ CES INSTRUCTIONS!
1. Lire toutes les instructions avant d’utiliser
le robot boulanger.
2. Éviter de toucher aux surfaces chaudes.
Utiliser les poignées et les boutons.
Toujours utiliser des mitaines de four
pour manipuler le moule à pain chaud
et le pain chaud.
3. Ne pas introduire la main à l’intérieur de
la chambre de cuisson après avoir sorti
le moule. L’unité de chauffe sera encore
chaude.
4. Afin d’éviter les risque de chocs
électriques, ne pas plonger le cordon,
la fiche ou l’appareil dans l’eau ou dans
d’autres liquides.
5. Exercer une surveillance étroite lorsque
l’appareil est utilisé à proximité d’un
enfant ou par un enfant.
6. Débrancher le robot boulanger de la prise
de courant lorsqu’on ne l’utilise pas et
avant de le nettoyer. Le laisser refroidir
avant d’installer ou de retirer des pièces
et avant de le nettoyer.
7. Éviter tout contact avec les pièces
mobiles.
8. Ne pas utiliser un appareil dont la fiche
ou le cordon est abîmé, qui présente un
problème de fonctionnement ou qui est
endommagé. Le rapporter pour le faire
examiner, réparer ou régler.
9. Afin d’éviter les risques d’incendie, de
choc électrique et de blessure corporelle,
ne pas utiliser avec des accessoires non
recommandés par le fabricant.
10. Ne pas utiliser à l’extérieur.
11. Ne pas laisser pendre le cordon d’une
table ou d’un comptoir, et ne pas laisser
le cordon entrer en contact avec une
surface chaude.
12. Ne pas placer l’appareil sur ou près
d’un brûleur à gaz ou électrique chaud
ou dans un four chauffé.
13. Utiliser l’appareil seulement aux fins
auxquelles il a été prévu.
14. Pour débrancher, régler l’une des
commandes à OFF (arrêt), puis sortir la
fiche de la prise de courant. Ne jamais
tirer sur le cordon.
15. Une prudence extrême s’impose s’il
faut déplacer l’appareil pendant qu’il
fonctionne.
Cet appareil est destiné à l‘usage
domestique seulement.
Cet appareil est équipé d’une fiche polar-
isée. Ce genre de fiche a une lame plus
large que l’autre. La fiche pourra être intro-
duite dans la prise dans un sens seulement.
C’est une mesure de sécurité visant à
réduire les risques de chocs électriques.
Si la fiche ne convient pas, essayer de la
retourner. Si la fiche n’entre toujours pas
dans la prise, faire remplacer la prise
désuète par un électricien qualifié. Ne pas
essayer de contourner le dispositif de
sécurité de la fiche polarisée en la modifiant
d’une façon ou d’une autre.
La longueur du cordon de cet appareil a
été choisie de façon à ce que l’on ne risque
pas de trébucher dessus. Si un cordon plus
long est nécessaire, utiliser une rallonge
appropriée. Le calibrage de la rallonge doit
être le même que celui de l’appareil ou
supérieur. Lorsqu’on utilise une rallonge,
s’assurer qu’elle ne traverse pas la surface
de travail, que les enfants ne puissent pas
tirer dessus par inadvertance et qu’on ne
puisse pas trébucher dessus.
Pour éviter les risques de surcharge
électrique, ne pas utiliser en même temps
qu’un autre appareil à haut wattage sur le
même circuit.
Lorsqu’on utilise un appareil électrique, il faut toujours respecter certaines règles de sécu-
rité fondamentales, notamment les suivantes :
Renseignements de sécurité aux consommateurs
840106600 FRv02.qxd 12/16/02 5:06 PM Page 2
Table of contents
Languages:
Other Hamilton Beach Bread Maker manuals

Hamilton Beach
Hamilton Beach 29985 User manual

Hamilton Beach
Hamilton Beach 29888 User manual

Hamilton Beach
Hamilton Beach HomeBaker 29881 User manual

Hamilton Beach
Hamilton Beach MealMaker Express 80200 User manual

Hamilton Beach
Hamilton Beach 29981 User manual

Hamilton Beach
Hamilton Beach HomeBaker 29881 User manual

Hamilton Beach
Hamilton Beach BM12 User manual

Hamilton Beach
Hamilton Beach 29883-CN User manual