manuals.online logo
Brands
  1. Home
  2. •
  3. Brands
  4. •
  5. Hammarlund
  6. •
  7. Receiver
  8. •
  9. Hammarlund HQ-140-X Manual

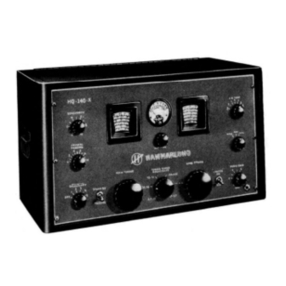
Hammarlund HQ-140-X Manual

HQ-140-X
COMMUNICATIONS
RECEIVER
TECHNICAL DESCRIPTION &
OPERATING INSTRUCTIONS
460
West
34th
Street : : : :
New
York
1,
N.
Y.
ERRATA
For
all
HQ.140.X
receivers No.
299
and
below
the
following
change
should
be
made
on
the
schematic diagram, Fig.
7.
The Line running up from R48 is connected to the top instead of
the bottom of the
S4
switch.
For
all
HQ.140·X
receivers No.
849
and
below
make
the
following change:
Resistor R35 is 820K ohms (Hammarlund
Part
No. 19309-103)
instead of 180K ohms on the schematic diagram, Fig. 7, and in the
Parts List, page 19.
For
all receivers
1099
and
below C25 is 4
mmf.
For
all receivers No.
1494
and below
make
the
following
change:
Item C68 is a ceramic trimmer, NPO, 1.5-7 mmf and carries part
number 23059.
Fig.
I-The
HQ-I40-X
Receiver.
INTRODUCTION
The
Hammarlund
HQ-140-X
is a
modern,
general
purpose,
super-
heterodyne
communications
receiver
designed
to
maintain
high
perform-
ance
characteristics
for
many
years
without
adjustment.
The
standard
cabinet
model
has
a
self-contained
stabilized
power
supply
operating
from
a 50-60 cps, 105-125
volt
AC
source.
Frequency
coverage
is
continuously
tunable
from
540
Kc
to
31
Mc
(555
to
9.7
meters)
with
adequate
selectivity
to
separate
crowded
signals.
Full
use
of
the
receiver's
high
sensitivity
is
available
for
reception
of
even
the
weakest
stations
because
of
inherently
high
signal-to-noise
ratio
and
the
superior
Hammarlund
noise limiter_
The
special
patented
Hammarlund
crystal
filter
provides
extreme
selectivity
for
the
high
attenuation
of
closely
adjacent
interfering
signals.
Band
spread
tuning
is
available
on
the
four
higher
frequency
ranges,
with
direct
calibration
for
the
80, 40, 20, 15,
and
10
meter
amateur
bands.
Calibration
charts
for
other
ranges
may
be
easily
made
for use
with
the
arbitrary
band-spread
logging scale.
While
this
receiver
was
designed
primarily
for
communications
use,
good
fidelity
of
music
and
voice
reproduction
in
both
the
standard
and
short
wave
broadcast
bands
is
provided.
Power
hum
is negligible.
Either
headphones
or
loudspeaker
may
be
used.
Automatic
volume
control
aids
in
keeping
music
and
voice
reception
at
the
desired
level.
[2)
When
you
are
interested
in
receIvmg
telegraph
or
code
signals,
you
will find
that
the
HQ-140-X
incorporates
an
unusually
stable
beat
fre-
quency
oscillator.
An
"5"
Meter
enables
you
to
obtain
accurate
reports
on
received
phone
signals while
the
Send-Receive
switch
and
relay
connec-
tions
permit
associated
transmitter
operation
without
interference.
Large,
comfortable
and
carefully
positioned
controls
make
the
HQ-
140-X
a
truly
professional-type
receiver,
the
ideal
instrument
for
operating
in
today's
crowded
short-wave
bands.
INSTALLATION AND OPERATION
Unpack
the
receiver
carefully.
Make
sure
that
the
fuse,
tubes,
asso-
ciated
tube
shields
and
pilot
lamps
are
in
place.
Tubes
V4, V5, V6, V8,
V9,
VIO,
and
Vll
are
not
shielded.
Connect
the
permanent
magnet
dynamic
speaker
to
the
two
terminals
marked
SPEAKER
on
the
rear
of
the
receiver
chassis.
For
best
perform-
ance
do
not
place
speaker
on
top
of
receiver
cabinet.
The
antenna
may
then
be
connected
as
described
under
ANTENNA.
Basically, all
that
is
necessary
to
operate
a
radio
receiver
are
the
tuning
and
volume
controls.
The
additional
knohs
and
switches
found
on
a
pro-
fessional-type receiver
such
as
the
HQ-140-X
control
functions
which
greatly
improve
operating
performance.
The
receiver
"ON-OFF"
switch
is
on
the
AUDIO
GAIN
control.
If
you
are
unfamiliar
with
the
type
of
power
availahle,
check
with
the
local
power
company
hefore
plugging
in
receiver.
Turn
on
the
receiver
by
ad-
vancing
the
AUDIO
GAIN.
Check
to
see
that
the
pilot
lamps
light
and
tuhes
warm
up.
400
l
UF
OHMS
1
\
~
ANT.
COMR
A
G
-C
6BA6
R.F.
AMPLIFIER
I
R48
6BE6
MIXER
'--...JVII"v---+
+B
I
'-------
.....
+B
(Reg.)
'--_=
_________
....
TO
SlO~S+~I~LTY
Fig.
2-Tuned
RF
Amplifier
and
Mixer.
[3]
While
the
tubes
are
heating,
set
the
TUNING
RANGE
switch
in
the
.54·1.32 position,
MAN·A
VC·BFO
on
A
VC
(automatic
volume control),
CRYSTAL
SELECTIVITY
on
OFF,
STANDBY·RECEIVE
on
RE·
CEIVE,
and
SENSITIVITY
on
"10".
Tune
in
the
broadcast
stations
by
using
the
MAIN
TUNING
dial
and
AUDIO
GAIN
control.
For
accurate
tuning
watch
the
"S"
meter.
Adjust
the
MAIN
TUNING
dial for
maximum
meter
reading for
the
station
to
which
you
are
listening.
The
ANTENNA
compensator
knob,
the
final
adjustment,
also should
be
set
for
greatest
meter
deflection.
When
automatic
volume control is
not
desired,
the
MAN·AVC·BFO
switch
can
be
set
on
MAN
(Manual),
the
AUDIO
GAIN
control
turned
fully clockwise,
and
the
SENSITIVITY
control employed
to
provide
the
desired volume.
When
headphones
are
plugged
into
the
jack
in
the
lower
right
hand
corner
of
the
panel,
the
speaker
is disconnected.
On
the
rear
of
the
chassis
are
two
pin
jacks
marked
RELAY
which
can
be
connected
to
the
send·receive relay
of
the
transmitter
for
break·in
operation.
With
the
STANDBY·RECEIVE
switch
in
STANDBY,
the
receiver is silent
but
ready
for
instant
use.
The
BFO
(Beat
Frequency
Oscillator) control provides a wide choice
of
tones for
CW
code operation.
Turning
the
MAN·A
VC·BFO
switch
to
BFO
disconnects
the
automatic
volume control,
and
the
SENSITIVITY
control
must
then
be
employed.
It
is often a
great
help
to
use
the
LIM.
ITER
in
short
wave reception.
The
PHASING
control normally is
set
at
the arrow in
the
center
of
its
scale,
but
may
be
adjusted
to
cut
out
interference from
stations
on
either
side
of
the
signal.
With
the
CRYSTAL
SELECTIVITY
switch
the
operator
can
choose
the
degree
of
selectivity
that
provides
the
greatest
fidelity
with
minimum
interference.
The
first
three
positions are for
phone
reception
and
the
fifth
and
sixth for single signal code reception in ex·
tremely
crowded bands.
Set
controls as follows for initial operation:
CONTROL
MAN·A
VC·BFO
CR
YSTAL
SELECTIVITY
CRYSTAL
PHASING
CWTONE
STANDBY
·RECEIVE
LIMITER
ANTENNA
AUDIO
GAIN
SENSITIVITY
for
PHONE
AVC
OFF
At
Arrow
Inoperative
RECEIVE
As required
To
Peak
Signal
Adjust
10
[4]
for
CWor
CODE
BFO
OFF
At
Arrow
±2
RECEIVE
As
required
To
Peak
Signal
10
Adjust
Band
1
2
3
4
5
6
TUNING
RANGES
Frequency
.540-1.32
Mc
1.32-3.2
Mc
3.2
-5.7
Mc
5.7
-10
Mc
10
-18
Mc
18
-31
Mc
Meters
Wave Length
555
-227
227
-93.7
93.7-52.6
52.6-30.0
30.0-16.7
16.7-9.7
TUNING
PROCEDURE
To
tune
in
a
standard
broadcast
station,
it
is
merely
necessary
to
tune
the
MAIN
TUNING
dial
to
the
desired frequency.
The
BAND
SPREAD
dial is
inoperative
on
the
first
two
ranges.
For
reception
of
short
wave
stations
with
the
MAIN
TUNING
dial
only,
it
is necessary
to
set
the
BAND
SPREAD
dial
to
100 in
order
to
attain
a
calibration
accuracy
of
1%
or
better.
The
BAND
SPREAD
dial is
calibrated
directly
for
the
80, 40, 20, 15,
and
10
meter
amateur
bands.
To
make
use
of
this
feature,
set
the
MAIN
TUNING
dial
at
the
high
frequency
end
of
the
desired
amateur
band.
The
BAND
SPREAD
dial
then
may
be
tuned
over
the
range
selected.
For
a
higher
degree
of
accuracy
the
BAND
SPREAD
dial
may
be
set
to
the
exact
frequency
of
a
known
signal
and
the
MAIN
TUNING
dial
care-
fully
tuned
for
maximum
signal.
It
is
no
longer necessary
to
touch
the
MAIN
TUNING
dial,
and
the
BAND
SPREAD
calibratidn
will hold.
A 0-100
arbitrary
logging scale is also
providcd
for
band-spread
tuning
of
any
desired
ranges
which
are
not
directly
calibrated.
Again
the
MAIN
TUNING
dial
is
set
at
the
high
end
of
the
selected
range.
Turning
the
BAND
SPREAD
dial
from
100
to
0
tunes
the
receiver progressively lower
in frequency.
The
following
table
indicates
the
approximate
frequency
range
covered
by
the
BAND
SPREAD
dial
at
various
settings
of
the
MAIN
TUNING
dial, for
each
of
the
four
higher
frequency
bands
of
the
receiver.
Band
Low
End
Middle High
End
3.2-5.7
Mc
0.4
Mc
0.7
Mc
1.25
Me
5.7-10
Me
0.2
Mc
0.5
Me
0.9
Me
10-18
Me
0.2
Me
0.5
Me
0.9
Me
18-31
Me
0.6
Me
1.2
Me
2.2
Me
[5]
DESIGN
Symbol Type Tube Complement Function
VI
6C4
Triode
Oscillator
V2
6BA6
Remote
Cutoff
Pentode
RF
Amplifier
V3
6BE6
Pentogrid
Converter
Mixer
V4 6BA6
Remote
Cutoff
Pentode
1st
IF
Amplifier
V5 6BA6
Remote
Cutoff
Pentode
2nd
IF
Amplifier
V6 6BA6
Remote
Cutoff
Pentode
3rd
IF
Amplifier
V7 6AL5
Twin
Diode
Detector,
AVC;
Noise
Limiter
V8 12AU7
Twin
Triode
1st
AF
Amplifier;
BFO
V9
6V6GT/G
Beam
Power
Audio
Power
Output
VI0
OC3/VRI05
Voltage
Regulator
Voltage
Regulator
Vll
5U4G
Full
Wave
Rectifier Rectifier
PRE-SELECTION
The
antenna
input
coupling
and
RF
amplifier
stage
plovide
the
neces-
sary
pre-selection
and
gain for
high
performance
and
rejection
of
unde-
sired
signals.
The
high
signal level
at
the
mixer
grid, V3,
contributes
to
a
favorable
signal
to
noise ratio.
Botb
grid
and
plate
circuits
of
the
RF
stage
are
tuned;
individual
tuning
coils
are
selected for
each
band.
The
antenna
compensating
capacitor,
adjustable
from
the
front
panel,
permits
the
receiver
to
be
resonated
for
optimum
performance
with
the
antenna
in
use.
CONVERTER STAGE
A
high
degree
of
oscillator
stability
is
attained
by
the
use
of
a
separate
mixer
(6BE6),
V3,
and
an
independent
oscillator (6C4),
VI.
The
output
signal
from
RF
amplifier, V2, is
heterodyned
with
the
output
of
the
local
high
frequency
oscillator,
VI,
and
electronically
com-
bined
within
the
mixer
tube,
V3.
On
thc
four
lower
frequency
ranges
the
local oscillator is 455
Kc
above
the
signal
frequency.
On
the
two
highest
ranges
the
oscillator is
4,55
Kc
below
the
signal
frequency.
Low-loss
tube
sockets,
ceramic
band
switches,
temperature
compen-
sating
capacitors,
zero
temperature
coefficient
ceramic
trimmers,
and
a
bi-metallic
compensating
plate
all
contribute
to
oscillator
stability.
Ad-
ditional
frequency
stability
is
attained
by
applying
regulated
voltage
to
the
oscillator
plate
and
by
the
rugged
construction
of
the
entire
oscillator
section
asscmbly.
[6]
I
C-
SELECTIVITY
Fig.
3-Crystal
Filter
Circuit. Fig.
4-H.
F.
Tuning
Assembly.
CRYSTAL
FILTER
AND
PHASING
NETWORK
The
patented
Hammarlund
455
Kc
crystal
filter
and
phasing
network
is
controlled
from
the
HQ-140-X
front
panel.
Its
six-position
SELECTIV-
ITY
switch
includes
an
OFF
position
and
five
increasingly
selective
band-
widths.
Switch
positions
1, 2,
and
3
provide
progressively
sharper
crystal
selectivity
for use
in
phone
reception.
Positions
4
and
5,
the
sharpest
selectivity
positions,
are
recommended
for reliable
CW
or
code
reception.
Highest
fidelity is
obtained
in
the
OFF
position,
when
the
crystal
filter is
inoperative.
The
phasing
control
may
be
set
to
highly
attenuate
interfering
adjacent
signals.
With
experienced
operating
technique
the
crystal
filter offers
distinct
advantages
under
severe
interference
conditions.
IF
AMPLIFIER
Nine
tuned
circuits,
in
three
stages
of
IF
amplification
(V4, V5,
and
V6),
contribute
to
sensitivity
and
selectivity.
The
gain
per
stage
is
purposely
low
in
order
to
maintain
stability.
Iron
core
permeability-tuned
transformers
improve
performance
and
add
to
the
ease
of
adjustment.
The
intermediate
frequency
is 455
Kc,
the
RTMA
standard.
AVC
SYSTEM
Automatic
Volume
Control
minimizes
fading
and
signal
strength
variations
by
controlling
the
gain
of
the
RF
stage
V2
and
the
IF
stages
V4
and
V5. As a
result,
a
comfortable
and
constant
level
of
audio
is
main-
tained.
[7]
,,------FUSE
POWER
TRANSFORMER
T7
3rd I F
-----1
FILTER
CAPACITOR
Z3
OUTPUT
TRANSFORMER
T5
2nd I
t~----+1
X'
TAL
FILTER
Z2
BFO
Z5
1st
IF
_____
-'
Z 1
Fig.
5-
Top
view
showing
chassis
layout.
The
Automatic
Volume
Control
is
operative
only
when
the
MAN.
A
VC-BFO
switch
is
in
the
A
VC
position.
With
A
VC,
greatest
signal-to-
noise
ratio
will
result
with
the
SENSITIVITY
control
set
at
maximum.
It
may
be
necessary
to
reduce
sensitivity
slightly
for
unusually
strong
signals.
"S"
METER
The
"S"
or
Tuning
Meter
is
provided
to
assist
in
tuning
and
to
give
an
indication
of
relative
signal
strength.
Because
the
meter
readings
are
proportional
to
A
VC
voltage,
it
is
operative
only
when
the
MAN
-A
VC·
BFO
switch
is
in
the
A
VC
position.
The
meter,
which
is
calibrated
to
20
db
over
S-9, is
factory
adjusted
so
that
a signal
input
of
approximately
50
microvolts
gives a
reading
of
S-9.
Each
"S"
unit
indicates
a 6
db
increase,
equivalent
to
doubling
signal
strength.
Should
meter
re-adjustment
be
necessary:
1.
Set
front
panel
SENSITIVITY
control
to
"10"
and
CRYSTAL
SELECTIVITY
to
"OFF".
2.
With
receiver
off,
mechanically
zero
pointer
with
a fine screw-
driver.
[8]
Fig.6
-BoLLom
view
showing
placement
of
parts.
3.
With
the
A
ve
on
and
the
1st
IF
tube
V4 removed, zero
pointer
with
ZERO
ADJ
potentiometer
R-19.
4.
With
Ave
on
and
V4 replaced,
adjust
meter
sensitivity
with
SENS
potentiometer
R-23.
SECOND
DETECTOR
AND
NOISE
LIMITER
One section
of
the
6AL5
tube
V7 is used for
the
second
detector
and
A
ve
system.
This
system
produces a
minimum
of
distortion.
The
other
half
of
V7
operates
as a series, self
adjusting
noise limiter.
It will reduce automobile ignition
and
other
types
of
impulse noise
to
a
minimum. Intelligibility is
not
affected
by
the
noise limiter,
although
it
may
be
switched off
if
desired.
BEAT
FREQUENCY
OSCILLATOR
The
Beat
Frequency
Oscillator, which employs one section
of
the
12AU7 (V8), is designed
to
provide
reception
of
ew
or
unmodulated
code
signals.
The
ew
TONE
control
permits
selection
of
the
desired
audio
tone.
Each
calibration
division represents
approximately
1000 cycles.
The
BFO
is only
operative
when
the
MAN
-AVe-BFO
switch is
in
the
BFO
position.
[9]
R4 R5
lOOK
1
10K
::kC5
"*,022
55-6R
L6
L5
L~Jc5)
L9
LB
L7
j~
~;--J1~
,~
c J
-+
lot:+--+--++-~.if'"QL-
~~
__
r--;
___
S_5~-5R
EI
~
'---l
__
--+
____
--q55-5Fp--
__
--+
__
-+
__
-4
~
~CIB
C55 "'"
R4B
2200
C57
5I00.f
.k'o
J..C56
J..CIA
~
C28
C2C
tA\NN"T~L--~:r~-----JL~~------:r~----~~
COMPo
ANT.
[10]
'--
__
+-
__
-+-
____
-qS5-3Fp--
____
+-
__
-+
__
--'
R.F.
o
N
W
o
on
u L
r
SCHEMATIC
DIAGRAM
OF
THE
Fig.
7-Circuit
diag
9
o
-
R22
2200
R24
2200
~~
l.v~0221
C39
C41
-----=il
T5
5 r l I
~I
~_---.--;PHONES
- I
:~
"II~
,~
2~'
__
:
1~:U7
6V6~~T
__
3
~ill-
It
5
-=_
4
.r
7
C~6
31'-- • Z5
.022
•
~
E2
J
--~l
R44
~AKER
~
g
;;:~
*u;:-=
I
1~K
'"
1
"''''
',-
I -
~
I L3 I
I
rIO
I
I
~
r-~*
I
I I
L:==t=-J
R42
22K
IW
c~I
.05Jr
f
R43
I'-
..-
u
on
,,<D 0
...
0..-
'"
'"
:::'"
'"
:::~
'"
~~
.,.
u
-~
~AY
~~J2
\°
54
STAND
BY
RECEI
VE
AVC
t-+-.,-----------t
.01
3900
=-~~IM~V
~~_
b
_~_
0
1,
_____
-;:
.....
f~S=E~N:;;Si;:IT~IV~I~Ti;oY=---~--l___r--l
u..,.
~-
52
..
R38
R39
R40
Y
62K-IW
10K
240
1r~--------~~~~_==~~SS!5~-2~R~--------------1I----~R~5~O-t~R~5~1~~L~4------J~T6
..,.
R,~9
~----------,
~
r±CIE
.------<>oi
0
~-----_,
7 5
4;;~~
+
'~5Z;;
+
C52C~~2
]
r-
.:;f
3
20-
20-
10-.
ri
~
U-
VIO
.f..
MFD.
MFO.
MFD.
V11
-"1.-"6,-<1--,
~"
+--_-f-~~~5-~i·P-,¥-+-I-f----1pC-"'2~"--'C"",h2H'
'0"<1$
¢ :
'il:
:
r:
j
,1
,'T.:~j
C~ly=.
p;~
CIF~
0
C2H""
..,. -
'"
'"
C53C54
~
~
~
~
~
5
~
~
~
~
~
~
Ut~iL
(0
<[
« m
In
CD
m m
to
ro~k=
..
o~12
X
~~c.oc.o(Dc.olDc.o
r
_-+_S_5-<>I~F
0":
NOTES:
--'-WAVE
BAND
SWITCH
55
SHOWN
IN 18-31 Me.
POSITION. WAFERS NUMBERED FROM I
TO
6-
NO.
I
BEING CLOSEST
TO
FRONT.
Z-FIXED
RESISTORS ARE 1/2 WATT
UNLESS
MULT1PUCATION
BY
1000.
3-FIXED
CAPACITORS ARE IN
MICROMICRO~
FARADS(MMF)
WHEN
GIVEN
IN
WHOLE
NUMBERS,.
CAPACITORS SHOWN
IN
DECIMAL VALUES ARE IN
+--+=+-<>-0{
~
MICROFARADS(MFO.).ELECTROLYTICS ARE SHOWN
~-'
S5~IRo
0 OTHERWISE SPECIFIED. LETTER
"K
N INDICATES
:J
-
~\..J.J
N (X) ...J WITH PROPER
POLARITY
CONNECTIONS.
~~
f
~~J
>-----<f-b---;f
c~~~
c
-'~~
c
19:
'e
C72
I'-
~!"
u
t;#
.022
~
~
R:l
I~
r!
R52
2200
osc.
THE
HQ-140-X
RECEIVER
diagram.
u
[11]
115V.A.C.
AUDIO AMPLIFIER
The
first
audio
stage
is a
resistance
coupled
voltage
amplifier
using
the
other
section
of
the
I2AU7
(V8).
The
audio
output
stage,
a
6V6GT/G
beam
power
amplifier (V9)
provides
an
undistorted
output
of
at
least
2
watts.
The
output
transformer
impedance
is 6
ohms
to
match
the
voice coil
of
the
Hammarlund
or
other
suitable
permanent
magnet
speaker.
Thc
phone
jack
is
connected
across
the
voice coil
winding
and
silences
the
speaker
when
the
phone
plug
is
inserted.
POWER SUPPLY
Thc
self-contained,
stablized
power
supply
is designed
with
a
large
safety
factor
to
insure
reliable,
trouble-free
operation.
Humfree
perform-
ance
is
provided
by
a
two
section
filter.
High
voltage
is
supplied
by
the
SU4G
rectifier,
VII.
The
OC3/VRIOS
(VIO)
furnishes
regulated
voltage
to
the
variable
frequency
oscillator
VI
and
the
screen
grid
of
V2, V3, V4,
and
VS.
ANTENNA
The
HQ-I40-X
is designed for use
with
either
a single wire
or
balanced
type
of
antenna.
A
good
match
to
most
antenna
systems
will
be
obtained
because
of
the
receiver's
input
impedance,
nominally
400
ohms,
and
its
high
sensitivity.
For
general coverage
an
indoor
wire
of
20
to
SO
feet
will give
surpris-
ingly
good
reception.
A long single wire
outdoor
antenna
such
as
shown
in
Figure
8 will
generally
give
entirely
satisfactory
performance.
This
wire
may
be
SO
to
7S
feet
long.
For
best
reception
the
antenna
should
be
isolated
as
much
as possible
from
neighboring
objects.
Fig.
8-Antenna
suggestions.
(A) Single
Wire.
(B) 300
ohm
folded
di-pole.
[12]
Optimum
performance
on
a
particular
amateur
band
or
other
narrow
tuning
range
will
be
obtained
by
using a
half-wave
di-pole
or
folded di-
pole fed
with
300
ohm
or
suitable
lead-in
as shown
in
Figure
8E.
The
length
of
the
required
di-pole
may
be
calculated
by
the
following
formula:
468
Length
(feet)
=----
Freq.
(Mc)
A good
ground,
although
not
absolutely
necessary, will
frequently
aid
in
reception.
RE-ALIGNMENT PROCEDURE
A.
Equipment necessary
1.
Cathode-ray
oscilloscope (externally
synchronized
by
the
signal
generator.)
2.
Frequency
Modulated
(swept) signal
generator
(fairly
constant
output.)
3.
Output
Meter.
E.
IF
Amplifier
The
intermediate-frequency
transformers
are
iron-core
per-
meability-tuned,
and
resonated
with
fixed silver-mica
capacitors.
A
high
degree
of
stability
results,
which
should
make
IF
re-align-
ment
unnecessary
for a long
time.
Re-alignment
should
not
be
attempted
without
suitable
equipment.
RE:AR OF
CHASSIS
G)(i)O
000
: :
...
--TEST
FREQUENCIES FOR
I I
RF
'OSC.
ALIGNMENT
I I
~
'e'e
I
..
I
.,
I •
I
I'
I
I I I , I I
•
I\)I
U U
U U ::f U ::f ::f
::f::f
::f 0
o
,.,.
ANT.
RF
osc.
IIQ·110·"
",-[CUY".
C~.yU
AT
clTHAEMT
cAn'A,-
'CS!TlOMS
\II
1/1,
\\I
\\
II
VII
\
~\\
l\
1./
1
~
.I
i.1I
\ //W
II
/
.
f--
f-c-
.,
5~7
3.2
TO
TO
10.0
5.7
Fig.
9-Left:
Diagram
for
tuning
IF
Amplifier,
RF
Stage
and
H.
F.
Oscillator.
[13]
"
1\
'I
l\
II.
1/
/
,,~
~/
Fig.
lO-Selectivity
Curves.
The
IF
transformers
must
be
tuned
for
symmetry
and
proper
coincidence
of
the
visible curves as well as for
amplitude
on
the
oscilloscope.
This
requires a stage-by-stage alignment,
starting
with
the
last
IF
transformer
(Z4)
and
continuing
back
through
the
first
IF
transformer
(ZI).
This
is
the
procedure:
(1)
Set
receiver as follows:
MAIN
TUNING
DIAL.
........
54
Mc
Bandswitch
(TUNING
RANGE)
..
54-1.32
Mc
STANDBy-RECEIVE
.........
RECEIVE
LIMITER.
. . . . . . . . . . . . . . . . .
..
OFF
MAN
-A
VC-B.FO. . . . . . . . . . . . .
..
MAN
CRYSTAL
SELECTIVITy
.....
OFF
(2)
With
the
generator
set
at
455
Kc
apply
signal to
the
grid
(pin
No.1)
of
the
3rd
IF
tube
(V6).
Adjust
the
two
in-
ductors
of
Z4
alternately
to
obtain
maximum
amplitude,
symmetry,
and
pattern
coincidence on
the
oscilloscope.
(3) Apply
the
signal
input
lead
to
the
grid (pin
No.1)
of
the
2nd
IF
tube
(V5).
Turn
the
two
adjustment
screws oJ
Z3
to
obtain
a symmetrical, coinciding
curve
with
as
much
amplitude
as possible
without
disturbing
the
pattern.
(4) Switch
the
signal
input
lead
to
the
grid (pin
No.1)
of
the
1st
IF
tube
(V4),
and
adjust
the
plate
inductor
(1'2)
ofthe
crystal
filter (Z2) for
maximum
amplitude
at
center
of
curve.
(5) Apply
the
signal
input
to
the
grid (pin
No.7)
of
the
6BE6
mixer
tube
(V3).
Adjust
screws
of
1st
IF
trans-
transformer
(ZI) as
in
(3).
This
should
result
in a tall
selectivity
curve
with
a slightly flattened peak.
(6)
Turn
CRYSTAL
SELECTIVITY
switch
to
position No.
1,
set
CRYSTAL
PHASING
pointer
on
arrow,
and
ad-
just
the
grid
inductor
(L2)
of
the
crystal
filter (Z2) for
maximum
amplitude
and
symmetry.
Adjust
signal
input
or
receiver
SENSITIVITY
control as required
to
prevenL
overloading.
(7) Switch
to
CRYSTAL
SELECTIVITY
position
No
2,
and
if
necessary,
move
PHASING
CONTROL
slightly
from
arrow
to
obtain
identical images.
Adjust
signal
generator
frequency
to
obtain
coincidence
of
the
images.
If
complete coincidence is
not
obtained,
alternately
make
slight
adjustments
of
the
PHASING
[14]
CONTROL
and
the
signal
generator
frequency,
until
images
coincide.
After
these
last
steps
have
determined
the
exact
fre-
quency
of
the
Quartz
crystal,
the
frequency
setting
of
the
signal
generator
should
be
left
undisturbed.
(8)
Repeat
carefully
the
complete
IF
alignment
.procedure
(steps
1
through
7) for
the
crystal
frequency.
C.
RF
Amplifier
The
RF
and
oscillator
stages
have
been
carefully
aligned
against
standard
crystals
at
the
factory
and
are
designed
to
hold
their
adjustments
over
a
long
period
of
time.
Re-alignment
should
not
be
attempted
unless
it
is
positive
that
re-adjustment
is necessary.
As
shown
on
the
chart,
Figure
9,
the
front
r~w
of
adjustments
control
the
H.
F.
oscillator
frequency
and
consequently
dial
calibration.
The
middle
row
of
adjustments
control
RF
alignment
and
the
rear
adjustments
are
for
antenna
alignment.
Here
is
the
procedure:
1.
Set
controls
as follows:
Receiver
STANDBY-RECEIVE
.........
RECEIVE
MAN
-A
VC-BFO.
. . . . . . . . . . . .
..
MAN
CRYSTAL
SELECTIVITy
.....
OFF
BAND
SPREAD.
. . . . . . . . . . .
..
100
Bandswitch
(TUNING
RANGE)
..
54-1.32
Mc
MAIN
TUNING.
. . . . . . . . . . .
..
.60
Mc
Signal Generator
Frequency.
. . . . . . . . . . . . . . . . . .
..
.60
Mc
Modulation.
. . . . . . . . . . . . . . . . .
..
Off
Each
band
is
adjusted
for
maximum
response
by
changing
the
inductance
at
the
low-frequency
end
and
the
capacitance
at
the
high-frequency
end.
These
adjustments
mutually
affect
each
other.
If
much
change
is
made
at
one
end
of
the
band,
the
other
end
of
the
band
must
also
be
re-adjusted.
This
procedure
is
repeated
until
dial
calibration
coincides
with
frequency
at
both
ends
of
the
band.
.
At
30
Mc
there
is
some
interaction
between
the
RF
and
oscillator
sections.
It
is
therefore
necessary
to
rock
the
MAIN
[15]
TUNING
dial
back
and
forth
while
adjusting
the
trimmer
capa-
citor,
in
order
to
avoid
a false setting.
2.
With
signal
generator
connected
to
the
receiver
ANTENNA
terminals,
and
output
meter
connected
to
the
SPEAKER
ter-
minals,
adjust
L17
until
maximum
deflection is
obtained
on
the
meter.
3.
Change
signal
generator
frequency
to
1.25
Mc
as
shown
in
Figure
9.
Set
MAIN
TUNING
dial
on
1.25
Mc
to
correspond.
Adjust
trimmer
capacitor
C73
to
tune
in signal,
and
C69
for
maximum
response.
4.
Set
signal
generator
to
1.4
Mc,
change
to
the
1.32-3.2
Mc
Band,
and
set
MAIN
TUNING
dial
on
1.4
Mc.
Adjust
LI8
until
signal
appears
and
L12
and
L6
for
maximum
response.
5.
Change
signal
generator
to
3
Mc,
and
set
MAIN
TUNING
dial
to
3
Mc
to
correspond.
Adjust
C64
to
tune
in
signal
and
C58
for
maximum
response.
In
like
manner
this
procedure
is followed for
each
band
and
should
be
repeated
until
calibration
and
tracking
are
as deaired.
MAINTENANCE
The
HQ-140-X
is designed
to
give
years
of
trouble-free
service
with-
out
need
for repairs.
Tube
failure is
the
most
common
source
of
trouble.
The
second
most
common
cause
of
difficulty is
component
failure
among
small
resistors
and
fixed capacitors.
The
following
chart,
Figure
11, gives
voltages
between
tube
socket
terminals
and
chassis. Below
each
voltage,
in
parenthesis,
is shown
the
meter
scale
required
for checking
with
a
voltmeter
having
a
sensitivity
of
1000
ohms
per
volt
or
better.
Slight
variations
from
voltages
indicated
may
be
disregarded.
With
the
aid
of
the
chart
and
the
schematic
diagram,
defective com-
ponents
can
usually
be
located.
The
parts
list
in
the
back
of
this
manual
gives
values
and
Hammarlund
part
numbers.
Standard
items
may
be
purchased
locally.
Non-standard
components
are
available
on
order
from
the
factory.
A delicate
communications
receiver
should
be
entrusted
only
to
a
qualified
technician.
Should
difficulty
be
experienced,
please
write
the
company
for
advice
or
to
arrange
for
factory
service.
[16]
LINE
VOLTAGE
117
V.A.C.
Limiter-off
SENSITIVITY AND AUDIO
AT
MAX.,
NO
SIGNAL
Man. Position Receive Position
I
MAN-AVC-BFO
SWITCH
I POSITION
iAVCiBFO
-II
RF I Mixer I
1
6BA6
6BE6
OSC
IF IF IF
A
VC
Out- Recti- Reg.
Audio
BFO
I
IBt
I
2nd
I 3rd I
Det·1
I I
VOlt·IIBt
I
6C4
AMP AMP AMP Limiter put
fier
OC3/
72 72
6BA6
6BA6
6BA6
6AL5
6V6GT
5U4G
VRI05
12A
U7
12AU7
Pin 1
II
1
92
I I I
-0.21
I 1
P;J~t
I
75
to ground
.....
_
..
_.
___
..
_._
(300)
_
..
_.
___
..
_._._
..
_._~_
..
_.
___
..
_._
(i~~)
~
....
Pin 2 1.1
3.5
1.5 2.3
-0.41
298
1
to
ground. .
... ...
(3)
...
(6)
(3)
(3)
(12)
...
(300)
..
.
...
. .
...
-----------------------
Pin 3 6.2 6.2 6.2 6.2 6.2 6.2 6.2
256
106
2.3
to
ground. . .
..
A.C. A.C. A.C. A.C.
A.C. A.C.
A.C.
(300)
...
(300)
(3)
Pin 4
to ground
.....
273
280
(300)
A.C.
6.2
A.C.
-----1------------------
-------------------
Pin 6
100
92
100 100
110
In
ground. . . . .
(300) (300)
(300)
(300) (300)
Tie
Point
280
210
A.C.
75
(300)
(300)
-----1-----------------------------------
Pin 7
3.6 3.5
3.1 2.3
-0.2
6.2
106
-13
to
ground. . .
..
(6)
...
.. .
(6)
(6)
(3)
(12)
A.C.
..
.
(300)
. . ..
(60)
I
~ngr~und
.....
-
..
-.-1-.
·-·-1-·
·-·-1-·
.-.-
--.
·-·-1-·
.-.-
--.
·-·-IJr
~--
----
SCHEMATIC
DESIGNATION
Cl,A-F
C2,
A-I
C3, 4, 5
C6
C7,
8,
9
CI0
Cll
C12, 13, 14, 15
C16
C17, 18
C19
C20
C21
C22,
23,24
C25
C26
PARTS LIST HQ.140.X
DESCRIPTION
CAPACITORS
Main
Tuning,
va~iable
..........
(Part
of
20840-Gl)
Band
Spread,
variable
..........
(Part
of
20840-G
I)
Ceramic disc,
_0221J.f
W_V.D.C
....................
.
Silver mica, 50
IJ.lJ.f
500
W.V.D.C
...................
.
Ceramic disc, .022
IJ.f
W.V.D.C
.....................
.
Silver mica, 240
IJ.lJ.f
500
W.V.D.C.
(Part
of
ZI,
I.F.
transformer
assembly
iii
26121)
..
Silver mica, 260
IJ.lJ.f
500
W.V.D.C.
(Part
of
ZI,
I.F.
transformer
assembly
iii
26121)
..
Ceramic disc, .022
IJ.f
W.V.D.C
.....................
.
Silver mica, 220
IJ.lJ.f
500
W.V.D.C.
(Part
of
Z2,
Crystal
Filter
Assembly
iii
26125)
.....
.
Silver mica, 100
1J.[J.f
500
W.V.D.C.
(Part
of
Z2,
Crystal
Filter
Assembly
iii
26125)
.....
.
Cry-stal
phasing
variable,
(part
of
Z2,
Crystal
Filter
Assembly !il26125)
.....
.
Silver mica, 270
1J.[J.f
500
W.V.D.C.
(Part
of
Z2,
Crystal
Filter
Assembly !il26125)
.....
.
Silver mica, 100
1J.[J.f
500
W.V.D.C
..................
.
(Part
of
Z2,
Crystal
Filter
Assembly !il26125)
.....
.
Ceramic disc, .022
[J.f
W.V.D.C
.....................
.
Ceramic,
NPO
1.5
IJ.lJ.f
500
W.V.D.C
...............
.
Silver mica, 240
'1J.[J.f
500
W.V.D.C.
(Part
of
Z3,
I.F.
transformer
assembly !il26123)
.....
[17]
HAMMARLUND
PART
No_
23034·24
23071·5
23034·24
23071·56
23003·112
23034·24
23071·55
23003·94
11776·Gl
23003-104
23003·94
23034-24
23023·107
CK
23071-56
SCHEMATIC
DESIGNATIOi'i
C27
C28,29,30,31.32
C33,34
C3S, 36, 37
C38
C39
C40
C41
C42
C43
C44
C4S
C46
C47
C48
C49
CSO
CSI
CS2
CS3,S4
CSS
CS6
CS7
CS8, S9, 60
C61
C62
C63
C64,6S
C66,67
C68
C69
C70
C71
C72
C73
C74
Fl
Jl
J2
El
E2
Ll
L2
L4
LS
L6
L7
L8
PARTS LIST
HQ.140.X-Cont.
DESCRIPTION
CAPACITORS-Continued
Silver mica, 260
{J.{J.f
SOO
W.V.D.C.
(Part
of
Z3,
I.F.
transformer
assembly jji26123)
...
.
Ceramic
disc, .022
{J.{J.f
W.V.D.C
...................
.
Silver mica,
9S
{J.{J.f
SOO
W.V.D.C.
(Part
of
Z4,
Final
I.F.
transformer
assembly
jji
26112)
Mica,
100
{J.{J.f
SOO
W.V.D.C
.......................
.
Paper
tubular,
.OS
{J.f
600
W.V.D.C
................
.
Paper
tubular,
.01
{J.f
400
W.V.D.C
.................
.
Ceramic disc, .022
{J.f
W.V.D.C
.....................
.
Silver mica, S
{J.{J.f
SOO
W.V.D.C
....................
.
Silver mica, 240
{J.{J.f
SOO
W.V.D.C.
(Part
of
ZS,
B.F.O.
Assembly
jji261OS)
...........
.
B.F.O.
variable,
(Part
of
ZS,
B.F.O.
Assembly
jji
2610S)
...........
.
Silver
mica,
220
{J.{J.f
SOO
W.V.D.C.
(Part
of
ZS,
B.F.O.
Assembly jji2610S)
...........
.
Paper
tubular,
.OS
{J.f
600
W.V.D.C
.................
.
Ceramic disc, .022
{J.f
W.V.D.C
.....................
.
Mica, 300
{J.{J.f
SOO
W.V.D.C
.......................
.
Electrolytic, 10
{J.f
ISO
W.V.D.C
...................
.
Paper
tubular,
.OS
{J.f
600
W.V.D.C
.................
.
Mica, 620
{J.{J.f
SOO
W.V.D.C.
(Part
of
R.F.
Unit
Assembly
jji
26131)
............
.
Ceramic,
NPO
8
{J.{J.f
SOO
W.V.D.C.
(Part
of
II.F.
Oscillator
Unit
Assembly
jji
26143)
...
.
Electrolytic,
10-S00V, 20-4S0V, 20-4S0V
............
.
Ceramic disc, .022
[J.f
.............................
.
Mica, 620
[J.[J.f,
SOO
W.V.D.C
.......................
.
Antenna
Compensator,
variable
(Part
of
Main
Tuning
Unit
jji20840-Gl)
..........
.
Mica, S100
[J.[J.f
SOO
W.V.D.C
......................
.
Trimmer,
mica 3-3S
[J.{J.f.
..........................
.
Trimmer,
mica 1.S-9
[J.{J.£.
.........................
.
Trimmer,
mica 3-3S
[J.{J.f.
..........................
.
Trimmer,
mica 1.S-9
{J.[J.£.
.........................
.
Trimmer,
mica 3-3S
[J.IJ.f.
.........................
.
Trimmer,
ceramic
NPO
1.S-7
[J.IJ.f.
.................
.
Trimmer,
ceramic
NPO
3-12
[J.[J.f
.............
.
Trimmer,
mica
1.S-9
[J.[J.f
..........................
.
Silver mica 673
IJ.[J.f
SOO
W.V.D.C
•..................
Silver mica 300
IJ.lJ.f
SOO
W.V.D.C
..................
.
Ceramic disc., .022
W.V.D.C
......................
.
Mica,
IS00
[J.{J.f
SOO
W.V.D.C
.......
,
..............
.
Mica, 1000
[J.[J.f
SOO
W.V.D.C
......................
.
Fuse,2
ampere
type
3AG
.........................
.
Phone
jack
......................................
.
Relay
jack
......................................
.
Antenna
terminal
strip
...........................
.
Speaker
terminal
strip.
. .
..
.
....................
.
COILS
R.F.
choke
(CII-X)
..............................
.
Crystal
Filler
grid coil,
(Part
of
Z2,
Crystal
Filter
Assembly jji2612S-GI)
..
.
Filter
choke
.....................................
.
Antenna
coil assembly
.S4-1.32
mc
range
..........
.
Antenna
Coil Assembly
1.32-3.2
mc
range
.........
.
Antenna
Coil
3.2-S.7
mc range
....................
:
Antenna
Coil
S.7-10
mc
range
....................
.
[18]
HAMMARLUNO
PART
No.
23003-1]2
23034-24
23071-62
23001-48
23912-2
239]2-23
23034-24
23002-1
2307]
-S6
1173S-G42
23071-SS
23912-2
23034-24
23001-7S
23073-71
23912-2
2300S-86
23023-22
CH
ISS04-6]
23034-24
2300S-86
SA-617
2301S-16B
16089-2
16089-1
16089-2
16089-1
16089-2
230S9-1
230S9-2
16089-1
23004-2
23003-]
OS
23034-24
2301S-20
2301S-40
IS928-7
6087
6142
6088
3843
609-Gl
31068-Gl
26111·1
260S1-Gl
260S1-G2
6013
6016
SCHEMATIC
DESIGNATION
L9
LlO
Lll
Ll2
Ll3
Ll4
Ll5
Ll6
Ll7
L18
Ll9
L20
L21
L22
Ml
PLl,2
Rl
R2
R3
R4
R5
R6
R7
R8,9
RIO
Rll
R12
R13
R14
R15
R16
R17
R18
R19
R20
R21,22
R23
R24
R25
R26
R27
R28
R29
R30, 31
R32
R33
R34
R35
R36
R37
R38
R39
R40
R41
PARTS LIST
HQ.140.X-Cont.
DESCRIPTIO:"lo"
COILS-Continued
,
HAMMARLUND
PART
No.
Antenna
Co~l
10-18
me
range
.....................
1
Antenna
Cod
18-31
me
range
.....................
:
R.F.
Coil Assembly
.54-1.32
me
range
..............
:
R.F.
Coil Assembly
1.32-3.2
me
range
..............
:
R.F.
Coil Assembly
3.2-5.7
me
range
...............
'
R.F.
Co~l
Assembly
5.7-10
me
range
...............
i
R.F.
CoIl Assembly
10-18
me
range
...............
.
R.F.
Coil Assembly
18-31
me
range
................
'
H.F.
Ose. Coil Assembly
.54--1.32
me
range
.........
.
H.F.
Ose. Coil Assembly
1.32-3.2
me
range
........
.
H.F.
Ose. Coil Assembly
3.2-5.7
me
range
.........
.
H.F.
Ose. Coil Assembly
5.7-10
me
range
..........
.
H.F.
Ose. Coil Assembly
10-18
me
range
..........
.
H.F.
Ose. Coil Assembly
18-31
me
range
...........
1
Carrier
Level
("S")
meter
..........................
!
6019
6022
26047-G2
26047-G1
26047-G6
26047-G5
26047-G4
26047-G3
26030-G2
26030-Gl
26030-G6
26030-G5
26030-G4
26030-G3
26149-Gl
Pilot
Lamp
No. 47, 6.3 V., .15
amp...
. . . . . . . . . . . . . .
.•
16004-1
RESISTORS
I
22
Ohms
72
W
....................................
i
47,000 Ohms,
72
W
................................
'
2,200 Ohms,
72
W
................................
'1
1
100,000 Ohms,
72
W
..............................
.
10,000 Ohms,
72
w
...............................
.
100,000 Ohms,
72
W
..............................
.
150 Ohms,
72
W
.................................
.
2,200 Ohms,
72
w
...............................
.
10,000 Ohms,
72
w
...............................
.
2,200 Ohms,
72
W
................................
.
2,200 Ohms,
72
W.
2,2Woagh~~2~
C¥~t.a.l.~~l~~~
~s.s~~~l.~
.
~
~~~~~~:
: : : : :
300 Ohms,
72
w
.................................
.
51 Ohms,
72
w
..............
,
...................
.
22 Ohms,
72
w
..................................
.
470,000 Ohms,
72
W
..............................
.
10,000 Ohms,
72
w
...............................
.
Potentiometer,
300
Ohms
.........................
.
270 Ohms,
72
w
.................................
.
2,200 Ohms,
72
W
................................
.
Potentiometer,
1500 Ohms
........................
.
2,200
Ohms,
Y2
w
................................
.
33,000 Ohms, I W
................................
.
47,000 Ohms,
72
W.
(Part
of
Z4,
LF.
Transformer
Assembly jji26113)
....
.
2,200 Ohms,
72
W
................................
.
240 Ohms,
72
W
.................................
.
47,000 Ohms,
72
W
...............................
.
270,000 Ohms,
72
W
..............................
.
1
Meg
Ohms,
72
W
...............................
.
2.2
Meg
Ohms,
72
W
.............................
.
820,000 Ohms,
72
W
..............................
.
180,000 Ohms,
72
W
................................
.
Potentiometer
250,000
Ohms
(switch
attached)
......
.
1,000 Ohms,
72
W
................................
.
62,000 Ohms, 1 W
................................
.
Potentiometer,
10,000 Ohms
.......................
.
240 Ohms,
72
W
.................................
.
33,000 Ohms,
72
W.
19309-9
19309-89
19309-57
19309-97
19309-73
19309-97
19309-259
19309-57
19309·73
19309-57
19309-57
19309-57
19309-202
19309-193
19309-9
19309-113
19309-73
15368-1
19309-262
19309-57
15368-2
19309-57
19310-293
19309-89
19309-57
19309-201
19309-89
19309-107
19309-121
19309-129
19309-119
19309-103
6095
19309-49
19310-231
15367-1
19309-201
(Part
of
Z5,
B.F.O.
Assemblv jji26107)
............
· 19309·85
[19]

Other manuals for HQ-140-X

2

Other Hammarlund Receiver manuals

Hammarlund Comet Pro User manual

Hammarlund

Hammarlund Comet Pro User manual

Hammarlund SP-600-JX-21 User manual

Hammarlund

Hammarlund SP-600-JX-21 User manual

Hammarlund SP-600-J User manual

Hammarlund

Hammarlund SP-600-J User manual

Hammarlund HQ-170 Operating and installation instructions

Hammarlund

Hammarlund HQ-170 Operating and installation instructions

Hammarlund HQ-180A Series Parts list manual
Hammarlund

Hammarlund HQ-180A Series Parts list manual

Hammarlund HQ-110A/VHF User manual

Hammarlund

Hammarlund HQ-110A/VHF User manual

Hammarlund FM 60A Manual

Hammarlund

Hammarlund FM 60A Manual

Hammarlund HQ-160 Operating and installation instructions
Hammarlund

Hammarlund HQ-160 Operating and installation instructions

Hammarlund HQ-110A Operating and installation instructions

Hammarlund

Hammarlund HQ-110A Operating and installation instructions

Hammarlund SP-600-JX-17 Troubleshooting guide

Hammarlund

Hammarlund SP-600-JX-17 Troubleshooting guide

Hammarlund HQ-140-X Manual

Hammarlund

Hammarlund HQ-140-X Manual

Hammarlund SP-600-JI-17 User manual

Hammarlund

Hammarlund SP-600-JI-17 User manual

Hammarlund SP-600-JX User manual

Hammarlund

Hammarlund SP-600-JX User manual

Hammarlund SP-600-JX-17 Parts list manual

Hammarlund

Hammarlund SP-600-JX-17 Parts list manual

Hammarlund HQ-170A Troubleshooting guide

Hammarlund

Hammarlund HQ-170A Troubleshooting guide

Hammarlund HQ-145X Operating and installation instructions

Hammarlund

Hammarlund HQ-145X Operating and installation instructions

Hammarlund SP-600-JX User manual

Hammarlund

Hammarlund SP-600-JX User manual

Hammarlund SP-600-JX-17 Operating instructions

Hammarlund

Hammarlund SP-600-JX-17 Operating instructions

Hammarlund SP-600-JX-21 User manual

Hammarlund

Hammarlund SP-600-JX-21 User manual

Hammarlund HQ-180 Series Manual

Hammarlund

Hammarlund HQ-180 Series Manual

Hammarlund SP-600-JX User manual

Hammarlund

Hammarlund SP-600-JX User manual

Hammarlund hq-150 Manual

Hammarlund

Hammarlund hq-150 Manual

Hammarlund HQ-100A Series User manual

Hammarlund

Hammarlund HQ-100A Series User manual
Hammarlund HQ-140-X User manual

Hammarlund

Hammarlund HQ-140-X User manual

Popular Receiver manuals by other brands

Horizon Hobby Spektrum AR6610T user guide

Horizon Hobby

Horizon Hobby Spektrum AR6610T user guide

Pro-Ject Audio Systems Bluetooth Box E Instructions for use

Pro-Ject Audio Systems

Pro-Ject Audio Systems Bluetooth Box E Instructions for use

J-Tech Digital JTECH-WEX-200M user manual

J-Tech Digital

J-Tech Digital JTECH-WEX-200M user manual

CaryMart 0020199 manual

CaryMart

CaryMart 0020199 manual

Kenwood GX806EF2 Service manual

Kenwood

Kenwood GX806EF2 Service manual

Marantz M-CR511 Quick setup guide

Marantz

Marantz M-CR511 Quick setup guide

Amino Aria 6 quick start guide

Amino

Amino Aria 6 quick start guide

Marantz SR-14 Service manual

Marantz

Marantz SR-14 Service manual

Strong SRT 7010 user manual

Strong

Strong SRT 7010 user manual

Axxera AVM2207S Installation & owner's manual

Axxera

Axxera AVM2207S Installation & owner's manual

weinor BiRec MA Assembly and installation instructions

weinor

weinor BiRec MA Assembly and installation instructions

Harman Kardon AVR 4550 Service manual

Harman Kardon

Harman Kardon AVR 4550 Service manual

Kenwood DVR-6100 Service manual

Kenwood

Kenwood DVR-6100 Service manual

Roger Technology H93/RX22A/I Instruction and warnings for the installer

Roger Technology

Roger Technology H93/RX22A/I Instruction and warnings for the installer

Allied Radio Knight-Kit Crystal Set 83 Y 261 manual

Allied Radio

Allied Radio Knight-Kit Crystal Set 83 Y 261 manual

Hi-Z Antennas Shack Switch-2 manual

Hi-Z Antennas

Hi-Z Antennas Shack Switch-2 manual

Telestar DIRA S 32i CD operating instructions

Telestar

Telestar DIRA S 32i CD operating instructions

PCB Piezotronics T333B40 Installation and operating manual

PCB Piezotronics

PCB Piezotronics T333B40 Installation and operating manual

manuals.online logo
manuals.online logoBrands
  • About & Mission
  • Contact us
  • Privacy Policy
  • Terms and Conditions

Copyright 2025 Manuals.Online. All Rights Reserved.