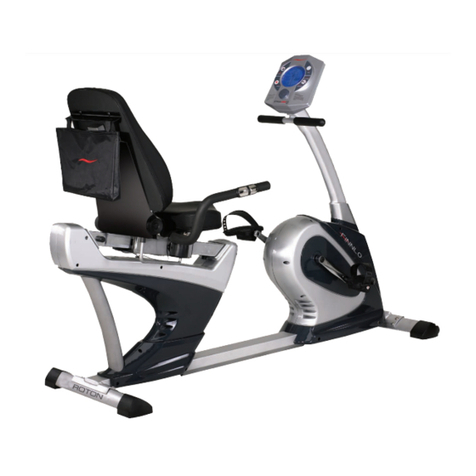
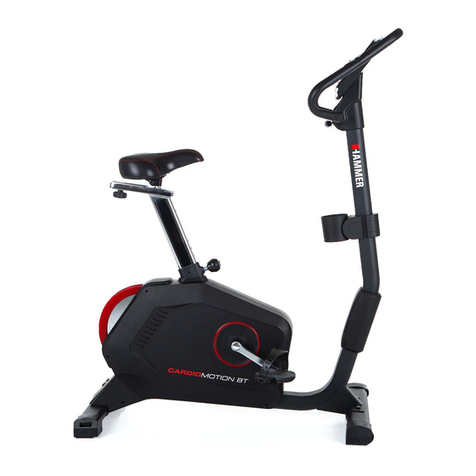
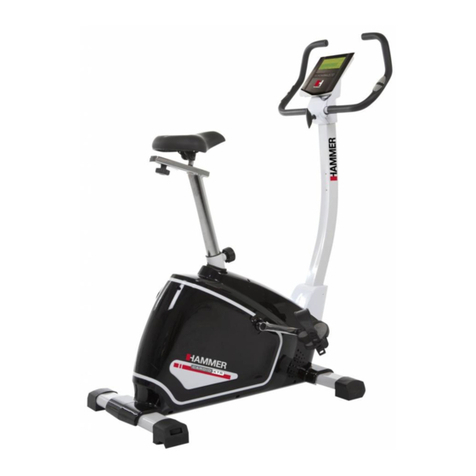
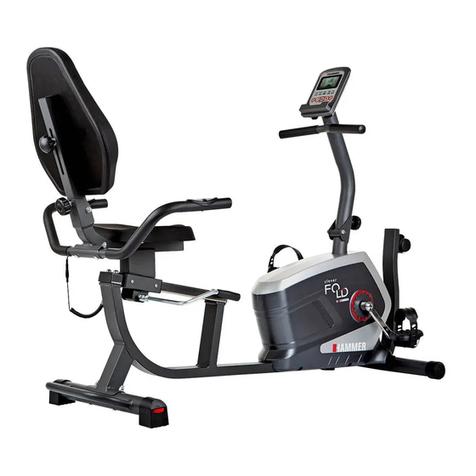
Hammer Cardio E1 User manual


Inhaltsverzeichnis Index Seite/Page
01
1. Sicherheitshinweise
2. Allgemeines
2.1 Verpackung
2.2 Entsorgung
3. Montage
3.1 Montageschritte
3.2 Einstellung der Sitzposition
3.3 Lenkerverstellung
3.4 Höhenverstellung
4. Pflege und Wartung
5. Computer
5.1 Funktionen
5.2 Funktionstasten
5.3 Bedienung des Computers
5.4 Anzeigenbereich
6. Technische Details
6.1 Netzgerät
6.2 Konformität gemäß Sicherheitsgesetz
7. Trainingsanleitung
7.1 Trainingshäufigkeit
7.2 Trainingsinstensität
7.3 Pulsorientiertes Training
7.4 Trainingskontrolle
7.5 Trainingsdauer
8. Explosionszeichnung
9. Teileliste
10. Garantie
11. Service-Hotline &
Ersatzteilbestellformular
1. Safety instructions 2
2. General 3
2.1 Packaging 3
2.2 Disposal 3
3. Assembly 4
3.1 Assembly Steps 4
3.2 How to adjust the saddle 10
3.3 Handlebar adjustment 10
3.4 Height adjustment 10
4. Care and Maintenance 11
5. Computer 11
5.1 Functions 12
5.2 Buttons 15
5.3 Operation 16
5.4 Display 20
6. Technical Details
6.1 Power supply 21
6.2 Conformity according to 21
7. Training manual 22
7.1 Training frequency 22
7.2 Training intensity 22
7.3 Heartrate orientated training 22
7.4 Training control 23
7.5 Training duration 24
8. Explosion drawing 26
9. Parts list 27
10. Warranty (Germany only) 28
11. - 30

WICHTIG!
Es handelt sich bei diesem Ergometer um ein drehzahlun-
abhängiges Trainingsgerät der Klasse HA, nach
DIN EN 957-1/5.
Max. Belastbarkeit 130 kg.
Der Ergometer darf nur für seinen bestimmungsgemäßen
Zweck verwendet werden!
Jegliche andere Verwendung ist unzulässig und
möglicherweise gefährlich. Der Importeur kann nicht
für Schäden verantwortlich gemacht werden, die durch nicht
bestimungsgemäßen Gebrauch verursacht werden.
Sie trainieren mit einem Gerät, das sicherheitstechnisch
nach neuesten Erkenntnissen konstruiert wurde. Mögliche
Gefahrenquellen, die Verletzungen verursachen könnten,
wurden bestmöglich ausgeschlossen.
Um Verletzungen und/oder Unfälle zu vermeiden,
lesen und befolgen Sie bitte diese einfachen Regeln:
1. Erlauben Sie Kindern nicht, mit dem Gerät oder in dessen
Nähe zu spielen.
2. Überprüfen Sie regelmäßig, ob alle Schrauben, Muttern,
Handgriffe und Pedale fest angezogen sind.
3. Tauschen Sie defekte Teile sofort aus und nutzen Sie das
Gerät bis zur Instandsetzung nicht. Achten Sie auch auf
eventuelle Materialermüdungen.
4. Hohe Temperaturen, Feuchtigkeit und Wasserspritzer
sind zu vermeiden.
5. Vor Inbetriebnahme des Gerätes die Bedienungsanleitung
genau durchlesen.
6. Das Gerät braucht in jede Richtung genügend Freiraum
(mindestens 1,5m).
7. Stellen Sie das Gerät auf einen festen und
ebenen Untergrund.
8. Trainieren Sie nicht unmittelbar vor bzw. nach den
Mahlzeiten.
9. Lassen Sie sich vor Beginn eines Fitness-Trainings immer
zuerst von einem Arzt untersuchen.
10. Das Sicherheitsniveau des Gerätes kann nur gewährleistet
werden, wenn Sie in regelmäßigen Abständen die
Verschleißteile überprüfen. Diese sind mit * in der Teileliste
gekennzeichnet.
11. Trainingsgeräte sind auf keinen Fall als Spielgeräte zu
verwenden.
12. Stehen Sie sich nicht auf das Gehäuse.
13. Tragen Sie keine lose Kleidung, sondern geeignete
Trainingskleidung wie z.B. einen Trainingsanzug.
14. Tragen Sie Schuhe und trainieren Sie nie barfuß.
15. Achten Sie darauf, dass sich nicht Dritte in der Nähe des
Gerätes befinden, da weitere Personen durch die
beweglichen Teile verletzt werden könnten.
16. Das Trainingsgerät darf nicht in feuchten Räumen (Bad)
oder auf dem Balkon aufgestellt werden.
IMPORTANT!
The Ergometer is produced according to DIN EN 957-1/5
class HA.
Max. user weight is 130 kg.
The Ergometer should be used only for its intended purpose.
Any other use of the item is prohibited and maybe
dangerous. The importeur cannot be held liable for
damage or injury caused by improper use of the
equipment.
The Ergometer has been produced according to the latest
safety standards.
To prevent injury and / or accident, please read and
follow these simple rules:
1. Do not allow children to play on or near the equipment.
2. Regularly check that all screws, nuts, handles and pedals
are tightly secured.
3. Promptly replace all defective parts and do not use the
equipment until it is repaired. Watch for any material
fatigue.
4. Avoid high temperatures, moisture and splashing water.
5. Carefully read through the operating instructions before
starting the equipment.
6. The equipment requires sufficient free space in all
directions (at least 1.5 m).
7. Set up the equipment on a solid and flat surface.
8. Do not exersice immediately before or after meals.
9. Before starting any fitness training, let yourself examined
by a physician.
10. The safety level of the machine can be ensured only if you
regularly inspect parts subject to wear. These are
indicacated by an * in the parts list. Levers and other
adjusting mechanisms of the equipment must not
obstruct the range of movement during training.
11. Training equipment must never be used as toys.
12. Do not step on the housing but only on the steps provi
ded for this purpose.
13. Do not wear loose clothing; wear suitable training
gear such as a training suit, for example.
14. Wear shoes and never exercise barefoot.
15. Make certain that other persons are not in the area of
the home trainer, because other persons may be injured
by the moving parts.
16. It is not allowed to place the item in rooms with high
humidity (bathroom) or on the balcony.
1. Sicherheitshinweise 1. Safety instructions
02
Der Anwendungsbereich dieses Trainingsgerätes ist der
Heimbereich. Das Gerät entspricht den Anforderungen der
DIN EN 957-1/5 Klasse HA. Die CE-Kennzeichnung bezieht
sich auf 2006/95/EG,2004/108/EG. Bei unsachgemäßem
Gebrauch dieses Gerätes (z. B. übermäßigem Training, falsche
Einstellungen, etc.) sind Gesundheitsschäden nicht auszuschlie-
ßen.
Vor Beginn des Trainings sollte eine allgemeine Untersuchung
von Ihrem Arzt durchgeführt werden, um eventuelle vorhandene
Gesundheitsrisiken auszuschließen.
2.1 Verpackung
Die Verpackung besteht aus umweltfreundlichen und wieder
verwertbaren Materialien:
Außenverpackung aus Pappe
Formteile aus geschäumtem, FCKW-freiem Polystyrol (PS)
Folien und Beutel aus Polyäthylen (PE)
Spannbänder aus Polypropylen (PP)
2.2 Entsorgung
Dieses Produkt darf am Ende seiner
Lebensdauer nicht über den normalen
Haushaltsabfall entsorgt werden, sondern
muss an einem Sammelpunkt für das
Recyclingvonelektrischenundelektronischen
Geräten abgegeben werden. Die Werkstoffe
sind gemäß ihrer Kennzeichnung wiederver-
wertbar. Mit der Wiederverwendung, der
stofflichen Verwertung oder anderen
Formen der Verwertung von Altgeräten leis-
ten Sie einen wichtigen Beitrag zum Schutze unserer Umwelt.
Bitte erfragen Sie bei der Gemeindeverwaltung die zuständige
Entsorgungsstelle.
This training equipment is for use at home. The equipment
complies with the requirements of DIN EN 957-1/5 Class HA.
The CE marking refers to 2006/95/EEC,2004/108/EEC.
Damage to health cannot be ruled out if this equipment is not
used as intended (for example, excessive training, incorrect
settings, etc.).
Before starting your training, you should have a complete phy-
sical examination by your physician, in order to rule out any
existing health risks.
2.1 Packaging
Environmentally compatible and recyclable materials:
External packaging made of cardboard
Molded parts made of foam CFS-free polystyrol (PS)
Sheeting and bags made of polyethylene (PE)
Wrapping straps made of polypropylene (PP)
2.2 Disposal
Please be sure to keep the packing
for the event of repairs / warranty
matters. The equipment should not be
disposed of in the household rubbish!
2. Allgemeines 2. General
03

Um den Zusammenbau des Ergometers für Sie so einfach wie
möglich zu gestalten, haben wir die wichtigsten Teile bereits
vormontiert. Bevor Sie das Gerät zusammenbauen, sollten Sie
bitte diese Aufbauanleitung sorgfältig lesen und danach Schritt
für Schritt, wie beschrieben, fortfahren.
Packungsinhalt
Entnehmen Sie alle Einzelteile aus der
Styroporform und legen Sie diese
nebeneinander auf den Boden.
Stellen Sie den Hauptrahmen auf eine
bodenschonende Unterlage, da ohne
montierte Standfüße Ihr Boden beschädigt/
verkratzt werden könnte.
Diese Unterlage sollte flach und nicht
zu dick sein, sodass der Rahmen einen
stabilen Stand hat.
Achten Sie darauf, dass Sie während des
Zusammenbaus in jede Richtung hin
genügend Bewegungsfreiraum (mind. 1,5 m)
In order to make assembly of the Ergometer as easy as
possible for you, we have preassembled the most important
parts. Before you assemble the equipment, please read these
instructions carefully and then continue step by step as descri-
bed
Contents of packaging
Unpack all individual parts and place them alongside
each other on the floor.
Place the main frame on a pad protecting the floor,
because without its assembled base feet it can
damage / scratch your floor. The pad should be
flat and not too thick, so that the frame has a
stable stand.
Make certain that you have adequate room for
movement (at least 1.5 m) on all sides during
assembly.
3. Aufbau 3. Assembly
04
3.1 Montageschritte/Assembly steps
Schritt /Step 1

05
Schritt / Step 2

06
Schritt / Step 3

07
Schritt / Step 4
74
74

08
Schritt / Step 6
Schritt / Step 5

Schritt / Step 7
09

3.2 Einstellen der Sitzposition
Sitzhöhe (vertikale Verstellung):
Das wichtigste Positionsmass ist die Sitzhöhe. Stellen Sie das
Sattelstützrohr in einer solchen Höhe ein, dass beim Sitzen
auf dem Gerät und Festhalten am Lenker beide Zehenspitzen
gleichzeitig den Boden berühren.
Die Sattelstütze darf nur bis zur max. Markierung
herausgezogen werden!
Satteleinstellung (horizontal): Nach der Einstellung der Sitzhöhe
ist die Einstellung des Sattelschlittens vorzunehmen. Dies kön-
nen Sie leicht durch Lösen der Griffschraube und Verschieben
des Sattelschlittens entsprechend Ihrer Körpergröße vorneh-
men. Folgende Faustregel kann zusätzlich bei der Einstellung
berücksichtigt werden:
Bei waagerecht gestellter Tretkurbel sollte der Winkel zwischen
Oberschenkel und Unterschenkel 90°betragen.
Neigungsverstellung des Sattels: Öffnen Sie beide Muttern
am Sattelgestell, bis sich der Sattel leicht drehen lässt.
Verstellen Sie die Neigung des Sattels durch drücken oder
ziehen an der Sattelspitze. Ist eine komfortable Neigung
erreicht, drehen Sie die zuvor geöffneten Muttern der
Sattelgestells mit dem passenden Werkzeug wieder zu.
3.3 Lenkerverstellung
Nach dem Lösen der Flügelschraube können Sie durch Neigen
des Lenkers die für Sie bequemste Lenkerposition auswählen.
Anschließend den Drehknopf wieder handfest anziehen
3.2 How to adjust the saddle postion
Height of the saddle: Most important is the correct height of
the saddle. Please fix the saddle in such a height, that both toes
can touch the floor.
The saddle may only be pulled out to the max. posi-
tion as indicated
Horizontal saddle adjustment: Adjust the height of the saddle
first. Unfasten the stargrip and move the saddle slider forward
or backward. Adjust it to a position, that when the pedals are in
the middle position, your knee should be at a 90 degree angle°.
Saddle incline adjustment: Open the 2 pcs of nuts under the
saddle, till the saddle can be turned. Push or pull the saddle till
you seat comfortable. Tight both nuts.
3.3 Handlebar adjustment
After unfixing the T-grip, you can adjust the angle of the hand-
lebar, to get the most comfortable seat position. After positio-
ning of the handlebar, you have to tighten the knob.
10
3.4 Höhensverstellung
Durch Drehen der Höhenverstellkappen am hinteren Standfuß
ist ein Bodenausgleich möglich. Ein Drehen gegen den
Uhrzeigersinn bewirkt ein Herausdrehen der Höhenverstellung.
Achten Sie darauf, dass sich noch genügend Gewindegänge in
der Fußkappe befinden.
3.4 Height adjustment
Turning the height adjustment screws can solve the wobble of
the ergometer. Turn the screw anti-clockwise increases the
height. Please pay attention that there is enough thread left in
the foot cap.

Wartung
Grundsätzlich bedarf das Gerät keiner Wartung
Kontrollieren Sie regelmäßig alle Geräteteile und den
festen Sitz aller Schrauben und Verbindungen
Tauschen Sie defekte Teile über unseren Kunden-
service sofort aus. Das Gerät darf dann bis zur
Instandsetzung nicht verwendet werden.
Pflege
Zur Reinigung verwenden Sie bitte nur ein feuchtes
Tuch ohne scharfe Reinigungsmittel. Achten Sie darauf,
dass keine Flüssigkeit in den Computer gelangt.
Bauteile (Lenker, Sattel), welche mit Schweiß in Kontakt
kommen, brauchen nur mit einem feuchten Tuch gerei-
nigt werden.
Maintenance
In principle, the equipment does not require
maintenance.
Regularly inspect all parts of the equipment and the
secure seating of all screws and connections.
Promptly replace any defective parts through our
customer service. Until it is repaired, the equipment
must not be used.
Care
When cleaning, use only a moist cloth and avoid harsh
cleaning agents. Ensure that no moisture penetrates
into the computer.
Components (handlebar, saddle) that come into contact
with perspiration, need cleaning only with a damp cloth.
4. Pflege und Wartung 4. Care and Maintenance
5. Computer (D)
11

12
5.1 FUNCTIONS
1.Program: 21 programs as following
A: 1 Manual Program (See fig 1)
B: 10 Preset Program Profile: P1-P10
fig 3
5.1 FUNKTIONEN
1. 21 Programme wie folgt
A: 1 Programm Manual (s. fig1)
fig 1
B: 10 Voreingestellte Programme: P1-P10
fig 2
fig 4

13
fig 5 fig 6 fig 7
fig 8 fig 9 fig 10
fig 11 fig 12 fig 13

14
P1: ROLLING P2:VALLEY P3: FATBURN P4:RAMP P5:MOUNTAIN
P6: INTERVAL P7:CARDIO P8:ENDURANCE P9:SLOPE P10:RALLY
C: 1 Watt Control Program See fig 12)
D: 4 Heart Rate Control Program: See fig 13 ~ fig 16)
55%H.R, 75%H.R, 90%H.R and TARGET H.R
E: 4 User Setting Programs: CUSTOM1 to CUSTOM4 (See fig 17 ~ fig
20)
fig 16
fig 19
F: 1. Body Fat Measuring Program (See fig 21)
2. Record the user‘s data of GENDER, HEIGHT, WEIGHT and AGE even
cut off the power.
3. Dot matrix display showing your current status. (See fig 22)
4. Simulative ECG measuring the heart rate (See fig 23)
5. Display Speed(RPM), TIME, DIST., CAL., WATT, PULSE, LEVEL at the
same time.
6. The computer will turn off automatically if there is no operation,
speed signal and pulse signal over 4 minutes. Meanwhile,it will store
your current exercise data and turn the loading resistance to the
minimum. Once you press any button or in motion,the computer will
turn on automatically.
P1: ROLLING P2:VALLEY P3: FATBURN P4:RAMP P5:MOUNTAIN
P6: INTERVAL P7:CARDIO P8:ENDURANCE P9:SLOPE P10:RALLY
C: 1 Watt-Programm (s. fig 12)
D: 4 pulsgesteuerte Programme: (s. fig 13 ~ fig 16)
55%H.R, 75%H.R, 90%H.R and TARGET H.R
E: 4 Benutzereinstellungen: CUSTOM1 bis CUSTOM4 (s. fig 17 ~ fig
20)
fig 14 fig 15
fig 17 fig 18
F: 1. Körperfettmessung (s. fig 21)
2. Speichert Benutzerdaten des GESCHLECHTS, GRÖSSE, GEWICHT
und ALTER .
3. Anzeige des benutzers (s. fig 22)
4. EKG genaue Pulsmessung (s. fig 23)
5. In der Anzeige erscheinen gleichzeitig die GESCHWIN
DIGKEIT, ZEIT, ENTFERNUNG, KALORIEN, PULS und
SCHWIERIGKEITSGRAD.
6. Der Computer schaltet sich automatisch aus, wenn innerhalb
von 4 Minuten keine Geschwindigkeit oder Puls angezeigt
wird. Die Daten werden dennoch gespeichert. Drücken
Sie einen beliebigen Knopf am Computer, damit er sich
einschaltet.
fig 20 fig 21
fig 22
fig 23

15
5.2 FUNKTIONSTASTEN:
1.ENTER
Drücken Sie ENTER, um im ausgewählten Programm Daten
einzugeben.
- Wählen Sie im Start-Modus mit der ENTER-Taste, ob Sie die
Geschwindigkeit oder Umdrehungszahl (RPM) angezeigt haben
wollen.
- Sie können in jedem Programm durch gedrückt-halten der
ENTER-Taste von zwei Sekunden den Computer neu starten.
2. START/STOP
- Drücken Sie diese Taste, um das Programm zu starten oder
zu stoppen.
- Sie können in jedem Programm durch gedrückt-halten der
START/STOP-Taste von zwei Sekunden den Computer neu
starten.
3. UP
- Wenn im STOP-Modus und die Punktematrix blinkt, drücken Sie
diese Taste, um in das obere Programm zu gehen.
- Im START-Modus (Anzeige START) drücken Sie bitte diesen
Knopf, um den Widerstand zu erhöhen.
4. DOWN
- Wenn im STOP-Modus und die Punktematrix blinkt, drücken Sie
diese Taste, um in das untere Programm zu gehen.
- Im START-Modus (Anzeige START) drücken Sie bitte diesen
Knopf, um den Widerstand zu verringern.
5. PULSE RECOVERY
- Messen Sie ihre momentane Herzfrequenz, die hier angezeigt
wird. Drücken Sie diesen Knopf, um in das PULSE RECOVERY-
Programm zu gelangen.
- Durch erneutes Drücken dieser Taste, verlassen Sie das
Programm.
5.2 BUTTONS:
1.ENTER
When you choose the program, press Enter to set the settings.
During the start mode(display START), press ENTER to choose
display the speed or RPM, or switch automatically. During any
mode, hold down this button for 2 seconds to totally reset the
computer.
2.START/STOP:
Press START/STOP button to start or stop the programs.
During any mode, hold down this button for 2 seconds to totally
reset the computer.
3.UP:
In stop mode and the dot matrix character flash, press this
button to select the program up. If the related window value
flash, press this button to increase the value. During the start
mode(display START), press this button to increase the training
resistance.
4.DOWN:
In stop mode and the dot matrix character flash, press this
button to select the program down. If the related window value
flash, press this button to decrease the value. During the start
mode(display START), press this button to decrease the training
resistance.
5.PULSE RECOVERY:
First test your current heart rate and show your heart rate value,
press this button to enter into pulse recovery testing. When you
are in pulse recovery mode, press this button to exit.

16
5.3 OPERATION
1.Turn on the computer
Plug in one end of the adaptor to the AC electrical source and connect
the other end to the computer. The computer will beep and enter into
initial mode.(See fig 24)
fig 26
2.Program select and value setting
Manual Program and Preset Program P1 P10
A.Press UP, DOWN button to select the program that you like. See
fig 25)
B.Press ENTER button to confirm the selected program and enter
time setting window.
C.The time will flash, and then press UP, DOWN button to set up your
desired time. Press ENTER to confirm the value. (See fig 26)
fig 29
D.The distance will flash, and then press UP, DOWN to set up the
desired distance value. Press ENTER to confirm the value. (See fig
27)
E.The calories will flash, and then press UP, DOWN to set up the
desired calories to be consumed. Press ENTER to confirm the value.
(See fig 28)
F.Press START/ STOP to begin exercise.(See fig 29)
5.3 BEDIENUNG DES COMPUTERS
1.Computer einschalten
Verbinden Sie das Stromkabel mit einer Steckdose und dem Computer.
Dieser wird dann piepsen (s. fig 24)
fig 24 fig 25
2.Programmwahl und Einstellungen
Manuelle Programme und Vorinstallierte Programme P1~P10
A. Drücken Sie UP, DOWN um ein Programm zu wählen. (s. fig 25)
B.Drücken Sie ENTER, um die Auswahl zu bestätigen und gehen dann
zur Zeiteingabe.
C.Das Feld TIME wird blinken. Durch drücken der UP bzw. DOWN-
Taste, können Sie die gewünschte Zeit eingeben. Drücken Sie ENTER,
um die Eingabe zu bestätigen. (s. fig 26)
fig 27 fig 28
D.DISTANCE blinkt. Geben Sie hier die gewünschte Entfernung ein
durch Drücken der UP bzw. DOWN-Taste. Mit ENTER bestätigen Sie
ihre Eingabe. (s. fig 27)
E.Das Feld CALORIES wird blinken. Durch drücken der UP bzw.
DOWN-Taste, können Sie die gewünschte Calorien eingeben, die Sie
verbrennen wollen. Drücken Sie ENTER, um die Eingabe zu bestätigen.
(s. fig 28)
F.Drücken Sie START/ STOP , um das Training zu beginnen. (s. fig
29)

17
fig 32
Watt Control Program
A.Press UP, DOWN to select the watt control program
B.Press ENTER to confirm the selected watt control program, and enter
into time setting window.
C.The time will flash, and then press UP, DOWN button to set up the
desired time,. Press ENTER to confirm the value.
D.The distance will flash, and then press UP, DOWN to set up the
desired distance value. Press ENTER to confirm the value.
E.The calories will flash, and then press UP, DOWN to set up the desired
calories to be consumed. Press ENTER to confirm the value.
F.The watt display will flash, and then press UP, DOWN to set up the
watt to do the exercise. Press ENTER to confirm the value. (See fig 30)
G.Press START/ STOP to begin exercise.
NOTE: The WATT value is decided by the TORQUE and RPM. In this
program, the WATT value will keep at constant value. It means that if
you peddle quickly, the load resistance will decrease and if you peddle
slowly, the load resistance will increase to ensure you at the same watt
value.
HEART RATE CONTROL PROGRAM: 55%H.R, 75% H.R and
90% H.R
The maximum heart rate depends on different age and this program will
ensure you do the healthy exercise within maximum heart rate.
A.Press UP , DOWN to choose the heart rate control program
B.Press ENTER to confirm the heart rate control program, and enter
into time setting window.
C.The time will flash, and then press UP, DOWN button to set up the
desired time. Press ENTER to confirm the value.
D.The distance will flash, and then press UP, DOWN to set up the
desired distance value. Press ENTER to confirm the value.
E.The calories will flash, and then press UP, DOWN to set up the desired
calories to be consumed. Press ENTER to confirm the value.
F.The age will flash, and then press UP, DOWN to set the user‘s age.
Press ENTER to confirm the value. (See fig 31)
G.When the target heart rate control program flash, the computer will
display the user‘s target heart rate according to user‘s age.
H.Press START/ STOP to begin exercise.
fig 30 fig 31
Watt Control Program
A.Drücken Sie UP, DOWN, um das Watt-Control-Programm zu wählen.
B.Drücken Sie ENTER, um das Watt-Control-Programm zu bestätigen
und ins TIME-Menü zu wechseln.
C.Die Anzeige TIME blinkt. Drücken Sie die UP, DOWN-Tasten, um die
gewünschte Zeit vorzugeben. Drücken Sie ENTER zur Bestätigung.
D.Die Anzeige DISTANCE blinkt. Drücken Sie UP, DOWN, um die
gewünschte Entfernung einzugeben. Bestätigen Sie mit ENTER.
E.Die Anzeige CALORIES blinkt. Drücken Sie UP, DOWN, um die
gewünschten Kalorien einzugeben. Bestätigen Sie mit ENTER.
F.Die Anzeige WATT blinkt. Drücken Sie UP, DOWN, um die gewünschten
Watt-Anzahl einzugeben. Bestätigen Sie mit ENTER. (s. fig 30)
G.Drücken Sie START/ STOP, um mit dem Training zu beginnen.
HINWEIS: Das WATT-Programm ist abhängig von der Drehzahl. In
diesem Programm bleibt die Watt-Zahl konstant. Dies bedeutet, dass
wenn Sie schnell treten, wird der Widerstand abnehmen und bei
langsamen treten zunehmen, sodass Sie immer in der vorgegebenen
Watt-Leistung trainieren..
HEART RATE CONTROL PROGRAM: 55%H.R, 75% H.R and
90% H.R
Die maximale Herzfrequenz ist abhängig vom Alter. Diese Programm
wird sicher gehen, dass Sie ein gesundheitsorientiertes Training
absolvieren.
A. Drücken Sie UP bzw. DOWN, um das Heart Rate Control Programm
zu wählen.
B. Drücken Sie ENTER zur bestätigung und wechseln Sie zum TIME-
Display.
C. Das Feld TIME wird blinken. Durch drücken der UP bzw. DOWN-Taste,
können Sie die gewünschte Zeit eingeben. Drücken Sie ENTER, um die
Eingabe zu bestätigen.
D. DISTANCE blinkt. Drücken Sie UP bzw. DOWN, um die gewünschte
Entfernung einzugeben und bestätigen Sie mit ENTER.
E. CALORIES blinkt. Drücken Sie UP bzw. DOWN, um die gewünschten
Kalorien einzugeben, die Sie gerne verbrennen wollen und bestätigen
Sie mit ENTER.
F. AGE blinkt. Drücken Sie UP bzw. DOWN, um das gewünschte
Entfernung einzugeben und bestätigen Sie mit ENTER.
G. Wenn das Herzfrequenzprogramm blinkt, dann haben Sie die
Zielherzfrequenz erreicht.
H. Drücken Sie START/ STOP, um das Training zu Beginnen.
fig 33 fig 34 fig 35

18
HEART RATE CONTROL PROGRAM: TARGET HEART
RATE
The user can set any target heart rate to do the exercise.
A.Press UP, DOWN to select TARGET HEART RATE program.
B.Press ENTER to confirm your choice and enter time setting
window.
C.The time display will flash, and then press UP, DOWN to set the
desired time to do the exercise. Press ENTER to confirm the value.
D.The distance will flash, and then press UP, DOWN to set up the
desired distance value. Press ENTER to confirm the value.
E.The calories will flash, and then press UP, DOWN to set up the
desired calories to be consumed. Press ENTER to confirm the value.
F.The target heart rate will flash, and then press UP, DOWN to set
up your target heart rate. Press ENTER to confirm the value.(See fig
32)
G.Press START/ STOP to begin exercise.
NOTE: During exercise, the user‘s heart rate value depends on
resistance level and speed. The heart rate control program is to
ensure your heart rate within the preset value. When the computer
detect your current heart rate is higher than preset, it will decrease
the resistance level automatically or you may slow down exercise.
If your current heart rate is lower than preset, it will increase
resistance and you may speed up.
User Profile Programs: CUSTOM1 CUSTOM4
A.Press UP, DOWN to select the user
B.Press ENTER to confirm your choice, and enter into time setting
window.
C.The time display will flash, and then press UP, DOWN to set up the
desired time to do the exercise. Press ENTER to confirm the value.
D.The distance will flash, and then press UP, DOWN to set up the
desired distance value. Press ENTER to confirm the value.
E.The calories will flash, and then press UP, DOWN to set up the
desired calories to be consumed. Press ENTER to confirm the value.
F.The first resistance level will flash, and then press UP, DOWN to set
the desired load resistance. Press ENTER to confirm. Then repeat
above operation to set the resistance from 1 to 16.(See fig 33)
G.Press START/ STOP to begin exercise.
Body Fat Measurement Program
A.Press UP, DOWN to select BODY FAT TEST program (See fig 34)
B.Press ENTER to confirm your choice, and enter into height setting
mode
C.The height display will flash, and then press UP, DOWN to set up
your height. Press ENTER to confirm the value (See fig 35)
D.The weight display will flash, and then press UP, DOWN to set up
your weight. Press ENTER to confirm the value.(See fig 36)
HEART RATE CONTROL PROGRAM: TARGET HEART
RATE
Sie können jede Ziel-Herzfrequenz für ihr Training wählen.
A. Drücken Sie UP bzw. DOWN, um das Programm TARGET HEART
RATE zu wählen.
B. Zur Programmbestätigung drücken Sie ENTER. Nun gelangen Sie
zur Zeitanzeige.
C. Das Feld TIME wird blinken. Durch drücken der UP bzw. DOWN-
Taste, können Sie die gewünschte Zeit eingeben. Drücken Sie ENTER,
um die Eingabe zu bestätigen.
D. DISTANCE blinkt. Drücken Sie UP bzw. DOWN, um die gewünschte
Entfernung einzugeben und bestätigen Sie mit ENTER.
E. CALORIES blinkt. Drücken Sie UP bzw. DOWN, um die gewünschten
Kalorien einzugeben, die Sie gerne verbrennen wollen und bestätigen
Sie mit ENTER.
F.Die Zielherzfrequenz blinkt, drücken Sie dann UP, DOWN, um die
Zielherzfrequenz einzugeben. Drücken Sie ENTER, um die Eingabe zu
bestätigen. (s. fig 32)
G.Drücken Sie START/ STOP, um mit dem Training zu beginnen.
HINWEIS: Während des Trainings ist die Herzfrequenz abhängig
vom Widerstand und der Geschwindigkeit. Das HEART RATE
CONTROL Programm dient zur Kontrolle Ihrer Herzfrequenz während
des Trainings in dem von Ihnen vorgegebenen Herzfrequenzbereich.
User Profile Programs: CUSTOM1 CUSTOM4
A. Drücken Sie UP, DOWN für die Benutzerauswahl.
B. Drücken Sie ENTER um ihre Asuwahl zu bestätigen. Sie wechseln
automatisch in das TIME-Fenster.
C. Das Feld TIME wird blinken. Durch drücken der UP bzw. DOWN-
Taste, können Sie die gewünschte Zeit eingeben. Drücken Sie ENTER,
um die Eingabe zu bestätigen.
D. DISTANCE blinkt. Drücken Sie UP bzw. DOWN,
um die gewünschte Entfernung einzugeben und bestätigen Sie mit
ENTER.
E. CALORIES blinkt. Drücken Sie UP bzw.
DOWN, um die gewünschten Kalorien einzugeben, die Sie gerne
verbrennen wollen und bestätigen Sie mit ENTER.
F. Benutzen Sie die UP bzw. DOWN-Taste, um den Widerstand zu
erhöhen oder verringern. Anschliessend drücken Sie ENTER zur
Bestätigung. Wiederholen sie die o.g. Schritte für 2 bis 10. (s. fig
33)
G.Drücken Sie START/ STOP, um das Training zu beginnen.
Body Fat Measurement Program
A. Drücken Sie UP, DOWN, um das Programm BODY FAT TEST
auszuwählen (s. fig 34)
B. Drücken Sie ENTER zur bestätigung und wechseln Sie in das
Programm Height
C. Das Feld HEIGHT wird blinken. Durch drücken der UP bzw. DOWN-
Taste, können Sie ihre Größe eingeben. Drücken Sie ENTER, um die
Eingabe zu bestätigen.
D. Das Feld WEIGHT wird blinken. Durch drücken der UP bzw.
DOWN-Taste, können Sie ihr Gewicht eingeben. Drücken Sie ENTER,
um die Eingabe zu bestätigen.
fig 36 fig 37 fig 38

19
E.The age display will flash, and then press UP, DOWN to set up your
age. Press ENTER to confirm the value.(See fig 37)
F.The gender display will flash, and then press UP, DOWN to set up
your gender. Press ENTER to confirm.(See fig 38)G.Press START/
STOP to begin testing your body fat.(See fig 39)
NOTE: During the body fat measurement, place both your palms on
the contact pads. The test result are: FAT%, BMR(Basal Metabolic
Rate), BMI(Body Mass Index), BODY and body shape. See fig 40)
FAT%: The total body fat in our body measured by percentage
BMR Basal Metabolic Rate (metabolism) is the energy (measured
in calories) expended by the body at rest to maintain normal bodily
function.
fig 40
BMI: means Body Mass Index, which is used for body shape building
During the body fat measurement, if your palms do not contact the
pulse sensor well, the computer cannot receive any signal and it will
display ERROR2.
3.Pulse Recovery Test
The pulse recovery test is to compare your heart rate before and
after exercise. It is target to determine your heart strength via the
measuring. Please do the test as below:
A.Both your hands hold the pulse sensor. The computer will display
your current pulse value.
B.Press RECOVERY to enter the pulse recovery test and the computer
program will enter the stop status.(See fig41)
C.Keep pulse detecting.
E.AGE blinkt. Drücken Sie UP bzw. DOWN, um das gewünschte Alter
einzugeben und bestätigen Sie mit ENTER. (s. fig 37)
F.GENDER blinkt. Drücken Sie UP bzw. DOWN, um ihr Geschlecht
einzugeben und bestätigen Sie mit ENTER. (s. fig 38)
G.Drücken Sie START/STOP zur Körperfettmessung. (s. fig 39)
HINWEIS: Halten Sie während der Körperfettmessung mit beiden
Händen die Griffe an den Kontaktstellen fest. Folgende Parameter
werden ihnen angezeigt: FAT%, BMR (Basal Metabolic Rate), BMI
(Body Mass Index). s. fig 40)
FAT%: Ihr absoluter Körperfettanteil in Prozent. BMR: Basal Metabolic
Rate (Metabolismus) ist die Energie (gemessen in Kalorien) die
zur Aufrechterhaltung aller Körperfunktionen benötigt wird. BMI:
heisst Körpermassen Index, gibt Auskunft über die individuelle
Gewichtsklasse.
fig 39
BMI: bedeutet Body Mass Index. Während der Messung müssen
beide Hände auf den Pulssensoren aufgelegt sein, ansonsten zeigt der
Computer Error 2 an.
3.Pulse Recovery Test
Der Pulse-Recovery Test vergleicht ihre Herzfrequenz vor und nach
dem Training. Bitte folgen Sie den Anweisungen:
A.Halten Sie mit beiden Händen den Pulssensor fest. Das Display zeigt
ihnen ihre aktuelle Herzfrequenz an.
B.Drücken Sie die RECOVERY-Taste um
den PULSE RECOVERY TEST zu starten. (s. fig 41)
C.Halten Sie weiterhin die Sensoren fest.
This manual suits for next models
1
Table of contents
Other Hammer Exercise Bike manuals

Hammer
Hammer 4852 ergometer cardio xtr User manual

Hammer
Hammer Wonderbike User manual

Hammer
Hammer NorsK CardioPace 5.0 User manual

Hammer
Hammer CARDIO 5.0 BT User manual

Hammer
Hammer RACER S User manual

Hammer
Hammer LR 18i User manual

Hammer
Hammer Clever Fold RC5 User manual

Hammer
Hammer Finnlo 3166 User manual

Hammer
Hammer Cardio Motion BT User manual

Hammer
Hammer ROWER COBRA 4536 User manual