HAMOKI B10 User manual

Planetary Mixer
Instruction Manual
Model: B10/B20/B30/B40/B60
1
Please read this instruction manual carefully before
operation

2
THIS PLANETARY MIXER IS A DANGEROUS APPLIANCE AND MUST ONLY BE USED
BY TRAINED PERSONNEL IN ACCORDANCE WITH THESE INSTRUCTIONS.
• Position on a flat, stable surface.
• A qualified technician should carry out installation and any repairs if
required. Do not remove any components on this product, it will void your
warranty.
• Always stand BEHIND the safety guard when operating the appliance.
• DO NOT place hands near the rotating attachments when in use. This can
result in severe injury.
• DO NOT remove food from the appliance until the mixing attachments have
come to a complete stop.
• DO NOT immerse the appliance in water.
• DO NOT attempt to mix items that this machine is not designed for. This can
damage the mixing attachments.
• DO NOT use with a damaged mixing attachment.
• DO NOT bypass the safety interlocks.
• Always switch off and disconnect the power supply to the appliance when
not in use.
• NEVER leave the appliance unattended when in use.
• The appliance is heavy, take care when moving and handling.
• This appliance must only be used in accordance with these instructions and
by persons competent to do so.
• This appliance is not intended for use by persons (including children) with
reduced physical, sensory or mental capabilities, or lack of experience and
knowledge, unless they have been given supervision or instruction concerning
use of the appliance by a person responsible for their safety.
• Keep all packaging away from children. Dispose of the packaging in
accordance to the regulations of local authorities.
• If the power cord is damaged, it must be replaced by a qualified engineer in
order to avoid a hazard. DO NOT attempt it yourself or it will void your
warranty.
• Never use accessories which are not recommended by the manufacturer.
They could pose a safety risk to the user and might damage the appliance.
Only use original parts and accessories.
• Clean the surface of stainless steel periodically with appropriate method to
prevent any damage brought by oxidization or any other chemical
interference.
Safety

3
The following procedures and instructions should always be carried out in order to
prevent any injuries. If the machinery is not used as recommended, the operator will
be responsible for his/her own safety and for the safety of any other person who may
be involved.
The information in this manual aims to assist the operator to understand, maintain,
and operate the mixer correctly. In order to prevent accidents, please ensure to read,
understand and follow all the precautions and warnings contained in this manual
before installation or operating. To gain a clear understanding of your mixer, it is
imperative that one must study this manual carefully.
Rotating machinery and electrics are dangerous and may cause injury if sufficient
precautions are not taken prior to operating or servicing the mixer. Ensure that the
power supply is not connected to mixer and is isolated before you clean or service the
machine. In certain troubleshooting situations it may be necessary to operate the mixer
in which case extreme caution must be used. Only suitably qualified personnel must
service the mixer.
▪This appliance is only for commercial and not for domestic use.
▪Whilst the machine is in operation, do not remove any covers or loosen any fittings.
▪When mixing products that develop dust, extreme care must be taken. Mix the
ingredients in speed 1 until the dust is eliminated.
▪Exposure to dust (including flour) may be harmful to health causing rhinitis (running
nose), watering eyes and possibly occupational asthma.
▪If dust is a hazard, ensure appropriate PPE (personal protective equipment) is used
by operators.
▪Ensure the electrical supply has been isolated and the power cord is disconnected
before attempting to move or service the mixer.
▪Be aware of the start capacitor situated behind the rear motor cover. In normal
circumstances this should discharge when the mixer is switched off. If in doubt
discharge the capacitor following adequate safety precautions.
▪When accessing the electrical components inside the mixer, be cautious of exposed
conductors that could be 'live'.
▪Always have your mixer and attachments regularly serviced; at least twice a year,
depending on frequency of use.
▪Ensure this manual is kept in an easily accessible place for future reference near the
mixer
Safety
▪When moving, transporting or lifting with a total weight in excess of 500kg, a bowl
truck must be used. Avoid tasks concerned with manual handling that involves a
risk to health as much as reasonably possible. This equipment should only be stored
in or transported through an environment with an ambient temperature above 5°C
and less than 55°C.
▪When mixing ingredients care must be taken to avoid the inhalation of dust
particles e.g. flour. Reference should be made to product supplier's data sheets to
ensure adequate precautions and protections are taken

4
▪Use the mixer as intended and inline with the operating instructions.
▪Use the mixer in a well-lit area.
▪Ensure the bowl, agitator, attachment and guard are correctly fitted to the mixer.
▪Remove the agitator before using any attachments.
▪Stop the mixer before adding more ingredients.
▪Use the stop button to stop machine.
▪Disconnect the mains electricity supply before cleaning the mixer.
▪Clean the bowl, agitators and attachments after use.
▪Clean the mixer using mild soap and water.
▪Clean the mixer daily.
▪Inspect the power cable and appliance regularly. If a fault is found do not operate.
▪Disconnect the mains electricity supply before cleaning the mixer.
DO NOT:
▪Change speed whilst the mixer is operating.
▪Wear loose clothing that may become caught in the mixer whilst it is in operation.
▪Attempt to reach into the bowl whilst it is mixing.
▪Leave the gear lever in mid position.
▪Use the bowl lift handle to stop the machine.
▪Use the gear lever to stop the machine.
▪Access rotating parts.
▪Use excessive force when operating which could affect the stability of the mixer.
▪Operate the mixer if parts are disassembled.
▪Fit the agitator to the mixer without a bowl in place.
▪Leave the agitator on the machine without the bowl being fitted.
▪Operate the mixer with both attachment and agitator fitted.
▪Override the safety switches fitted to the mixer.
▪Open the guard to stop the machine.
▪Use the mixer in an unsafe condition.
▪Operate the mixer or attachment if a fault develops or the mixer is unsafe.
▪Attempt to repair the appliance yourself. A qualified technician must service the machine.
▪Clean the mixer with scouring powder or a scouring pad.
▪Hose or pressure clean this appliance.
▪Clean aluminium agitators in a dishwasher.
▪Inhale mixing ingredient dust particles.
The mixer is not suitable for outdoor installation and must not be installed where a water
jet could be used for cleaning.
The mixer must only be operated by trained staff and must be installed in an area where
the use and maintenance is restricted to trained personnel.
Ensure that the mixer is at a height with the bowl handles approximately between the
knuckle and elbow height. This will reduce the need to bend at the waist.
Select a suitable flat level surface that can support the weight of the mixer and bowl
contents when full. It is recommended the mixer is secured in position. Ensure the table,
stand or work surface is firmly fixed to the floor. The appliance must be restrained to
prevent any movement during use.
Ensure that there is sufficient space around the mixer to allow for the safe operation.
Servicing may also become an issue if there is a greatly reduced clearance, so ensure that
the service accesses to the top, side and rear of the mixer are clear.

5
About the Product
The following information and instructions within this manual may not
cover all details or variations in the equipment, nor cover every problem
that one may have during installation or use. If additional information is
required please contact us.
The B series Planetary Food Mixers are designed and made for high
performance. The agitators use a planetary motion in the bowl to ensure
that the food has been fully blended. They can be used for a range of
different functions, such as flour mixing, powdered and liquid food etc.
These machines are also equipped with several levels of protection, so
that they can work smoothly and reliably. Additionally, there are several
working speeds and different agitators which all serve a different purpose,
whether it be for flour mixing, stuffing mixing and egg beating etc. All the
machine parts that come into contact with the food whilst in operation are
made from stainless steel, or their surfaces are specially treated in
conformity with hygiene standards.
The machine is, easily operable and very efficient, suitable for food
preparation in hotels, restaurants, food processing factories and for
material preparation in medicine making factories, chemical working
facilities etc.
We reserve the right to alter the design of the products without prior
notice. Whilst every effort is made to ensure this publication reflects the
latest design, the company cannot guarantee full compliance.
Technical Specifications:

6
Spiral Agitator: This agitator is suitable for mixing dough and sticky solid
food. When using, the capacity of flour must correspond to the mark and
the capacity of the water is 45% to 50% of the flour. Should only be used
at low speed.
Beater: This agitator is suitable for thin pieces, powdered and mushy food,
such as stuffing. Suited for use at medium speed.
Wire whip: This agitator is suited for mixing liquid food, such as cream and
egg beating. Suited for use at high speed.
CAUTION: BEFORE CHANGING SPEED, YOU MUST STOP THE MACHINE
FIRST. DO NOT MIX DOUGH AT MEDIUM OR HIGH SPEED
Before use, check whether the power supply corresponds to that required by the
machine, check whether the external earth wire is reliably connected.
▪The machine with the 3-phase motor must be checked to see that the machine
rotates in the direction indicated by the rotation mark. If the rotation direction is
wrong, exchange the two of the three livewires with each other. Note: For testing of the
machine, mixing tools should never be installed, otherwise they will fall out in the event
of wrong rotation direction, and will cause damage to machine parts.
▪For every power educe line which has no attached plug, it should be connected to the
switch of at least 3mm touch-point distance which installed by user. Rated current of
the switch must be not lower than 35A.
Note: When installing the blender, the Stir-axis gear must be a good size with the Stirrer
Crossing in place to prevent falling.
Bowl lift:
a) When mixing, rotate the hand wheel to raise the bowl until it reaches the stop position,
so that the food can be mixed thoroughly.
b) Exchanging agitators and after mixing, rotate the hand wheel to lower the bowl so that
the bowl and agitators can be removed.
Note: When assembling an agitator, slip the agitator up on the shaft and turn it until the
driving pin in the shaft reaches the L-shaped slot in the agitator shank in order to avoid the
agitator falling down while running.

7
Refer to figure 1 for mixer component identification.
▪Before using for the first time, thoroughly clean the bowl and agitator, as described in
section 7 of this manual.
▪Ensure that the mixer is firstly switched off (1)
▪Ensure the cover (11) is fitted to the hub (where applicable) if an attachment is not in use.
▪Always remove any attachments before using the agitator.
▪Lower the bowl support by rotating the bowl handle downwards (3)
▪Rotate the front guard cage assembly (10) to the open position
▪Place the required agitator (9) into the bowl (7) and lift bowl onto the bowl support (5)
▪Ensure that the rear bowl location (4) and side bowl pins (6) are correctly engaged
▪Slide the agitator onto the shaft, turning clockwise to engage the drive pin in the “L” slot of
the agitator shank.
▪Add the ingredients into the bowl and raise the bowl using the handle (3)
▪Rotate the front guard cage (10) into the operating position.
▪Select the desired speed (12).
▪Start the machine by pressing the 'green' start button (1)
▪When mixing is complete stop the machine using the 'red' stop button (1)
▪Lower the bowl support, open the guard cage and remove the agitator from the shaft
▪Remove the bowl and agitator from the mixer for emptying and cleaning.
Speed setting 1 (LOW) is for heavy mixtures such as dough, heavy batters and mashed
potatoes.
Speed setting 2 (MEDIUM-LOW) is for mixing cake batters, mashing potatoes and for
developing dough.
Speed number 3 (MEDIUM-HIGH) is for mixing maximum 3 amount of air into light batches. The
wire whip is used for whipping cream, beating egg whites, mixing light icings, meringues and
whipping.
ITEM NUMBER DESCRIPTION
1
STOP/START SWITCHES
2
SPLASH SHIELD
3
BOWL LIFT HANDLE
4
REAR BOWL LOCATION PIN
5
BOWL SUPPORT
6
SIDE BOWL PIN
7
BOWL
8
AGITATOR
9
BEATER SHAFT
10
GUARD
11
ATTACHMENT HUB COVER

8
MAINTENANCE & CLEANING
1. After use each time, carefully clean the bowl, agitators etc, and make sure to keep the
machine clean.
2. Lubricate the bowl side ways regularly.
3. The transmission gearbox is packed with special grease that will be sufficient for six months.
To add or replace grease, it is necessary only to remove the upper cover and the bearing cover
DO NOT CLEAN BY WATER DIRECTLY
DO NOT HOSE OR PRESSURE CLEAN THIS MIXER.
DO NOT USE ANY ABRASIVE CLEANERS
Ensure that the machine is disconnected from the main electrical power supply prior to
cleaning.
It is important that correct and detailed cleaning procedures are made for all surfaces that
come into contact with food. The cleaning frequency should be clearly defined for the mixer (i.e.,
daily, after production runs, or more often if necessary) and also the type of cleaning required
must also be identified. The objective of cleaning and disinfecting food contact surfaces is to
remove food debris (that bacteria require to grow), and to kill bacteria that are present. It is
important the cleaned surfaces are stored dry to prevent bacteria growth. Cleaning equipment
(brushes, etc.) used must also be stored in a clean and sanitary manner. The correct procedure
for cleaning of the splash zone and the food-contact surfaces are as follows:
1. Pre-clean - remove excess food waste by sweeping, wiping or pre-rinsing.
2. Main clean - loosen surface waste and grease using a detergent.
3. Rinse - remove loose food waste, grease and detergent.
4. Disinfection - kill the bacteria.
5. Final rinse - remove the disinfectant.
6. Drying - remove all moisture.
• Note with light contamination the pre-clean and main clean can be combined.
• Some surfaces do not need to be disinfected after every wash.
• Disinfect any items which come either into direct contact with food or with the hands of
operators.
• The best method of drying surfaces is to let them air-dry, but if this is not possible, use paper
towels or a clean dry cloth.
• It is important the disinfecting chemicals are approved for food contact surface application.
CLEANING BEFORE INITIAL USE:
Before using the mixer for the first time, ensure to wash the mixer bowls, agitators and
attachments in hot water and a mild detergent solution. This procedure should be followed for
bowls and agitators before use for egg whites or whole eggs.
CLEANING AFTER USE:
After use, clean the mixing bowl, agitators and attachments with hot water and a suitable non-
abrasive detergent and soft bristle brush. Rinsing the bowl with hot water immediately after use
will also speed up the cleaning of the bowl afterwards.
Note: Do not clean the Aluminium agitators in a dishwasher. Wash immediately after use in a
bowl of warm soapy water.
Ensure to wipe down the mixer with a hot damp cloth, thoroughly wiping the bowl support,
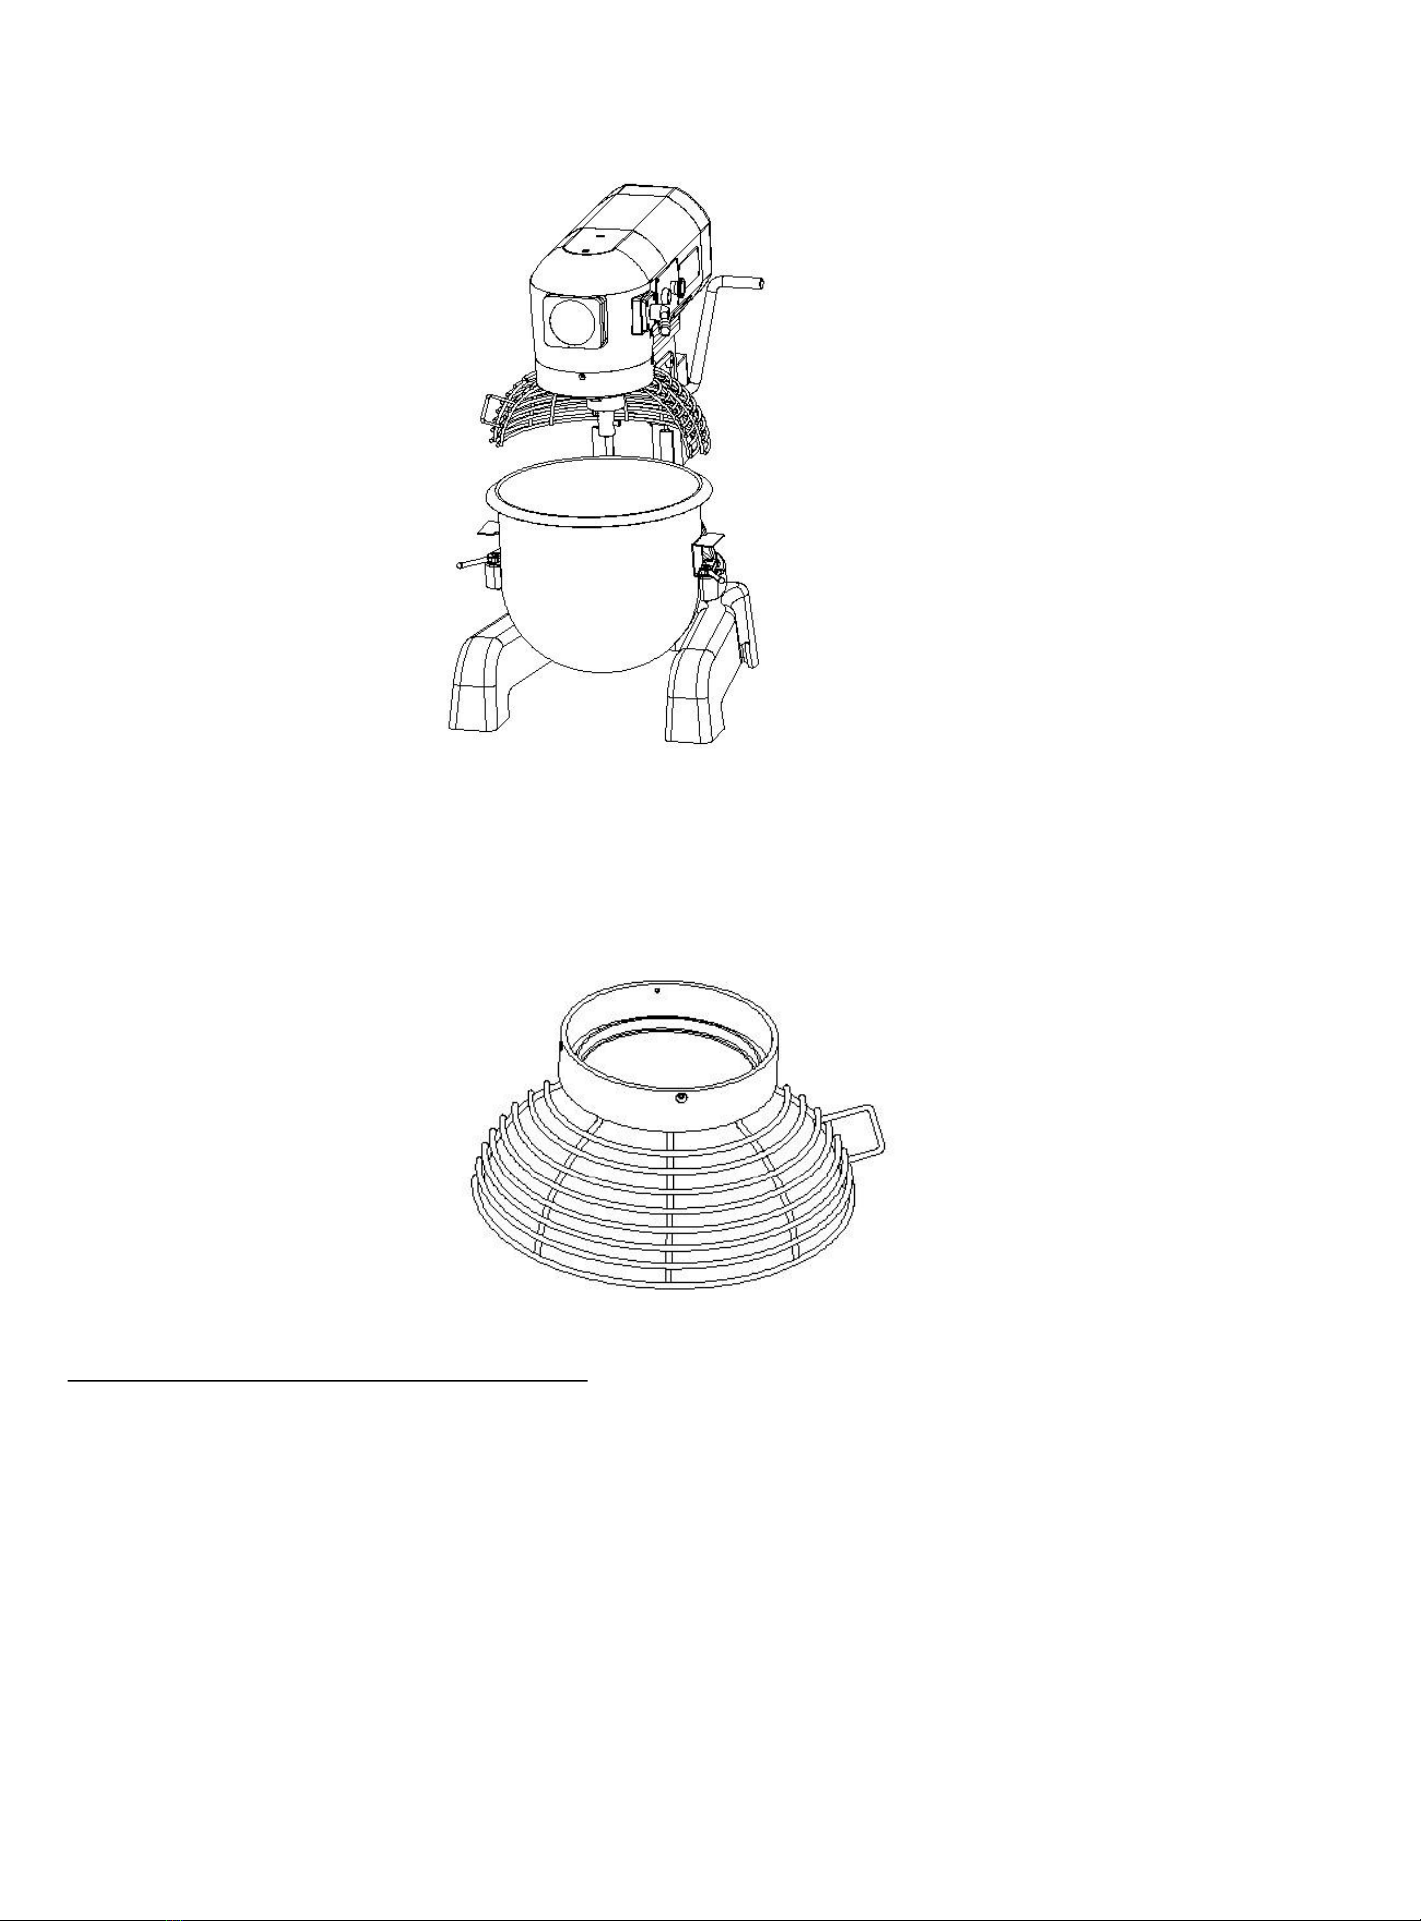
pedestal, base and all exterior surfaces. All food debris must be removed. The guard should be
cleaned in hot soapy water. The guard assembly has been designed to be easily removed for
cleaning.

9
TO REMOVE THE CAGE ASSEMBLY
• Ensure that the bowl support is in the lowered position (photograph 1). Remove the
agitator and bowl first
When the cage assembly is in the closed position, a stop will prevent it from
rotating in an anticlockwise direction.
Loosen the screw. Once done, you can then remove the cage.
TO REMOVE THE REAR SPLASH SHIELD:
The rear splash shield should by regularly inspected and cleaned when necessary. This
should be performed by a suitably trained supervisor or maintenance department at
least once a month. The splash shield can be either cleaned in either a bowl of hot soapy
water or a dishwasher.
• Ensure that the bowl is in the down position. Remove the bowl, guard cage and agitator
as described previously.
• Using a suitable bladed screwdriver, remove the 3 retaining screws securing the drip
cup to the mixer. NOTE: ensure that you have a firm grip on the shield whilst removing the
screws.
• The drip cup can be carefully lowered away from the machine. Take care not to
damage the paintwork of the mixer.
• Wipe any signs of grease from the drip cup first before washing.
• Refit the rear splash shield in reverse order once done, ensuring the screws are securely
tightened.

10
Wherever possible, the mixer should be transported to the installation position in
the packaging provided to avoid any damage. Do not use a sharp knife to open
the box to prevent damaging the machine. On first inspection, check for any
possible shipping damages. If any damage has been found, save the packaging
material and contact us.
Caution: The mixer is a heavy object and must be correctly handled and lifted to
avoid any and all personal injuries.
With the machine in the vicinity of its final position remove from the transportation
pallet. The machine is affixed to the pallet by four retaining bolts through the
pallet into the threaded feet of the base. Care must be taken during this operation
to ensure:
▪All required safety measures are taken to ensure correct lifting and handling to
avoid risk of injury, which may be through dropping, falling or tilting.
▪No damage is made to the machine which could impair the normal operation.
The mixer is not suitable for outdoor installation and must not be installed where a
water jet could be used for cleaning. The mixer must only be operated by trained
staff and must be installed in an area where the use and maintenance is
restricted to trained personnel.
▪Ensure that the mixer is at a height with the bowl handles approximately
between the knuckle and elbow height. This will reduce the need to bend at the
waist.
▪Select a suitable flat level surface that can support the weight of the mixer and
bowl contents when full. It is recommended the mixer is secured in position.
▪Ensure the table, stand or work surface is firmly fixed to the floor. The appliance
must be restrained to prevent any movement during use.
▪Ensure that there is sufficient space around the mixer to allow for safe
operation. Servicing may also become an issue if there is a greatly reduced
clearance, so ensure that the service accesses to the top, side and rear of the
mixer are clear.

11
ELECTRICAL INSTALLATION:
The electrical installation of the mixer must conform to the local or national electricity board
regulations.
A competent person must carry out the electrical installation. Ensure that the electrical supply
agrees with the machine specification, prior to connection.
The mixer is 'class l' appliances where the protection against electric shock does not rely solely
on basic insulation. An external electrical isolator and MCB/fuses (both items supplied by
others) must be fitted to the incoming electrical supply to the mixer. In addition a 35mA
residual current device is strongly recommended to provide extra protection
This appliance should be connected to the point of the supply with the impedance value
Zsys less than (0.05+j0.03)Ω.
If the supply cord is damaged, it must be replaced by a special cord or assembly available
from the manufacturer or retailer.
Electrical Installation
B10, B20

12
Electrical Installation
B30, B40
B60

13
Parts Guide

14

15

16
PRODUCT B10 B20 B30 B40
CapacIty
Of Bowl (Litres
Liquid)
10
20
30
40
Egg Whites
0.6L
1L
1.4L
1.7L
Mashed Potatoes
5kg
7kg
11kg
14kg
Mayonnaise (
Liters of
Oil)
4.3L
9.5L
11.4L
12,3L
Merinque
(Qty. of
Water)
0.4L
0.7L
1L
1.5L
Waffle or Hot Cake
Batter
5kg
7kg
12kg
15kg
Whipped Cream
3kg
4kg
6kg
9kg
Cake, Angel Food (8
-10
oz. cake)
2kg
4kg
6kg
9kg
Cake, Box or Slab
6kg
9kg
14kg
18kg
Cake, Cup
6kg
9kg
14kg
21kg
Cake, Layer
6kg
9kg
14kg
21kg
Cake, Pound
6kg
10kg
14kg
18kg
Cake, Short (Sponge)
3kg
7kg
11kg
11kg
Cake, Sponge
4kg
6kg
8kg
19kg
Cookies, Sugar
5kg
7kg
11kg
14kg
Dough, Bread or Roll
§
(Lt.
-Med.) 60% AR
6kg
11kg
21kg
21kg
MIXER CAPACITY CHART

17
PRODUCT B10 B20 B30 B40
Dough, Heavy Bread
§55% AR
4kg
7kg
14kg
16kg
Dough, Pie
5kg
8kg
12kg
16kg
Dough, Thin
Pizza 40% AR
§
(max. mix time 5
min.)
2kg
4kg
6kg
11kg
Dough, Med. Pizza 50% AR
§
2kg
5kg
9kg
15kg
Dough, Thick Pizza 60% AR
§
5kg
9kg
18kg
21kg
Dough, Raised Donut 65% AR
2kg
4kg
7kg
11kg
Dough, Whole Wheat 70% AR
5kg
9kg
18kg
21kg
Eggs & Sugar for Sponge Cake
2kg
4kg
6kg
8kg
Icing, Fondant
3kg
6kg
8kg
11kg
Icing, Marshmallow
1kg
1kg
2kg
2kg
Shortening & Sugar, Creamed
4kg
7kg
11kg
16kg
Pasta, Basic Egg Noodle (max.
mix time 5 min.)
-
2kg
4kg
7kg

18
PROBLEM POSSIBLE CAUSES SOLUTION
The mixing shaft
does not rotate
after switch on
Electric connectors are
loose
Check the electric
circuit, tighten those
loose connectors
Oil leakage
Oil seals are worn out
Replace the oil seals
The raising handle
is too tight
Guide ways are corroded
The lead screw, bevel gear
and hand wheel shaft etc. is
dry
Clean and oil the guide
ways
Oil them
Temperature rise
of motor is too
high, below speed
Lack of voltage
Overload
The working speed selected is
too high or agitator is not
suitable
Check the supply voltage
Less load
Select a suitable speed
and agitator
TROUBLESHOOTING

WARRANTY
19
WARRANTY Hamoki Ltd warrants the original purchaser of every new
product (under normal and proper use and maintenance service as
specified by Hamoki Ltd and upon proper installation and start-up in
accordance with the instruction packet supplied with each unit) a one
year parts only warranty.
Hamoki Ltd’s obligation under this warranty is limited to a period of one (1)
year from the date of original installation.
WARRANTY CLAIMS:
All claims for parts must be made directly through the retailer in the first
instance. All claims raised with the retailer should include:
Your name:
Model number:
Your company:
Serial number of the product:
Address: Date of purchase:
Email: Proof of purchase :
Phone:
Information supporting the alleged defect.(A video/photo)
Photo of the dataplate.
This manual suits for next models
4
Table of contents
Popular Mixer manuals by other brands

Kitchen Living
Kitchen Living HM925 user guide

Viking
Viking Professional VSM500 Use and care instructions and recipes

PICOTE
PICOTE SMART MIXER 2.0 Operating & safety manual

Kalorik
Kalorik USK MS 1 operating instructions

General
General GEM110 instruction manual

Hamilton Beach
Hamilton Beach HMD200P-CE Operation manual