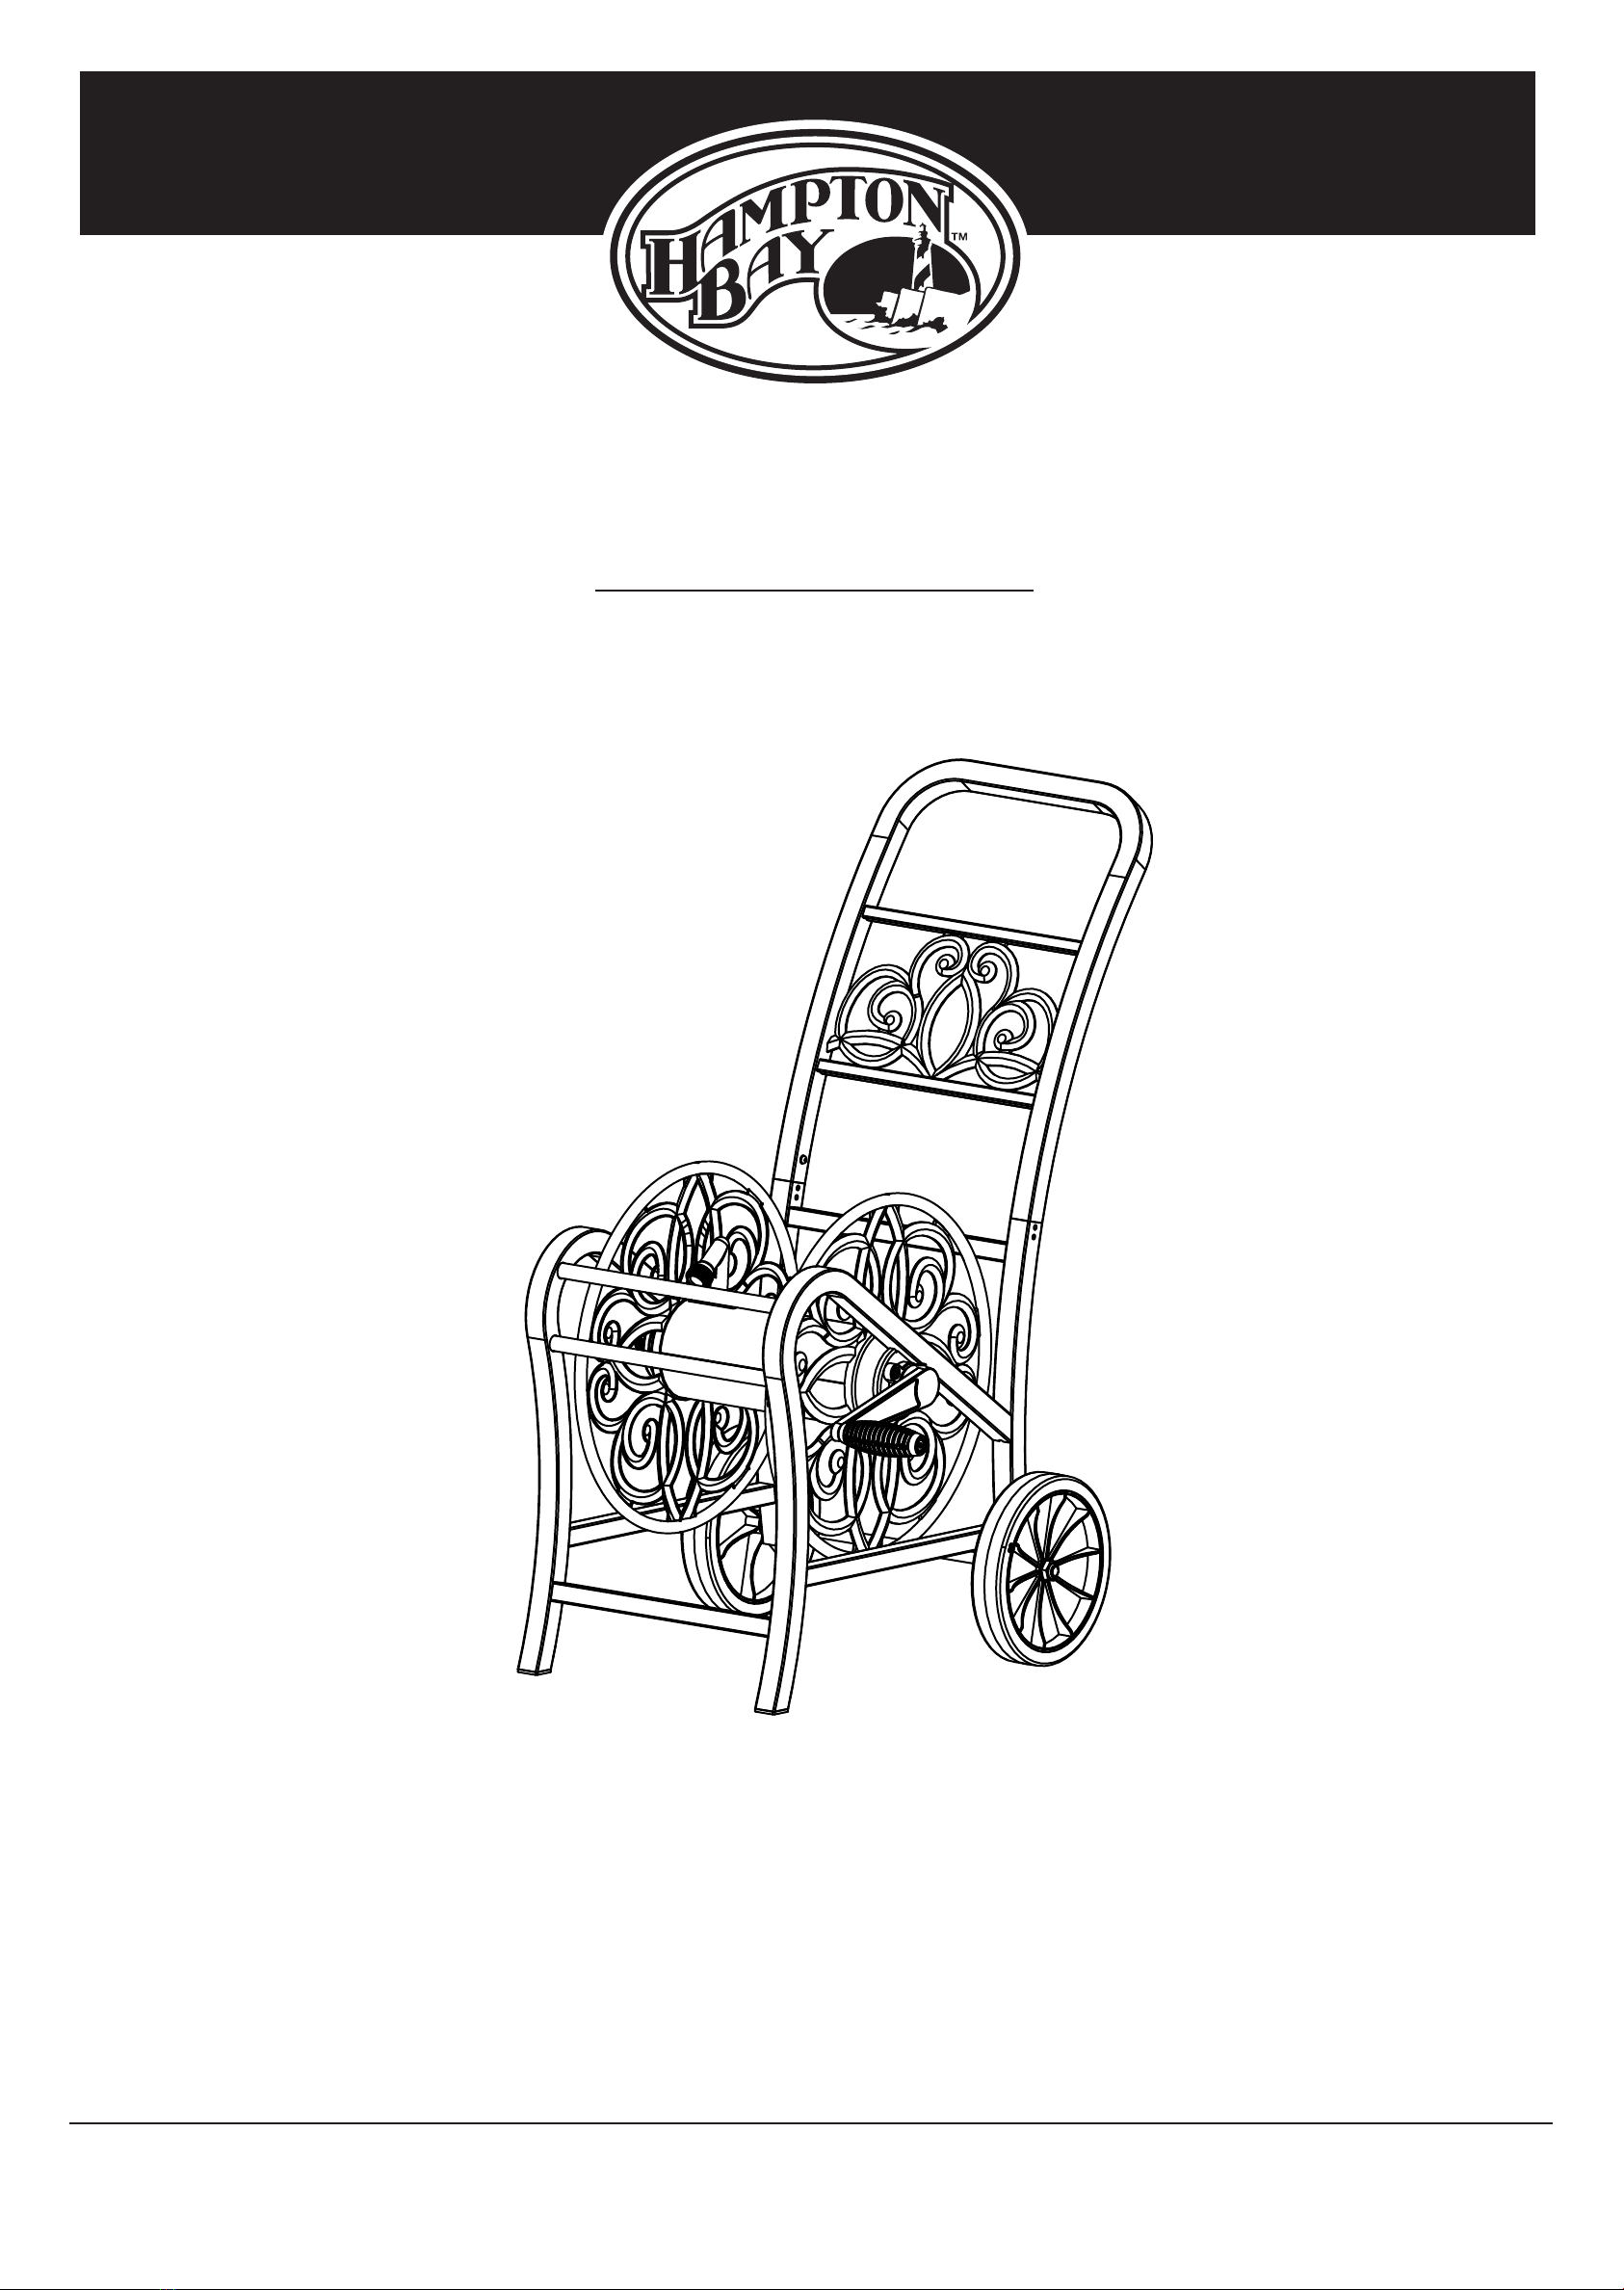
HAMPTON BAY MDHC150HB User manual

USE AND CARE GUIDE
DECORATIVE HOSE REEL
Questions, problems, missing parts? Before returning to the store,
call Hampton Bay Customer Service
8 a.m. - 7 p.m., EST, Monday - Friday, 9 a.m. - 6 p.m., EST, Saturday
1-855-HD-HAMPTON
HAMPTONBAY.COM
THANK YOU
We appreciate the trust and confidence you have placed in Hampton Bay through the purchase of this decorative hose reel. We strive to continually
create quality products designed to enhance your home. Visit us online to see our full line of products available for your home improvement needs.
Thank you for choosing Hampton Bay!
Item #000-000
Model #MDHC200
Item # 1002-109-665
Model # MDHC150HB

2
Table of Contents
Safety Information....................2
Warranty ............................2
Assembly ...........................3
Planning Assembly ........................3
Package Contents .........................3
Assembly ...........................4
Maintenance ........................5
Safety Information
CAUTION: When unwinding the hose, keep hands free from the
range of the rotating crank handle.
CAUTION: This product may become susceptible to impact
damage in freezing temperatures.
CAUTION: DO NOT store near excessive heat.
Warranty
FIVE YEAR LIMITED WARRANTY
This warranty gives you specific legal rights, and you may also have other rights which vary from state to state. Some states do not allow the exclusion or
limitation of incidental or consequential damages; the limitation or exclusion may not apply to you.
WHAT IS COVERED
The manufacturer warranties against leaking and product failure resulting from defects in manufacturing or materials. The warranty period starts on the
delivery date. The manufacturer will repair or replace only the parts that failed under the terms of the warranty. In some cases, the replacement parts may not be
identical, but they shall be of equal or greater performance than the original part. We may require proof of purchase. Proof of purchase may be the original dated
store receipt. We may require evidence of the failure. Evidence of failure may include photographs or returning failed components to the manufacturer.
WHAT IS NOT COVERED
This warranty covers only defects that affect the form, fit, or function of the unit. It excludes natural aging of the unit, discoloration, ordinary wear and tear,
ordinary weathering, sunlight fading, or rust. It excludes staining caused by mold, mildew or tree sap and damage caused by animals including insects, vermin
or household pets. The warranty does not cover damage caused by Acts of Nature including but not limited to wind in excess of 65 mph, tornado, hurricane,
microburst, hail, flood, blizzard, extreme heat, pollution, or fire.
The following actions void the warranty: improper assembly; assembly on a foundation other than as described in the assembly instructions; use above intended
and reasonable capacity; misuse; abuse; failure to perform ordinary maintenance; modification; cleaning with abrasive tools; exposing the unit to heat sources;
and vandalism. Painting, sandblasting, and cleaning with harsh chemicals not recommended for plastics voids the warranty on resin components. Modification
of the original product voids all warranties. The manufacturer assumes no liability for any modified product or consequences resulting from failure of a modified
product. Disassembly of this unit for reasons other than authorized repair voids the warranty. This warranty does not cover damage to the unit caused by
improper hose attachment or defects caused by the consumer’s hose or hose attachments. The manufacturer is not responsible for loss of use of the unit, labor
for repair, inspection fees, or disposal costs.
This warranty is nontransferable. It is valid for normal household use only. The warranty is voided by commercial or industrial use. It excludes floor models,
clearance, and open box units. The manufacturer’s liability hereunder is limited solely to the repair or replacement of the defective product or part and the
manufacturer shall in no event be liable for any incidental or consequential damages which may result from any defect in material or workmanship or from the
breach of any express or implied warranty.
The manufacturer does not represent that this unit will meet city, county, state, homeowner’s association standards or zoning requirements. The owner is
responsible for securing all permits and meeting other requirements needed for placement, construction and use.
Contact the Customer Service Team at 1-855-HD-HAMPTON or visit www.Hamptonbay.com.
Visit www.Hamptonbay.com.
Contact the Customer Service Team at 1-855-HD-HAMPTON for further assistance.

Pre-Assembly
PLANNING ASSEMBLY
Please read the entire manual prior to assembly, and identify all the parts included in the package against the parts list. If any parts are missing or damaged, do
not attempt assembly, but contact our Customer Service Team at 1-855-HD-HAMPTON or visit www.Hamptonbay.com.
Please follow the instructions; the manufacturer is not responsible for replacing parts damaged due to incorrect assembly.
This product contains parts that can be damaged if incorrectly assembled. To avoid damage, assemble this product on a non-abrasive surface. Keep these
instructions for future use.
PACKAGE CONTENTS
Part Description Quantity
A Handle 1
B Hose Reel Housing 1
C Crank Handle 1
D Screw 1
E Allen wrench 1
F Leader Hose 1
3
A
B
C
D
E
F
Visit www.Hamptonbay.com.
Contact the Customer Service Team at 1-855-HD-HAMPTON for further assistance.

Assembly
1 Attaching the Handle
□Attach the handle (A) to the hose reel housing (B).
Press down on the handle (A) until you
hear a snap.
2 Attaching the Crank Handle
□Attach the crank handle (C) onto the crank arm by inserting the
screw (D) through the crank handle (C). Tighten securely using the
Allen wrench (E).
4
3 Attaching the Leader Hose
NOTE: When attaching the garden hose to the leader hose to
the In-Tube, be sure to attach correctly, cross threading could
cause permanent damage.
□Connect the leader hose (F) to the In-tube on the exterior of the hose
reel.
□Connect the opposite end of the leader hose (F) to the water supply.
□Do not cross-thread the leader hose into the In-tube.
4 Attaching the Garden Hose
NOTE: Check that the garden hose has a washer inside the
female coupler. If the washer is missing, consult your local
hardware store for the correct washer needed.
□Insert your garden hose between the frame bars and connect to the
Out-tube. Turn on the water supply and check for leaks. If necessary
re-tighten connections.
IN-TUBE OUT-TUBE
CD
A
B
1

5
PRODUCT SHOWN MAY DIFFER FROM ACTUAL PRODUCT.
In Tube/Out Tube removal for O-ring replacement
□Remove two screws from the In-Tube and two screws from the Out-Tube. (Fig. 1)
□Remove the In-tube then remove the clip. (Fig. 2) Pull apart to locate the O-rings.
□To replace the O-rings on the In-Tube (Fig. 3) remove them from the In-Tube. Coat new O-rings with silicone based lubricant and return to the In-tube.
Insert the In-Tube back into the hose reel and attach using the screws previously taken out. Repeat this process for the Out-tube O-ring.
Care and Cleaning
□To help prevent rust, check for any scratches on your hose cart. Apply clear acrylic/weatherproof paint to avoid rusting.
□When you have finished using your reel, close the water supply. Do not leave water pressure activated when not in use.
□Store the hose reel indoors during colder months. If you must leave under freezing conditions, disconnect the hose from the water source and drain all the
water from the hose and reel. Freezing of trapped water may cause damage to the reel, hose or pipes.
□Once a year, remove the In-tube to clean and lubricate the O-rings. Then re-install the In-tube.
□Check In-tube and Out-tube connections prior to first use each spring. If the hose reel starts to leak, tighten all water connections and check washers in
the In-tube and the garden hose. Replace washers if necessary.
Reeling the hose
CAUTION: Before winding the hose, remove the nozzle or other attachment and drain as much water out of the hose as possible. This will prevent extra stress
on the hose reel (from the weight of the water) that could cause permanent damage.
□Prior to winding your hose, walk the end back to the hose reel so that the hose is in a “U” shape in front of the reel, this assists in the rewinding process.
Operation
Visit www.Hamptonbay.com.
Contact the Customer Service Team at 1-855-HD-HAMPTON for further assistance.
Figure 1 Figure 2 Figure 3
1
1
Out-Tube
1
1
2
3
In-Tube
Clip
O-Rings
O-Ring

Questions, problems, missing parts? Before returning to the store,
call Hampton Bay Customer Service
8 a.m.-7 p.m., EST, Monday-Friday, 9 a.m. - 6 p.m., EST, Saturday
1-855-HD-HAMPTON
HAMPTONBAY.COM
Retain this manual for future use.

GUÍA DE USO Y CUIDADO
CARRETE DECORATIVO PARA MANGUERA
¿Tiene preguntas, problemas, o faltan piezas? Antes de regresar a la tienda,
llame a Servicio al Cliente de Hampton Bay.
De lunes a viernes, de 8 a.m. a 7 p.m. EST, sábados de 9 a.m. a 6 p.m. EST
1-855-HD-HAMPTON
HAMPTONBAY.COM
GRACIAS
Apreciamos la confianza que ha depositado en Hampton Bay por la compra de este carrete decorativo para manguera. Nos esforzamos por crear continuamente productos de calidad diseñados
para mejorar su hogar. Visítenos en internet para ver nuestra línea completa de productos disponibles para sus necesidades de mejorar su hogar. ¡Gracias por elegir a Hampton Bay!
Item # 1002-109-665
Model # MDHC150HB

Tabla de contenido
Información de seguridad. . . . . . . . . . . . . .8
Garantía ............................8
Pre-ensamblaje ......................9
Planificación del ensamblaje ...............10
Contenido del paquete .....................9
Ensamblaje ........................10
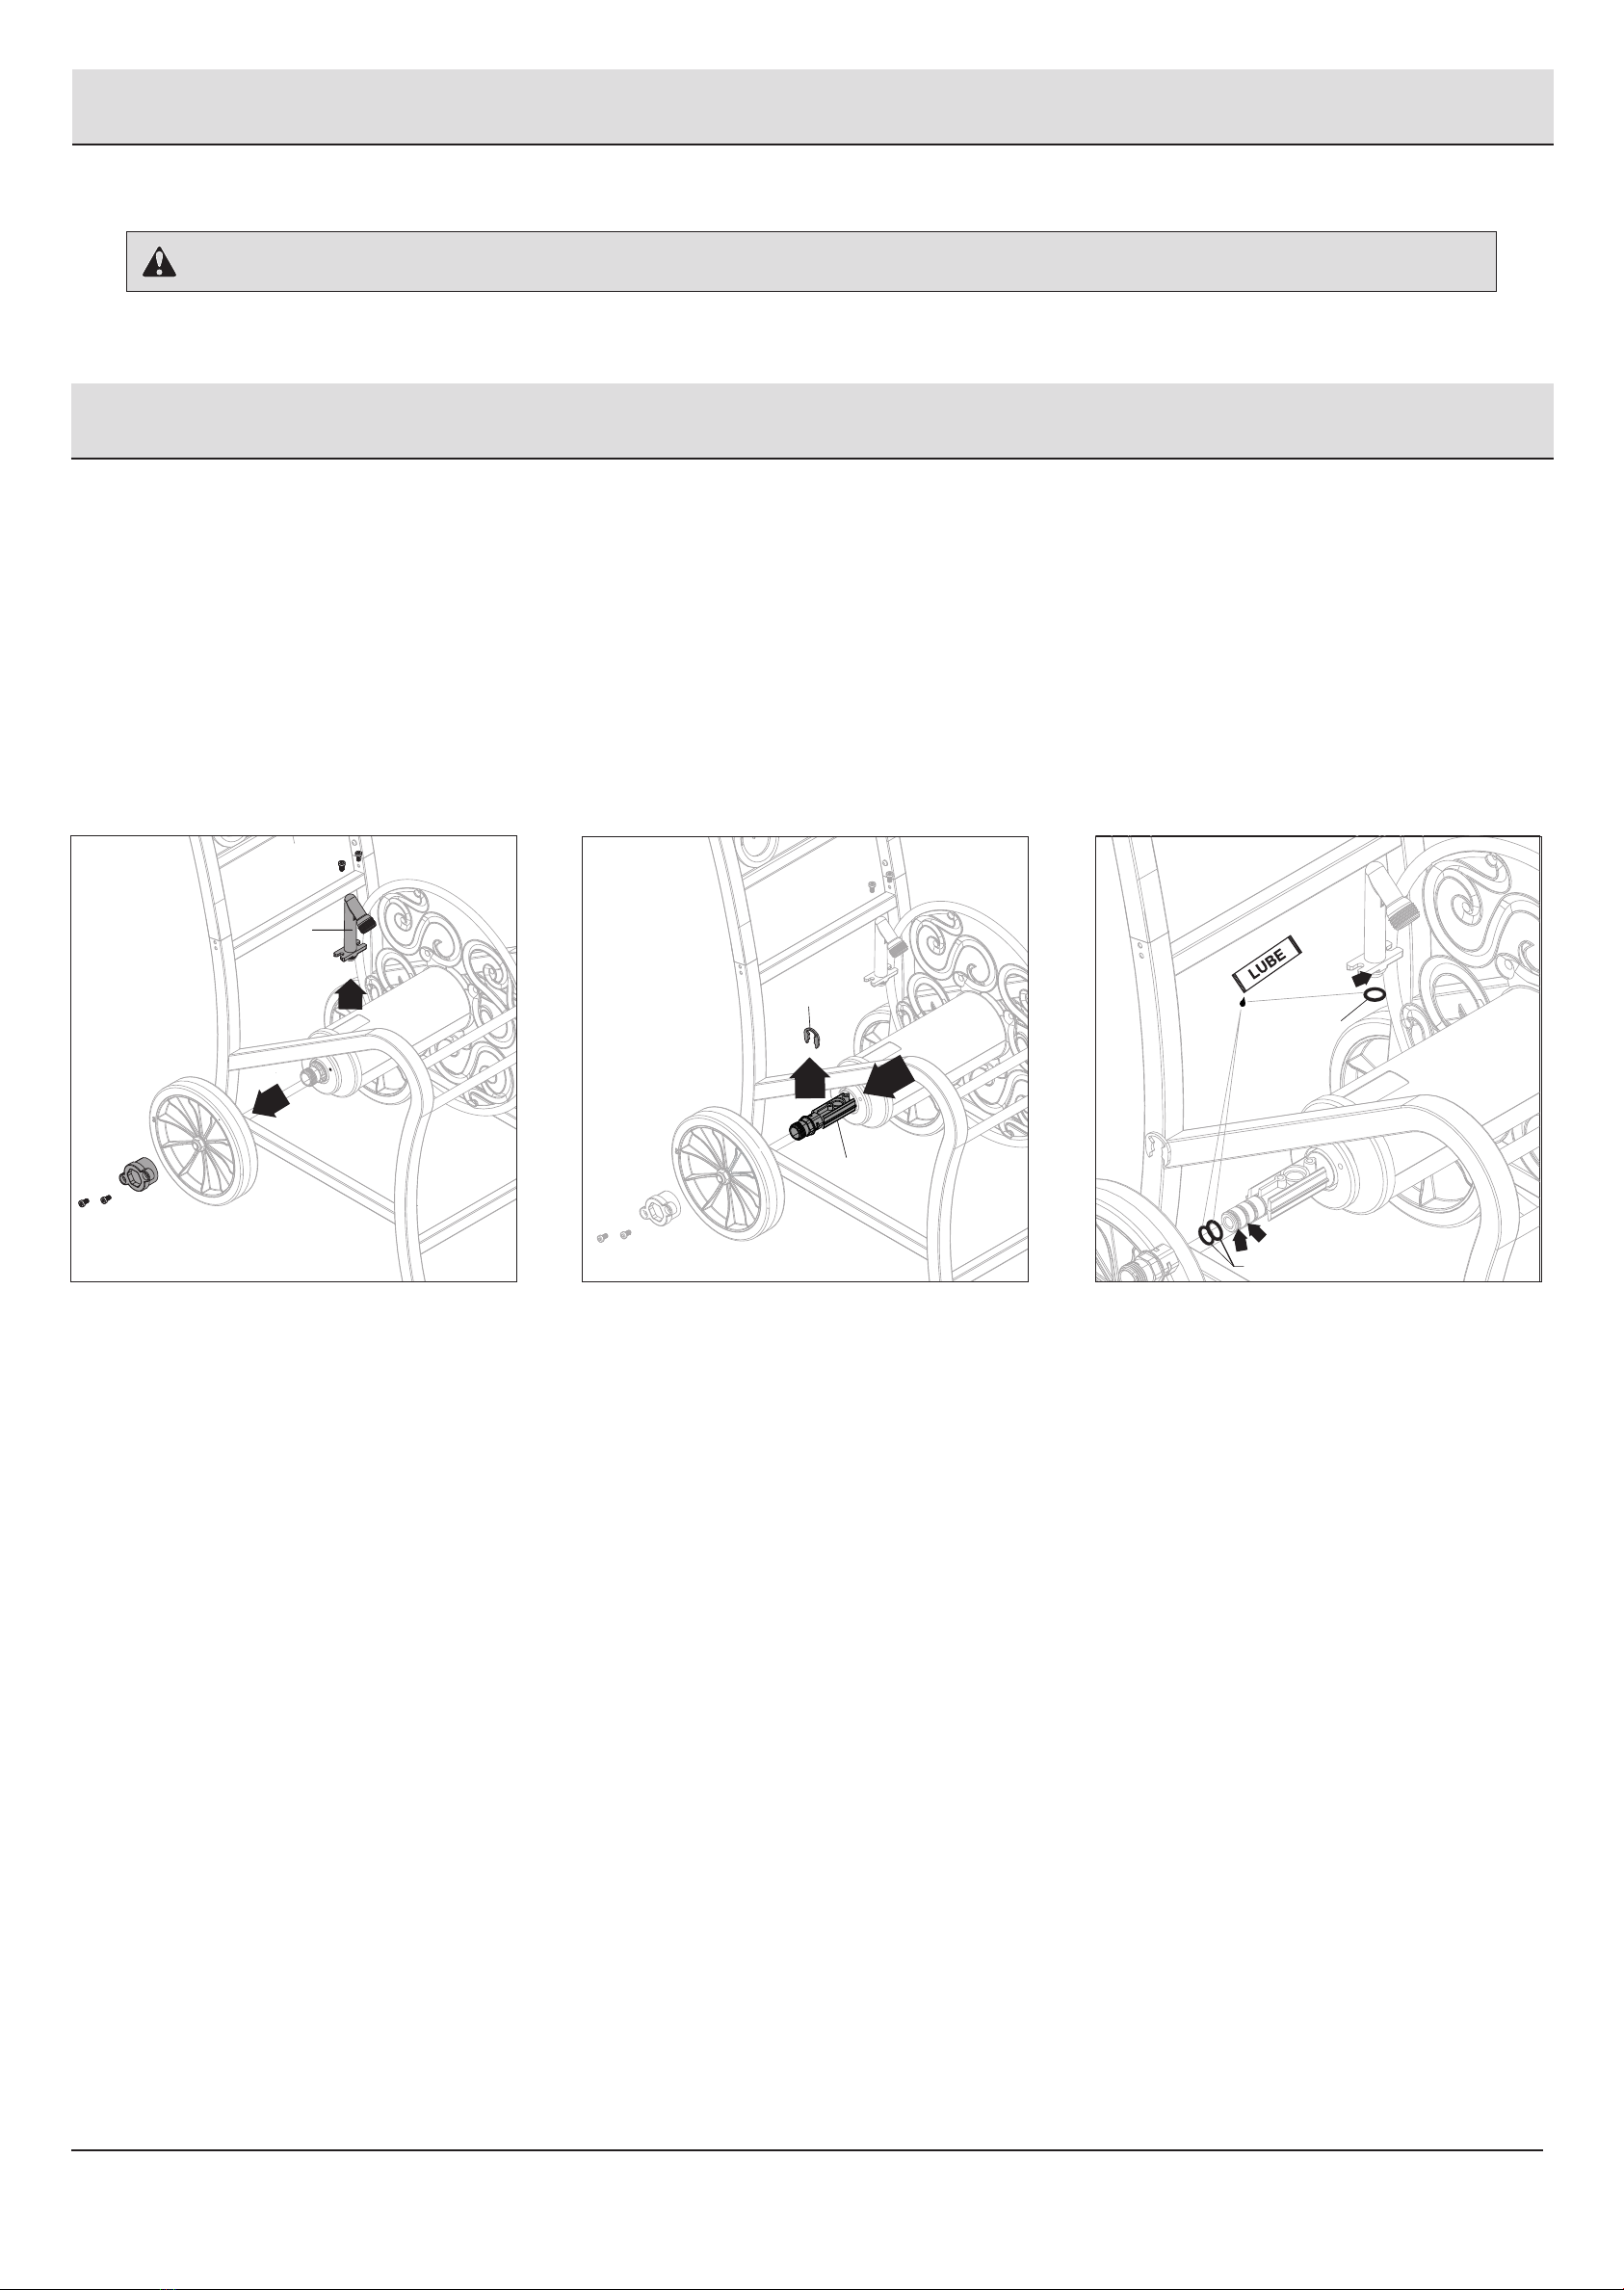
Maintenance .......................11
Información de seguridad
PRECAUCIÓN: Cuando desenrolle la manguera, mantenga las
manos fuera del rango de la manivela en rotación.
PRECAUCIÓN: Este producto puede volverse susceptible a
daños por impacto en temperaturas de congelación.
PRECAUCIÓN: NO almacene cerca del calor excesivo.
Garantía
GARANTÍA LIMITADA DE CINCO AÑOS
Esta garantía le otorga derechos legales específicos, y también puede tener otros derechos que varían de un estado a otro. Algunos estados no permiten la
exclusión o la limitación de los daños accesorios o perjudiciales, por lo tanto, es posible que las limitaciones y exclusiones anteriores podrían no aplicar a
usted.
LO QUE ESTÁ CUBIERTO
El fabricante garantiza contra fugas y fallos del producto que resulten de defectos en mano de obra o materiales. El periodo de la garantía comienza en la fecha
de entrega. El fabricante reparará o reemplazará solamente las piezas que fallen bajo los términos de la garantía. En algunos casos, las piezas de repuesto
pueden no ser idénticas, pero serán de igual o mayor desempeño que la pieza original. Podemos exigir prueba de compra. La prueba de compra puede ser el
recibo original fechado de la tienda. Podemos exigir evidencia del fallo. La evidencia de fallo puede incluir fotografías o componentes defectuosos devueltos al
fabricante.
LO QUE NO ESTÁ CUBIERTO
Esta garantía cubre solamente defectos que afectan a la forma, ajuste o función de la unidad. Excluye el envejecimiento natural de la unidad, decoloración,
desgaste normal, erosión por inclemencias del tiempo, desvanecimiento por la luz del sol u óxido. Excluye el manchado por moho, mildiú o savia de árbol y
los daños causados por animales como insectos, alimañas o mascotas. La garantía no cubre daños causados por fenómenos naturales incluyendo pero no
limitados a vientos de más de 65 mph, tornados, huracanes, microrráfagas, granizo, inundaciones, ventiscas, calor extremo, contaminación o fuego.
Las siguientes acciones anularán la garantía: ensamblaje inadecuado, ensamblaje sobre cimientos que no estén descritos en las instrucciones de ensamblaje;
uso sobre la capacidad prevista y razonable; mal uso; abuso; ausencia de mantenimiento normal, modificación, limpieza con herramientas abrasivas;
exposición de la unidad a fuentes de calor; y vandalismo. La pintura, pulido con chorro de arena y limpieza con químicos fuertes no recomendados para
plásticos anula la garantía sobre los componentes de resina. La modificación del producto original anula todas las garantías. El fabricante no asume ninguna
responsabilidad por cualquier producto modificado o consecuencias que resulten de fallos de un producto modificado. El desmontaje de esta unidad por otra
razón que no sea la reparación autorizada anula la garantía. Esta garantía no cubre daños a la unidad causados por acoplamiento inadecuado de la manguera o
defectos causados por la manguera del consumidor o acoplamientos de la manguera. El fabricante no es responsable de pérdida de uso de la unidad, trabajo de
reparación, cargos por inspección o costos de disposición.
Esta garantía no es transferible. Es válida únicamente para uso doméstico. La garantía queda anulada por uso comercial o industrial. Excluye modelos de
piso,de espacio libre y unidades de caja abierta. La responsabilidad del fabricante en lo sucesivo está limitada únicamente a la reparación o reemplazo del
producto o pieza defectuosa y el fabricante en ningún caso será responsable de ningún daño incidental o consecuente que pueda resultar de cualquier defecto
en materiales o mano de obra o de la violación de cualquier garantía expresa o implícita.
El fabricante no garantiza que esta unidad cumplirá con los estándares de asociación de ciudad, condado, estado propietario o requisitos de zona. El propietario
es responsable de asegurar todos los permisos y cumplir otros requisitos requeridos para colocación, construcción y uso.
o contacto con el Equipo de Servicio al Cliente llamando al 1-855-HD-HAMPTON o visita www.Hamptonbay.com.
8www.Hamptonbay.com.
o contacto con el Equipo de Servicio al Cliente llamando al 1-855-HD-HAMPTON para más asistencia

9
Pre-ensamblado
PLAN DE ENSAMBLAJE
Por favor, lea el manual completo antes de ensamblar e identifique todas las piezas incluidas en al paquete contra la lista de
piezas. Si hace falta alguna pieza o se encuentra dañada, no intente ensamblarla, pero póngase en contacto con el equipo de
Servicio al Cliente llamando al 1-855-HD-HAMPTON o visite www.HamptonBay.com.
Siga las instrucciones; el fabricante no es responsable de reemplazar piezas dañadas debido a un ensamblaje incorrecto.
Este producto contiene piezas que pueden dañarse si se ensambla incorrectamente. Para evitar daños, ensamble este producto en
una superficie no abrasiva.
Conserve estas instrucciones para uso futuro.
CONTENIDO DEL PAQUETE
Pieza Descripción Cantidad
A Mango 1
B Carcasa del carrete de manguera 1
C Manivela 1
D Tornillo 1
E Ilave Allen 1
F Manguera de conexión 1
A
B
C
D
E
F
www.Hamptonbay.com.
o contacto con el Equipo de Servicio al Cliente llamando al 1-855-HD-HAMPTON para más asistencia

Ensamblaje
1 Fijar el mango
□Acople el mango (A) a la carcasa del carrete de manguera
(B). Presione hacia abajo el mango (A) hasta que escuche
un chasquido.
2 Fijación de la manivela
□Acople la manivela (C) al brazo de la manivela insertando el
tornillo (D) a través de la manivela (C). Apriete rmemente
con la llave Allen (E).
1
10
en el tubo de tubo de salida
3 Cómo instalar la manguera lider
NOTA: Cuando instale la la manguera líder al tubo de carga,
asegúrese de instalarla correctamente. El enroscado cruzado
puede ocasionar daños permanentes.
□Conecte la manguera de conexión (F) al tubo de entrada en el
exterior del carrete de manguera.
□Conecte el extremo opuesto de la manguera de conexión a la
fuente de agua.
□Tenga cuidado de no dañar la rosca al hacer una conexión
incorrecta de la manguera de conexión con el tubo de
entrada.
4 Instalación de la manguera de jardín
Compruebe que la manguera de jardín tenga una arandela dentro
del acoplador hembra. Si hace falta la arandela, consulte a su
tienda de herraje local para la arandela correcta requerida
□Inserte la manguera de jardín entre las barras del marco
y conéctela al tubo de salida. Abra la fuente de agua y
cerciórese de que no haya fugas. Si es necesario vuelva a
apretar las conexiones.
CD
A
B

11
EL PRODUCTO QUE SE MUESTRA PUEDE DIFERIR DEL PRODUCTO ACTUAL.
Desinstalación del tubo de entrada y el tubo de salida para reemplazar las
juntas tóricas
□Retire los dos tornillos del tubo de entrada y los dos tornillos del tubo de salida (Fig. 1).
□Desinstale el tubo de entrada y luego retire la abrazadera (Fig. 2). Separe para ubicar las juntas tóricas.
□Para reemplazar las juntas tóricas del tubo de entrada (Fig. 3) retírelas del mismo. Coloque una capa de lubricante a base de
silicona en las nuevas juntas tóricas y vuélvalas a colocar en el tubo de entrada. Inserte el tubo de entrada dentro del carrete
de la manguera y acóplelo con los tornillos que retiró previamente. Repita el proceso para la junta tórica del tubo de salida.
Figura 1 Figura 2 Figura 3
Cuidado y limpieza
□Para ayudar a prevenir el óxido, revise que no haya rasguños en el carrito de manguera. Aplique pintura transparente acrílica
impermeable para evitar el óxido.
□Quand vous avez ni d’utiliser le dévidoir, fermez le robinet d’eau. Ne laissez pas la pression d’eau ouverte après l’utilisation.
□Almacene el carrete de la manguera en interiores durante los meses más fríos. Si tiene que dejarlo afuera en condiciones
extremadamente frías, desconecte la manguera de la fuente de agua y drene toda el agua de la manguera y el carrete. El agua
congelada atrapada puede dañar el carrete, la manguera o las tuberías.
□Una vez al año, desinstale el tubo de entrada para limpiarlo y lubricar las juntas tóricas. Luego, vuelva a instalar el tubo de entrada
□Revise las conexiones del tubo de entrada y del tubo de salida antes de usar por primera vez la manguera cada primavera. Si el
carrete de la manguera presenta una fuga, apriete todas las conexiones de agua y revise las arandelas del tubo de entrada y de la
manguera del jardín. Reemplace las arandelas, si es necesario.
Operación
El devanado de la manguera
DEPÓSITO: Antes de enrollar la manguera retire el accesorio y drene toda el agua que sea posible de la manguera. Estoevitará que el peso del agua cause estrés excesivo en el carrete de la
manguera, lo cual podría causar daño permanente.
□Para enrollar la manguera, extienda la manguera en línea recta y en dirección opuesta al carrete de la manguera. Para enrollar la
manguera, inserte el extremo otra vez en el carrete de la manguera de manera que la manguera forme una “U” enfrente del carrete.
Esto ayuda a facilitar el enrollamiento de la manguera.
1
1
Tube de sortie
1
1
2
3
tubo de entrada
acortar
juntas tóricas
juntas
tóricas
lubricante

¿Tiene preguntas, problemas, o faltan piezas? Antes de regresar a la tienda,
llame a Servicio al Cliente de Hampton Bay
De lunes a viernes, de 8 a.m. a 7 p.m. EST, sábados de 9 a.m. a 6 p.m. EST
1-855-HD-HAMPTON
HAMPTONBAY.COM
Conserve este manual para uso futuro.
12
This manual suits for next models
1
Table of contents
Languages: