manuals.online logo
Brands
  1. Home
  2. •
  3. Brands
  4. •
  5. Hans Grohe
  6. •
  7. Plumbing Product
  8. •
  9. Hans Grohe Focus 31171000 Manual

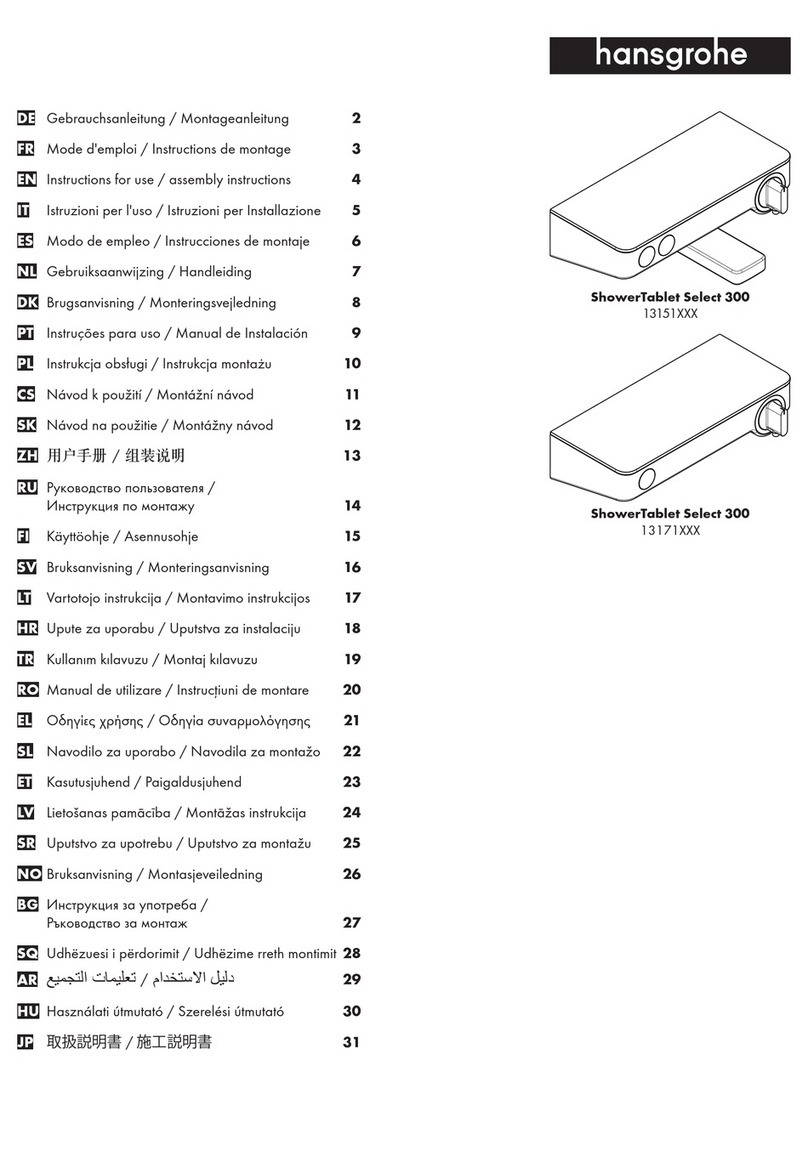
Hans Grohe Focus 31171000 Manual

DE Gebrauchsanleitung / Montageanleitung 2
FR Mode d'emploi / Instructions de montage 3
EN Instructions for use / assembly instructions 5
IT Istruzioni per l'uso / Istruzioni per Installazione 6
ES Modo de empleo / Instrucciones de montaje 8
NL Gebruiksaanwijzing / Handleiding 9
DK Brugsanvisning / Monteringsvejledning 11
PT Instruções para uso / Manual de Instalación 12
PL Instrukcja obsługi / Instrukcja montażu 14
CS Návod k použití / Montážní návod 15
SK Návod na použitie / Montážny návod 17
ZH 用户手册/组装说明 18
RU Руководство пользователя / Инструкция по
монтажу 20
HU Használati útmutató / Szerelési útmutató 21
FI Käyttöohje / Asennusohje 23
SV Bruksanvisning / Monteringsanvisning 24
LT Vartotojo instrukcija / Montavimo instrukcijos 26
HR Upute za uporabu / Uputstva za instalaciju 27
TR Kullanım kılavuzu / Montaj kılavuzu 29
RO Manual de utilizare / Instrucţiuni de montare 30
EL Οδηγίες χρήσης / Οδηγία συναρμολόγησης 32
SL Navodilo za uporabo / Navodila za montažo 33
ET Kasutusjuhend / Paigaldusjuhend 35
LV Lietošanas pamācība / Montāžas instrukcija 36
SR Uputstvo za upotrebu / Uputstvo za montažu 38
NO Bruksanvisning / Montasjeveiledning 39
BG Инструкция за употреба / Ръководство за
монтаж 41
SQ Udhëzuesi i përdorimit / Udhëzime rreth
montimit 42
AR  / 45 Focus
31172000 / 31174000
Focus
31171000 / 31173000
Battery operation
The indicator LED signals that the battery must be changed.
Battery voltage ≤ approx. 5.5 V:
The indicator LED in the sensor window blinks when the fitting is operated, water
withdrawal continues to be possible
Battery voltage ≤ approx. 5.3 V:
The indicator LED in the sensor window lights continuously, water withdrawal is no
longer possible, the battery must be replaced.
Attention! After insertion of the battery, the fitting should not be activated for ap-
prox. 30 seconds. This time is required for self-adjustment.
Replacement, installation and disposal of batteries is subject to the regulations speci-
fied in EN 60335-1 Appendix 3 Section 7.12.
Power supply pack operation
For the replacement of a power supply pack, the procedure corresponds to the
replacement of a battery.
Normal operation
The range of the detection area or the removal of the switch-on/off point from the
fittings depends on the ambient optical conditions (for example, the shape and
reflection of the washstand and the ambient light) as well as on the shape, the size,
the speed and the reflection of the object that was brought into the detection area.
The detection area of the fittings or the distance of the switch-on/off point from the
fittings is approx. 110 to 150 mm in normal operation.
The detection of dark (for example grey-black) objects by the fittings is inadequate
because of their low reflection. The range of the detection area or the distance of
the switch-on/off point can be smaller than 110 mm.
The detection of bright or reflecting objects by the fittings is very good as a result of
their high reflectivity. The range of the detection area or the distance of the switch-
on/off point can be greater than 150 mm.
Strong light sources should not shine directly on the sensor window of the fittings.
Drops of water or condensed water on the sensor window of the fittings can initiate
unintended running of the water.
Range setting for infrared proximity electronics
It may be necessary to maximize the range of the infrared proximity electronics by
manual mode switching when the fittings are connected to large washstands.
The following two modes can be selected:
• "Maximum range" (reduced range maximized by approx. 50 mm)
• "Reduced range" (factory setting)
The LED behind the sensor window signals which mode the fittings are currently in:
• Short blinking when the fittings are closed = "reduced range"
• No blinking when the fittings are closed = "maximum range"
Perform the following steps to change from "reduced" to "maximum" range or vice
versa:
• Interrupt voltage supply of the fittings for approx. 10 s (disconnect electrical plug
connection between fittings and battery housing or power pack and reconnect
after 10 s)
• The LED blinks to indicate the software version (e.g. blinking once = software
version 1)
• When the LED lights permanently (-> calibration of infrared proximity electronics),
cover sensor window completely with your hand or a white piece of paper
• Remove your hand or the paper after 20 s to 40 s
• The LED indicates the currently activated mode by blinking: Once = "maximum
range", twice = "reduced range"
• The LED then lights permanently until the calibration of the just set range of the
infrared proximity switch has completed
• When the LED goes off again, the fittings are ready for operation
Safety Notes
Gloves should be worn during installation to prevent crushing and cutting
injuries.
The shower system may only be used for bathing, hygienic and body cleansing
purposes.
Children as well as adults with physical, mental and/or sensoric impairments
must not use this shower system without proper supervision. Persons under the
influence of alcohol or drugs are prohibited from using this shower system.
The hot and cold supplies must be of equal pressures.
Only the battery housing with battery CR-P2 or power pack HG No.
30589310 supplied by Hansgrohe may be connected to the electrical connec-
tion cable of the fittings.
A damaged connecting line must not be replaced. The transformer may no
longer be used.
The transformer and its mains plug may only be installed or plugged in in dry
interior rooms outside of the protected zones.
The transformer must not be installed in protection zones 0 or 1.
The wall socket must be outside of the protected zones. (see page 46 Fig. 5)
The fitting may be installed in protected zone 2.
Installation Instructions
• The fitting must be installed, flushed and tested after the valid norms!
• The included corner valves must be installed to prevent dirt from being washed in
from the line network. Washed in dirt can compromise the function and/or cause
damages to the functional parts of the fixture. Damages caused by this condition
are not covered by our warranty!
• If the instantaneous water heater causes problems or if you wish to increase
the water flow, the EcoSmart® (flow limiter) located behind the aerator can be
removed.
• The fittings must not be installed on washstands with raised edge.
• At the start of operation, or after maintenance, function of the faucet may be de-
layed due to reflections during adjustment of the operating distance. The faucet
will automatically calibrate itself. The self-calibration will start after 10-15 minutes.
• During initial start-up and after servicing, air in the fittings can cause an unattrac-
tive jet pattern. The jet pattern is okay again after switching the jet on and off
about 15 times.
• 31172000 / 31174000: After the installation, the output temperature of the fitting
must be tested and set to the temperate desired by the customer.
Electrical installation
Electrician
The installation and test work must be performed by an authorized electrician
under consideration of DIN VDE 0100 part 701 / IEC 60364-7-701.
Electrical connection
Voltage supply: 230 V AC ± 10 % / 50 – 60 Hz
The system must be protected via a leakage current protective device (RCD/
FI) with a measurement difference current of ≤ 30 mA. The proper function of
this protective device must be checked at regular intervals.
Any work may only be carried out in a de-energized state. Here, the voltage
supply must be safely separated via the main switch or mains plugs.
The wall socket must be outside of the protected zones. (see page 46 Fig. 5)
Adjustment
This mixer has the following feature: background fade-out with integrated range
adjustment, that means the mixer is automatically adjusted on to the local condi-
tions (washbasin, brightness, reflection) by the sensory mechanism.
English
5
Symbol description
Exchange battery (see page 49)
Maintenance (see page 50)
The check valves must be checked regularly according to DIN EN
1717 in accordance with national or regional regulations (at least once
a year).
Operation (see page 48)
Flow diagram (see page 51)
 with EcoSmart®
 without EcoSmart®
Dimensions (see page 51)
Cleaning washbasin (see page 49)
Cleaning (see page 50) and enclosed brochure
Do not use silicone containing acetic acid!
Spare parts (see page 52)
Protected area (see page 46)
Safety Function (see page 47)
The desired maximum temperature for example max. 38ºC can be pre-
set thanks to the safety function.
Technical Data
This mixer series-produced with EcoSmart® (flow limiter)
Operating pressure: max. 0,8 MPa
Recommended operating pressure: 0,1 - 0,5 MPa
Test pressure: 1,6 MPa
(1 MPa = 10 bar = 147 PSI)
Hot water temperature: max. 60°C
Follow-on time: 1 - 2 s
Automatic switching-off: after 1 min
battery: Lithium
transformer: 230 V AC ± 10 % / 50 – 60 Hz / 20 mA
Protection class: IPX5
installation site of type plate: see page 52
Assembly see page 46
Test certificate (see page 51)
6
0, 1, 2
English
46
2
1
2.
1.
8
5
6 7
3
4SW 10 mm SW 19 mm
SW 19 mm
G½
DN15
1 2
0
47
31171000 / 31173000
3
1
5
2
6
4
SW 3 mm
z. B. 38°C
for example 38°C
SW 3 mm
SW 3 mm
1.
2.
1.
2.
!
M4x10
M5x25
M4x10
48
31171000 / 31173000
31172000 / 31174000
2.
3.
1.
4.
1.
3.
4
12
3
2.
6
5
60 °C 10 °C
0,3 MPa
0,3 МПа
0,3 لﺎﻜﺴﺑﺎﺠﻴﻣ
10°C
60°C
30°C
50°C
38°C
49
31 2
ca. 10 sec ca. 60 sec
1.
2.
1
CR-P2
6 V
Lithium
2
4
3
4
50
2.
1.
1 2
4 6
32
9
2.
1.
1
2.
1.
87
SW 10 mm
SW 19 mm
1.
2.
5
51
Focus
31171000 / 31172000
Focus
31173000 / 31174000
Focus
31171000 / 31172000 / 31173000 / 31174000
P-IX ETA ACS
31171000 P-IX 19699/IO 1.42/19985 X
31172000 P-IX 19699/IO 1.42/20059 X
31173000 P-IX 19699/IO 1.42/19985 X
31174000 P-IX 19699/IO 1.42/20059 X
52
96904000
97399000
95291000
98809000
98802000
EcoSmart
98231000
(18x1,5)
13961000
98801000
96456000
95686000
98800000
98808000
96456000
95433000
97661000
Hansgrohe · Auestraße 5 - 9 · D-77761 Schiltach · Telefon +49 (0) 78 36/51-1282 · Telefax +49 (0) 7836/511440
E-Mail: [email protected] · Internet: www.hansgrohe.com
03/2013
9.01608.03
13904000
Hansgrohe SE D-77761 Schiltach Auestr. 5-9
Elektronik Waschtischarmatur
Produkt-Nr.:
Serien-Nr.:
6 V DC, 1,5 mA IPX5
max = 10 bar / 1,0 MPa
30118700 V x.x.x.x
xx/xxxx xxxxxx
max = 60° C / 140° F
98215000
(5x2)
98422000
(7x1,5) 98458000
(6x2)

Other manuals for Focus 31171000

1

This manual suits for next models

3

Other Hans Grohe Plumbing Product manuals

Hans Grohe Vernis Blend 71456 Series Manual

Hans Grohe

Hans Grohe Vernis Blend 71456 Series Manual

Hans Grohe Focus E Series User manual

Hans Grohe

Hans Grohe Focus E Series User manual

Hans Grohe Talis M54 210 2jet 72800 3 Series Manual

Hans Grohe

Hans Grohe Talis M54 210 2jet 72800 3 Series Manual

Hans Grohe AXOR Starck Organic 80 12006009 Manual

Hans Grohe

Hans Grohe AXOR Starck Organic 80 12006009 Manual

Hans Grohe Vivenis 75420 9 Series Manual

Hans Grohe

Hans Grohe Vivenis 75420 9 Series Manual

Hans Grohe Porter'E Handshower Holder 27504 Series Installation guide

Hans Grohe

Hans Grohe Porter'E Handshower Holder 27504 Series Installation guide

Hans Grohe Croma Classic 100 User manual

Hans Grohe

Hans Grohe Croma Classic 100 User manual

Hans Grohe AXOR Starck 10932000 Manual

Hans Grohe

Hans Grohe AXOR Starck 10932000 Manual

Hans Grohe Axor Citterio Twin Towel Bar 40820XX0 User manual

Hans Grohe

Hans Grohe Axor Citterio Twin Towel Bar 40820XX0 User manual

Hans Grohe Metris 31652000 User manual

Hans Grohe

Hans Grohe Metris 31652000 User manual

Hans Grohe Raindance 27167009 Manual

Hans Grohe

Hans Grohe Raindance 27167009 Manual

Hans Grohe AXOR Starck 10925 1 Series Instruction Manual

Hans Grohe

Hans Grohe AXOR Starck 10925 1 Series Instruction Manual

Hans Grohe AXOR Montreux 16833 1 Series Installation guide

Hans Grohe

Hans Grohe AXOR Montreux 16833 1 Series Installation guide

Hans Grohe AXOR Starck 10754180 User manual

Hans Grohe

Hans Grohe AXOR Starck 10754180 User manual

Hans Grohe Selecta Puls 28497 Series User manual

Hans Grohe

Hans Grohe Selecta Puls 28497 Series User manual

Hans Grohe Talis E2 31534000 Manual

Hans Grohe

Hans Grohe Talis E2 31534000 Manual

Hans Grohe 31741180 User manual

Hans Grohe

Hans Grohe 31741180 User manual

Hans Grohe Talis Select S 220 72822001 Instruction Manual

Hans Grohe

Hans Grohe Talis Select S 220 72822001 Instruction Manual

Hans Grohe Aktiva A'8 Handshower 28547 1 Series User manual

Hans Grohe

Hans Grohe Aktiva A'8 Handshower 28547 1 Series User manual

Hans Grohe PuraVida 15073 1 Series Installation guide

Hans Grohe

Hans Grohe PuraVida 15073 1 Series Installation guide

Hans Grohe 15720 Series User manual

Hans Grohe

Hans Grohe 15720 Series User manual

Hans Grohe AXOR Uno 40219 Series User manual

Hans Grohe

Hans Grohe AXOR Uno 40219 Series User manual

Hans Grohe C 04218 Series Instruction Manual

Hans Grohe

Hans Grohe C 04218 Series Instruction Manual

Hans Grohe Modern Manual

Hans Grohe

Hans Grohe Modern Manual

Popular Plumbing Product manuals by other brands

Hansa 5891 Mounting and operating instructions

Hansa

Hansa 5891 Mounting and operating instructions

Triton ASPIRA Installation and operating instructions

Triton

Triton ASPIRA Installation and operating instructions

Acorn MERIDIAN 3793 Installation, operation & maintenance manual

Acorn

Acorn MERIDIAN 3793 Installation, operation & maintenance manual

Canadian Timber Collection CTC2245W Assembly instructions

Canadian Timber Collection

Canadian Timber Collection CTC2245W Assembly instructions

Thetford 19833 quick start guide

Thetford

Thetford 19833 quick start guide

BELLOSTA mini-b 4421/Q Installation instruction

BELLOSTA

BELLOSTA mini-b 4421/Q Installation instruction

Bristan QD SHXSMFF C D3 Installation instructions & user guide

Bristan

Bristan QD SHXSMFF C D3 Installation instructions & user guide

Moen T6205 Illustrated parts list

Moen

Moen T6205 Illustrated parts list

Grohe 34150 manual

Grohe

Grohe 34150 manual

Cooke & Lewis Tapti 3663602954552 manual

Cooke & Lewis

Cooke & Lewis Tapti 3663602954552 manual

Kohler K-14675 Installation and care guide

Kohler

Kohler K-14675 Installation and care guide

Symmons Duro SLC3612PP Operation & maintenance manual

Symmons

Symmons Duro SLC3612PP Operation & maintenance manual

Bristan Zing Safe Touch Bar Mixer Multi Mode Kit Installation instructions & user guide

Bristan

Bristan Zing Safe Touch Bar Mixer Multi Mode Kit Installation instructions & user guide

CRISTINA KITCHEN CRIKT540 installation instructions

CRISTINA

CRISTINA KITCHEN CRIKT540 installation instructions

METHVEN 03-9470M installation guide

METHVEN

METHVEN 03-9470M installation guide

Grohe Eurocube 39661000 manual

Grohe

Grohe Eurocube 39661000 manual

Triton NOVA Thermostatic Series Installation and operating instructions

Triton

Triton NOVA Thermostatic Series Installation and operating instructions

Gessi MIMI 31263 manual

Gessi

Gessi MIMI 31263 manual

manuals.online logo
manuals.online logoBrands
  • About & Mission
  • Contact us
  • Privacy Policy
  • Terms and Conditions

Copyright 2025 Manuals.Online. All Rights Reserved.