Hansa OKC654T User manual

IO 01309/3
(03.2018)
Kitchen extractor hood / Tvaika nosūcēja korpuss /
Hotă pentru plită / Кухонна витяжка / Кухненски
абсорбатор / Корпус вытяжки / Асүй плитасы
үстіндегі сіңіргіш
OKC654T
OPERATING INSTRUCTIONS EN
LIETOŠANAS INSTRUKCIJA LV
INSTRUCŢIUNE DE DESERVIRE RO
ІНСТРУКЦІЯ З ЕКСПЛУАТАЦІЇ UK
ИНСТРУКЦИЯ ЗА ОБСЛУЖВАНЕ BG
ИНСТРУКЦИЯ ПО ЭКСПЛУАТАЦИИ RU
ПАЙДАЛАНУ БОЙЫНША НҰСҚАУ KK


- 3 -
NOTES ON SAFETY 7
UNPACKING 10
DISPOSAL OF OLD APPLIANCE 10
OPERATION 11
COOKER HOOD CONTROLS 11
CONTROL PANEL 11
OFF TIMER 11
OTHER IMPORTANT INFORMATION CONCERNING THE OPERATION OF THE HOOD 12
CLEANING AND MAINTENANCE 13
MAINTENANCE 13
GREASE FILTER 13
ACTIVATED CHARCOAL FILTER 13
LIGHT 13
WARRANTY AND AFTER SALES SERVICE 14
WARRANTY 14
DROŠĪBAS NORĀDĪJUMI 16
IZSAIŅOŠANA 19
NOLIETOTO IERĪČU UTILIZĀCIJA 19
APKALPE 20
TVAIKA NOSŪCĒJA VADĪBA 20
VADĪBAS PANELIS 20
TAIMERIS (TVAIKA NOSŪCĒJA MOTORA AIZKAVĒTĀ IZSLĒGŠANĀS) 20
CITA SVARĪGA INFORMĀCIJA PAR TVAIKA NOSŪCĒJA LIETOŠANU 21
TĪRĪŠANA UN KOPŠANA 22
UZTURĒŠANA 22
PRETTAUKU FILTRS 22
OGLES FILTRS 22
APGAISMOJUMS 22
GARANTIJAS UN PĒCGARANTIJAS PAKALPOJUMI 23
GARANTIJA 23
EN- Table of contents
LV - Satura rādītājs
INDICAȚII PRIVIND SIGURANȚA 25
DESPACHETARE 29
ÎNDEPĂRTAREA DISPOZITIVELOR UZATE 29
OPERARE 30
CONTROL HOTĂ 30
PANOU DE COMANDĂ 30
TIMER (AMÂNAREA OPRIRII MOTORULUI HOTEI) 30
ALTE INFORMATII IMPORTANTE PENTRU OPERAREA HOTEI 31
CURĂŢAREA ŞI ÎNTREŢINEREA 32
ÎNTREŢINERE 32
FILTRUL ÎMPOTRIVA GRĂSIMILOR 32
FILTRUL DE CARBON 32
SISTEM DE ILUMINARE 32
GARANŢIE, SERVICII POSTVÂNZARE 33
GARANŢIA 33
RO - Cuprins

- 4 -
ВКАЗІВКИ ЩОДО БЕЗПЕКИ ЕКСПЛУАТАЦІЇ 35
РОЗПАКУВАННЯ 39
УТИЛІЗАЦІЯ ЗНОШЕНОГО ОБЛАДНАННЯ КОРИСТУВАЧАМИ 39
ЕКСПЛУАТАЦІЯ 40
УПРАВЛІННЯ ВИТЯЖКОЮ 40
ПАНЕЛЬ УПРАВЛІННЯ 40
ТАЙМЕР (ВИМКНЕННЯ ДВИГУНА ВИТЯЖКИ ІЗ ЗАТРИМКОЮ) 40
ІНША ВАЖЛИВА ІНФОРМАЦІЯ ПРО РОБОТУ ВИТЯЖКИ 41
ЧИЩЕННЯ І ДОГЛЯД 42
ДОГЛЯД 42
ЖИРОВЛОВЛЮВАЛЬНИЙ ФІЛЬТР 42
ВУГІЛЬНИЙ ФІЛЬТР 42
ОСВІТЛЕННЯ 42
ГАРАНТІЯ, ОБСЛУГОВУВАННЯ ПІСЛЯ ПРОДАЖУ 43
ГАРАНТІЯ 43
ПРЕПОРЪКИ ОТНОСНО БЕЗОПАСНОСТТА 45
РАЗОПАКОВАНЕ 49
ОБЕЗВРЕЖДАНЕ НА ИЗНОСЕНИ УРЕДИ 49
ОБСЛУЖВАНЕ 50
УПРАВЛЕНИЕ НА АБСОРБАТОРА 50
ПАНЕЛ ЗА УПРАВЛЕНИЕ 50
TIMER (ИЗКЛЮЧВАНЕ НА ДВИГАТЕЛЯ НА АБСОРБАТОРА СЪС ЗАКЪСНЕНИЕ) 50
ДРУГИ ВАЖНИ ИНФОРМАЦИИ ЗА ОБСЛУЖВАНЕТО НА АБСОРБАТОРА 51
ПОЧИСТВАНЕ И ПОДДРЪЖКА 52
ПОДДРЪЖКА 52
ФИЛТЪР ЗА МАЗНИНИ 52
ВЪГЛЕН ФИЛТЪР 52
ОСВЕТЛЕНИЕ 52
ГАРАНЦИЯ, СЛЕД ПРОДАЖБЕНО ОБСЛУЖВАНЕ 53
ГАРАНЦИЯ 53
УКАЗАНИЯ ПО ТЕХНИКЕ БЕЗОПАСНОСТИ 55
РАСПАКОВКА 59
УТИЛИЗАЦИЯ ИЗНОШЕННОГО ОБОРУДОВАНИЯ 59
ЭКСПЛУАТАЦИЯ 60
УПРАВЛЕНИЕ ВЫТЯЖКОЙ 60
ПАНЕЛЬ УПРАВЛЕНИЯ 60
ТАЙМЕР (ВЫКЛЮЧЕНИЕ ДВИГАТЕЛЯ ВЫТЯЖКИ С ЗАДЕРЖКОЙ) 60
ПРОЧАЯ ВАЖНАЯ ИНФОРМАЦИЯ О РАБОТЕ ВЫТЯЖКИ 61
ЧИСТКА И УХОД 62
КОНСЕРВАЦИЯ 62
ЖИРОУЛАВЛИВАЮЩИЙ ФИЛЬТР 62
УГОЛЬНЫЙ ФИЛЬТР 62
ОСВЕЩЕНИЕ 62
ГАРАНТИЯ, ПОСЛЕПРОДАЖНОЕ ОБСЛУЖИВАНИЕ 63
ГАРАНТИЯ 63
UK - Зміст
BG - Съдържание
RU - Содержание

- 5 -
KK - Мазмұны
ҚАУІПСІЗДІК ТЕХНИКАСЫ БОЙЫНША НҰСҚАУЛАР 65
ОРАУДАН АШУ 69
ПАЙДАЛАНЫЛҒАН ҚҰРЫЛҒЫЛАРДЫ КӘДЕГЕ ЖАРАТУ 69
ПАЙДАЛАНУ 70
СІҢІРГІШТІ БАСҚАРУ 70
БАСҚАРУ ПАНЕЛІ 70
ТАЙМЕР (СІҢІРГІШТІҢ ҚОЗҒАЛТҚЫШЫН КІДІРІСПЕН СӨНДІРУ) 70
СОРҒЫШТЫҢ ЖҰМЫСЫ ТУРАЛЫ ӨЗГЕ МАҢЫЗДЫ АҚПАРАТ 71
ТАЗАРТУ ЖӘНЕ КҮТІМ 72
КОНСЕРВАЦИЯЛАУ 72
МАЙ АУЛАҒЫШ СҮЗГІ 72
БҰРЫШТЫҚ СҮЗГІ 72
ЖАРЫҚТАНДЫРУ 72
КЕПІЛДІК, САТҚАННАН КЕЙІНГІ ҚЫЗМЕТ КӨРСЕТУ 73
КЕПІЛДІК 73

- 6 -
Dear customer,
From now on, your daily housework will be easier
than ever before. Your appliance is excep-
onally easy to use and extremely ecient. Aer
reading these Operang Instrucons, operang the
appliance will be easy.
Before being packaged and leaving the manufacturer,
the appliance was thoroughly checked with regard to
safety and funconality.
Before using the appliance, please carefully read
these Operang Instrucons. By following these
instrucons carefully you will be able to avoid any
problems in using the appliance. It is important to
keep these Operang Instrucons and store them in a
safe place so that they can be consulted at any me.
Follow these instrucons carefully in order to avoid
possible accidents.
Sincerely,

- 7 -
NOTES ON SAFETY
• Before using the appliance, please carefully read
this manual!
• The appliance is designed for household use only.
• The manufacturer reserves the right to introduce
changes, which do not aect operation of the ap-
pliance.
• The manufacturer shall not be liable for any dam-
age or re caused by the appliance resulting from
failure to follow instructions in this manual.
• Cooker hood is designed to remove cooking
odours. Do not use cooker hood for other pur-
poses.
• Connect the cooker hood operating in extraction
mode to a suitable ventilation duct (do NOT con-
nect the cooker to smoke or ue gas ducts, which
are in use). It requires installation of the air ex-
traction duct to the outside. The length of the
duct (usually a pipe of Ø 120 or 150 mm) should
not be longer than 4-5 m. An air extraction duct
is also required for telescopic and furniture hoods
in absorption mode.
• Cooker hood operating in air recirculation mode
requires the installation of an activated charcoal
lter. In this case, installing an extractor duct is
not required, however it is recommended to in-
stall an air guide vane (Mainly in chimney cooker
hoods).
• The cooker hood features independent lighting
and exhaust fan that can be operated at one of
several speeds.
• Depending on the type, the hood is designed to
be permanently attached to a vertical wall over
a gas or electric stove (chimney and universal
hoods); on the ceiling over a gas or electric stove
(island hoods); on the vertical built in furniture

- 8 -
over a gas or electric stove (telescopic and built-
in hoods). Before installing, make sure that the
wall/ceiling structure is strong enough to suspend
the hood. Some hoods are very heavy.
• For details of the installation distance above an
electric hob please refer to product technical
sheet If the installation instructions of the gas
cooker specify a greater distance, this must be
taken into account (Fig. 1).
• Do not leave an open ame under the hood.
When the pots are removed from the burner, set
the minimum ame. Always make sure that the
ame does not extend outside the pot, because it
causes unwanted loss of energy and a dangerous
concentration of heat.
• When cooking on fat, supervise the pans con-
stantly, because overheated fat can ignite.
• Unplug the appliance before any cleaning, replac-
ing the lter or repair work.
• Cooker hood grease lter should be cleaned at
least once a month, because the lter saturated
with fat is ammable.
• Ensure adequate ventilation (air ow) if other
equipment such as liquid fuel stoves or heaters
are operated in the room in addition the cooker
hood. When the cooker hood is simultaneously
operated with burning appliances requiring ade-
quate fresh air from the room to work properly,
their safe operation is possible if under pressure
around these appliances is a maximum of 0.004
mbar (this does not apply when the cooker hood
is used as an odour lter)
• Do not lean on the hood.
• The hood should be cleaned regularly both inside
and out (AT LEAST ONCE A MONTH, following the
indications concerning maintenance provided in
this manual)..Failure to adhere to the rules con-
cerning cleaning the hood and replacing lters

- 9 -
results in a re risk.
• If the power cord is damaged it should be re-
placed by a specialised service centre.
• Ensure that it is possible to disconnect the ap-
pliance from the mains by removing the plug or
switching o the bi-polar switch.
• This appliance is not intended for use by persons
(including children) with physical, mental or sen-
sory handicaps, or by persons inexperienced or
unfamiliar with the appliance, unless under su-
pervision or in accordance with the instructions
as communicated to them by persons responsible
for their safety.
• Particular attention should be paid not to allow
unaccompanied children to use the appliance.
• Make sure voltage indicated on the nameplate
corresponds to the local mains supply voltage.
• Before use, extend and straighten the power cord.
• Packaging materials (bags, polyethylene, poly-
styrene, etc.) should be kept away from children
during unpacking.
• Before connecting the hood to the mains power
supply always check that the power cord is prop-
erly installed and is not trapped by the appliance.
Do not connect the appliance to the mains until
assembly is complete.
• Do not operate your kitchen hood without the al-
uminium grease lters.
• It is strictly forbidden to cook dishes under on an
open ame (ambé) under your kitchen hood.
• Always strictly adhere to regulations issued by the
competent local authorities regarding the techni-
cal and safety requirements for fume extraction.
• Failing to tighten bolts and fasteners in accord-
ance with these instructions may endanger life
and health.
• Hanging kitchen hoods operate only in air circu-
lation / odour absorber mode

- 10 -
UNPACKING
During transportation, protective
packaging was used to protect the
appliance against any damage. Af-
ter unpacking, please dispose of all
elements of packaging in a way that
will not cause damage to the environ-
ment.
All materials used for packaging the
appliance are environmentally friendly; they are
100% recyclable and are marked with the appropri-
ate symbol.
Important! Packaging materials (bags, polyethyl-
ene, polystyrene, etc.) should be kept away from
children during unpacking.
DISPOSAL OF OLD APPLIANCE
In accordance with European Directive
2012/19/EU and Polish legislation re-
garding used electrical and electronic
goods, this appliance is marked with
the symbol of the crossed-out waste
container. This marking indicates that
the appliance must not be disposed of
together with other household waste
after it has been used.
The user is obliged to hand it over to waste collec-
tion centre collecting used electrical and electron-
ic goods. The collectors, including local collection
points, shops and local authority departments pro-
vide recycling schemes.
Proper handling of used electrical and electronic
goods helps avoid environmental and health haz-
ards resulting from the presence of dangerous com-
ponents and the inappropriate storage and process-
ing of such goods.

- 11 -
OPERATION
Cooker hood controls
Control Panel is shown in Figure 4, for reference it is also shown below:
3
2
51
4
Control Panel
It is equipped with a touch controls. Touch one the sensors to enable
the desired function:
1 — Reduce fan speed
2 — Increase fan speed
3 — Speed display The hood fan can run at 3 or 4 speeds (depending
on the model).
4 — O timer
5 — Lighting on/o The lighting operates independently of hood fan.
Available fan speeds:
- Low speed (1). Use this speed when cooking a little food with hardly
any fumes.
- Medium speeds (2 and 3*). Use this speed when cooking multiple
dishes at the same time with moderate amount of fumes.
- High speed (4*). Use this speed when frying or grilling, with large
amount of fumes.
* Varies depending on the model
O Timer
Use o timer to turn o the hood after a specied time. Use o timer
to lter the fumes out of the air after cooking. Maximum delay time
is 90 minutes. Touch to cancel the o-timer at any time. The num-
ber will ash on the display. Then use and to select the delay in
the range 1–9 (multiply the number by ten to obtain delay in minutes,
1 – 10 minutes, 2 – 20 minutes ... 5 – 50 minutes). Touch again to
activate the function. The o timer is set a dot will ash on by the digit
on the display. Touch to cancel the o timer. Touch to reduce the
delay time down to zero. Touch .to conrm the o-timer has been
cancelled. Cancelling the o-timer does not turn o the lighting.

- 12 -
Other important information concerning the operation of
the hood
Operation in air circulation / odour lter mode. In this mode, the ltered
air returns to the room through the outlets. Install activated charcoal
lter in this setting. It is recommended to install the air guide (available
depending on the model, mainly in chimney cooker hoods).
Air extraction operation: When cooker hood operates in extraction mode,
air is discharged outside through an extraction duct. Remove activated
charcoal lter in this setting. The cooker hood is connected to the air
outlet opening using a rigid or exible extraction duct with a diameter of
150 or 120 mm, and the appropriate clamps, which must be purchased
at a hardware store. The appliance should be installed by a qualied
installer.
Fan speed: Lowest and medium fan speed is used in normal conditions
and less intense odours, while the highest speed is used only when cook-
ing odours are very intense, such as during frying or grilling.
Note (applies to universal hoods only): Due to the design of universal
hoods you need to manually change the mode of operation. See Figure
8 for instructions on how to change the mode.
Note (only applies to telescopic and in-built kitchen hoods): Furniture
and telescopic cooker hoods operating in air recirculation mode require
installation of the exhaust duct. The other end of the duct should be di-
rected to the room as it will discharge ltered air.
Note: Hanging kitchen hoods operate only in air circulation / odour ab-
sorber mode

- 13 -
CLEANING AND
MAINTENANCE
Maintenance
Regular maintenance and cleaning of the appliance will ensure trou-
ble-free operation of the cooker hood and extend its life. Especially make
sure that the grease lter and activated charcoal lter are replaced ac-
cording to manufacturer's recommendations.
• Do not use a soaked cloth, sponge, or water jet.
• Do not use solvents or alcohol, as they may tarnish lacquered sur-
faces.
• Do not use caustic substances, especially for cleaning stainless steel.
• Do not use a rough or abrasive cloth.
• It is recommend to use a damp cloth and a neutral detergent.
Note: After several washes in the dishwasher, the colour of the alumini-
um lter may change. The change of colour does not indicate improprie-
ties or the necessity to change it.
Grease lter
For normal hood operation, aluminium grease lter should be cleaned
every month in the dishwasher or by hand using a mild detergent or
liquid soap.
Dismantling of aluminium grease lter is shown on Figure 5.
Acrylic lter is used in some models. This lter should be replaced at
least once every two months or more frequently if the appliance is used
intensively.
Activated charcoal lter
Charcoal lter is used only when the cooker hood is not connected to
the ventilation duct. Activated charcoal lter can absorb odours until
saturated. Charcoal lter is not suitable for washing or regeneration and
should be replaced at least once every two months or more frequently if
the appliance is used intensively.
Dismantling of charcoal lter is shown on Figure 6.
Light
Use incandescent / halogen / LED modules of the same specication as
those factory-installed in the appliance. See Figure 7 for details how to
replace lights. If there is no such gure in this manual, please contact
authorised service to replace the lighting module.

- 14 -
WARRANTY AND AFTER
SALES SERVICE
Warranty
Warranty service as stated on the warranty card. The manufacturer shall
not be held liable for any damage caused by improper use of the product.
The manufacturer recommends that all repairs and adjust-
ments be carried out by the Factory Service Technician or the
Manufacturer's Authorized Service Point. Repairs should be
carried out by a qualied technician only.
Manufacturer’s Declaration
The manufacturer hereby declares that this product meets the re-
quirements of the following European directives:
• Low Voltage Directive 2014/35/EC
• Electromagnetic Compatibility (EMC) Directive 2014/30/EC
• ErP Directive 2009/125/EC
• Directive RoHS 2011/65/EC
and has thus been marked with the symbol and been issued with
a declaration of compliance made available to market regulators.

- 15 -
Godājamais
pircēj,
No šodienas ikdienas pienākumu kļūs vieglāki nekā
jebkad agrāk. Šī ierīce sevī apvieno izmanto-
šanas vieglumu un lielisku efekvitā. Pēc iepazīšanās
ar instrukciju, ierīces izmantošana vairs nesagādās
problēmas.
Pirms iepakošanas, rūpnīcā kusi rūpīgi pārbaudīta
ierīces drošība un funkcionalitāte darba vietā.
Lūdzu, pirms ierīces ieslēgšanas, rūpīgi izlasiet lietoša-
nas instrukciju. Drošības instrukcijas norādījumu ievē-
rošana pasargās Jūs no nevēlamām ierīces lietošanas
sekām. Lietošanas instrukcija ir jāsaglabā un jāuzglabā
tā, lai tā vienmēr būtu pa rokai.
Rūpīgi ievērojiet drošības instrukcijas norādījumus,
lai izvairītos no negadījumiem.
Ar cieņu,

- 16 -
DROŠĪBAS NORĀDĪJUMI
• Tvaika nosūcēju izmantojiet tikai pēc lietošanas
instrukcijas izlasīšanas
• Iekārta ir paredzēta izmantošanai mājsaimniecī-
bā.
• Ražotājs patur tiesības veikt izmaiņas, kas neie-
tekmē iekārtas darbību.
• Ražotājs nenes atbildību par bojājumiem, kas ir
radušies nepareizas ierīces lietošanas rezultātā,
neievērojot šīs instrukcijas norādījumus.
• Tvaika nosūcējs ir paredzēts virtuves tvaiku no-
sūkšanai. Tvaika nosūcējs nav paredzēts izman-
tošanai citiem nolūkiem.
• Tvaika nosūcējs darbojas uzsūkšanas režīmā un
to ir jāpieslēdz atbilstošam ventilācijas kanālam
(nedrīkst savienot ar ekspluatācijā esošajiem
skursteņa kanāliem, dūmvadiem vai izplūdes gā-
zes kanāliem). Tvaika nosūcējam nepieciešams
gaisa izvades cauruļvads. Vada garums (visbie-
žāk Ø 120 mm vai 150 mm caurule) nedrīkst būt
lielāks par 4-5 m. Gaisa novadīšanas vads ir ne-
pieciešams arī teleskopiskajiem un iebūvējamiem
tvaika nosūcējiem absorbēšanas režīmā.
• Tvaika nosūcējam, kas darbojas uzsūkšanas re-
žīmā, nepieciešams aktīvās ogles ltrs. Tādā ga-
dījumā nav nepieciešams uzstādīt gaisa izvades
cauruļvadu, bet ieteicama gaisa izvades stūres
montāža (tikai skursteņa tvaika nosūcēji).
• Tvaika nosūcējs ir aprīkots ar neatkarīgu apgais-
mojumu un izplūdes ventilatoru ar iespēju iesta-
tīt vienu no vairākiem apgrieziena ātrumiem.
• Atkarībā no iekārtas versijas, tvaika nosūcējs ir
paredzēts montāžai pie vertikālas sienas virs gā-
zes vai elektriskās plīts (skursteņa un universālie
nosūcēji); pie griestiem virs gāzes vai elektriskās
plīts (virtuves salas tvaika nosūcēji); pie verti-
kālas sienas iebūvējamās virtuves mēbelēs virs

- 17 -
gāzes vai elektriskās plīts (teleskopiskie un iebū-
vējamie tvaiku nosūcēji). Pirms montāžas ietei-
cams pārliecināties vai sienas/griestu konstrukci-
ja ir piemērota tvaika nosūcēja noturēšanai. Daži
no tvaika nosūcēja modeļiem ir ļoti smagi.
• Ierīces montāžas augstums virs elektriskās plīts
ir norādīts produkta kartē (ierīces tehniskā speci-
kācija). Ja gāzes ierīču instalēšanas instrukcijā
ir norādīts lielāks attālums, tas ir jāņem vērā (1
zīm.).
• Zem tvaika nosūcēja nedrīkst atstāt atklātu lies-
mu. Trauka noņemšanas laikā no degļa, iestatiet
minimālo liesmu. Vienmēr pārbaudiet vai liesma
neapņem trauka malas, jo tas var izraisīt nevē-
lamu enerģijas zudumu un nedrošu siltuma kon-
centrāciju.
• Taukos pagatavotos ēdienus ieteicams pastāvīgi
uzraudzīt, jo pārkarsuši tauki var strauji aizdeg-
ties.
• Pirms katras ltra tīrīšanas, nomainīšanas vai la-
bošanas, ieteicams atvienot ierīces kontaktdakšu
no strāvas padeves kontaktligzdas.
• Ierīces prettauku ltrs ir jātīra vismaz reizi mēne-
sī, jo uzsūkušies tauki var viegli uzliesmot.
• Ja neskaitot tvaiku nosūcēju, telpā tiek izmanto-
tas neelektriskās ierīces (piemēram, šķidrā ku-
rināmā plītis, plūsmas sildītāji, siltuma vannas),
jāparūpējas par pietiekamu ventilāciju (gaisa pie-
plūdi). Droša ekspluatācija iespējama, ja vienlai-
cīgi ar tvaika nosūcēja un sadedzināšanas iekārtu
darbu, kas atkarīgas no gaisa līmeņa telpā, šo ie-
kārtu novietošanas vietā valdītu forvakuums ne
lielāks kā 0,004 milibāri (šis punkts nav saistošs,
ja tvaiku nosūcējs tiek izmantots kā smaržu uz-
sūcējs) .
• Tvaika nosūcēju nevajadzētu izmantot kā atbal-
sta punktu cilvēkiem, kas atrodas virtuvē.
• Tvaika nosūcēju nepieciešams regulāri tīrīt gan
no iekšpuses, gan ārpuses (VISMAZ REIZI MĒ-
NESĪ, ievērojot lietošanas instrukcijā norādītos
apkopes norādījumus). Neievērojot iekārtas tīrī-
šanas un ltru nomaiņas norādījumus, var rasties

- 18 -
ugunsgrēka draudi.
• Ja strāvas vads ir ticis bojāts, to ir jānomaina
specializētā remonta darbnīcā.
• Jānodrošina ierīces atvienošanas iespēja no strā-
vas padeves tīkla, izņemot spraudni vai bipolāro
slēdzi.
• Šī iekārta nav paredzēta lietošanai maziem bēr-
niem, personām ar ziskiem vai garīgiem trau-
cējumiem, personām ar taustes mazjūtīgumu,
personām ar pieredzes vai zināšanu trūkumu ie-
rīces lietošanas jomā, ja vien tā nenotiek saskaņā
ar lietošanas instrukciju vai drošības pasākumus
pārzinošas personas uzraudzībā.
• Jāpievērš īpaša uzmanība tam, lai iekārtu neiz-
mantotu bez uzraudzības atstāti bērni.
• Pārbaudiet, vai zemējuma tabulā norādītais strā-
vas spriegums atbilst vietējiem strāvas tīkla pa-
rametriem.
• Pirms montāžas attiniet un iztaisnojiet strāvas
padeves vadu.
• Iepakojuma materiālus (polietilēna maisiņi, pu-
tuplasta gabaliņi, utt.) izsaiņošanas laikā, lūdzu,
uzglabāt atstatus no bērniem.
• Pirms tvaika nosūcēja pieslēgšanas strāvas tīk-
lam nepieciešams pārbaudīt, vai barošanas vads
ir pareizi instalēts un iekārta to NAV saspiedusi
montāžas darbu laikā. Nepieslēdziet ierīci elek-
trības padeves tīklam pirms montāžas beigām.
• Aizliegts izmantot tvaika nosūcēju bez uzstādī-
tiem alumīnija prettauku ltriem.
• Kategoriski aizliegts zem tvaika nosūcēja gatavot
ēdienu, izmantojot atklātu liesmu (Flambē).
• Nepieciešamības gadījumā pielietot tehniskos un
drošības līdzekļus attiecībā uz izplūdes gāzu no-
vadīšanu, stingri jāievēro vietējo varas iestāžu iz-
dotie noteikumi.
• Skrūvju un montāžas elementu nepieskrūvēšana
kā tas norādīts lietošanas instrukcijā, var radīt
draudus cilvēka veselībai.
• Piekarināmie tvaika nosūcēji darbojas vienīgi aro-
māta absorbēšanas režīmā.

- 19 -
IZSAIŅOŠANA
Transportēšanas laikā ierīce ir nodro-
šināta pret bojājumiem. Pēc izsaiņo-
šanas, lūdzam, atbrīvoties no iepa-
kojuma materiāliem, nepiesārņojot
apkārtējo vidi.
Visi iepakojuma laikā izmantotie ma-
teriāli ir apkārtējai videi nekaitīgi,
100% nododami pārstrādei un mar-
ķēti ar nepieciešamajiem simboliem.
Uzmanību! Iepakojuma materiālus (polietilēna mai-
siņi, putuplasta gabaliņi, utt.) izsaiņošanas laikā,
lūdzu, uzglabāt atstatus no bērniem.
NOLIETOTO IERĪČU
UTILIZĀCIJA
Ierīce ir marķēta ar Eiropas Savienības
direktīvu 2012/19/EK un Polijas liku-
mu par nolietotajām elektriskajām un
elektroniskajām iekārtām - pārsvītrots
atkritumu konteinera simbols. Šāds
simbols uz produkta vai tā iepakojuma
norāda, ka šo produktu nedrīkst izmest
saimniecības atkritumos.
Lietotājs ir atbildīgs par iekārtu nodošanu attiecīgos
elektrisko un elektronisko iekārtu savākšanas punk-
tos pārstrādāšanai vai personai, kas ir atbildīga par
šādu iekārtu savākšanu. Iekārtu savācēji, tai skai-
tā vietējie savākšanas punkti, veikali un pašvaldību
vienības, veido atbilstošu sistēmu šādu iekārtu no-
došanai.
Nodrošinot pareizu atbrīvošanos no šī produkta,
jūs palīdzēsiet izvairīties no potenciālām negatīvām
sekām apkārtējai videi un cilvēka veselībai, kuras
iespējams izraisīt, nepareizi izmetot atkritumos šo
produktu.

- 20 -
APKALPE
Tvaika nosūcēja vadība
Tvaika nosūcēja vadības panelis ir parādīts 4. zīmējumā vai skat. zemāk:
3
2
51
4
Vadības panelis
Tvaika nosūcējs ir aprīkots ar vadības paneli. Lai ieslēgtu izvēlēto funk-
ciju, nospiediet vienu no sekojošiem laukiem:
1- Samazina motora ātrumu par vienu līmeni
2- Palielina motora ātrumu par vienu līmeni
3- Displejā parādās izvēlētais ātrums. Tvaika nosūcējs ir aprīkots ar 3
vai 4 ātrumiem (atkarībā no modeļa).
4- Tvaika nosūcēja aizkavētās izslēgšanās funkcija (Taimeris)
5- Apgaismojuma ieslēgšana vai izslēgšana. Apgaismojums darbojas
neatkarīgi no tvaika nosūcēja motora.
Iespējamie iestatīšanas ātrumi:
- Vismazākais ātrums (1). Šis ātrums tiek izmantots, ja tvaika dau-
dzums ir neliels.
- Vidējie ātrumi (2 un 3*). Šis ātrums tiek izmantots, ja tvaika dau-
dzums ir vidējs, piemēram, gatavojot vairākus ēdienus vienlaicīgi.
- Vislielākais ātrums (4*). Šis ātrums tiek izmantots, ja tvaika dau-
dzums ir liels, piemēram, cepšanas vai grilēšanas laikā.
* Atkarībā no modeļa
Taimeris (tvaika nosūcēja motora aizkavētā izslēgšanās)
Šī funkcija ir paredzēta aizkavētai tvaika nosūcēja izslēgšanai. Izman-
tojiet šo funkciju pēc gatavošanas beigām, lai attīrītu gaisu telpā no
tvaikiem. Maksimālais aizkavētās izslēgšanās laiks ir 90 minūtes. Lai
ieslēgtu šo funkciju, tvaika nosūcēja darba laikā, jebkurā no ātrumiem,
nospiediet sensoru . Displejā sāks mirgot cipars . Pēc tam ar senso-
riem un izvēlieties aizkavētās izslēgšanās laiku diapazonā no 1 līdz
9 (katrs līmenis dod papildu 10 minūtes, piemēram, izvēloties ciparu
2, aizkavētās izslēgšanās laiks ir 20 min, izvēloties ciparu 5, aizkavē-
tās izslēgšanās laiks ir 50 min u.tml.). Atkārtoti nospiediet sensoru ,
lai aktivizētu funkciju. Par pareizi iestatītu aizkavētās izslēgšanās laiku
signalizē mirgojošs punktiņš displejā līdzās ciparam. Lai ātrāk izslēgtu
aizkavētās izslēgšanās funkciju, nospiediet sensoru . Pēc tam ar sen-
soru samaziniet aizkavētās izslēgšanās laiku līdz nullei. Apstipriniet
aizkavētās izslēgšanās laika anulēšanu ar sensoru . Aizkavētās izslēg-
šanās funkcija neizslēdz tvaika nosūcēja apgaismojumu.
Table of contents
Languages:
Other Hansa Ventilation Hood manuals

Hansa
Hansa OKC6641ISH User manual
Hansa
Hansa OKC6726IH User manual

Hansa
Hansa OKC6462WH User manual

Hansa
Hansa OKC951SH User manual
Hansa
Hansa OKC5111MWH User manual
Hansa
Hansa OKC611RH User manual
Hansa
Hansa OTS 615 IH User manual
Hansa
Hansa OSC Series User manual
Hansa
Hansa OKP6654ISH User manual
Hansa
Hansa OTS 5 Series User manual
Hansa
Hansa OKP6222MH User manual

Hansa
Hansa OKP6545SH User manual

Hansa
Hansa OKP6321ZBH User manual
Hansa
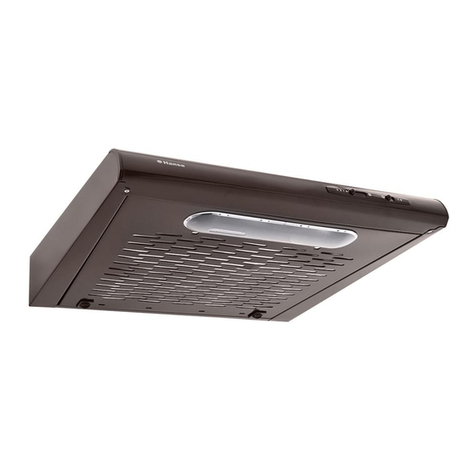
Hansa OSC511BH User manual
Hansa
Hansa OTC612BH User manual
Hansa
Hansa OKC653SWH User manual

Hansa
Hansa OTP6241BH User manual
Hansa
Hansa OSC6212IH User manual

Hansa
Hansa OMP6251BGH User manual

Hansa
Hansa OTP5233WH User manual


