Hanvon WISEreader N618 User manual

WISEreader N618
E-Book Reader
User Manual

Contents
QUICK START GUIDE.......................................................................................... 4
DEVICE BUTTONS....................................................................................................4
TIPS AND ADVICE ....................................................................................................6
BASIC OPERATIONS ........................................................................................... 8
MAIN MENU .........................................................................................................8
READING INTERFACE ................................................................................................8
RECENT FILES .........................................................................................................9
SURFING INTERNET .................................................................................................9
BOOKCASE...........................................................................................................10
DIGITAL EDITIONS .................................................................................................16
PICTURES............................................................................................................16
AUDIO ................................................................................................................17
NOTEPAD ............................................................................................................20
MEMO ...............................................................................................................22
TOOLS ................................................................................................................24
SETTINGS ............................................................................................................25
ADOBE READER INSTRUCTIONS ...................................................................... 32
FORMATS............................................................................................................32
DRM .................................................................................................................32
STEPS FOR SETTING UP DRM ..................................................................................32
OTHER OPERATIONS........................................................................................ 34
BATTERY CHARGING...............................................................................................34
FILE MANAGEMENT ..............................................................................................34
APPENDIX ....................................................................................................... 36
TECHNICAL SPECIFICATIONS.....................................................................................36

WARNINGS..........................................................................................................36
PRODUCT MAINTENANCE........................................................................................39
Contains Reader® Mobile technology by Adobe Systems
Incorporated.
Due to our continuous updates on the product, all figures
in this manual are only for reference and may change
without notice.

Quick Start Guide
Device Buttons
1) Network switch
Push this button to left to turn ON/OFF the wireless network.
2) Power button
Push to the right to turn the device on/off. Push to the
right and hold to turn off the device directly.
3) Mini USB port

The USB connection port is used for charging the device and
transferring data to and from a PC.
4) Micro SD card slot
Insert Micro SD card here.
5) Earphone jack
Listen to the audio via earphones
6) LED indicator
The red indicator will illuminate when the device is charging;
the yellow indicator will glow while the device is being used.
7) Microphone
Used for recording audio.
8) MENU button
Press this button to display the function menu.
9) Return/Cancel button
When making a selection or inputting information,
press this button to cancel the operation. In
sub-menus and interfaces, press this button to return
to the previous interface.
10) Tab
When navigating file lists, press the “Tab” button to
turn to the next page. In the reading interface, press
the Tab button to turn ten pages at once.

11) Button
Press this button to turn the page forward.
12) OK button
When viewing lists or dialog boxes, press the “OK”
button to confirm the operation. The “OK” button
will be illuminated to indicate the corresponding
function is being processed; the light will turn off
while the system is sleeping or turned off.
13) Button
Press this button to turn the page backward.
14) Display screen
15) Stylus and stylus slot
The stylus is automatically enabled or disabled when
removed from or placed into its slot.
16) Speaker
Tips and advice
1.Return to the main menu: In operating interfaces,
press the “MENU” button and then select “Main
Menu.” In the “Recent Files,” “System Settings,”
“User Manual” and “Audio Controls” interfaces, press
the Return button to return to the main menu.
2.When reading, press the “OK” button to refresh the

screen.
3.While reading, input the page number and press “OK” to
jump to the corresponding page.
4.Power saving techniques: use sleep mode; place
the stylus in its slot when not in use; move the stylus
away from the screen when not in use.
5.Handwriting recognition settings: for slow writing
speeds select “long,” for faster writing speeds select
“short.”
6.It is faster and safer to use a Micro SD card reader to
transfer data between PC and device.
7.If you forget your password, please email the Serial Number
on the back of the device to ebookstech@hanvon.com. We
will then send you a new password.

Basic Operations
Main Menu
The main menu is displayed when the device is turned on.
Reading interface
The screen is separated into 3 parts. The status area is
located at the top of the screen; the reading and
writing area is in the middle; the page information
area is at the bottom.

1.Status Area: the e-book title, time, menu, WIFI,
stylus, Micro SD card, battery, and “ESC” icons are
located in this area.
2.Reading and writing area: function list, file lists, text and
pictures are displayed in this area.
3.Page information area: displays the current page number,
total number of pages, “Previous” and “Next” page buttons,
and skip forward/back 10 pages buttons.
Recent Files
The 14 most recent files will be displayed.Press /
buttons to select a book and press the “OK” button to confirm,
or use the stylus to open the book directly. The last page
read will be displayed when the book is opened.
Note: if one of the books on the list is deleted from the Micro
SD card, the reading record will still remain in the “Recent
Files” list but cannot be opened.
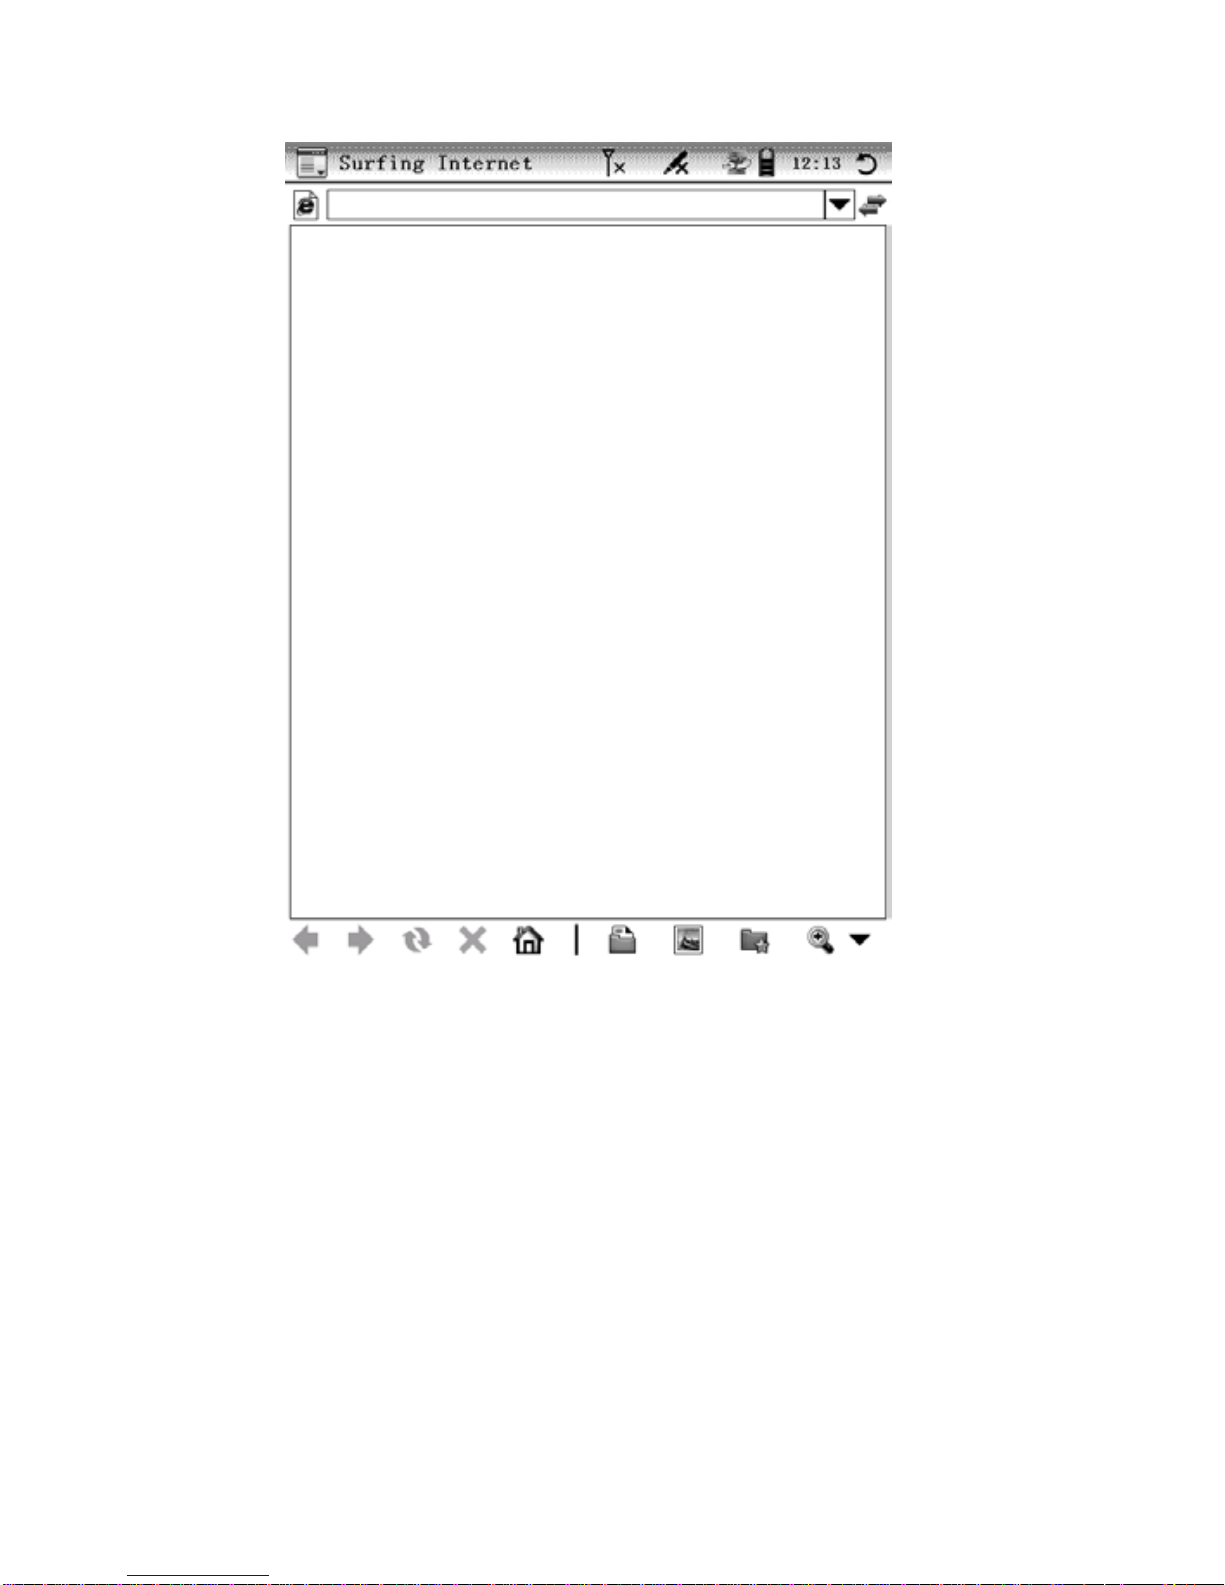
Surfing Internet
Press “Surf Internet” and the “Open WIFI?” prompt will be
displayed; press “OK” to access internet. Click “Home Page”
and a keyboard will appear at the bottom of the interface.
Enter the web address with the stylus and press “OK” to
connect to the network.
Bookcase
Book reading
Select “Bookcase,” then select a book and press OK to open
it.
Font Settings
While reading TXT, HTXT and HTML documents, press the
“MENU” button and select “Font settings.” The “Adjust Line
Spacing” window will pop up. Select desired font size; press

up/down key, or click -/+ to decrease or increase line spacing.
Click “OK” to confirm.
Fast page turning
When viewing lists, press the Tab button to turn to the
next page; when reading, press Tab to turn forward
10 pages. When reading TXT, HTXT and HTML documents,
you can also hold /button to turn ten pages at a time.
Page jumping
While reading, press “MENU” button, and select
“Page Jump.” Enter the page number with stylus and
press “OK” to confirm. The book will jump to the
corresponding page directly. If you make a mistake,
press “cancel.”


Note: If the number you’ve input exceeds the total number of
pages, the system won’t accept the operation.
Font size
For PDF and EPUB files, the device offers 3 font sizes: small,
medium and large. For TXT, HTXT and HTML files, choose
from 8 font sizes.
Page Orientation
Press the “MENU” button and then select “Rotate
Screen” to switch the display between portrait and
landscape views.
Supported formats
The device support the following formats: TXT, HTXT, PDF,
EPUB, DOC, XLS and HTML.
Search
Press the “MENU” button and select “Search” to
open the search window. Input your search item and
click “Search” or press the “OK” button to search for
content. Click “Close” to close the window.
Bookmark
There are two kinds of bookmarking methods, one for files

(e-books) and one for directories (folders). File bookmarking
allows up to 5 bookmarks per file to be saved. Directory
bookmarking allows up to 5 bookmarks across multiple files
within the same directory to be aggregated and saved. To
choose the bookmarking method, from settings, select
“Continuous Turning.” The default setting is file bookmarking;
highlight the Picture / HTML / TXT boxes to select directory
bookmarking.
Add a bookmark: While reading, press “MENU” and select
“Bookmark.” Click “Add” to bookmark the current page.
View bookmarks: Press the “MENU” button and select
“Bookmark” to display the bookmark list. Select a bookmark to
open the corresponding page.
Note: the bookmarks will be sorted by date; only the
5 most recent bookmarks will be shown.
With image files, only directory bookmarks can be
made.
Remarks
While reading, press the “MENU” button and select
“Remark.” Add remarks and annotate file using the
stylus.
Clear Remarks:press the “MENU” button and select

“Clear Remarks,” then select “Clr remarks from page”
to clear the remarks from current page. Select “Clr
remarks from file” to clear all remarks from the file.
Note: remarks can be added to TXT, HTXT, HTML
,
PDF and EPUB files. For TXT, HTXT, HTML and
EPUB files, if the page orientation or font is changed,
the remarks will disappear. The remarks in PDFs,
whether embedded or not, are always displayed after
the page orientation or font changes.
Extract
When reading TXT, HTXT, and HTML files, press
“MENU” and select “Extract,” and then use the stylus
to draw a diagonal line from the upper-left to the
lower-right corner of the text to be extracted. The
“”button will pop up at the bottom-right of the
screen. Click “ ” to open the save window; press
“OK” to save. It will be saved in the Notepad with the
same name as source file. The saved text can be
read and edited.
Browse and edit excerpts: the extracted files are

saved in Notepad and can be edited.
Digital Editions
After your WISEreader is authorized by Adobe, open Adobe
Digital Editions on your PC. Turn on the activated WISEreader
and connect it to your computer to copy downloaded Adobe
books from Adobe Digital Editions to the folder named “Digital
Editions” in the device’s Micro SD card.
Pictures
Picture turning
Image Viewer
All pictures saved in the same folder can be browsed
continuously when the “picture” option in “Continuous
turning” under “Settings” is selected.
Viewing pictures
There are four display modes for viewing pictures: Fit
Window, Fit Width, Fit Height and Actual Size. Press
the “MENU” button and select the desired display
mode.
Switch picture orientation
From the “menu,” select “rotate screen” to switch
between portrait and landscape views

Supported formats
Supports the following formats: JPG, BMP, GIF, TIF and PNG.
Picture size
Support 3 million pixel maximum.
Audio
There are two audio functions: record and play.
Play music
Select “Audio” from the main menu and press the
“OK” button to display the audio list. Click the desired
audio file to open the “Recorder and Player”
interface.
Supports the following audio formats: mp3, wav,
wma.
Play recorded files
Select “Audio” from the main menu and press the
“OK” button. Then press the “Menu” button and
select “Audio” to open the “Player and Recorder”
interface. Click “Rec” to record. The recorded file will
be saved in the e_record folder as a WAV file.
Player and Recorder controls
Play/Pause: using the stylus, click “Play/Pause” to
play/pause music or recorded file. A speaker icon will

appear in the status area.
Record: using the stylus, click “Rec” to record, and a
microphone icon will appear in the status area.
Stop: using the stylus, click “Stop” to stop music or
recording.
Forward/Rewind: using the stylus, click “Forward”
and “Rewind” to fast forward and rewind
Repeat/Cycle: using the stylus, click “Repeat/Cycle”
to select the playing mode.

VOL+/-: click “VOL+/VOL-” to increase or decrease the
volume.
Pre/Next:press up/down direction buttons or click
“Previous/Next” to select the previous or next track
respectively.

Notepad
Click “Notepad” to create a text file.
Edit Text: In default mode, use the stylus to write any
English words in the “Handwriting area” or click the
soft keyboard icon to input characters with
stylus. Click “Return” to save and then exit after
finishing.
Clear Text: click to clear current text.
Switch input method
Close soft keyboard input: click to change the soft
keyboard input to handwriting input.
Close handwriting input: click to change handwriting
Table of contents
Other Hanvon Ebook Reader manuals


