Harbor Freight Tools 92579 User manual

OPERATION INSTRUCTIONS
NIGHT VISION GOGGLES
WITH ADAPTER RAIL FOR SOUND
AMPLIFIER
3491 Mission Oaks Blvd., Camarillo, CA 93011
Visit our Web site at http://www.harborfreight.com
Copyright©2004 by Harbor FreightTools®. All rights reserved.
No portion of this manual or any artwork contained herein may be
reproducedinany shape or form without the express writtenconsent
of Harbor Freight Tools.
For technical questions and replacement parts, please call 1-800-444-3353
92579

SKU 92579 For technical questions, please call 1-800-444-3353 Page 2
SaveThis Manual
You will need the manual for the safety warnings and
precautions, assembly instructions, operating and maintenance
procedures, parts list and diagram. Keep your invoice with this
manual. Write the invoice number on the inside of the front cover.
Keep the manual and invoice in a safe and dry place for future
reference.
Safety Warnings and Precautions
WARNING: When using this product, basic safety precautions
should always be followed to reduce the risk of personal
injury and damage to equipment.
Read all instructions before using this product!
1. Failure to follow all warnings and instructions completely can
result in damage to this product and the sound amplifier. Read
the directions for this product and the sound amplifier completely be-
fore use and do not allow inexperienced individuals or children to use
this equipment.
2. Stay alert. Watch what you are doing, use common sense. Do not
use any product when you are tired.
3. Maintenance. For your safety, service and maintenance should be
performed regularly by a qualified technician.
4. Keep children away. Donotlet them handle or playwiththis product.
Specifications
Face mount Goggle for convenient, hands-free viewing. Goggle flip-up
capability. Perfect for hunting or simply watching animals in the dark on
nature hikes.
Range of View
Magnification
Power Source
Eye Piece Lens Dia.
Weight
Features
300 ft.
1x
(1) 3V CR123 Lithium Battery (not included)
Battery Life: 25 Hours (Goggles only)
7 Hours (Goggles & Illumination)
16MM
2.50 lbs.
Includes: Adapter Rail for Sound Amplifier
(SKU 4334), Nylon Carrying Bag w/Shoulder
Strap, Overexposure Shutdown

SKU 92579 For technical questions, please call 1-800-444-3353 Page 3
5. Maintain products with care. Keep products clean for better and
safer performance. Follow instructions for changing accessories.
6. Replacement parts and accessories. Whenservicing,useonlyiden-
tical replacement parts.Use of any other parts will void the warranty.
Only use accessories intended for use with this product. Approved
accessories are available from Harbor Freight Tools.
7. Donotsetuptheproductif underthe influence of alcoholor drugs.
Read warning labels if taking prescription medicine to determine if
your judgment or reflexes are impaired while taking drugs. If there is
any doubt, do not setup or use the product.
8. Check for damaged parts. Before using any product, any part that
appears damaged should be carefully checked to determine that it
will operate properly and perform its intended function. Check for any
broken parts or mounting fixtures; and any other condition that may
affect proper operation. Any part that is damaged should be properly
repaired or replaced by a qualified technician.
9. Disposed of used batteries properly. Contact your localWaste Dis-
posal Facility for instructions on proper battery disposal. Never burn
any battery.
Warning: The warnings, cautions, and instructions discussed in this
instruction manual cannot cover all possible conditions and
situationsthatmayoccur.Itmustbeunderstood bythe operator
that common sense and caution are factors which cannot be
built into this product, but must be supplied by the operator.
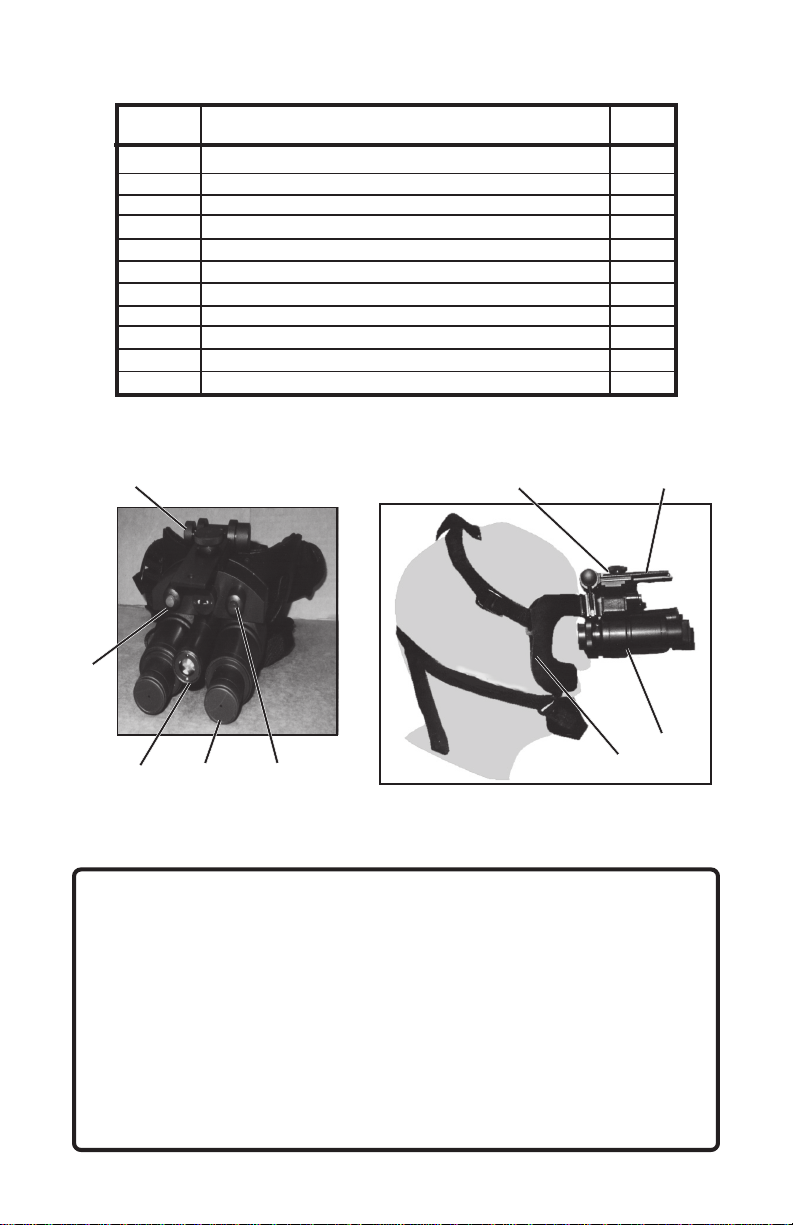
Unpacking
When unpacking, check to make sure the parts shown in the parts
list and assembly diagram on page 8 are included. If any parts are
missing or broken, please call Harbor Freight Tools at the number on the
cover of this manual, or contact your local Harbor Freight retailer.
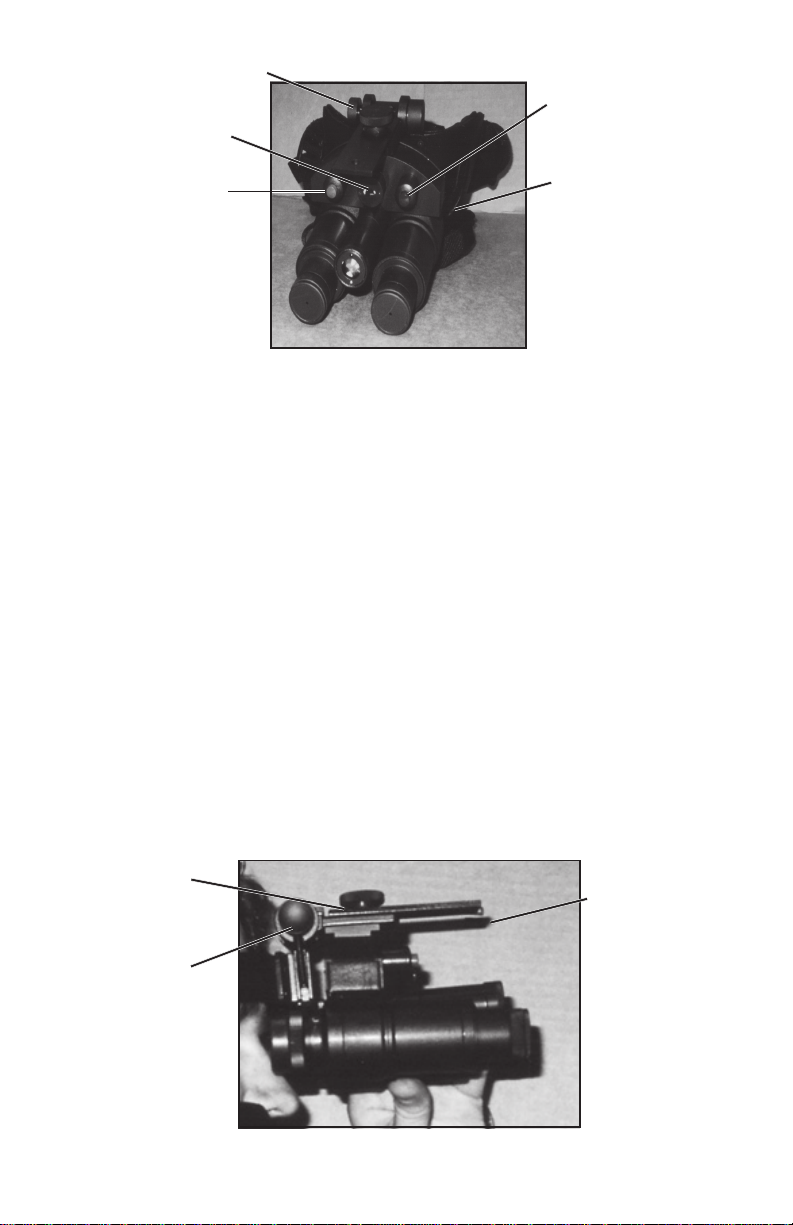
Do not remove the Lens Caps in daylight or under bright illumi-
nation. Do not expose the NightVision Goggles to any light, such as
headlights,for an extended period of time. TheseGogglesareequipped
with a flash protection system, but long-term exposure can still damage
the Goggles and may cause permanent damage to the unit.

SKU 92579 For technical questions, please call 1-800-444-3353 Page 4
General information on NightVision devices.
This electro-optical device assists in viewing in near darkness or com-
pletedarkness. It works byamplifying the already existinglightof the moon
or the stars. If no light is present the illuminator acts as an external light
source. When viewing an object through the night vision scope, you are
actually seeing an image that comes from the intensifier tube within the
device.
The objective lens captures the light and directs it to the front of the
intensifier tube, which is the electro-optical component. The power source
then passes energy through the intensifier tube causing electrons to strike
the phosphor screen.The image in the intensifier tube is then magnified by
the eyepiece.
This device is excellent for wildlife viewing, search and rescue opera-
tions, boating safety, home security, and camping.
Note: Battery condition will effect use and abilities.
Tube Screen Appearance
Light and dark spots caused by image con-
verter tube may be visible in the field of view.
These are normal and not considered imperfec-
tions by image intensifier standards. Most of the
distortion will occur in the peripheral area, not in
the center.
Setup
Battery Installation/Replacement
1. Open the Battery Cover (6) by unscrewing the cap between the eye
pieces.
See Figure A.
2. Insert the 3V CR123 Lithium Battery (not included) into the Battery
Compartment (4). Insert the battery with the positive end first.
3. Close the Battery Compartment (4) by twisting the Battery Cover (6)
back on.Finger tighten.
Note: Dispose of used batteries properly.
Battery Cover (6)
Battery
Compartment (4)
Figure A

SKU 92579 For technical questions, please call 1-800-444-3353 Page 5
Fitting Headgear onYour Head
1. Hold the Headgear (11) bythebackstrap.Slip over
your head with the Goggles in the front.
See Figure B.
2. While pulling on the three adjustable straps on the
backof the headgear, adjust the padded facemask
so the headgear fits comfortably.
See Figure C.
Note: Hook&loop pads can be removedforclean-
ing.
3. Pushing the Adjustment Pin (c) (see Figure F on
page 6) on the Goggles allows them to be flipped
up or down.
See Figures D & E.
4. Whenflipped down,the Goggles havenormal bin-
ocular adjustments for focusing.
5. Adjust the binoculars to a comfortable eye posi-
tion before use.
Figure B
Figure C Figure D Figure E
(11)
Setup (continued)
Operation
Avoid dropping or jarring the unit.
This device has sensitive precision instruments inside, a
sudden shock can damage them.
1. To begin, remove the Lens Caps. Important: If you are not in a dark
area, do not remove the Lens Caps (9).
2. Turn on the Night Vision Goggles operation by pushing the Green
Power Button (6). Note:The green indicator light will indicate that the
power is ON.
3. Look through the Eyepieces (a).You should see a green glow if the
NightVision Goggles are working properly.Adjust the focus of the eye
pieces to properly focus to your eye’s particular needs by turning the
eyepieces on the front of the Goggles.
See Figure F
, next page.

SKU 92579 For technical questions, please call 1-800-444-3353 Page 6
Figure F
Red Button
(7)
Eyepieces (a)
Green Power
Button (6)
Illuminating
Settings (b)
Adjustment Pin (c)
4. When operating in total darkness you will need to use the built-in
illuminator by pressing the Red Button (7). A red indicator light will
appear.The illuminating Setting Switch (b) can be switched to illumi-
nate from high to low. The low setting is represented by a small dot
next to the switch;the high setting is represented by a large dot.When
finished using the infrared illuminator, press the Red Button (7).
See
Figure F.
Note:The Illuminator uses more battery power, so the battery will not
last as long with the Illuminator on.
5. When finished using the NightVision Goggles, push the Green Power
Button (6).Replace the Lens Caps (8) immediately.Store the Goggles
(1) and Headgear (11) in the Nylon Carrying Bag (3).
Adapter Rail (2)
Washer (10)
Screw (11)
Adjustment
Pin
Figure G
Connecting the Adapter Rail for Sound Amplifier
1. Be sure Green Power Button (6) is off and that the Lens Caps (8) stay
on during this procedure.
2. Connect the Adapter Rail (2) to the top of the Goggles (1), using the
Washer (10) and Screw (11).
See Figure G
.

SKU 92579 For technical questions, please call 1-800-444-3353 Page 7
Maintenance
1. Clean the lenses only with professional lens cleaning products.
Never wipe dirt or dust off the lenses. You may use dry, compressed
air.
2. Clean the housing with a dry, soft cloth.
3. Remove battery when storing for more than two weeks.
4. Avoid storing the Goggles where sudden changes of tempera-
ture occur. Store in a dry, well ventilated area. Never store near a
heater, air conditioner, or in direct sunlight.
5. Protect the unit from moisture, dust, and sunlight. When not in
use, this product should be stored in a dry location to inhibit rust. If
this unit is used in a cold environment and then brought into a warm
area or if condensation is visible on the unit, wait five hours before
using it again, to prevent damage to the internal components of this
unit.
6. Service and repairs should only be performed by a qualified tech-
nician.
Troubleshooting
1. If the screen will not glow while in the “on” position:
Check the battery. Make sure it is charged and installed properly.
2. If the image fades or disappears completely:
a. If you are in complete darkness, the Goggles need
some
light.
Activate the Illuminator (7).
b. It is also possible that you pointed the device at an intense light
source which might have shut down the unit to protect the intensi-
fier tube. Turn the power off by pressing the Green Power Button
(6) and wait five minutes before turning it back on.
3. If unable to properly focus:
Try adjusting the focus on both the Eyepiece (a) and the objective lens
on the front of the Goggles (1). Also, try cleaning the lens with profes-
sional supplies.

SKU 92579 For technical questions, please call 1-800-444-3353 Page 8
PLEASE READTHE FOLLOWING CAREFULLY
THE MANUFACTURER AND/OR DISTRIBUTOR HAS PROVIDED THE PARTS
DIAGRAM IN THIS MANUAL AS A REFERENCE TOOL ONLY. NEITHER THE
MANUFACTURER NOR DISTRIBUTOR MAKES ANY REPRESENTATION OR
WARRANTY OF ANY KIND TO THE BUYERTHAT HE OR SHE IS QUALIFIEDTO MAKE
ANY REPAIRS TO THE PRODUCT ORTHAT HE OR SHE IS QUALIFIED TO REPLACE
ANY PARTS OF THE PRODUCT. IN FACT, THE MANUFACTURER AND/OR
DISTRIBUTOR EXPRESSLYSTATESTHAT ALLREPAIRSAND PARTS REPLACEMENTS
SHOULD BE UNDERTAKEN BY CERTIFIED AND LICENSEDTECHNICIANS AND NOT
BY THE BUYER.THE BUYER ASSUMES ALL RISK AND LIABILITY ARISING OUT OF
HIS OR HER REPAIRS TO THE ORIGINAL PRODUCT OR REPLACEMENT PARTS
THERETO, OR ARISING OUT OF HIS OR HER INSTALLATION OF REPLACEMENT
PARTSTHERETO.
Parts List
1
1
1
1
1
1
1
2
1
1
1
Part # Description Qty.
1 Night Vision Goggles
2 Adapter Rail
3 Nylon Carrying Bag (not shown)
4 Battery Compartment
5 Battery Cover
6 Green Power Button
7 Red Illuminator Button
8 Lens Cap
9 Washer
10 Screw
11 Headgear
NOTE: Some parts are listed and shown for illustration purposes only and
are not available individually as replacement parts.
Assembly Diagram
1
2
9, 10
711
4, 5
6
8
Adjustment Pin
Table of contents
Other Harbor Freight Tools Accessories manuals

Harbor Freight Tools
Harbor Freight Tools 38335 User manual

Harbor Freight Tools
Harbor Freight Tools 90402 User manual

Harbor Freight Tools
Harbor Freight Tools 91736 Quick reference guide

Harbor Freight Tools
Harbor Freight Tools TRAILER JACK 41006 User manual

Harbor Freight Tools
Harbor Freight Tools ARMSTRONG Assembly instructions

Harbor Freight Tools
Harbor Freight Tools 3394 User manual